

Getting Started
Quickstart
This guide walks you through creating your first video tutorial with Tutorial AI — from recording to published video.
Step 1: Install the recorder
Section titled “Step 1: Install the recorder”Download the Desktop App for macOS or Windows. Alternatively, install the Chrome Extension for browser-based recording.
Already have a recording you want to use? Skip to Uploading Videos — Tutorial AI can analyze an existing file and build the project for you.

The Desktop App is recommended — it captures metadata and cursor positions that enable advanced cursor effects the Chrome Extension can’t provide.
Step 2: Record your screen
Section titled “Step 2: Record your screen”Open the recorder and capture your workflow. You can:
- Stay silent — AI will generate a narration script from your screen actions
- Speak while recording — AI transcribes your words and refines them into a polished script
Quick tips:
- Keep recordings under 10 minutes for best results
- Close unnecessary tabs and mute notifications
- Click deliberately on elements — the recorder tracks clicks to generate Sync Markers
Step 3: Let AI do the editing
Section titled “Step 3: Let AI do the editing”Once your recording uploads, the AI Script Writer shows what it will do before it generates anything:
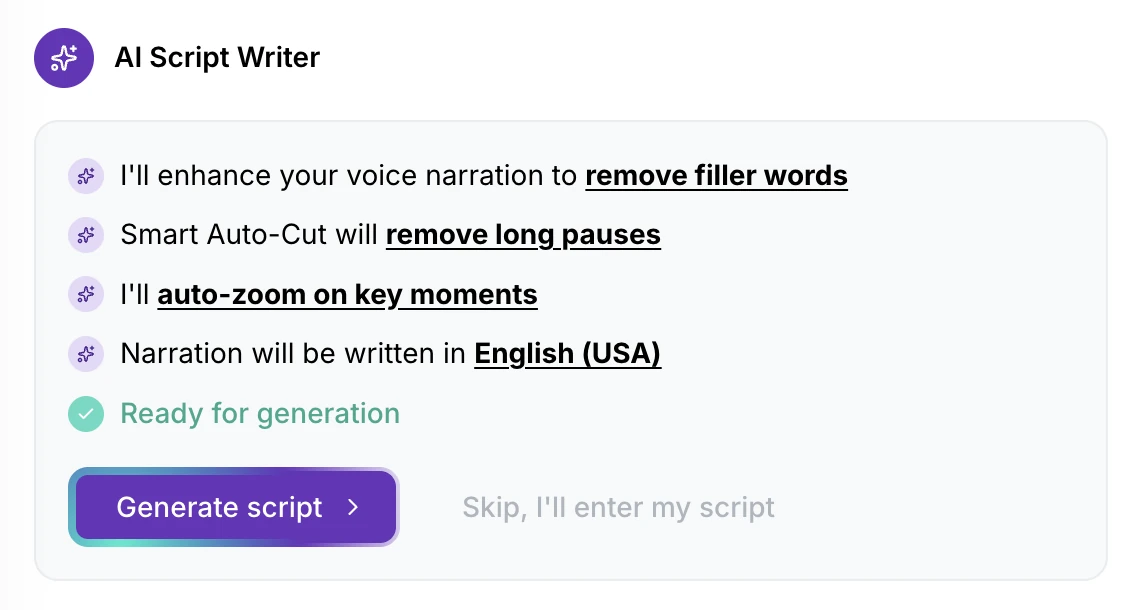
- Enhance your voice narration — removes filler words (when you recorded with your voice)
- Smart Auto-Cut — removes long pauses from the video
- Auto-zoom — zooms in on key moments
- Narration language — the language the script is written in, such as English (USA)
Click Generate script and AI writes the narration and adds a professional AI voiceover. Prefer to write it yourself? Click Skip, I’ll enter my script.
Step 4: Review and refine
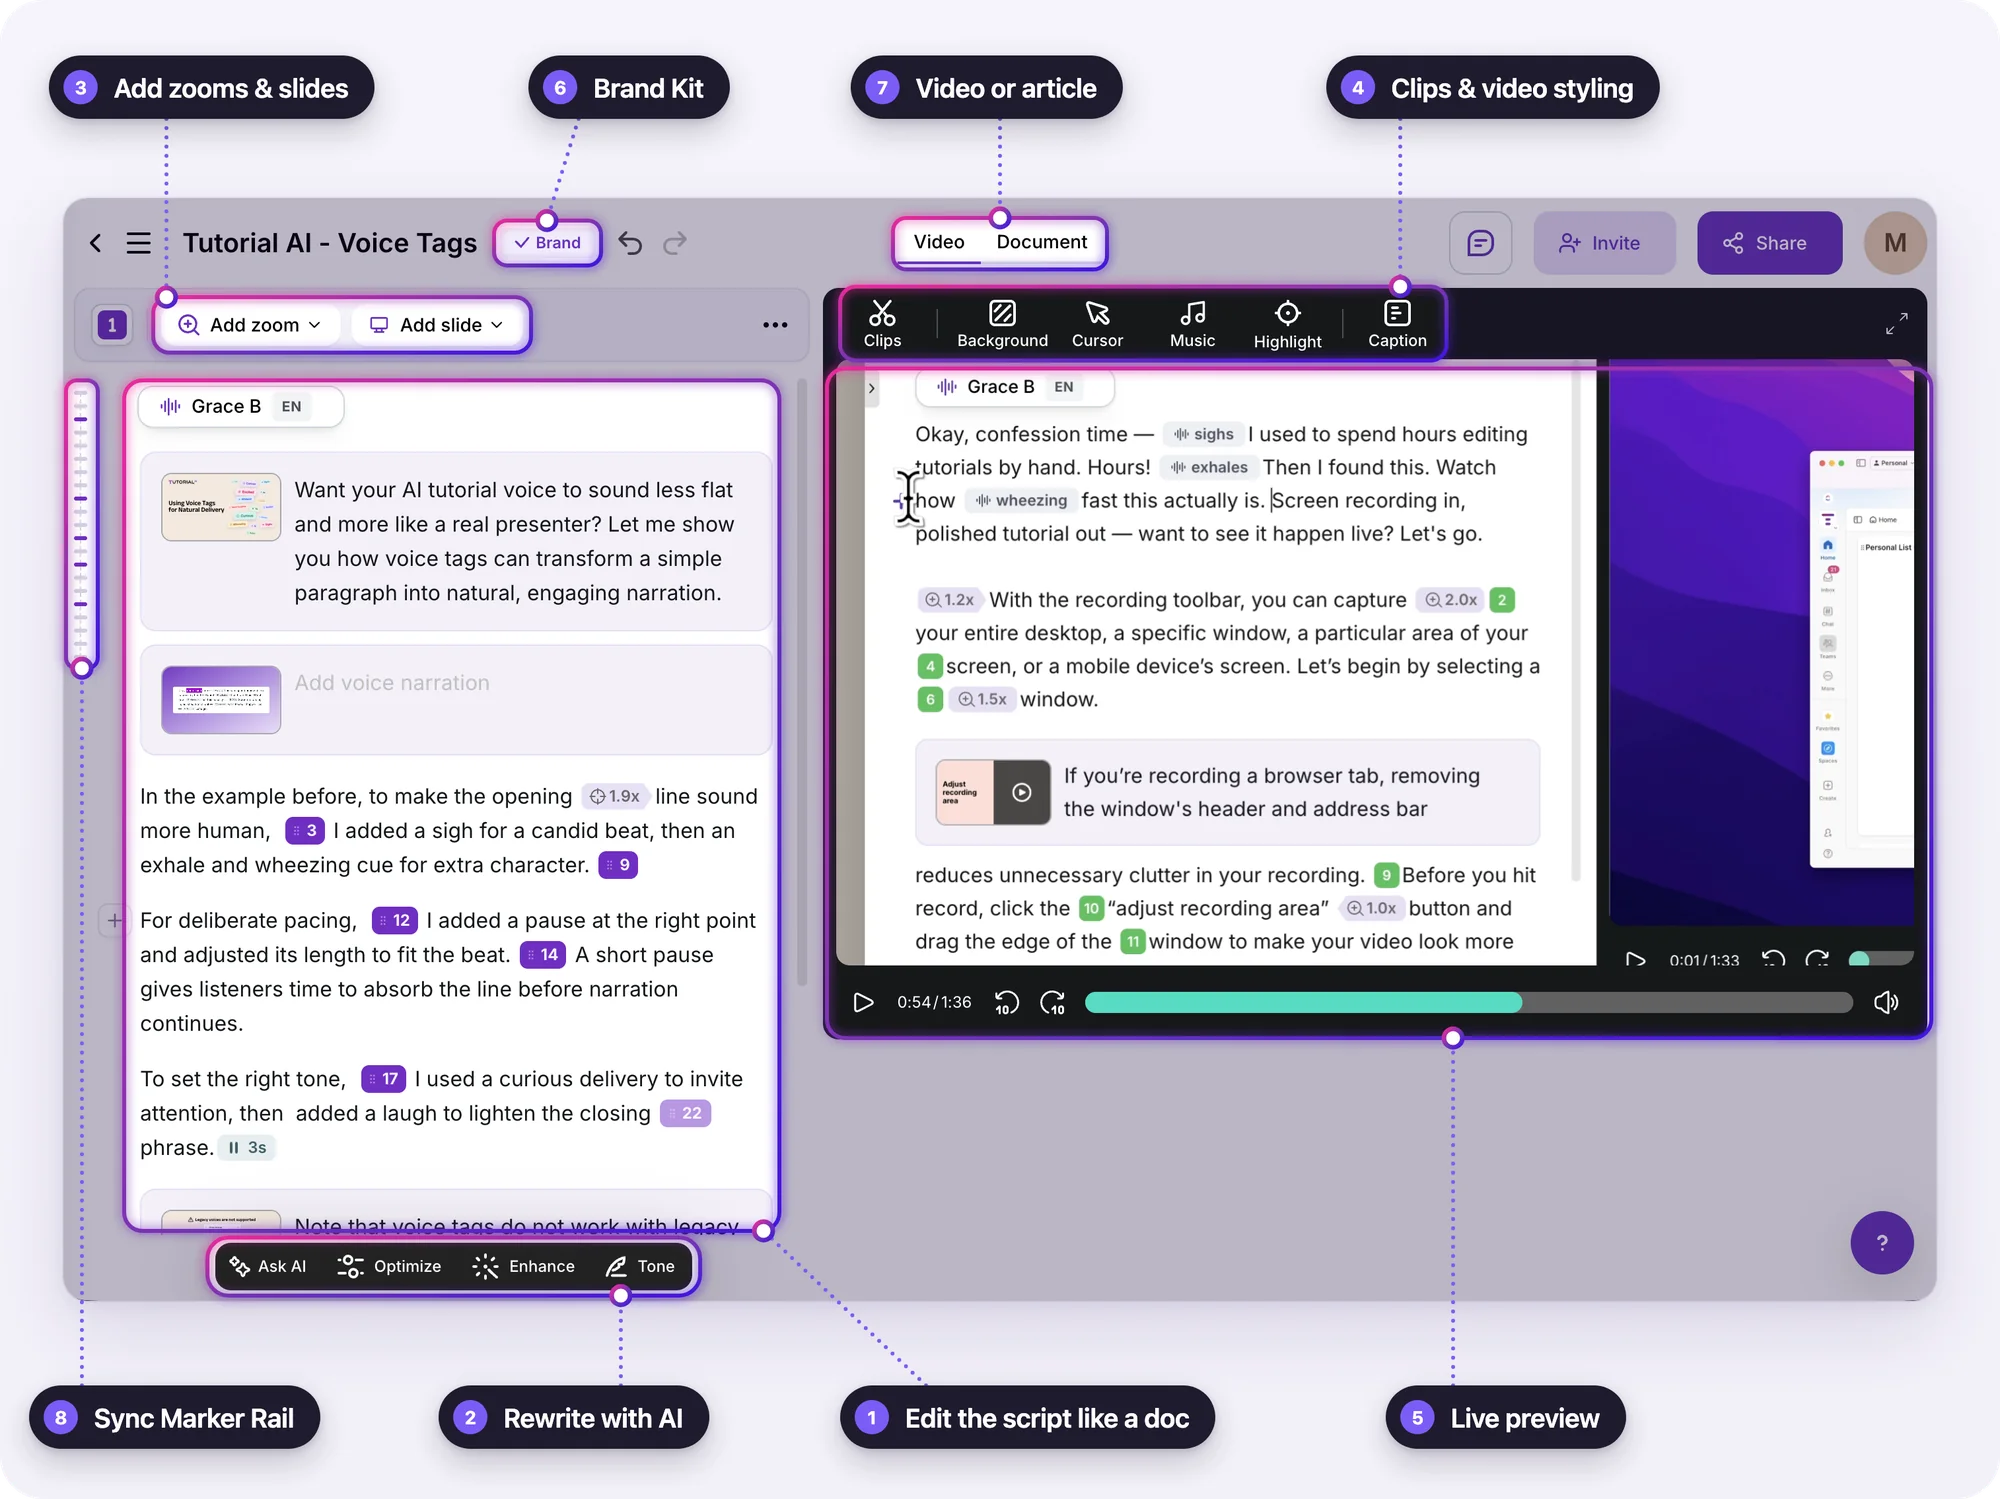
Section titled “Step 4: Review and refine”Open the editor to fine-tune your video. The editor uses a script-based approach — you edit text, not a timeline.
-
Edit the script like a doc — change the words, and the voiceover and video timing update to match.
-
Rewrite with AI — Ask AI, Optimize, Enhance, and Tone polish the narration for you.
-
Add zooms and slides — zoom in on key moments, or insert intro, agenda, and outro slides.
-
Clips and video styling — open Clips to cut and trim your recording, or change the background, cursor, music, highlights, and captions.
-
Live preview — play your latest edits right in the editor.
-
Brand Kit — apply your logo, colors, and fonts with a Brand Kit.
-
Video or article — switch to Document to see the written guide generated from the same recording.
-
Sync Marker Rail — open it to see the sync markers from your recording and drag them into the script to keep narration and video in step. See Sync Markers.
For a full tour of the editor, see Editor Overview.
Step 5: Publish
Section titled “Step 5: Publish”Export your finished video as MP4, share via link, or embed directly in your help center, LMS, or website.
Tutorial AI also generates a written article with screenshots from the same recording — giving you both a video tutorial and step-by-step documentation from a single recording session.