

Editing
Editor Overview
The Editor is where you craft your video and audio projects. Unlike traditional video editors that use timelines, Tutorial AI uses a script-based approach — you edit text, and the video updates to match.
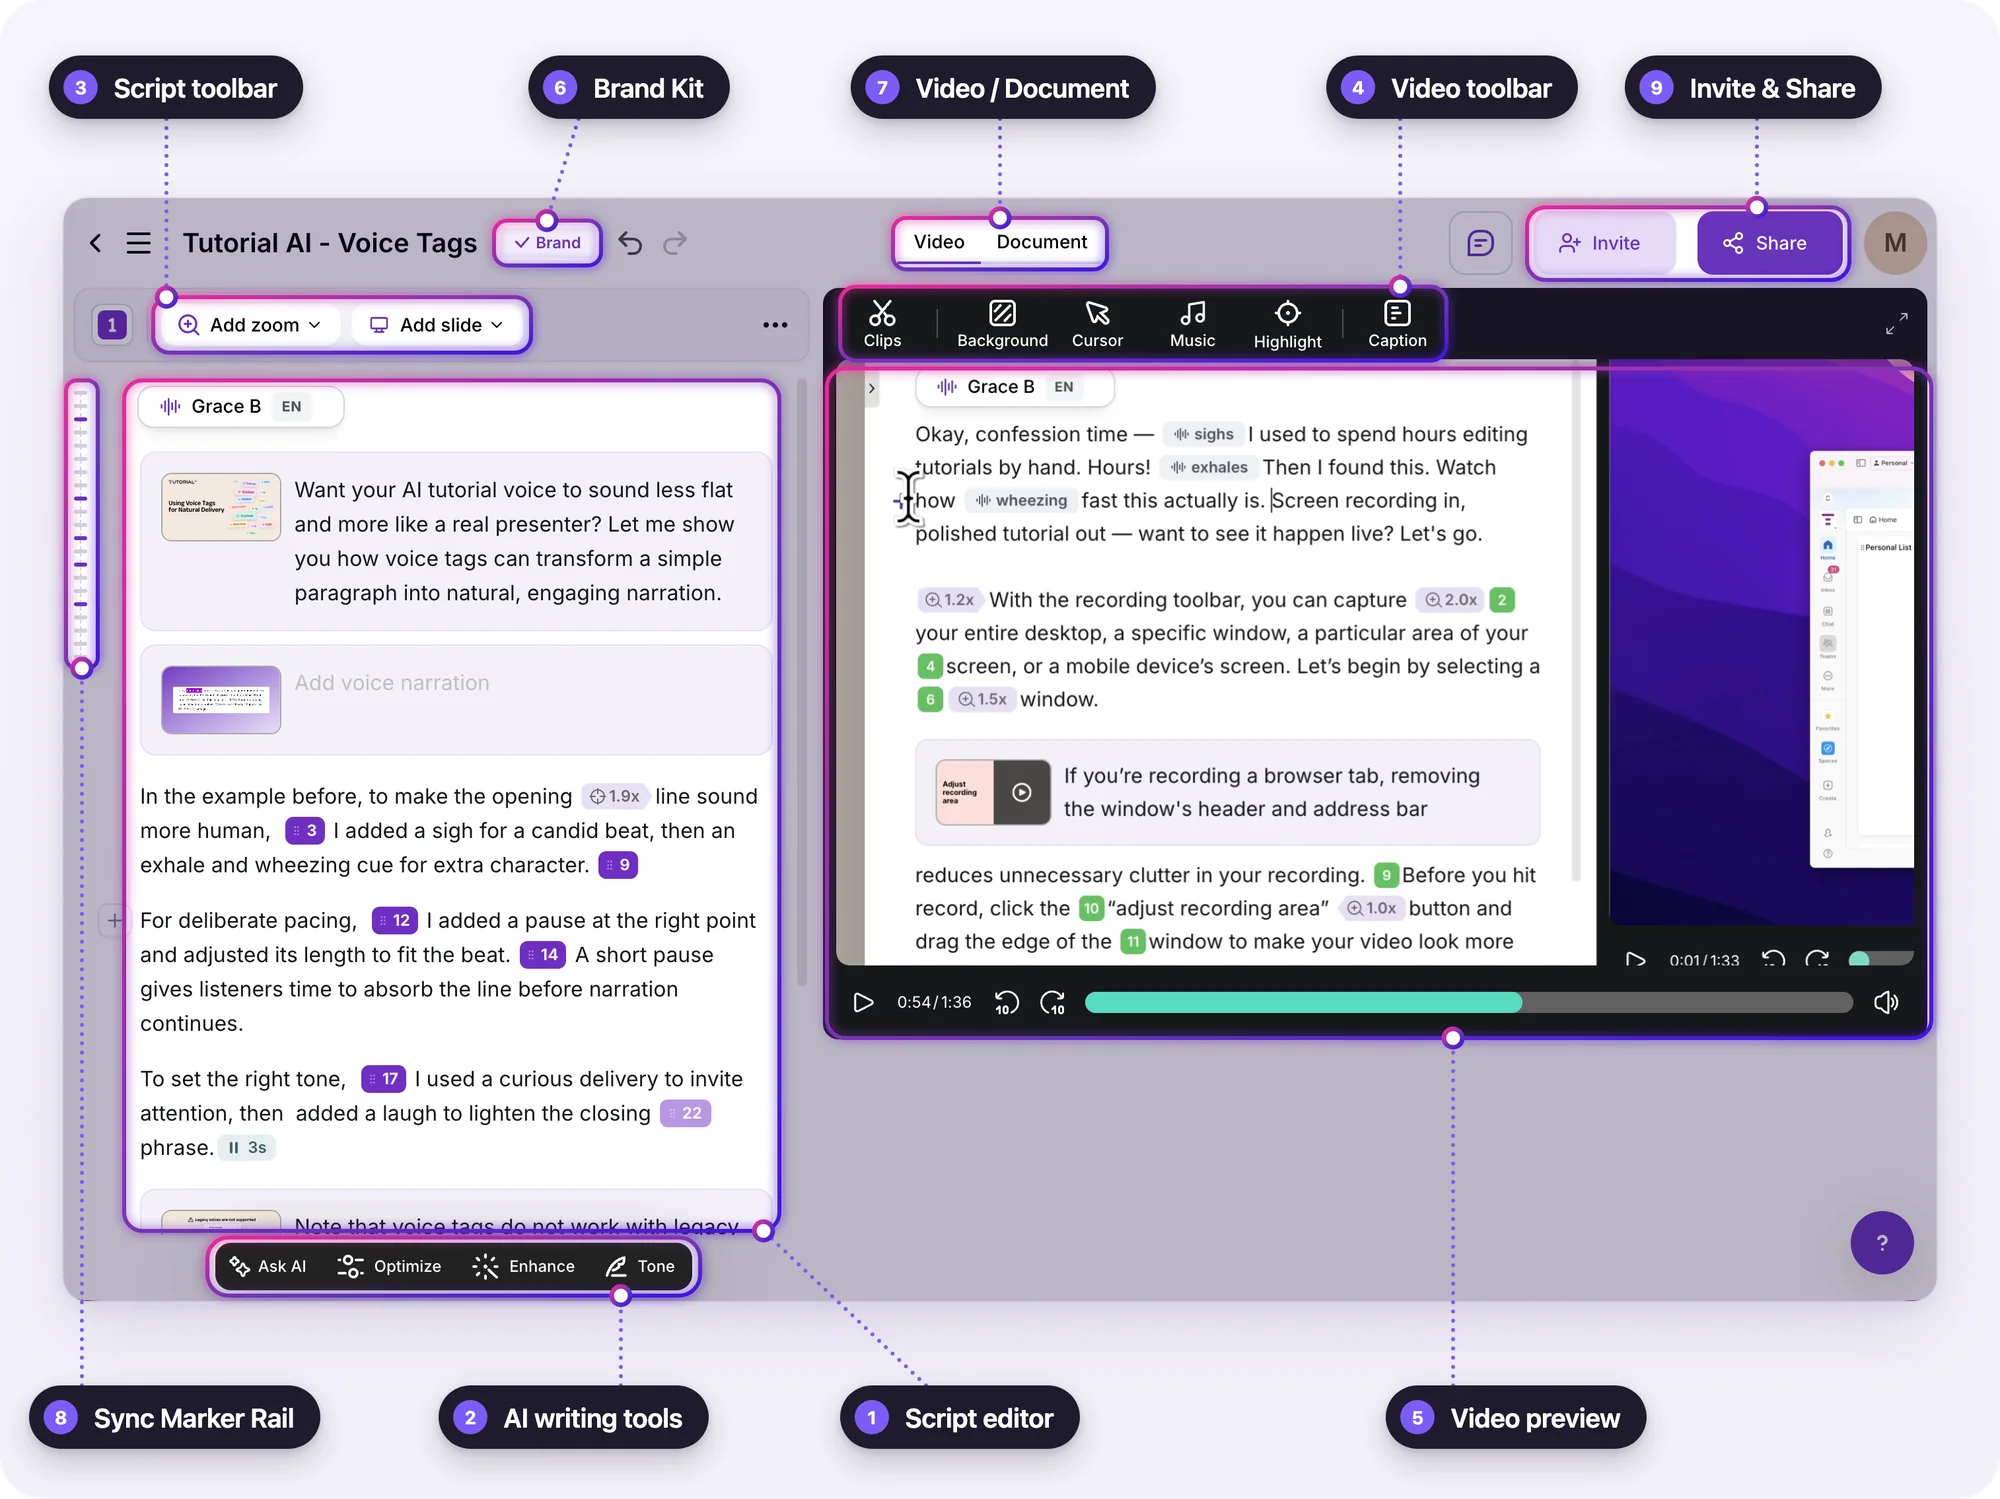
Key areas of the Editor
Section titled “Key areas of the Editor”The numbers match the callouts in the screenshot.
1. Script editor
Section titled “1. Script editor”This is where you write and edit your narration script, which replaces the traditional video timeline. Change a word and the voiceover and video timing update to match. Sync Markers placed in the text tie words to moments in your recording.
Zooms, voice tags, and slides sit inline in the script, so you edit them right where they happen.
2. AI writing tools
Section titled “2. AI writing tools”The bar at the bottom of the script: Ask AI, Optimize, Enhance, and Tone rewrite your narration — polish rough wording, add missing detail, or change the tone. See Ask AI.
3. Script toolbar
Section titled “3. Script toolbar”Add zoom adds a zoom to the script, and Add slide adds an intro, agenda, outro, or other slide.
4. Video toolbar
Section titled “4. Video toolbar”The tools above the video preview:
- Clips — edit your recording footage (overview): cut and trim, split and remove clips, insert more recordings, and blur sensitive data (blur is available on Growth, Team, and Enterprise plans)
- Background — wallpapers, gradients, or solid colors, plus padding, rounded corners, and shadow
- Cursor — cursor size and movement
- Music — background music
- Highlight — dim everything except the area viewers should focus on (Growth, Team, and Enterprise plans)
- Caption — captions for your video
5. Video preview
Section titled “5. Video preview”A live preview of the finished video. Press play at any time to see your latest edits, including everything you set from the video toolbar.
6. Brand Kit
Section titled “6. Brand Kit”The Brand button next to the project title applies your Brand Kit — logo, colors, and fonts. Brand Kits are available on the Team and Enterprise plans.
7. Video / Document
Section titled “7. Video / Document”Switch between the video and the written document generated from the same recording.
8. Sync Marker Rail
Section titled “8. Sync Marker Rail”The spine on the left edge of the script. Open it to navigate through the key scenes of your recording, similar to slides in a presentation. Sync Markers are created automatically when you click on items while recording with the Desktop App, and you align the video with your script by dragging them into the script.
9. Invite & Share
Section titled “9. Invite & Share”Invite gives workspace members and collaborators access to the project. Share is where you generate the final video, then publish it as a link or embed, or export it — see Publish & Share. The project name sits at the left of the same bar.