You already have the deck. The slides are approved, the story is clear, and now someone asks for a version people can watch on their own time. That’s the moment when a PowerPoint stops being a presentation file and becomes a distribution problem.
Often, ppt to video isn’t about flashy production. It’s about reuse. A product marketer wants a feature release walkthrough. A support lead needs a help-center video. An enablement manager wants the same onboarding deck available without a live presenter. The slides exist. The question is how to turn them into something watchable, useful, and easy to update.
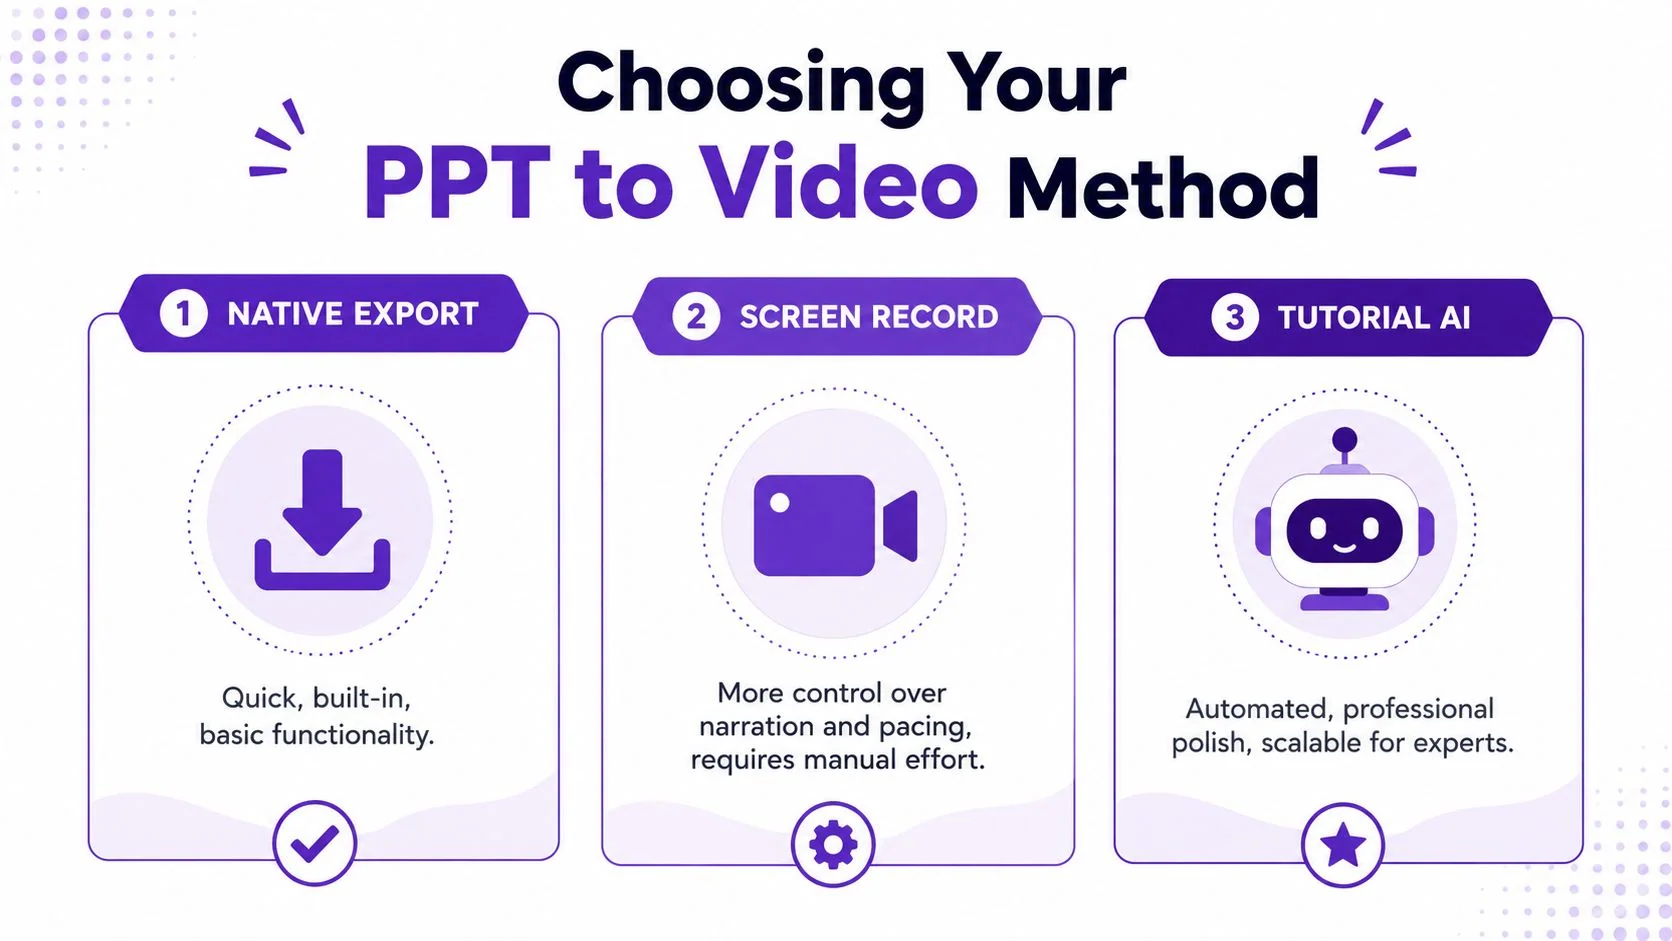
There are three practical ways to do it. You can export directly from PowerPoint. You can present the deck while screen recording. Or you can use an automated workflow that starts from a recording and adds editing, pacing, and documentation support. Each method works. Each also fails in predictable ways if you use it for the wrong job.
Why Turn a PowerPoint Presentation Into a Video
A slide deck is efficient for the person presenting it. A video is efficient for everyone else.
That matters because most presentations don’t stay in the room where they were first shown. They get reused for onboarding, customer education, internal training, SOPs, release notes, and sales enablement. Once the audience becomes asynchronous, a deck alone usually isn’t enough. People miss the explanation between slides, the emphasis on what matters, and the pacing that made the live version coherent.
There’s also a strong format argument for video. Synthesia says viewers retain 95% of a video’s message versus 10% from text, and Microsoft has long supported PowerPoint video export through File > Export > Create a Video, which shows how established this workflow has become in mainstream software (Synthesia’s PowerPoint-to-video overview).
Practical rule: If the value of your presentation depends on what the speaker says between slides, the deck should probably become a video.
Where teams usually get stuck
The problem usually isn’t starting. It’s choosing the right level of production.
Some teams need a fast internal asset and don’t want any extra tools. Others need cursor movement, live narration, or app switching because the deck is only part of the story. And some need a polished output they can localize, brand, publish, and pair with written documentation.
Those are different jobs. Treating them as the same job is what creates frustration.
The three workflows that matter
Most real-world ppt to video projects fall into one of these buckets:
- Native export from PowerPoint for simple, linear playback when the deck is already final.
- Screen recording the presentation when you need more natural narration, cursor guidance, or the ability to show the actual product alongside the slides.
- Automated recording-to-video workflows when you need speed, polish, and repeatability without learning a traditional editor.
The best choice depends less on your software stack and more on the content itself. A quarterly internal update can tolerate rough edges. A customer onboarding video usually can’t.
Method 1 Use the Native PowerPoint Export Function
If your deck is already structured exactly how you want viewers to consume it, PowerPoint’s built-in export is the shortest path from slides to video.
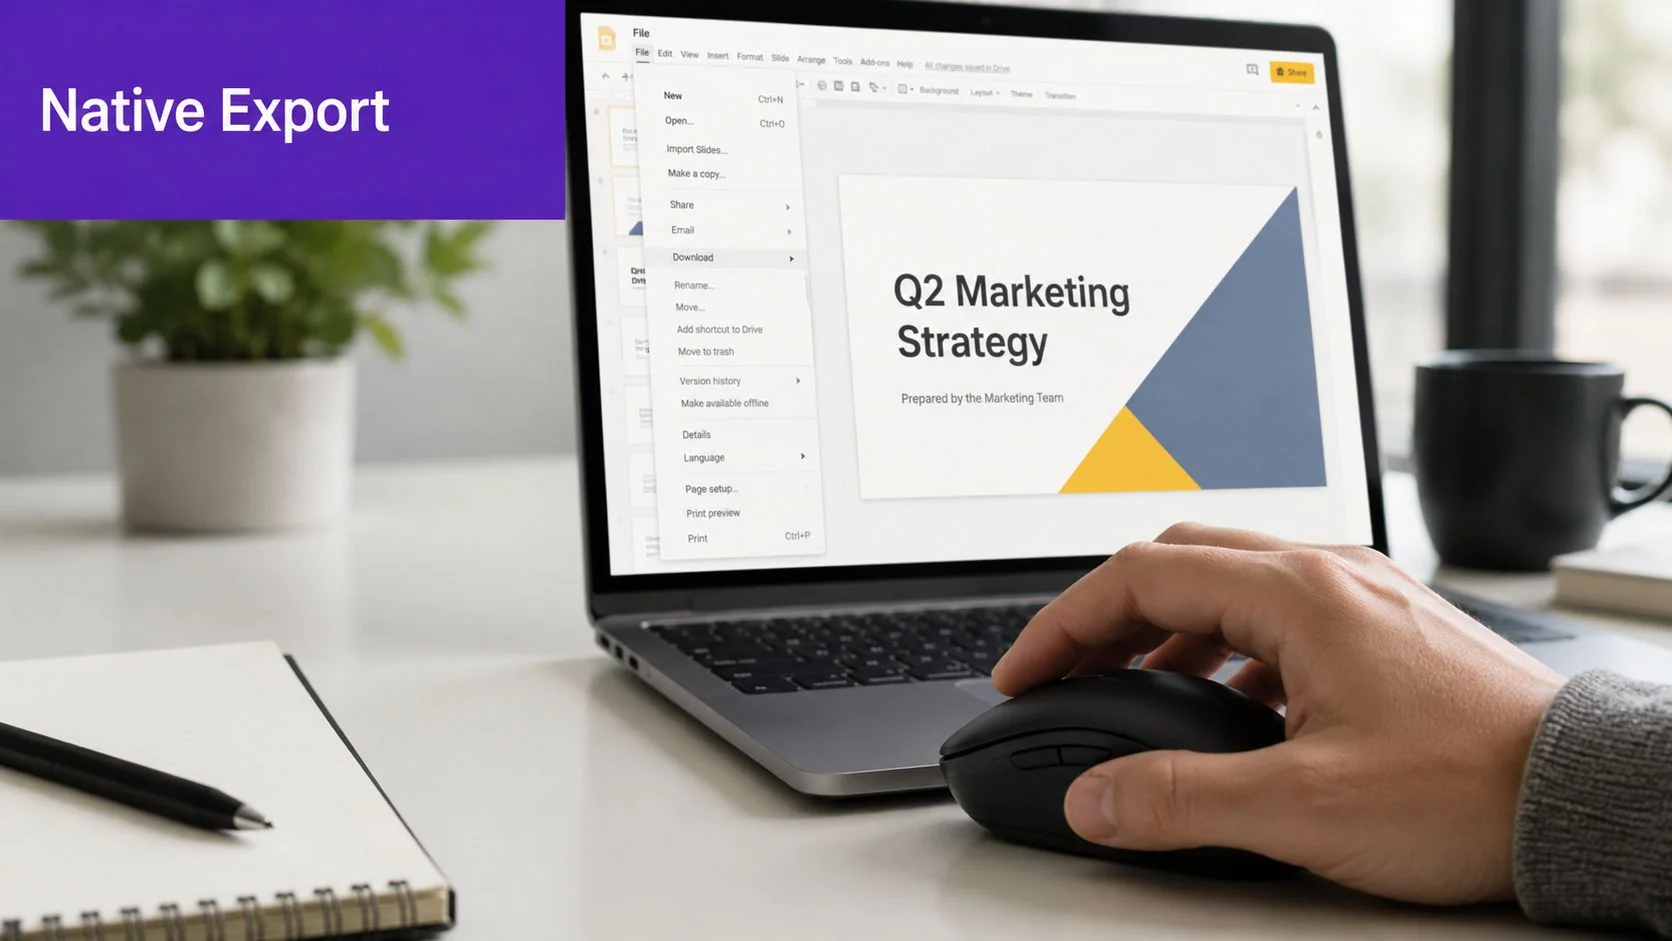
This method works best when the presentation is linear, the visuals are final, and you don’t need editing beyond what PowerPoint already supports. Think policy walkthroughs, training decks, company updates, and narrated presentations that won’t change often.
How to export it properly
The workflow is straightforward, but the setup matters more than the final click.
- Lock the deck first
Finalize slide order, on-slide text, animations, and any speaker notes you’ve already converted into narration. Native export is much smoother when the presentation itself is stable. - Record narration and slide timing if needed
If the video needs your voice or intentional pacing, record those before export. A plain export with default timing often feels robotic. - Export as MP4 or WMV
In PowerPoint, go to the video export flow and choose your output format. - Select “Use Recorded Timings and Narrations”
This is the setting many people miss. It tells PowerPoint to follow your actual pacing instead of generic default timing. Atlassian’s guide specifically calls this out as important when turning a deck into a linear video rather than a live presentation, and it recommends keeping slide duration around 5–7 seconds unless a slide needs more explanation (Atlassian’s walkthrough on making a PowerPoint into a video).
A deck that worked live can feel strangely slow as a video. Viewers don’t have the social cue of a presenter standing in front of them, so pacing problems become obvious fast.
When native export works well
There are good reasons this remains the default method.
- It’s built in. You don’t need to buy, learn, or approve another tool.
- It preserves slide design. What you approved in PowerPoint is what people will see.
- It’s fast for stable content. If the narration and timing are already done, export is easy.
- It suits formal decks. Compliance updates, executive briefings, and structured training often fit this format well.
Where it breaks down
The limitations show up as soon as you need the video to feel less like a slideshow.
| Strength | Limitation |
|---|---|
| Keeps the original slide design intact | Minimal post-production control |
| Good for simple narrated playback | Hard to tighten awkward pauses after recording |
| No extra software required | Generic motion and transitions can feel dated |
| Easy for one-off exports | Revisions can mean re-recording more than you want |
The biggest issue is that PowerPoint export assumes the slides are the product. In many product, support, and onboarding videos, they aren’t. The deck is only one layer. You also need cursor emphasis, UI context, zooms, or selective cleanup after recording.
Use this method when
Use native export when the presentation itself is already the final experience.
Good fits include:
- Internal updates where speed matters more than polish
- Narrated training modules with a fixed script
- Board or stakeholder summaries that need asynchronous viewing
- Simple explainers where every important point is already on the slide
If the audience needs to watch you interact with an actual product, not just advance slides, this method starts to feel restrictive.
Method 2 Screen Record Your Presentation for More Control
Screen recording solves the main problem with native export. It lets you present like a human instead of publishing a slide deck with playback.
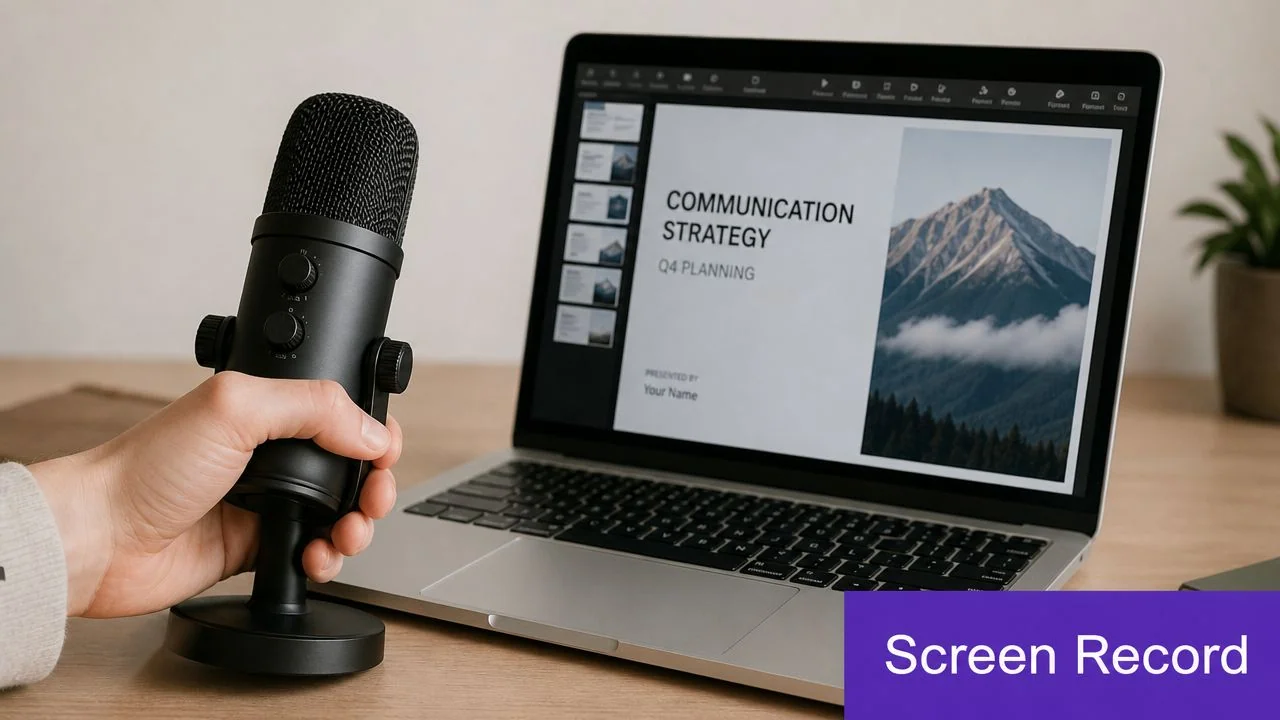
That sounds small, but it changes the result a lot. You can speak more conversationally, pause on a point when it deserves it, use your cursor to guide attention, and leave the slide deck entirely if you need to show a live product, dashboard, or help-center flow.
What this workflow gives you
This is the method I’d choose when the deck is supporting material, not the whole story.
A screen-recorded walkthrough works well for product demos, customer onboarding, feature release videos, support article videos, and internal SOPs. You can move through slides, open a browser tab, show the live UI, then come back to the deck. That flexibility makes the final video feel more relevant and less staged.
If you’re comparing tools for this kind of workflow, LearnStream’s roundup of software for creating online courses is useful because course creators run into the same practical constraints: screen clarity, voice quality, and how much cleanup the recording needs afterward.
The trade-off is manual effort
This method gives you control, but it also exposes every weakness in the recording process.
Casual screen recorders are fine for capturing content. They’re much less helpful at shaping that content. Subject-matter experts often ramble, restart a sentence halfway through, pause while finding the next tab, or explain something twice because the first version didn’t land. None of that is unusual. It’s what happens when the person who knows the product is also trying to perform in one take.
The more expertise someone has, the more likely they are to add useful but unscripted detail. That often improves the substance and hurts the pacing.
Here’s what usually goes wrong:
- Long openings where the presenter warms up before reaching the point
- Cursor drift that makes viewers guess where to look
- Retakes inside the same recording because re-recording a full segment feels wasteful
- Dead air while switching windows or waiting for an app to load
How to make screen-recorded ppt to video content better
You don’t need a studio workflow. You do need restraint.
- Use slides as anchors, not a teleprompter
Keep each slide focused on one idea. If a slide is dense, your spoken track will become dense too. - Record in short sections
Don’t force a single take if the video has clear chapters. It’s easier to redo one segment than fix a shaky full run. - Narrate for the viewer, not for the room
Live presenters say things like “as you can see here” or “I’ll give everyone a second to read this.” Those lines rarely belong in video. - Show the actual interface when it matters
For product training, the actual UI usually beats another explanatory slide.
For teams trying to get more consistent at this format, Tutorial AI has a practical guide on screen recording for tutorials that’s worth reviewing before you record.
Best use cases for screen recording
This method is often the right middle ground.
| Good fit | Why it works |
|---|---|
| Product demos | You can move from slides into the live UI |
| Sales walkthroughs | Conversational delivery feels more credible |
| Help-center videos | Cursor movement and real workflows matter |
| Internal process training | You can show both context and execution |
The downside is that control creates cleanup. You get a more natural video, but you usually inherit editing work too. If you need recurring output across many demos, tutorials, or support assets, that manual burden adds up quickly.
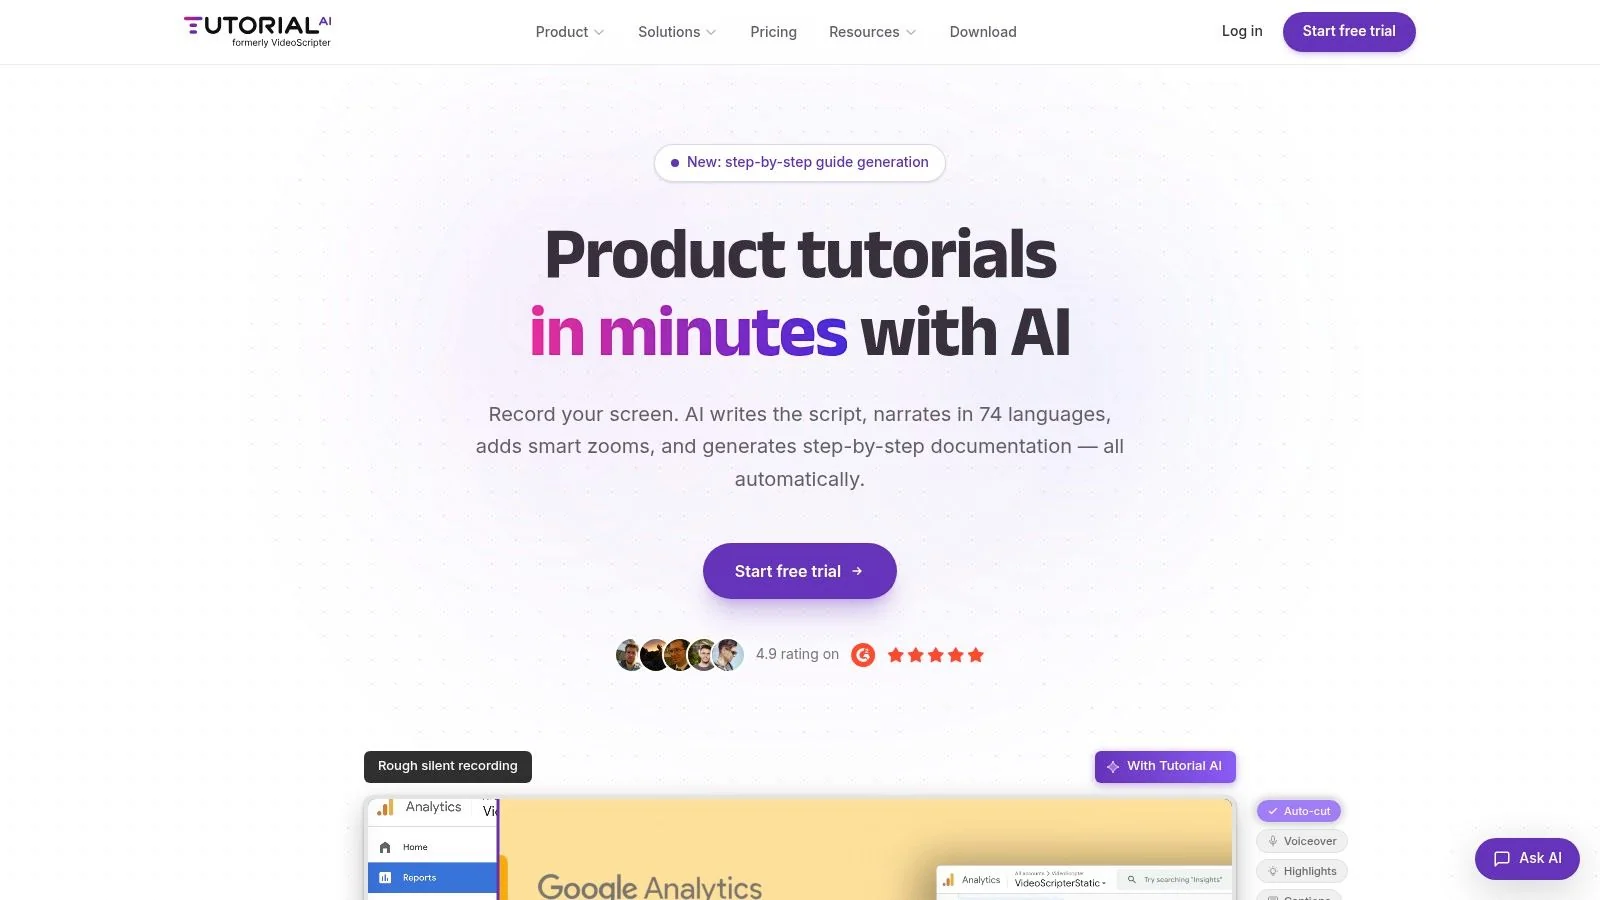
Method 3 Use Tutorial AI for Polish and Scalability
A common scenario looks like this. The product expert already has slides, a rough walkthrough, and the right explanation in their head. What they do not have is time to clean up timing issues, re-edit every pause, and produce matching documentation by hand.
That is where an automated workflow earns its place. Native export is fast but limited by the deck. Screen recording gives more delivery control but pushes editing work downstream. Tutorial AI fits the cases where the raw recording is only the starting point, and the goal is a cleaner final asset that can be reused across teams and formats.
Microsoft’s export flow is still the baseline, but newer tools increasingly focus on turning uploaded decks or recordings into narrated video with scene assembly, transitions, and script support handled automatically, as described in SlideSpeak’s overview of PowerPoint-to-video AI workflows. That matters for product managers, trainers, support leads, and solutions engineers who need consistent output without becoming video editors.
Where automated workflows fit
Use this method when the content needs to look finished, but the production model still has to be efficient.
It is a strong fit for onboarding libraries, support videos, release walkthroughs, internal training, and product education programs where one person or a small team has to publish repeatedly. In those cases, the bottleneck is rarely recording. It is revision speed, consistency, and the effort required to turn one explanation into multiple usable assets.
Automated editing changes that production math. The recording becomes source material that can be tightened, standardized, and repackaged, instead of a file that someone has to fix manually in a timeline.
What changes in the production process
With Tutorial AI, the workflow starts from a real screen recording and real voice, not a synthetic avatar. That makes it a practical option for software tutorials where viewers need to see the actual interface and hear someone explain what is happening with product-level accuracy.
The trade-offs are clear:
- AutoRetime improves pacing by reducing dead space and smoothing uneven delivery. It saves time on cleanup, but it still depends on a recording that follows a sensible structure.
- Script-based editing reduces timeline work because spoken changes can be handled in text. That is faster for SMEs and doc teams, but it will not replace editorial judgment on what should be cut or reordered.
- Document generation creates a written version from the same source. This is useful when support and enablement teams need both video and article output from one walkthrough.
- Brand Kits improve consistency across multiple creators. That matters for larger teams, though it is less important for one-off internal videos.
- Multilingual support helps with distribution when the same tutorial needs to serve multiple regions.
- Enterprise controls such as SSO/SAML, SOC 2, and GDPR support matter when the content lives inside a formal training, support, or documentation operation.
A good automated workflow reduces the amount of manual post-production required to get from rough explanation to publishable tutorial. It does not replace clear thinking, clean narration, or a sensible recording plan.
What this method does better than the other two
This workflow is strongest when volume and consistency matter more than raw recording control.
If a team publishes occasional internal updates, PowerPoint export is usually enough. If a solutions engineer is giving a high-touch walkthrough and wants full delivery control, screen recording is often the better fit. Tutorial AI makes more sense when the team needs repeatable production for feature education, help-center videos, onboarding series, and sales enablement assets that will be revised often.
That is the core advantage. It scales the boring parts of production.
Typical good-fit use cases include:
- Feature release videos that need quick polishing after a product change
- Onboarding sequences with multiple short lessons that should feel consistent
- Support content where one recording should become both video and written guidance
- Sales enablement walkthroughs that need frequent updates without a full re-edit
If you’re mapping the broader ecosystem around modern publishing workflows, this roundup of AI tools to boost content workflow is useful context because it shows how many teams now expect automation in production, not just ideation.
Here’s a product walkthrough of the format in action:
Trade-offs to understand before choosing it
This method improves packaging, pacing, and repeatability. It does not fix weak source material.
If the walkthrough is confusing, if the presenter skips steps, or if the screen capture is messy, the final result will still suffer. AI editing reduces manual cleanup, but it cannot add product judgment that was missing in the original recording.
It also has a narrower sweet spot than general video editing software. For cinematic storytelling, highly custom motion design, or ad-style creative, a traditional editor still gives more control. For instructional content, documentation-driven video, and product education, the balance is usually much better.
I would use this method when a team needs to publish the same kind of tutorial repeatedly and wants a process that non-editors can maintain. A support or documentation team is the clearest example. One source walkthrough can drive a video, a written article, and a more consistent viewer experience without rebuilding the asset from scratch each time.
If that is your use case, this quick reference guide for training video workflows is a practical benchmark for evaluating your current process.
Customers such as Bosch, Deutsche Bahn, Intesa Sanpaolo, Microsoft, and UNICEF also suggest that this category is being used for real operational content, not just creator-side experimentation.
How to Choose the Right PPT to Video Method
The right workflow depends on what you’re optimizing for. Workflows often involve balancing four things at once: speed, polish, flexibility, and repeatability. You rarely get all four from the same method.
PPT to Video Method Comparison
| Method | Best For | Key Advantage | Main Drawback |
|---|---|---|---|
| Native Export | Finalized decks, simple training, internal updates | Fast and built into PowerPoint | Limited editing and presentation feel |
| Screen Record | Demos, walkthroughs, mixed slide and UI content | More natural narration and control | Manual cleanup after recording |
| Tutorial AI | Repeatable tutorials, onboarding, support, enablement | Polished output from raw recordings | Still depends on recording quality and fit |
A simple decision framework
Use native export when the deck itself already does the job. If the presentation is stable, linear, and mostly self-contained, don’t overcomplicate it. This is the sensible option for a one-off asset with low revision pressure.
Choose screen recording when the story benefits from live delivery. This is usually the case for product walkthroughs, feature explanations, and support content where cursor movement and app switching make the explanation clearer.
Pick Tutorial AI when you expect the workflow to repeat. That includes onboarding libraries, help-center videos, sales training, internal SOPs, and any environment where one expert needs to publish useful instructional content regularly without becoming a part-time editor.
Match the method to the use case
Here’s how I’d think about common scenarios:
- Quick internal update
Native export is often enough. - Customer onboarding video
Screen recording or Tutorial AI usually makes more sense because the viewer often needs a guided explanation, not just slides. - Support article video paired with written documentation
Tutorial AI is the stronger fit because the same source can support both outputs. - Formal narrated compliance training
Native export can work if the deck is tightly written and approved.
Choose the method that matches the shelf life of the content. The longer a video will be reused, the more important polish, accessibility, and update efficiency become.
Advanced Tips for Professional and Accessible Videos
Most ppt to video guides stop at export. That’s enough to create a file, but not enough to create a professional asset people can use.
Microsoft’s accessibility guidance puts attention on alt text, grouping layered images, and captions for deaf or hard-of-hearing viewers, which highlights a common gap in conversion advice. Teams often focus on how to render the deck as video and skip the harder question of whether the result is understandable, inclusive, and compliant in practice (Microsoft’s accessibility guidance discussed in this PowerPoint accessibility video).
Accessibility isn’t an extra step
A narrated slide deck without captions is harder to use in quiet offices, noisy homes, multilingual teams, and accessibility-sensitive environments. A video with dense visuals but no verbal explanation creates a different failure mode. The file exists, but the meaning doesn’t travel.
Here are the basics that improve the result fast:
- Add captions so spoken content is available without relying on audio alone
- Write descriptive alt text in the source deck for meaningful visuals before conversion
- Group layered images so visual relationships stay understandable
- Avoid color-only distinctions in charts and diagrams
If captions are part of your workflow, this guide on how to add captions to videos is a useful operational reference.
Charts and diagrams need adaptation
A chart that works during a live presentation often fails in a video because the presenter isn’t there to point, pause, and clarify in real time.
Microsoft’s image accessibility guidance also emphasizes descriptive alt text, patterns or shapes in addition to color, and grouped visuals for layered content (Microsoft guidance for improving image accessibility in PowerPoint). That’s a useful reminder that visual preservation isn’t the same as visual comprehension.
For complex slides, the safer move is usually to simplify for video:
- Split one dense slide into several beats
- Narrate what to look at before why it matters
- Use zooms, highlights, or staged reveals when available
- Rewrite labels that only make sense to insiders
Professional video quality isn’t just cleaner editing. It’s making sure viewers can follow the content without the original meeting context.
If your team turns presentations, demos, or walkthroughs into customer education and support content regularly, Tutorial AI is worth evaluating as a production workflow. It starts from a real screen recording, helps tighten pacing, and can turn the same recording into both a video and a written article, which is useful when one subject-matter expert needs to publish in multiple formats without spending the week inside a video editor.