You recorded the demo in pieces. The intro went well, the product walkthrough needed two retakes, and the ending exists as a separate clip because someone pinged you mid-sentence. Now you want one clean video on YouTube.
Then you open YouTube Studio and realize the obvious step is missing.
That moment trips up a lot of people who are trying to do practical merging videos on youtube for demos, onboarding, support content, or release notes. The frustration is not the merge itself. It is the gap between quick recording tools that create messy raw footage and traditional editors that expect genuine post-production skill.
For business tutorials, that gap matters. Subject matter experts know the product, but they do not want to spend an afternoon nudging clips on a timeline just to publish a usable walkthrough.
Why You Can’t Directly Merge Videos on YouTube Anymore
YouTube Studio is no longer the place to assemble multiple raw clips into one finished video. That editing path was removed years ago, so the practical workflow now is simple. Merge first in an editor, then upload the final export to YouTube.
That gap matters most for business tutorials. Product demos, onboarding videos, support walkthroughs, and release updates are often recorded in short segments because the script changes, a step needs a retake, or a screen recording breaks halfway through. YouTube can still help with small edits on an uploaded video, but it does not function as an effective multi-clip assembly tool.
A common assumption is that YouTube can handle this workflow:
- Upload clip one
- Upload clip two
- Add intro and outro
- Click merge
- Publish
That workflow is gone.
What YouTube still handles well is limited cleanup on a video that already exists as a single upload. You can trim a section, remove part of the beginning or end, and make a few presentation-level adjustments. You cannot reliably turn separate takes, webcam clips, screen recordings, and retakes into one polished tutorial inside YouTube Studio.
For business teams, that changes the role YouTube plays in production. It is the distribution endpoint. The actual assembly has to happen before upload.
That is more than a technical detail. It affects staffing, turnaround time, and how quickly a team can publish updates. If a trainer or product marketer has to hand raw clips to a traditional editor every time a feature walkthrough changes, the process slows down fast. If the same team uses a script-based workflow that can combine segments without a full timeline edit, short tutorial production gets much easier to manage.
A better recording plan helps too:
- Record one product step per clip so updates stay isolated
- Name files by scene or feature, not by vague retake labels
- Decide early whether the video needs a full editor or a faster AI-based merge workflow
- Treat upload as the final publishing step, not the place where the edit comes together
After the merge is done, the upload process is straightforward. This guide to how to post a YouTube video is a useful companion for the final publishing step.
Choosing Your Video Merging Method
A business tutorial usually breaks at the revision step, not the first recording. The primary choice is not just how to combine clips. It is how much rework your team creates every time a product screen changes, a line needs tightening, or a trainer records a better take.
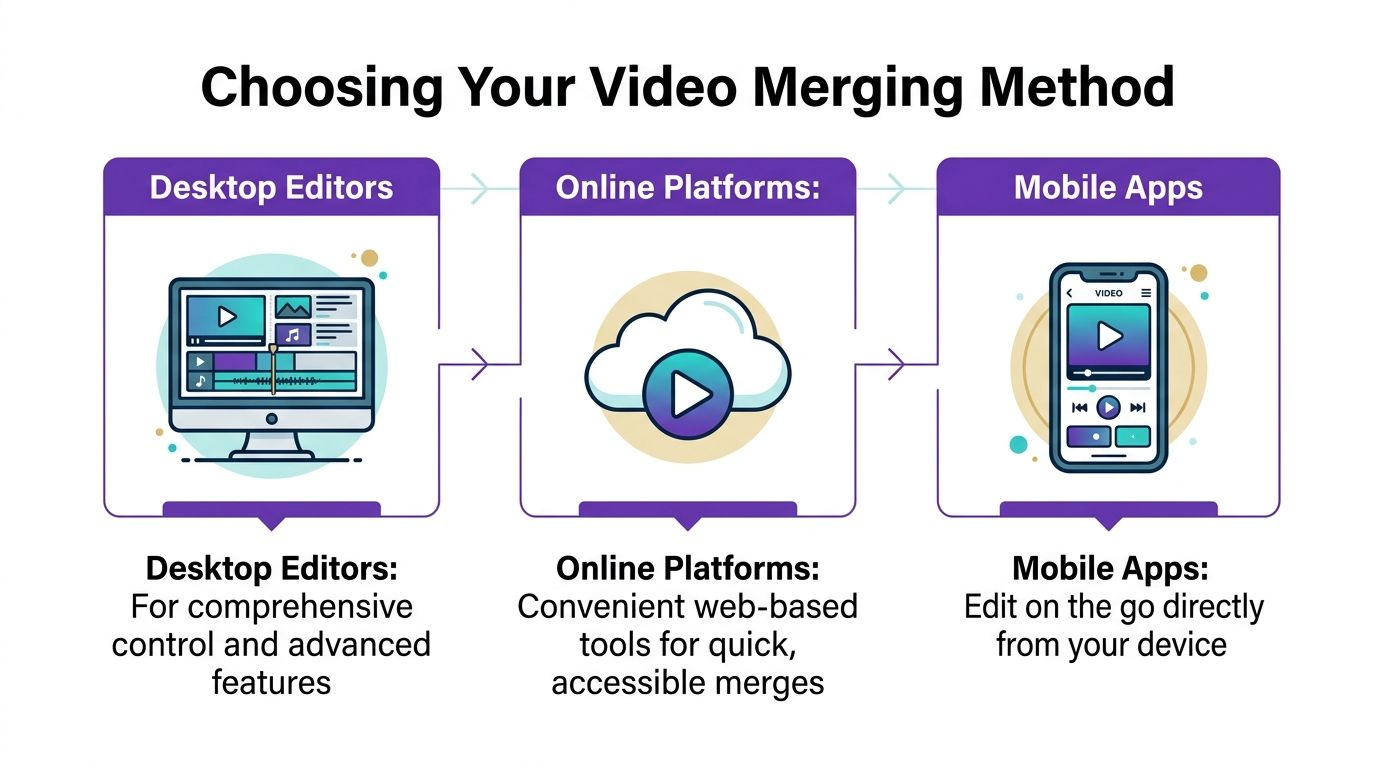
Three paths cover nearly every use case. Each has a place. Each also creates a different kind of friction.
What YouTube Editor can still do
YouTube Editor helps with light cleanup on a video that is already uploaded. It is useful for trimming the beginning or end, cutting a section, and making small presentation fixes inside YouTube Studio, as shown in this walkthrough of the YouTube editor workflow.
Its limitation is practical, not subtle. It does not give business teams an effective way to assemble separate screen recordings, webcam takes, retakes, and narration clips into one polished tutorial.
Use it for:
- Trimming a section from a video that is already live
- Cleaning up a rough intro or ending after upload
- Making small edits when the structure of the video is staying the same
Skip it if the job is to combine multiple source files into a finished demo or training video.
Traditional editors give precision, but they slow repeatable tutorial work
Desktop tools like Adobe Premiere Pro, DaVinci Resolve, Filmora, and iMovie give editors full manual control. Mobile and browser tools like CapCut and Kapwing reduce setup time, but the editing model is still the same. You work on a timeline, clip by clip.
That is fine for a one-off campaign video.
It gets expensive for recurring tutorials. A small script change in the middle of a product walkthrough can force new cuts, timing fixes, audio cleanup, caption updates, and export checks. The merge is a single step. The revision chain is what eats time.
Traditional editors are the right fit when you need:
- Detailed manual cuts
- Layered music and voice balancing
- Custom transitions and visual timing
- Tight export control for different platforms
They are a weaker fit when subject matter experts need to publish updates themselves and do not want to manage a timeline every week.
AI platforms reduce the revision burden
An AI-driven workflow treats the raw recording as source material to refine, not as a performance that has to be edited by hand from start to finish.
That difference matters most for business tutorials. Product demos, onboarding videos, and support explainers change often. Teams need to remove filler, tighten pauses, replace rough narration, and update steps without rebuilding the full sequence every time. A script-based workflow for creating training videos with AI fits that job far better than a manual timeline when speed and repeatability matter.
The trade-off is straightforward. AI tools are stronger at fast cleanup, script-led changes, and scalable tutorial production. They are less suited to editors who want frame-level creative control over every cut.
A simple decision framework
| Method | Best for | Main downside |
|---|---|---|
| YouTube Editor | Small edits to an existing uploaded video | Cannot assemble a true multi-clip tutorial workflow |
| Desktop or mobile editors | Full manual control and custom editing | Slower to revise, harder for non-editors |
| AI editing platforms | Business demos, training, and repeated updates | Less precise for highly crafted frame-by-frame edits |
Choose based on how often the video will change.
For solo creators publishing occasional videos, a mobile or desktop editor is usually enough. For teams producing demos, internal training, and help content, the better question is which method lets the owner update the message without turning every revision into a full editing session.
A Smarter Workflow for Demos with Tutorial AI
Most business tutorial videos do not fail because the speaker lacks expertise. They fail because the production method forces the expert into the wrong role.
A product marketer, solutions engineer, trainer, or support lead usually knows exactly what the audience needs to see. What they do not want is to become a video editor just to publish one clean walkthrough.
That is where the biggest workflow gap shows up.
Quick recording tools are convenient, but raw recordings often include pauses, retries, filler phrases, backtracking, and dead space. They are good for speed, not polish. On the other side, professional editors can produce a sharp result, but they ask the subject matter expert to work like an editor.
Why the old middle ground does not hold up
A common pattern looks like this:
- Record a demo in Loom or a similar tool
- Realize the recording runs long
- Re-record parts to fix mistakes
- Export multiple files
- Open a timeline editor
- Start cutting and stitching
- Rework audio because the pacing feels off
- Fix captions and upload
That process works, but it has a hidden cost. Every correction multiplies effort. A changed sentence affects timing. Timing affects cuts. Cuts affect callouts. Then someone notices the dashboard changed and the middle scene has to be replaced.
For one-off content, you can absorb that. For recurring demos and training, it becomes drag.
What script-based merging changes
AI editing platforms shift the core unit of editing from the timeline to the script.
That sounds small, but in practice it changes everything. Instead of treating each clip as a manually trimmed block, the system transcribes the recording and lets you revise the video by editing text. If you remove a sentence, the video timing updates. If you rewrite narration, the timing can update with it.
For teams producing demos, onboarding videos, explainer videos, feature release videos, and support article videos, that is a much better fit for how content gets made. The expert can focus on clarity. The tool handles much of the cleanup.
The measurable advantage is already visible in the data. AI editors like Tutorial AI address many post-merge issues that plague top video guides, including audio sync errors in multi-language exports. With script-based merging, AutoRetime, and narration regeneration in 30+ languages, teams can reduce editing time by up to 70% for knowledge base content and publish directly to YouTube in 4K without re-encoding losses, according to this analysis of AI-assisted YouTube merging workflows.
What this looks like in practice
Instead of rehearsing until every line is perfect, the subject matter expert can speak naturally while recording the screen. The cleanup happens after the fact.
That creates a very different production rhythm:
- Record the walkthrough in segments
- Let the platform transcribe the narration
- Remove rough phrasing by editing text
- Update wording without rebuilding the whole sequence
- Regenerate narration if needed
- Export or publish directly
This is especially useful when the content has to stay current. Product tours, onboarding steps, and help center videos rarely stay fixed for long.
If you want a closer look at that production style, this guide on creating training videos with AI is worth reviewing.
Why business users care more than hobby creators
Hobby creators can tolerate some roughness. Internal enablement and customer education teams usually cannot.
A business tutorial often needs to meet several requirements at once:
- Clear pacing: No long pauses while the speaker hunts for the right tab
- Brand consistency: Fonts, colors, slides, and voice should feel intentional
- Fast updates: Product changes should not require a full re-edit
- Localization support: Multi-language output should not break sync
- Secure presentation: Sensitive UI details may need blur or masking
Here, AI-driven merging stops being a novelty and becomes an operational tool.
A short demo helps make that more concrete.
A practical rule: If the person recording is also the product expert, the best workflow is usually the one that removes as much timeline work as possible.
What works and what does not
What works well:
- Recording in short logical scenes
- Speaking naturally instead of trying to perform a perfect one-take script
- Revising narration after recording
- Using text-led edits for timing changes
- Publishing in the same workflow used for editing
What usually does not:
- One long take with the hope of “fixing it later”
- Manual timeline surgery every time copy changes
- Re-recording a whole demo to correct one awkward explanation
- Treating product walkthroughs like cinematic edits
For tutorial-heavy teams, the modern goal is not just to merge clips. It is to turn rough screen recordings into reliable instructional videos without requiring Adobe-level editing skill from every expert on the team.
Merging Videos with Traditional Desktop and Mobile Editors
Sometimes you do want the manual route. Maybe the edit is simple. Maybe you already know Premiere Pro or iMovie. Maybe the clip structure is locked and you just need to stitch, trim, and export.
That approach is still valid. It just helps to go in with realistic expectations.
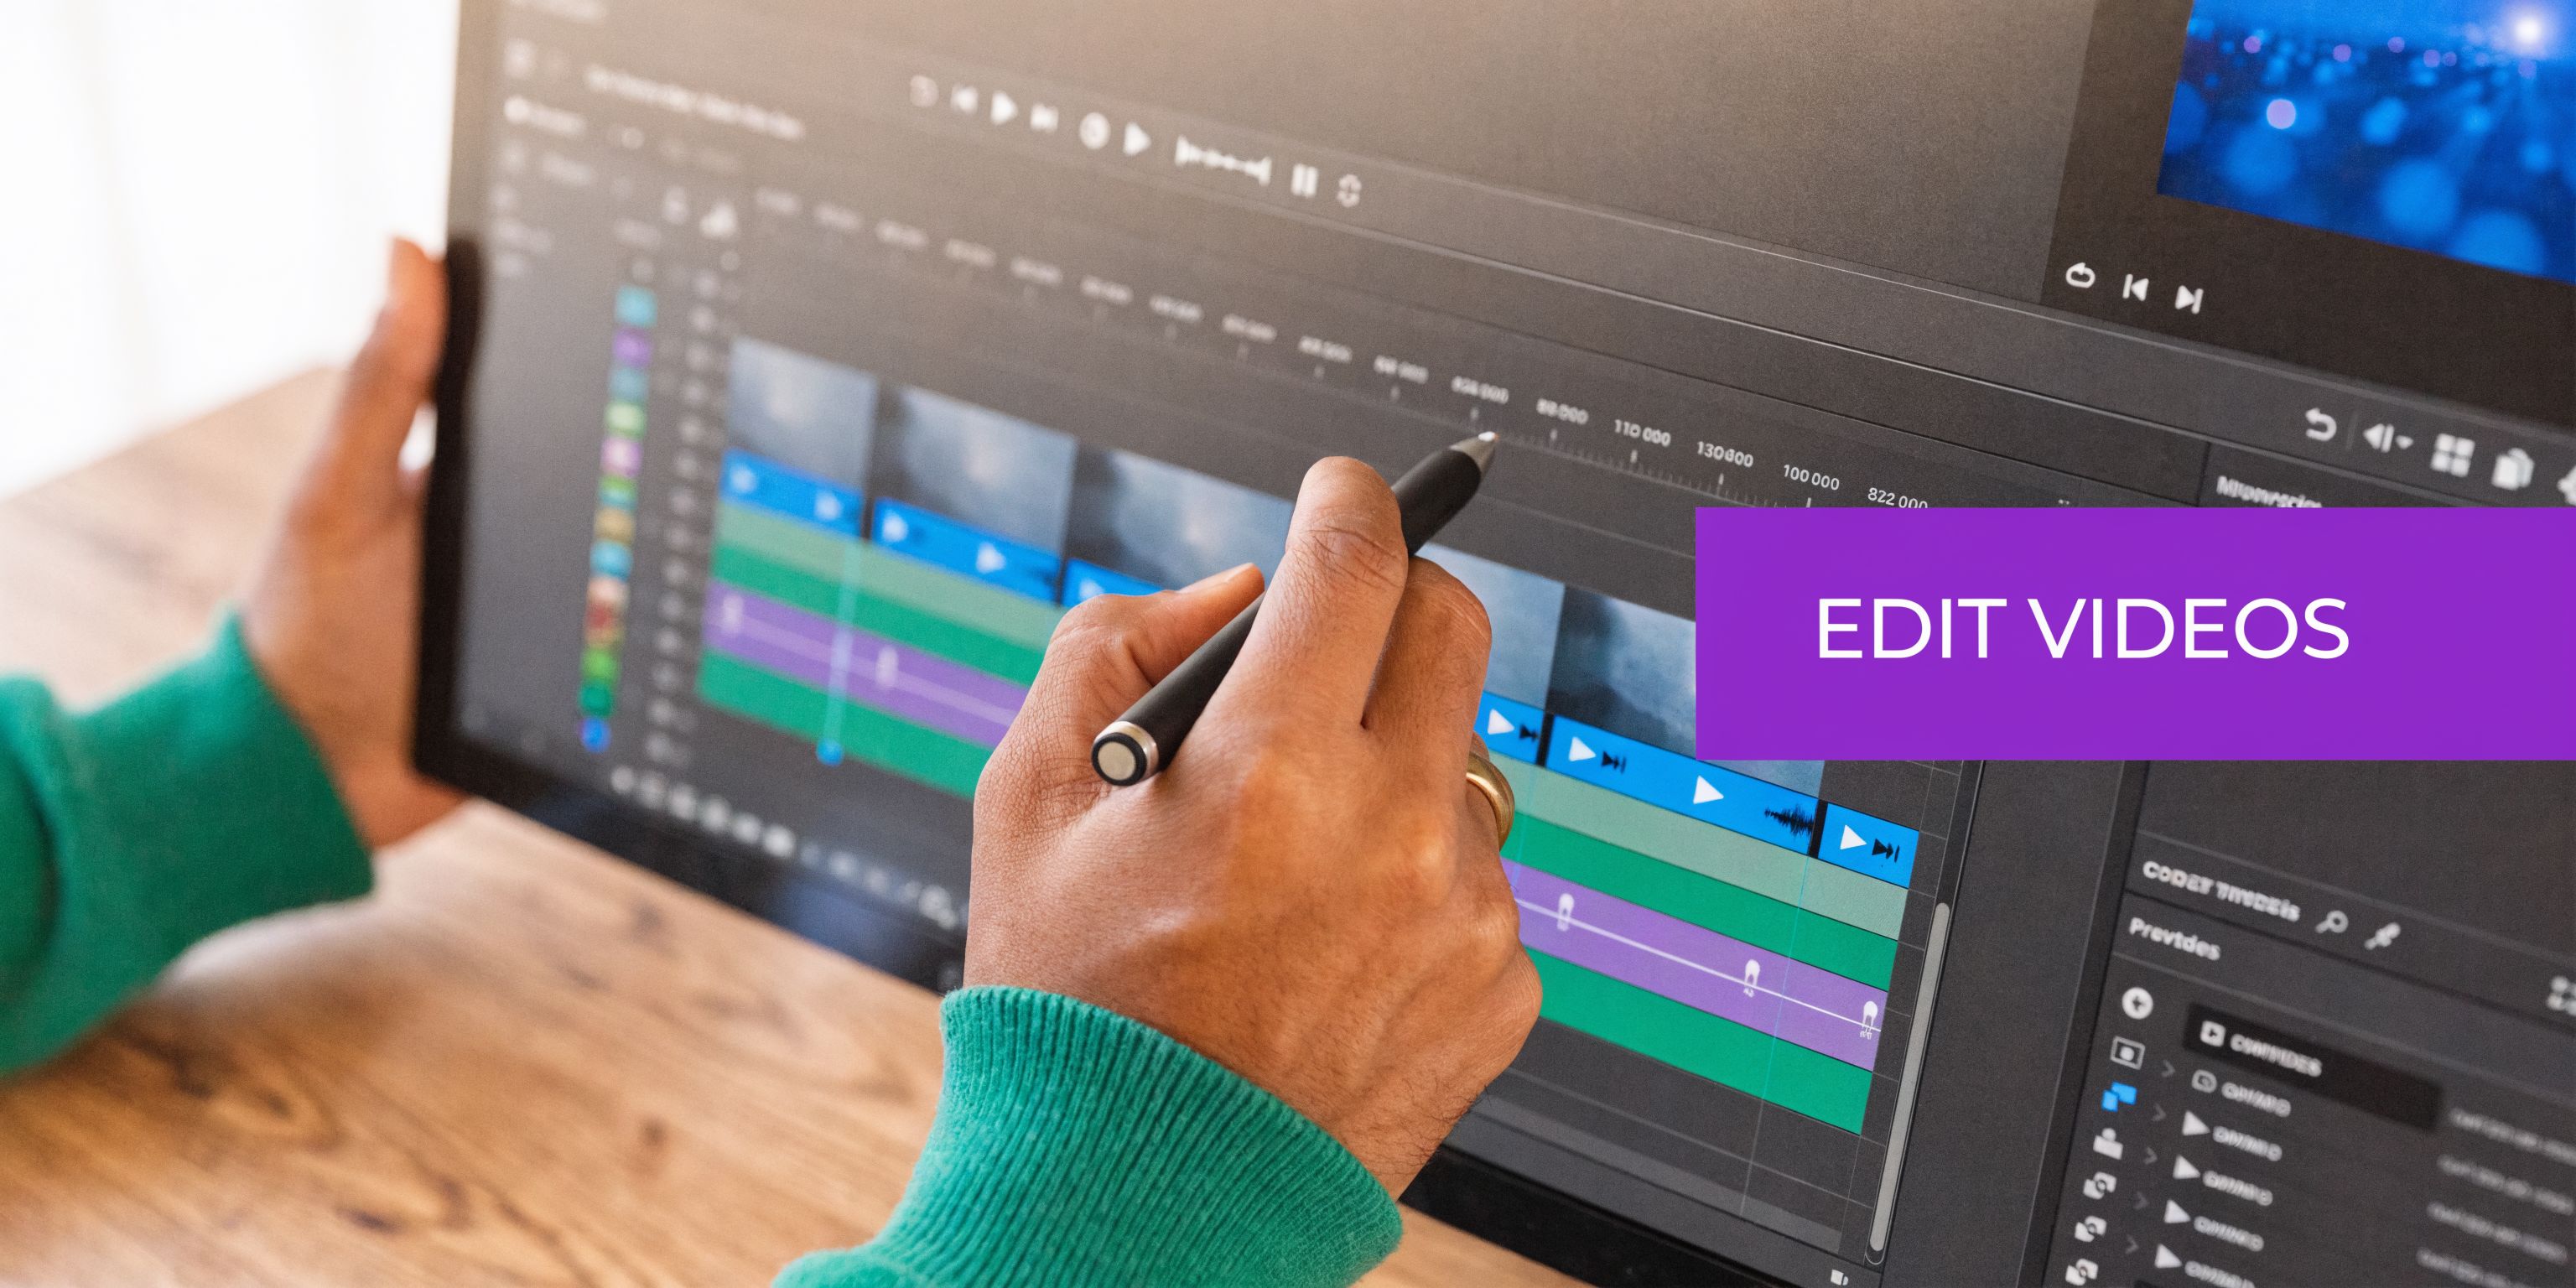
The basic merge workflow
Across iMovie, CapCut, Filmora, DaVinci Resolve, and Adobe Premiere Pro, the merge process is mostly the same.
Start with project setup
Create a new project before importing everything at once. Set the canvas and aspect ratio based on your destination. If the video is for a standard YouTube upload, choose a standard widescreen project rather than trying to fix mixed dimensions later.
Then import the clips in their raw form. Do not trim them in Finder, Photos, or your phone gallery first unless you have a good reason. It is usually easier to preserve the original media and make the cuts inside the editor.
Build the rough sequence first
Drag the clips onto the timeline in the order you want them to appear.
This sounds obvious, but it is the step people rush. If you start trimming before the sequence is final, you often end up doing the same work twice.
A better order is:
- Place all clips
- Confirm the overall flow
- Trim the edges
- Add transitions last
That sequence is especially important because, as noted earlier, pre-production planning saves a lot of reordering pain in timeline-based editing.
Clean up the cuts
After the clips are in order, trim the start and end of each segment.
Look for:
- Cursor movement before the primary action starts
- Dead air after a sentence finishes
- Repeated click attempts
- Pauses caused by searching a menu
- Mismatched audio starts between clips
Then preview the cut points. Hard cuts can work, but tutorial videos often feel smoother with subtle transitions.
Use transitions lightly. A fast dissolve or fade usually helps. Fancy transitions often distract from the product action.
Where traditional editors still struggle
The timeline method becomes harder when your source material includes multiple recording angles, screen-plus-camera layouts, or sensitive information.
That is especially relevant for software demos. Traditional merging re-encodes 90% of the time, which often degrades quality, while 65% of educators report privacy risks in unredacted merged videos, according to this discussion of multi-angle merging and redaction issues. In plain terms, if you are combining recordings with account details, internal data, or customer examples on screen, manual workflows require more care.
That does not mean you should avoid traditional editors. It means you should check your footage for privacy and quality issues before export, not after upload.
Desktop versus mobile
Here is the blunt version.
Desktop editors are better when you need precision, layered audio, or a longer tutorial.
Mobile apps are better when speed matters more than precision.
A good rule of thumb:
| Tool type | Best use |
|---|---|
| Desktop editor | Product demos, onboarding, release explainers |
| Mobile app | Quick social cut, simple two-clip merge, basic repost |
| Browser editor | Lightweight edits when you need access from anywhere |
If you are comparing software options across these categories, this breakdown of video editing software comparison helps frame the trade-offs.
The traditional route works best when the story is already clear, the files are organized, and the person editing is comfortable living on a timeline for a while.
Finalizing and Exporting Your Merged Video
A merged timeline is not the finish line. Export settings and final polish decide whether the upload looks intentional or sloppy once it reaches YouTube.
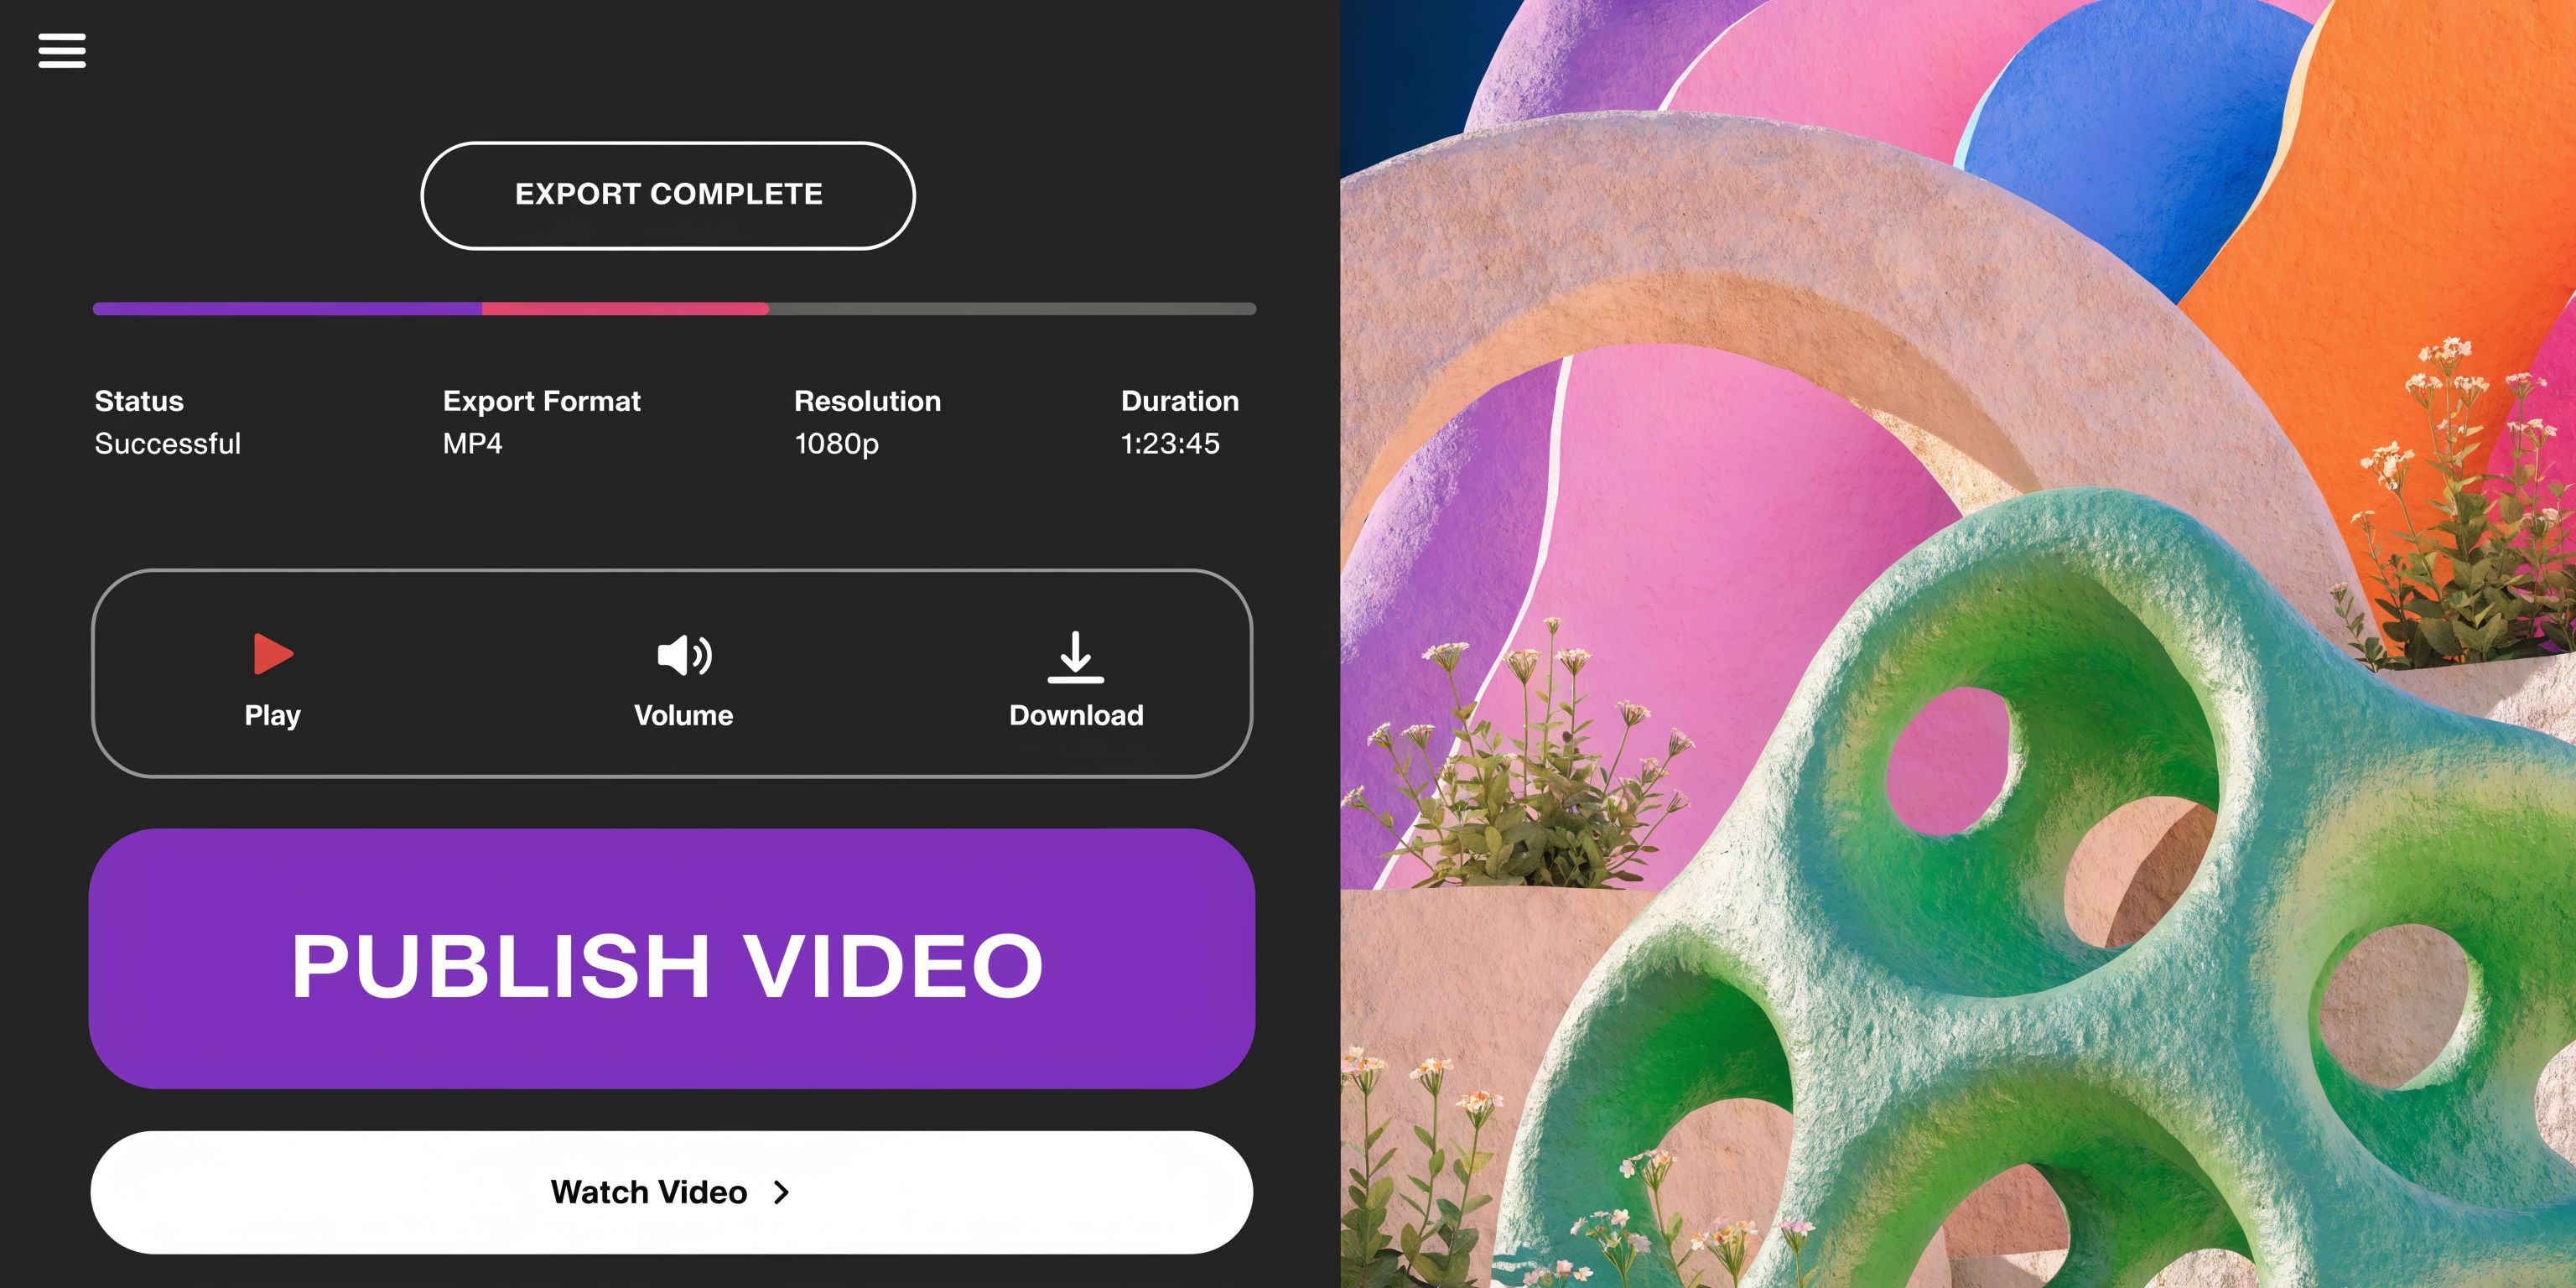
The first rule is simple. For YouTube, export in MP4 and use a 16:9 aspect ratio, such as 1920x1080, for standard videos. If you are producing Shorts, use 9:16 instead. Also, add transitions like fades or dissolves where needed, because adjacent clips without them create a jarring, unfinished experience, as outlined in this YouTube export and transition guide.
Your export checklist
Before clicking export, check these items:
- Format: MP4 is the safest default for YouTube uploads.
- Aspect ratio: Standard videos should stay in 16:9. Shorts should stay in 9:16.
- Resolution: Match your project settings and source footage where possible.
- Audio consistency: Make sure levels do not jump between clips.
- Transitions: Add them where the cut feels abrupt, not everywhere.
Often, “bad YouTube quality” complaints start at export. The platform can only work with the file you give it.
Captions and polish
Captions are worth handling before upload if your editing workflow supports it well.
For tutorial videos, captions do more than accessibility. They help viewers follow steps, confirm terminology, and stay oriented when the speaker moves quickly through a UI. If your platform can generate and edit captions accurately, use that capability before publishing.
A few other finish-line checks matter:
Watch the full export once
Do not just scrub the timeline. Watch the exported file from beginning to end.
That catches issues like:
- A missing transition
- A volume drop
- A cut that lands too early
- A callout lingering too long
- Black bars you did not notice in the editor
Keep the upload metadata aligned
Your title, description, and thumbnail should match the merged content you published. This sounds basic, but it matters most when the video combines footage recorded at different times. A mismatch between the opening promise and the final tutorial can make the video feel stitched together in a bad way.
Final review tip: Open the exported file on a second device before uploading. Problems you miss on your editing monitor often show up immediately on a laptop screen or phone.
A practical publishing standard
For business tutorials, the standard is not cinematic quality. It is clarity.
That means the finished video should do three things well:
- Start without confusion
- Move through each step cleanly
- End without technical distractions
If the export preserves those three things, your merged video is ready for YouTube.
Troubleshooting Common Merging and Upload Issues
Most problems show up after the merge, not during it. The video uploads, but something looks wrong, sounds off, or gets flagged.
The fastest way to fix these issues is to trace each symptom back to its likely cause.
The video looks blurry or soft
This usually starts with export settings or source mismatch.
Check whether your project resolution matched your main footage. If you mixed low-resolution clips with higher-quality screen captures, the final export may look uneven. Also check whether the footage was re-encoded more than once across different tools. Every extra conversion increases the chance of softness.
If the file itself looks sharp before upload but softer on YouTube immediately after publishing, give the platform time to finish processing higher-quality playback versions.
The audio drifts out of sync
This is common when clips come from different devices or recordings with inconsistent timing behavior.
The safest fix is to align the clips again in the editor and export a fresh master rather than trying to patch sync after upload. For multilingual or revised narration workflows, script-based tools are often easier because they manage timing at the narration level instead of forcing manual timeline correction.
Black bars appear around the video
That usually means the project aspect ratio and the source clips do not match.
If one clip was recorded vertically and another horizontally, you need to decide which format wins. For standard YouTube tutorials, that is usually a widescreen frame. Scale and crop intentionally rather than letting the editor guess.
A copyright or Content ID issue appears
This one is procedural. If you downloaded or reused footage you do not own or do not have permission to republish, you can run into copyright trouble.
Even when the merge itself is technically fine, the legal side still matters. That includes background music, embedded clips, and customer or partner footage. For business tutorial teams, internal review should happen before upload, not after a claim appears.
The merged video feels awkward even though nothing is “wrong”
This is usually pacing.
The clips may technically connect, but the edit still feels stitched together because the transitions are too abrupt, the narration tone changes between segments, or the trim points leave dead air at the seams. Watch the joins, not just the scenes.
If you are doing a lot of merging videos on youtube for demos and training, the best long-term fix is to choose a workflow that reduces re-encoding, keeps timing stable, and makes revisions easier when the script changes.
If your team creates demos, onboarding walkthroughs, support videos, or internal training, Tutorial AI is worth a close look. It turns raw screen recordings into polished tutorials with script-based editing, AI narration, cursor effects, smart zooms, privacy-friendly blurs, multilingual outputs, and direct publishing workflows that fit real business content production.