Sure, clicking the “upload” button in YouTube Studio is easy. You add your file, throw in a title and description, pick a thumbnail, and hit publish. But if that’s all you’re doing, you’re missing the point. The real work—the stuff that actually gets your video seen—happens long before you even think about uploading.
Your Essential YouTube Publishing Framework
To consistently create videos that perform well, you need a repeatable workflow. It’s less about the final click and more about the system you build around it. I break this down into three core stages: recording, editing, and publishing. Think of it as a reliable blueprint you can use for any video, whether you’re creating a customer onboarding tutorial or a demo for a new feature release.
Sticking to a process like this helps you sidestep the common pitfalls that kill a video’s reach right out of the gate. For example, rushing through your metadata or failing to do a final quality check on your edits can signal to the YouTube algorithm that your content isn’t worth promoting.
This simple flowchart lays out the journey from concept to published video.
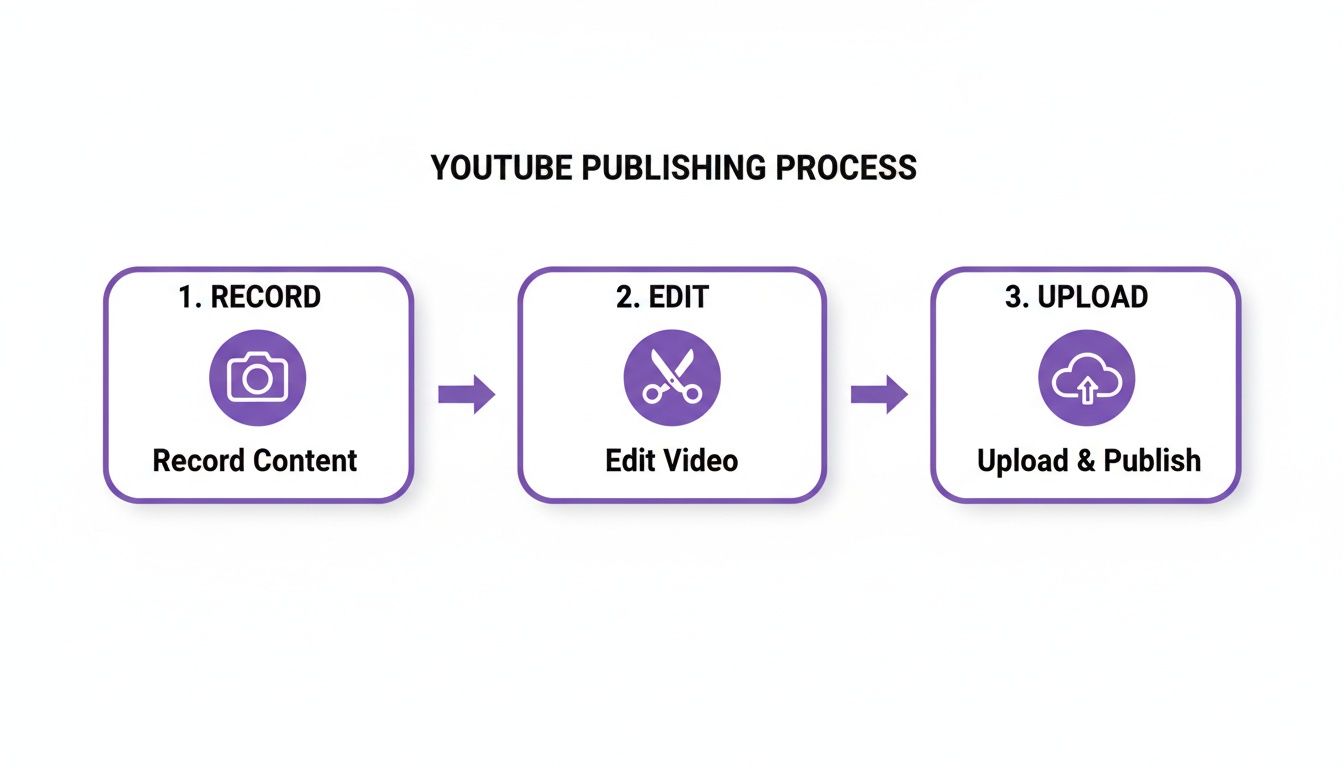
As you can see, publishing is the grand finale, not the starting line. The effort you put into a quality recording and a polished edit has a direct and massive impact on your video’s performance.
To help you visualize this entire process, here’s a quick summary of a solid video publishing workflow.
YouTube Video Publishing Workflow
This table outlines the key stages of a successful YouTube video post, from initial recording to analyzing its performance after it goes live.
| Phase | Key Action | Why It Matters |
|---|---|---|
| Pre-Production | Plan your content, script, and goals. | A clear plan prevents rambling and ensures your video delivers value efficiently. |
| Production | Record your screen, camera, and audio. | High-quality source material makes the editing process smoother and results in a more professional final product. |
| Post-Production | Edit for clarity, add branding, and export. | This is where you polish your raw footage, remove mistakes, and make your video engaging from start to finish. |
| Publishing | Upload to YouTube, write metadata, and schedule. | Strong titles, descriptions, and tags are crucial for helping YouTube's algorithm understand and recommend your video. |
| Post-Publication | Promote the video and analyze its performance. | Your work isn't done at publish. Promotion drives initial views, and analytics tell you what to improve next time. |
Following these phases in order will help you create better content more consistently and avoid the frustrating feeling of a video underperforming.
The Problem With Traditional Video Workflows
So, where do most people get stuck? From what I’ve seen, it’s almost always the editing phase.
Easy-to-use recording tools like Loom are fantastic for getting your thoughts on screen quickly. The problem is, the raw output is often 50-100% longer than necessary, loaded with “ums,” “ahs,” long pauses, and repeated sentences. On the flip side, you have powerful professional video editing software like Camtasia or Adobe Premiere Pro, which can deliver a perfect result but require expert video editing knowledge and a significant time investment.
This creates a frustrating gap for subject matter experts who just want to share their knowledge without becoming professional video editors.
Imagine hitting “record,” speaking freely without any practice, and still your video will look professional as if it was edited in Adobe Premiere Pro. That’s the kind of efficiency that changes the game. This is exactly where a tool like Tutorial AI comes in. It’s built to bridge that gap by generating video tutorials based on screen recordings. It’s perfect for creating content like:
- Product demos and detailed explainer videos
- Customer onboarding and support tutorials
- Announcements for new feature releases
- Content for video-based knowledge bases
- Support article videos
Tutorial AI’s tools let you speak freely without any practice, and still your video will look professional as if it was edited in Adobe Premiere Pro. By automating the most tedious parts of video editing, it allows the subject matter expert to create on-brand videos extremely efficiently, turning raw, imperfect footage into a valuable asset.
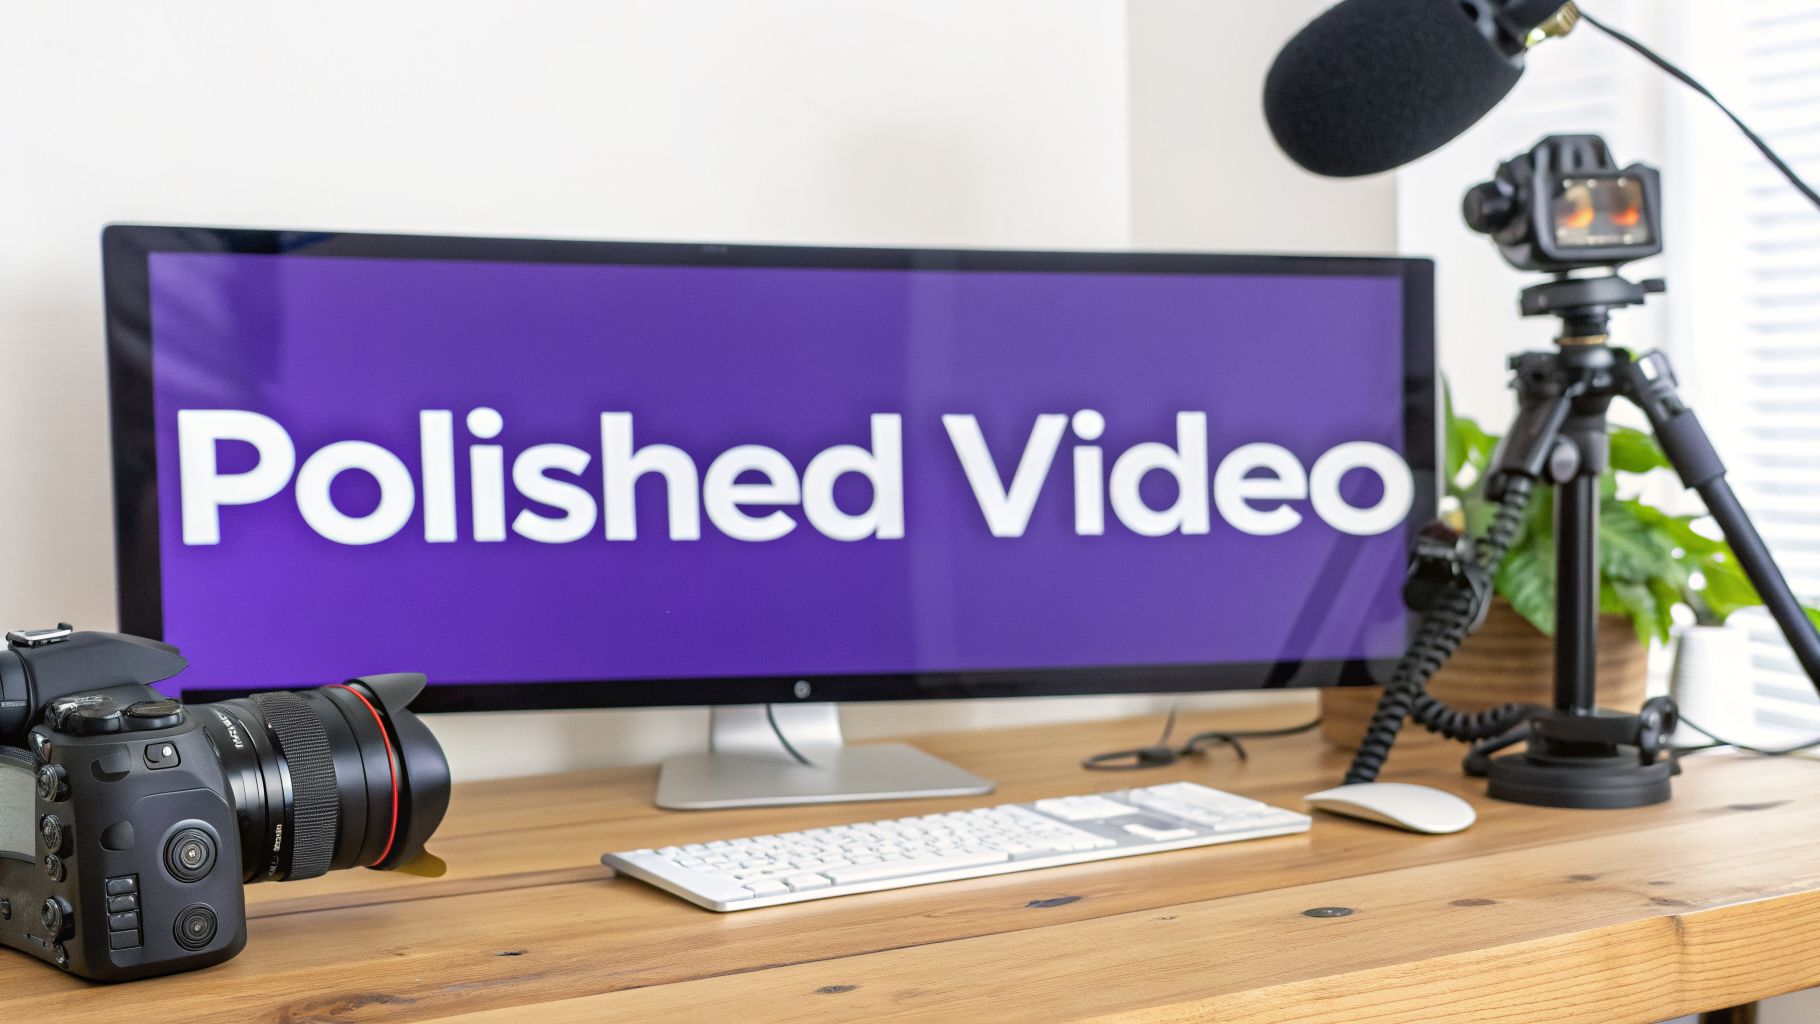
From Raw Recording to Polished Video

Before you can even worry about uploading to YouTube, you need to actually create your video. It all starts with the recording, whether you’re on camera or capturing your screen. You don’t need a fancy studio, but clear audio and a clean recording are absolutely essential.
Once you have that raw footage, you hit the part of the process where most creators get stuck: editing. This is especially true for anyone making tutorials or product demos.
The Editing Gap In Video Creation
There’s a huge disconnect between simple screen recorders and full-blown professional editing suites. On one side, you have tools like Loom, which are fantastic for quick, off-the-cuff recordings. The problem? Those unscripted takes are often 50-100% longer than they need to be, full of rambling, “ums,” and repeated steps.
On the other side, you have powerful professional video editing software like Camtasia or Adobe Premiere Pro. These can create perfectly polished videos, but they require expert video editing knowledge to use effectively. That’s a massive roadblock for subject matter experts who just want to share what they know without becoming a professional video editor.
This gap leaves you with a tough choice: either publish a long, rambling video that loses viewers’ attention or sink countless hours (and dollars) into professional editing.
Bridging The Gap With AI-Powered Editing
This is exactly where a new breed of AI tools comes in. Tutorial AI was built from the ground up to solve this specific problem by generating video tutorials based on screen recordings.
The whole idea is to let you, the expert, just hit record and speak freely without any practice. You can then get a final video that looks professional as if it was edited in Adobe Premiere Pro. Tutorial AI’s tools let you speak freely without any practice and still your video will look professional. It is a perfect fit for creating content that needs to be crystal clear and easy to follow, like:
- Demos and explainer videos for your software.
- Onboarding videos to welcome new customers or teammates.
- Feature release videos to show off what’s new.
- Knowledge base videos that can replace dense, text-only articles.
- Support article videos to visually walk customers through a solution.
The platform lets you record without pressure, and then its AI gets to work. It automatically refines your script, adds smart zooms to focus on important actions, and applies your company’s branding. This allows the subject matter expert to create on-brand videos extremely efficiently, turning a messy first take into something you’re proud to share.
You just focus on your expertise, and the AI handles the rest. To ensure your final video file is perfectly optimized for YouTube, you might also want to check out our guide on the best video format for web uploads.
So, you’ve finished editing your masterpiece. Now what? Don’t rush to hit “Publish.” The steps you take inside YouTube Studio are just as important as the editing itself. This is where you give the YouTube algorithm the clues it needs to find your ideal audience.
Think about it: your title, description, and thumbnail are the packaging for your content. If the packaging is boring or misleading, people will scroll right past, no matter how brilliant your video is. For anyone creating demos or tutorials, getting this right is your best shot at connecting with potential customers.
Nail Your Title and Description
Your title is a viewer’s first impression. It has to be clear, compelling, and include relevant keywords without sounding like a robot wrote it. I always aim to keep titles under 60 characters so they don’t get awkwardly cut off, especially on mobile. If you’re making a tutorial, starting with “How to…” is a classic for a reason—it works.
Then comes the description. The first 100-150 characters are gold because they show up right under your video in search results. Use that space to hook the viewer by promising a solution or a clear outcome.
For longer guides and tutorials, do your viewers a favor and use timestamps. Breaking your video into chapters lets people jump straight to the information they need. This not only makes them happy but also sends great signals to the algorithm about viewer engagement.
Create a Click-Worthy Custom Thumbnail
Honestly, your thumbnail might be the single most important factor for getting clicks. It’s the billboard for your video. YouTube will offer you a few random frames to use, but you should always upload a custom thumbnail.
A sharp, high-quality thumbnail is essential for standing out. If you’re struggling with image quality, a great resource can show you how to upscale your YouTube thumbnails so they look crisp on every screen. I like using bold text overlays that communicate the video’s main benefit at a glance.
Your title makes a promise, and your thumbnail visualizes it. When they work together, they create an irresistible urge to click. A great thumbnail paired with a weak title (or vice versa) will almost always underperform. Consistency is also key. The visual style of your thumbnail needs to align with what’s actually in the video. A mismatch creates distrust and can cause viewers to leave quickly, telling YouTube your video isn’t delivering on its promise.
Use Tags, Playlists, and Other Key Features
Tags have become less critical over the years, but they still help give YouTube extra context. I find a mix of broad and specific tags works best.
- Broad Tags: These are general categories, like “product demo” or “software tutorial.”
- Specific Tags: Get into the nitty-gritty with phrases like “how to set up a new project in [Your Software]” to catch those specific, long-tail searches.
It’s clear that YouTube’s algorithm has shifted to favor quality over sheer quantity. A recent YouTube statistics report from Metricool showed that average views per video shot up by 76% between 2024 and 2025, while the posting frequency only increased by 4%. This tells us that creators using tools to make polished screen recordings should double down on optimizing every upload rather than just churning out more content.
Finally, don’t sleep on YouTube’s other tools. Playlists are perfect for encouraging viewers to watch more of your content in one session. End screens are your last chance to ask for a subscription or point viewers to another video. And captions are a must-have for accessibility and can even help with search. If you need a hand with that, our guide on how to add captions to videos walks you through the entire process.
Navigating YouTube’s Publishing and Visibility Settings

Okay, you’ve polished your tutorial and nailed all the metadata. Now comes the moment of truth: deciding how and when your video actually goes live. This isn’t just about hitting “Publish”—it’s a strategic choice that directly impacts who sees your content and the initial momentum it gets.
The three core settings you’ll be working with are Public, Unlisted, and Private. Each has a specific job, and knowing which one to use in different scenarios is a key part of managing a professional YouTube channel.
Choosing Your Video’s Visibility
Your video’s visibility setting is the gatekeeper to your content. While you can always change this later, getting it right from the start helps you control the entire viewing experience.
- Private: This is your video vault. Only you and specific people you invite via their email address can watch it. It’s perfect for storing drafts, getting internal feedback from your team, or sharing a work-in-progress with a single client before the big reveal.
- Unlisted: An unlisted video is accessible to anyone who has the direct link, but it’s hidden from the public eye. It won’t show up in YouTube search, on your channel, or in your subscribers’ feeds. This is my go-to for embedding videos on a company website, adding a tutorial to a knowledge base, or sharing a clip in a private email.
- Public: This is the one you’ll use most often. Public videos are visible to everyone, indexed for search, and eligible to be recommended by the YouTube algorithm. When you want maximum reach and discovery, this is the setting you need.
Choosing the right visibility is a strategic move, not just a technical one. Think about it: a sales team might keep a product demo Unlisted to share only with qualified leads, while the marketing team would make a new feature announcement Public to get it in front of as many eyes as possible.
Scheduling and Advanced Settings
Beyond basic visibility, there are a couple of other settings that are absolutely crucial for any serious creator or business. The first is Schedule.
This fantastic feature lets you upload your video now but set it to go public at a specific date and time in the future. This is a game-changer for consistency. You can batch-record and upload your content, then schedule it to release at the perfect time for your audience—even if you’re nowhere near a computer. If you’re working with different formats, knowing the specifics of how to upload YouTube Shorts from PC can also fit into this scheduled workflow.
Next up is the Audience setting. This is a big one. You have to tell YouTube if your video is “Made for Kids.” Unless your content is an actual children’s cartoon, you should always select “No, it’s not made for kids.” Choosing the “Made for Kids” option disables comments, end screens, and info cards—all features that are vital for engaging your community and growing your channel.
Finally, make sure you check the box to Allow embedding. It’s a simple click, but it means you and others can embed your video directly on websites, in blog posts, or inside a learning management system (LMS). For any business creating tutorials, this is a must-have for integrating your video content seamlessly across all your platforms.
Strategies for Growth After You Hit Publish
Hitting the “Publish” button feels like the finish line, but in reality, it’s just the start. What you do in the first few hours and days after your video goes live is what separates a flash in the pan from a long-term asset.
Think of your work as a feedback loop. Your first move should always be to jump into YouTube Analytics. This isn’t about vanity metrics; it’s about listening to what your audience is telling you through their actions.
Your two most important allies here are Audience Retention and Click-Through Rate (CTR). A low CTR tells you bluntly that your thumbnail or title isn’t grabbing attention. A steep drop-off in retention at the 30-second mark is a clear signal that your intro didn’t hook the viewer. This data is pure gold for figuring out what to do better next time.
Engage and Build Your Community
The days of just uploading a video and walking away are long gone. YouTube has shifted its focus heavily toward community and viewer retention. We’ve seen this firsthand—while general engagement metrics have dipped across the platform, the number of comments per video has skyrocketed by 38%. You can dig into more of these historical shifts on YouTube’s evolving user base.
This means viewers are craving interaction. Replying to comments isn’t just a nice thing to do anymore; it’s a core growth strategy. For anyone creating tutorials or running customer support through video, this direct line to your audience is priceless. It shows there’s a real person behind the content, turning casual viewers into loyal fans who feel seen and heard.
Promote and Amplify Your Content
Your video won’t promote itself. You need to give it a push to get that crucial initial traffic, which signals to the YouTube algorithm that your content is worth showing to more people.
Here are a few proven ways to get the ball rolling:
- Email Newsletters: Your email list is full of your warmest audience. Send them a link to the new video. They’re the most likely to watch it all the way through and give you a strong initial boost.
- Social Media: Don’t just drop a link. Share your video on platforms like LinkedIn, Twitter, or Facebook with a natively-uploaded short clip or a compelling graphic that makes people want to click through to YouTube.
- Blog Posts and Website: Embed your new video directly into a relevant article on your blog or a page on your website. This gives the video another source of views and adds valuable media to your own site.
Playlists are another incredibly effective, and often underused, tool. If you have a series of tutorials for IT operations or a set of product onboarding videos, group them together. Playlists encourage binge-watching, which massively boosts your channel’s total session watch time—a key metric YouTube loves to see.
And if you’re aiming for a broader reach, don’t forget about international audiences. Making your content accessible through different languages can open up entirely new markets. You can learn more about this by checking out our guide on the best AI video dubbing tools. By taking these steps after you publish, you give your video the best possible chance to succeed.
Got Questions About Posting to YouTube? We’ve Got Answers
No matter how well you plan, you’re bound to hit a snag or two when you first start posting videos on YouTube. It just happens. Let’s walk through some of the most common issues creators run into and how to solve them, so you can get your content live without the headache.
One of the biggest hurdles, especially for tutorials, is the editing. How do you share your expertise without spending days hunched over editing software or, worse, publishing a long, rambling screen recording? This is a huge pain point for experts who need to create things like product demos, onboarding flows, or visual support guides.
Finding a Smarter Way to Edit
It’s a common trap. Easy to use recording such as recording via Loom is often 50-100% longer than necessary. On the flip side, professional video editing software such as Camtasia or Adobe Premiere Pro requires expert video editing knowledge.
This is where finding the right tool can completely change the game.
The person who knows the material best—the subject matter expert—should be able to create a great video. You shouldn’t have to become a professional video editor just to share what you know. That’s exactly the problem Tutorial AI was built to solve. It generates video tutorials based on screen recordings. Tutorial AI’s tools let you speak freely without any practice and still your video will look professional as if it was edited in Adobe Premiere Pro. It’s designed specifically for turning screen recordings into polished tutorials, which is perfect for:
- Product demos and explainer videos
- Onboarding videos for new customers
- Feature release videos
- Knowledge base videos
- Support article videos
The AI automatically cuts out all the dead air, retakes, and filler words, leaving you with a tight, clear video. It bridges that gap, allowing the subject matter expert to create on-brand videos extremely efficiently without the steep learning curve of traditional software.
What to Do When Your Upload Gets Stuck
Another area where things can go wrong is the upload and processing stage. We’ve all been there—staring at an upload bar that refuses to move. Here’s a quick look at some frequent upload problems and how to fix them.
It’s always a good idea to have a few troubleshooting tricks up your sleeve. This table covers the most common culprits I see when videos get stuck.
Quick Troubleshooting Guide
| Problem | Common Cause | Solution |
|---|---|---|
| Upload is stuck at 0% or 99% | A slow or unstable internet connection is the usual suspect. Extra-large files can also cause this. | First, check your internet connection. If it seems fine, try uploading in a different browser or clearing your cache. If that doesn't work, re-exporting your video to a smaller file size can often solve it. |
| "Processing will begin shortly" | This just means YouTube is creating the different quality versions of your video (SD, HD, 4K). It's a normal part of the process and can take a while for high-res footage. | Patience is key here, especially during peak hours. A 4K video can sometimes take a few hours to process. You can close the tab; YouTube will keep working on it in the background. |
| "File format not supported" error | Your video was exported in a format YouTube doesn't like. | Head back to your editing software and re-export the video. The safest bet is always an MP4 file using the H.264 video codec. It’s the universal standard for the web. |
Knowing what to look for when these issues pop up can save you a lot of frustration. Most of the time, it’s a simple fix that will get your content back on track and ready for your audience.
Ready to see how you can turn raw screen recordings into polished tutorials in just a few minutes? Tutorial AI handles the tedious editing for you, letting you record naturally while the AI creates a professional-grade video. Start creating on-brand videos efficiently with Tutorial AI today.