Most guides answer how to resize image without losing quality with one rule: make the image smaller and export it. That advice works for a straightforward downscale, but it breaks down as soon as you need to enlarge a small photo, preserve tiny interface text, or meet an exact pixel dimension. The better question is not whether resizing can be perfectly lossless. It’s which information the resize can preserve, which detail it must approximate, and whether resizing is even the right operation.
A production-safe workflow starts with the highest-quality original, keeps proportions locked, scales once, chooses an appropriate resampling method, and treats export as part of the image-quality decision. Downscaling, upscaling, screenshots, product photos, print files, and web assets all need slightly different handling.
Why No Resize Is Truly Lossless
The more useful question is which information a resize can preserve, which detail it must approximate, and whether resizing is even the right operation. Changing an image’s pixel grid requires software to calculate new pixel values from existing ones. That makes resizing a resampling problem, rather than a simple move or copy. Interpolation can estimate transitions, but it cannot recover detail the source never captured. Cambridge in Colour’s explanation of image interpolation offers a clear visual explanation of why both downscaling and upscaling involve approximation.
Downscaling generally produces the more reliable result because the source contains more information than the smaller output needs. The software can combine neighboring pixels while retaining broad shapes, tones, and visible edges. Fine detail still disappears, but the image may look sharper because the target no longer has to represent every source pixel separately.
Upscaling faces the opposite constraint. The enlarged image includes positions where no original pixel exists, so the software must estimate what belongs there. Basic interpolation can create smooth transitions, but it cannot restore a missing eyelash, crisp letterform, or product label that was too small to record. Saving the result in a high-quality format does not change that limit.
Traditional interpolation is usually enough when you are enlarging modestly, working with low-detail imagery, or preparing an asset where slight softness is acceptable. AI super-resolution becomes more defensible when the image must be enlarged substantially and recognizable texture or edges matter. It can produce a more convincing result, but it is still an estimate. Enhancement tools may invent plausible detail, and that detail should not be treated as verified information.
Practical rule: Treat “without losing quality” as “without unnecessary visible degradation.” Zero loss is not a realistic promise when pixel dimensions change.
The source file sets the quality ceiling. A high-resolution original gives every method better input, while an already compressed or repeatedly resized copy gives the algorithm less reliable information. For web publishing, resizing belongs alongside image optimization for web performance, since dimensions, encoding, and delivery all affect the final result.
Before changing dimensions, decide whether the actual need is a resize, crop, or compression. Cropping changes framing, compression changes how existing pixels are encoded, and resizing changes pixel dimensions. If the dimensions already fit but the file is too large, resizing may remove useful detail without addressing the core issue.
For a closer look at working with large, detailed assets, see high-resolution imaging. The practical decision is straightforward: downscale from the original when possible, and use AI enhancement only when ordinary interpolation cannot meet the visual requirement.
Choosing the Right Resampling Algorithm
The resampling method determines how software estimates new pixels from the source. It cannot recover information missing from a poor original, but it can decide whether edges stay clean, textures remain natural, or fine details develop halos. The right choice depends first on direction: downscaling usually benefits from controlled sharpening, while upscaling has a stricter detail limit.
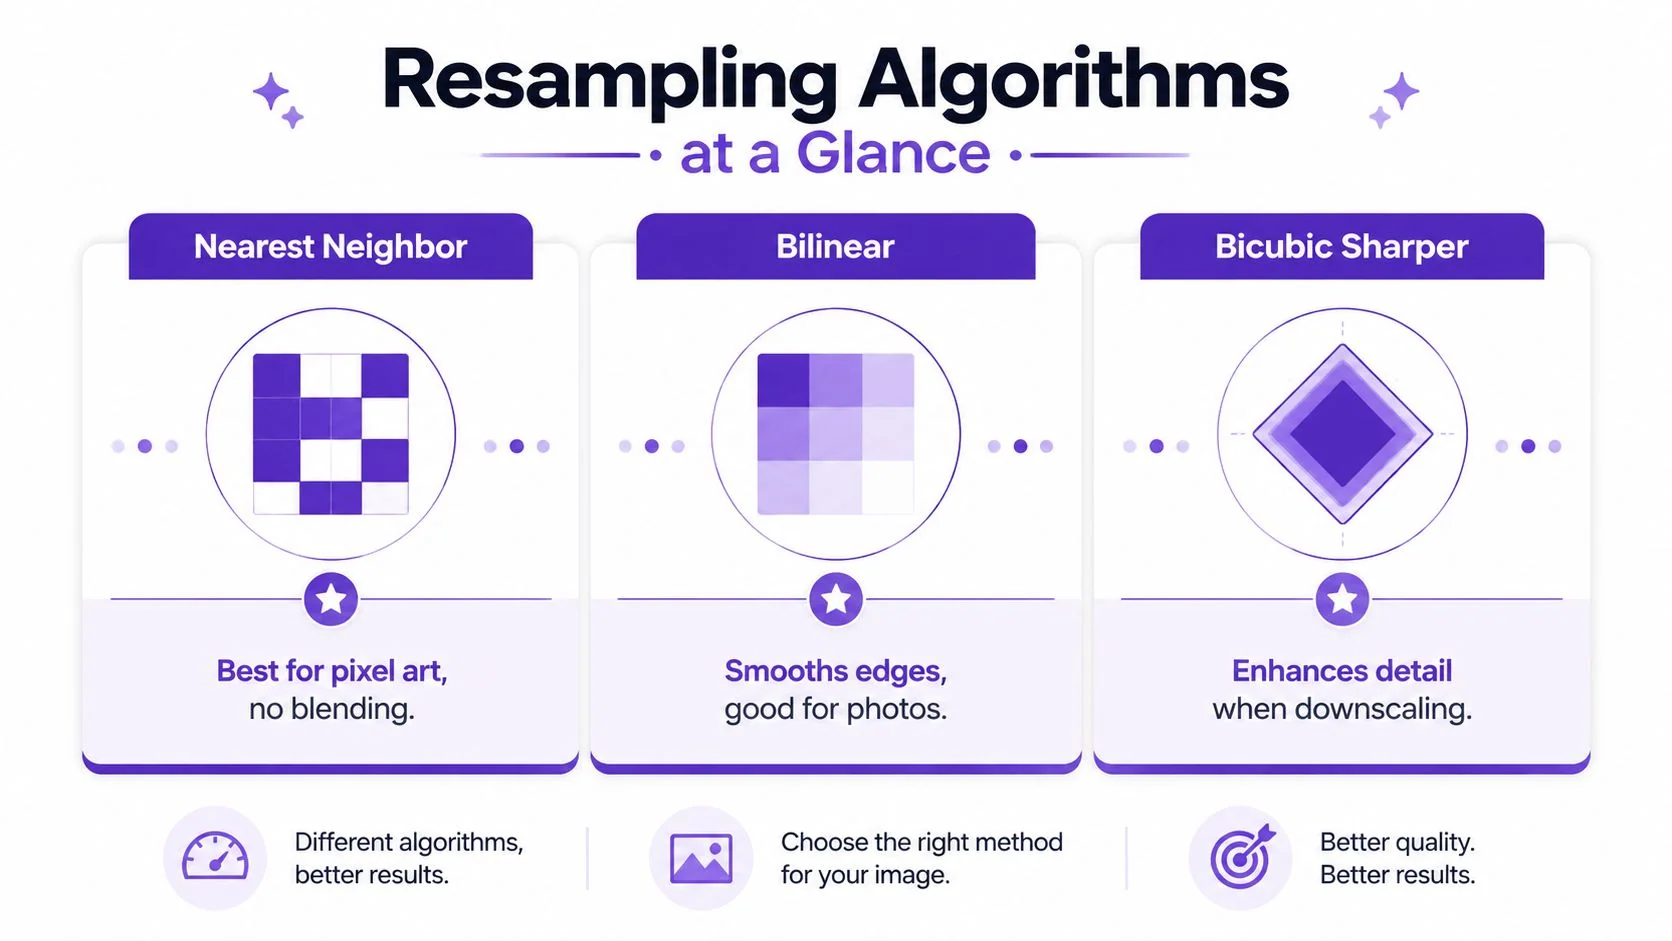
Nearest-neighbor copies the closest source pixel without blending nearby values. The result has hard, block-like transitions, which suits pixel art, indexed graphics, and some technical visualizations. It usually performs poorly on photographs because diagonal lines and smooth tonal changes become jagged.
Bilinear interpolation estimates each new pixel from linear changes among nearby pixels. It is simple and produces a smooth, slightly softened result. That can work for ordinary photographs when avoiding aggressive edge sharpening matters more than maximum crispness. Small text and high-contrast details, however, may lose definition.
Bicubic interpolation examines a broader neighborhood and uses a smoother curve-based estimate. It generally handles tonal transitions more gracefully than bilinear scaling. Editors often provide specialized variants, including Bicubic Smoother for enlargement and Bicubic Sharper for reduction. These labels describe useful starting points, not guarantees. The source, target dimensions, and image content still determine the visible result.
When Lanczos earns a place in the workflow
Lanczos resampling uses a windowed sinc-style filter intended to retain sharp transitions while limiting aliasing. It can produce a crisp downscale, but its sharpness has a cost. Around black text, thin lines, or isolated objects on a light background, inspect for faint halos and ringing.
For a photographic reduction, test Lanczos against a well-tuned bicubic option. For pixel art, choose nearest-neighbor. For screenshots with interface text, compare a sharp bicubic setting with Lanczos at 100% viewing size. The sharpest preview is not automatically the most readable output.
Scale once from the highest-quality source available. Repeated interpolation forces each pass to estimate from an image that already contains approximated pixels. That is especially damaging when an image is reduced, enlarged, and reduced again. An academic discussion of image resizing explains why rescaling is not lossless and why unnecessary passes should be avoided.
Use traditional interpolation for modest downscales and routine enlargements where existing detail remains adequate. Consider AI super-resolution when the image must be enlarged substantially, recognizable texture or edges matter, and standard methods leave it visibly soft. Enhancement tools can create plausible detail, but they cannot verify information that was never captured.
Choose the filter by the job:
- Pixel art: Nearest-neighbor prevents unwanted blending.
- General photography: Bicubic or Lanczos usually gives a balanced result.
- Small downscales: Bicubic Sharper can retain perceived edge definition.
- High-contrast graphics: Inspect for ringing and halos before approval.
- Large enlargement: Test AI enhancement against traditional interpolation, then reject invented detail that does not serve the image.
Tool-Specific Workflows for Quality Preservation
The interface differs across applications, but the quality decisions are consistent: preserve proportions, start from the original, select the resampling mode deliberately, and avoid overwriting the source.
Photoshop
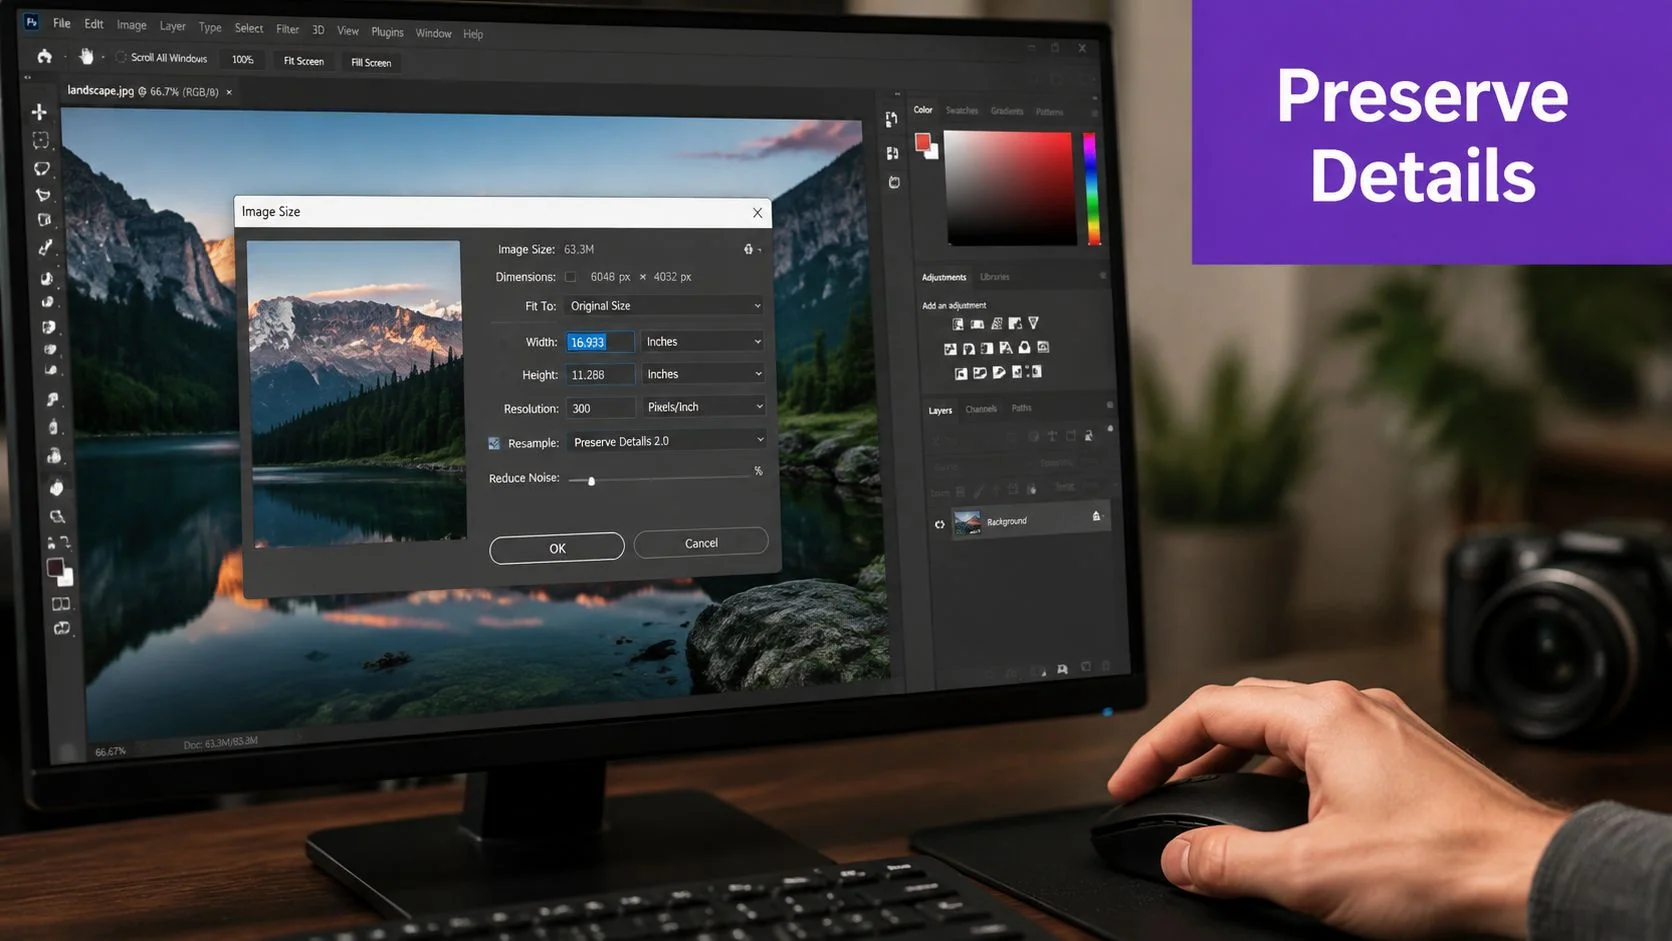
Open Image > Image Size. Keep the chain icon enabled so width and height remain proportional, then turn Resample on when you want Photoshop to add or remove pixels. If Resample is off, Photoshop changes the relationship between pixel dimensions and print resolution without recalculating the image grid. That’s useful for certain print setups, but it isn’t the control you want when creating a new web-sized pixel file.
For a reduction, test Bicubic Sharper and inspect the result at actual size. For enlargement, try Preserve Details 2.0, then adjust the Reduce Noise control carefully. Preserve Details can produce a more convincing enlargement than a basic interpolation pass, but it still can’t guarantee factual detail that wasn’t captured. Save the resized result as a new file, or use a Smart Object when the asset needs repeated placement and transformation inside a larger composition.
If you’re preparing a screenshot, don’t judge it only at a zoomed-out fit view. Check small labels, icons, and one-pixel rules at 100%, because interface graphics reveal softness and ringing faster than photographs do.
For related design work, a font-identification workflow such as comparing fonts from images can help when a screenshot contains typography you need to reproduce rather than enlarge.
A practical Photoshop sequence is:
- Duplicate the original or work from a Smart Object.
- Open Image > Image Size.
- Keep proportions linked.
- Enable Resample.
- Choose Bicubic Sharper for a reduction or Preserve Details 2.0 for a considered enlargement.
- Inspect at 100%.
- Export a derivative, not the master.
The following walkthrough is useful when you want to see the dialog behavior rather than rely on memory.
GIMP
In GIMP, open Image > Scale Image. Enter the target width or height and confirm that the linked chain keeps the aspect ratio intact. Use the Interpolation dropdown to select a method suited to the asset. Cubic is a dependable general-purpose choice, while NoHalo or LoHalo can be worth testing for images where edge behavior matters.
GIMP’s dialog lets you distinguish pixel dimensions from print resolution. Set the dimensions needed by the destination, then review the interpolation choice before clicking Scale. Don’t scale a working copy, export it, reopen that export, and scale again for a second destination. Return to the original each time.
For quick layout work, you can also use quick cropping in Canva, but cropping and resizing still solve different problems. Crop only when the framing needs to change.
ImageMagick
ImageMagick is useful for repeatable jobs because the filter can be specified directly. A basic Lanczos reduction looks like this:
magick input.jpg -filter Lanczos -resize 1200x1200 output.jpg
The dimensions preserve the image’s proportions when only one constraint is supplied or when the geometry is compatible. For a more controlled output, add the format and quality settings after resizing, then inspect representative files. A nearest-neighbor command is appropriate for pixel art:
magick pixel-art.png -filter Point -resize 800x800 output.png
For enlargements, test a conventional filter first, but don’t assume a longer command can manufacture missing detail. If the enlarged result will be used for a banner, print asset, or UI reference, compare a dedicated super-resolution model with the traditional output. AI enhancement is justified when the target needs detail that interpolation cannot provide, not merely because the source is inconveniently sized.
Export Settings and Format Decisions
A technically good resize can still look poor after export. Format choice controls whether the file preserves transparency, sharp text, smooth gradients, or photographic texture, and compression can introduce defects that weren’t present in the resized image.
| Format | Quality Preservation | File Size | Best Use Case |
|---|---|---|---|
| JPEG | Lossy, with quality depending on export settings | Usually efficient for photographs | Product photos, email images, photographic web assets |
| PNG | Lossless for the encoded image and supports transparency | Often heavier for photographs | Screenshots, logos, interface graphics, transparent artwork |
| WebP | Supports lossy and lossless encoding | Often efficient across photos and graphics | Modern web delivery, mixed image libraries |
| TIFF | Preserves substantial editing information depending on settings | Large | Print production, archival masters, professional handoff |
For a web photograph, use WebP when your delivery stack supports it and compare the output at its actual display size. A quality slider is only a starting point because different images respond differently. A smooth studio product photo may tolerate more compression than a screenshot containing small dark text on a pale background.
JPEG remains practical for compatibility and email, but repeated JPEG saves can create blockiness, ringing, and mosquito noise around edges. Export once from the best available source and keep an editable or lossless master. PNG is the safer choice for screenshots and flat graphics when crisp edges matter, though it can be inefficient for photographic content.
Match the format to the visual structure
Use PNG or lossless WebP for interface captures, diagrams, logos, and transparent assets. Use JPEG or lossy WebP for photographs where slight texture changes are less distracting than a much heavier file. Use TIFF when the file will continue through a print or retouching workflow and storage efficiency isn’t the primary concern.
Color management matters as much as the file extension. Convert to the color profile expected by the destination, embed the profile when the workflow depends on consistent color, and check saturated areas after export. Stripping metadata can reduce unnecessary file weight and remove sensitive capture details, but keep copyright or workflow metadata when it has operational value.
Progressive JPEG can improve perceived loading by displaying a rough version before the full image arrives, but it doesn’t restore detail or compensate for excessive compression. AVIF can be useful in modern web pipelines, particularly when your browser support, CDN, and fallback strategy are already handled. Test it with real assets rather than adopting a format based only on theoretical efficiency.
For teams handling mixed media, the same discipline applies to other assets. A focused guide to compressing an MOV file is useful when the bottleneck is video rather than image pixels.
Batch Processing Without Quality Degradation
Batch resizing fails when automation hides the decisions that matter. A folder full of images may contain photographs, screenshots, transparent graphics, and already compressed derivatives. Applying one filter and one export preset to all of them can produce consistent dimensions while producing inconsistent quality.
Start by separating assets by type and destination. Keep the original files in a read-only source folder, create a working output folder, and name derivatives by their target use rather than overwriting the source. Every output should come from the original, not from a thumbnail created during an earlier pass.
ImageMagick batch handling
A simple shell workflow can apply one Lanczos reduction to a directory of photographs:
mkdir -p output && for f in originals/*.jpg; do magick "$f" -filter Lanczos -resize 1200x1200 -quality 85 "output/$(basename "$f")"; done
The command makes the operation repeatable, but the quality value still needs validation against your images. Use a separate command or preset for PNG screenshots, and don’t send transparent assets through a JPEG output path.
For high-quality downscaling benchmarks, OpenCV recommends aligning the source before scoring. The workflow crops the source so its dimensions match the scale factor, resizes the cropped image with cv::resize, and then compares the result against the aligned original using PSNR(img_new, cropped) and SSIM through cv::quality::QualitySSIM::compute. That pre-crop step matters because border misalignment breaks pixel correspondence and can make a sound resampler appear worse than it is. The reproducible process is documented in OpenCV’s super-resolution benchmark workflow.
Application-based batches
In Photoshop, record an Action that opens Image Size, uses the required resampling method, converts to the intended color profile, and exports to a new folder. Run it through File > Automate > Batch, then review the log and inspect samples from different source categories. In GIMP, use a batch plugin or an external script, but keep the interpolation and output format explicit.
Performance is part of production quality. A benchmark resizing a 1374×1374 image to 256×256 recorded 64.95 ms for NetVipsResize, 78.72 ms for ImageSharpResize, 79.90 ms for SkiaSharpResize, and 122.31 ms for MagickNetResize. The same comparison found meaningful differences in native memory use, so the .NET image-resizing benchmark is a useful reminder to test throughput and memory under your own workload.
Don’t judge a batch by one attractive sample. Review portraits, fine text, gradients, transparent edges, and high-contrast graphics, then compare both visual output and resource behavior.
Troubleshooting Common Quality Issues
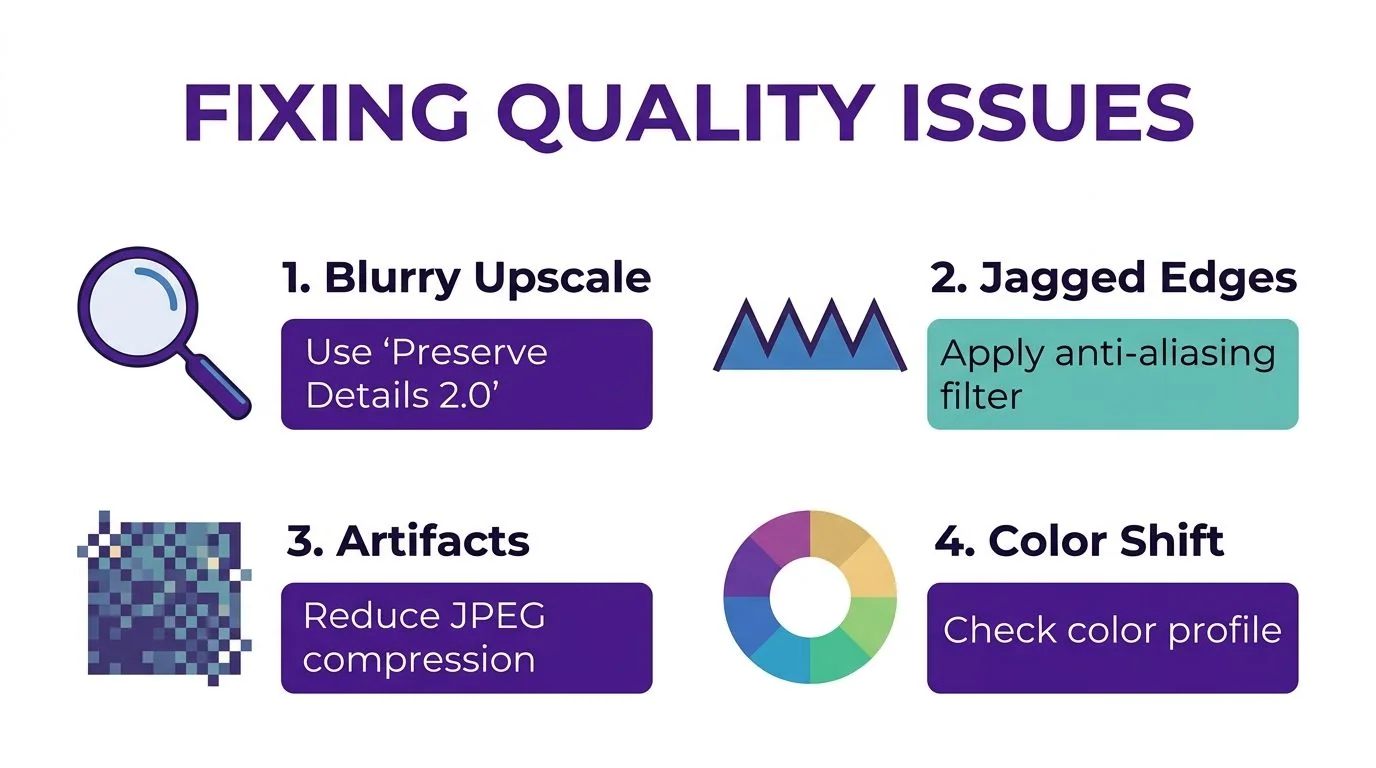
A blurry result usually means the target demands detail the source doesn’t contain, especially after enlargement. Try Preserve Details 2.0, Lanczos, or a dedicated super-resolution model, but treat the output as an estimate. Traditional interpolation is enough for modest changes and clean originals. AI super-resolution becomes more defensible when the image must be substantially larger or contains meaningful subject detail that a smooth resize can’t retain.
Jagged screenshot edges often come from nearest-neighbor being applied to non-pixel-art content, or from reducing thin lines to dimensions where they can’t be represented cleanly. Test a higher-quality filter, enable appropriate anti-aliasing, and inspect the actual display size. If text was unreadable in the source, resizing won’t make it legible.
JPEG artifacts around text and logos point to overly aggressive compression or repeated exports. Return to the original, use PNG or lossless WebP for graphic elements, and reduce compression pressure. Color shifts and banding usually call for a profile check, a less destructive export path, and careful handling of gradients.
Super-resolution is not a universal replacement for resizing. Review literature and NTIRE 2025 challenge reporting describe super-resolution as an active research area with quality and runtime constraints, reinforcing the practical decision: use ordinary resampling when the source already contains enough information, and reserve enhancement for cases where the target requires plausible reconstructed detail. The research overview is available through this NTIRE 2025 super-resolution reference.
Tutorial AI turns a single screen recording and spoken narration into a polished tutorial video that looks edited in Adobe Premiere Pro, then generates a matching written article from that same recording. Use it for product demos, onboarding, help-center videos, support articles, SOPs, internal training, or sales enablement, and visit Tutorial AI to ship the video and documentation together.