You’ve recorded a software demo in 4K, opened the file in your editor, and discovered that the session consumed far more storage than expected. The cursor looks smooth, but the timeline stutters, the laptop fan is loud, and the final tutorial still needs readable interface text after compression.
That outcome is predictable when resolution, frame rate, codec, bitrate, storage, and thermals are treated as separate settings. A reliable 4K video recording workflow treats them as one decision. You need enough detail for small software controls and text, but not so much data that your recorder drops frames, your drive throttles, or your editor becomes difficult to use.
What 4K Video Recording Actually Means
For a software tutorial, 4K matters because a dense interface needs to survive playback, resizing, and occasional zooms. UHD 4K records at 3840 × 2160 pixels, which is about 8.29 million pixels per frame. At 30 frames per second, that represents 248,832,000 pixels every second, so the practical challenge quickly moves beyond resolution and into bitrate, storage, and encoder capacity. See this technical overview of 4K camera recording for the underlying pixel dimensions and recording context.
Consumer devices usually use UHD 4K. DCI 4K uses 4096 × 2160 pixels and a wider cinema-oriented aspect ratio, while UHD uses the familiar 16:9 shape. DCI belongs mainly to digital cinema workflows. For screen recordings, product demos, and help-center tutorials, UHD is generally the relevant target. Labels such as “4K+” or “QFHD” still need checking, because a product name alone doesn’t prove that the source is capturing native 3840 × 2160 pixels rather than scaling a smaller image.
Frame rate changes how movement appears and how much data your workflow handles. Cinema commonly uses 24 fps, broadcast workflows use 25 or 30 fps, and higher-motion television workflows use 50 or 60 fps, as outlined in this professional video terminology guide. For a screen recording, 60 fps can make cursor movement and scrolling feel smoother and can give you cleaner options when cutting motion. The cost is substantially more data, with independent guidance noting that 4K at 60 fps uses roughly twice the storage of 4K at 30 fps under comparable codec and bitrate settings.
| Standard | Resolution | Typical FPS | Common Use |
|---|---|---|---|
| UHD 4K | 3840 × 2160 | 24, 25, 30, 50, or 60 fps | Software tutorials, broadcast, product demos, general video |
| DCI 4K | 4096 × 2160 | 24, 25, or 30 fps | Digital cinema and cinema-oriented production |
For most software tutorials, start with UHD at 30 fps. It gives interface motion enough fluidity without making every minute of footage unnecessarily expensive. Move to 60 fps when fast scrolling, cursor movement, or animated product behavior is central to the lesson. A static slide deck usually won’t gain enough from 60 fps to justify the larger files.
Hardware You Need for Clean 4K Capture
The hardware question isn’t just whether a computer can display a 4K desktop. It must also capture that desktop, encode the frames, write the resulting stream continuously, and keep the interface responsive while other applications remain open.
A hardware encoder is usually more important than adding CPU cores for a screen-recording setup. Modern GPUs and integrated graphics can provide dedicated encoding paths, including NVIDIA NVENC, Intel Quick Sync, AMD AMF, and Apple’s hardware media engines. Their quality and codec support differ, so test the exact codec your editor will decode before committing to a production workflow. A powerful software encoder can produce excellent results, but it also competes with the browser, design tools, and application being demonstrated.
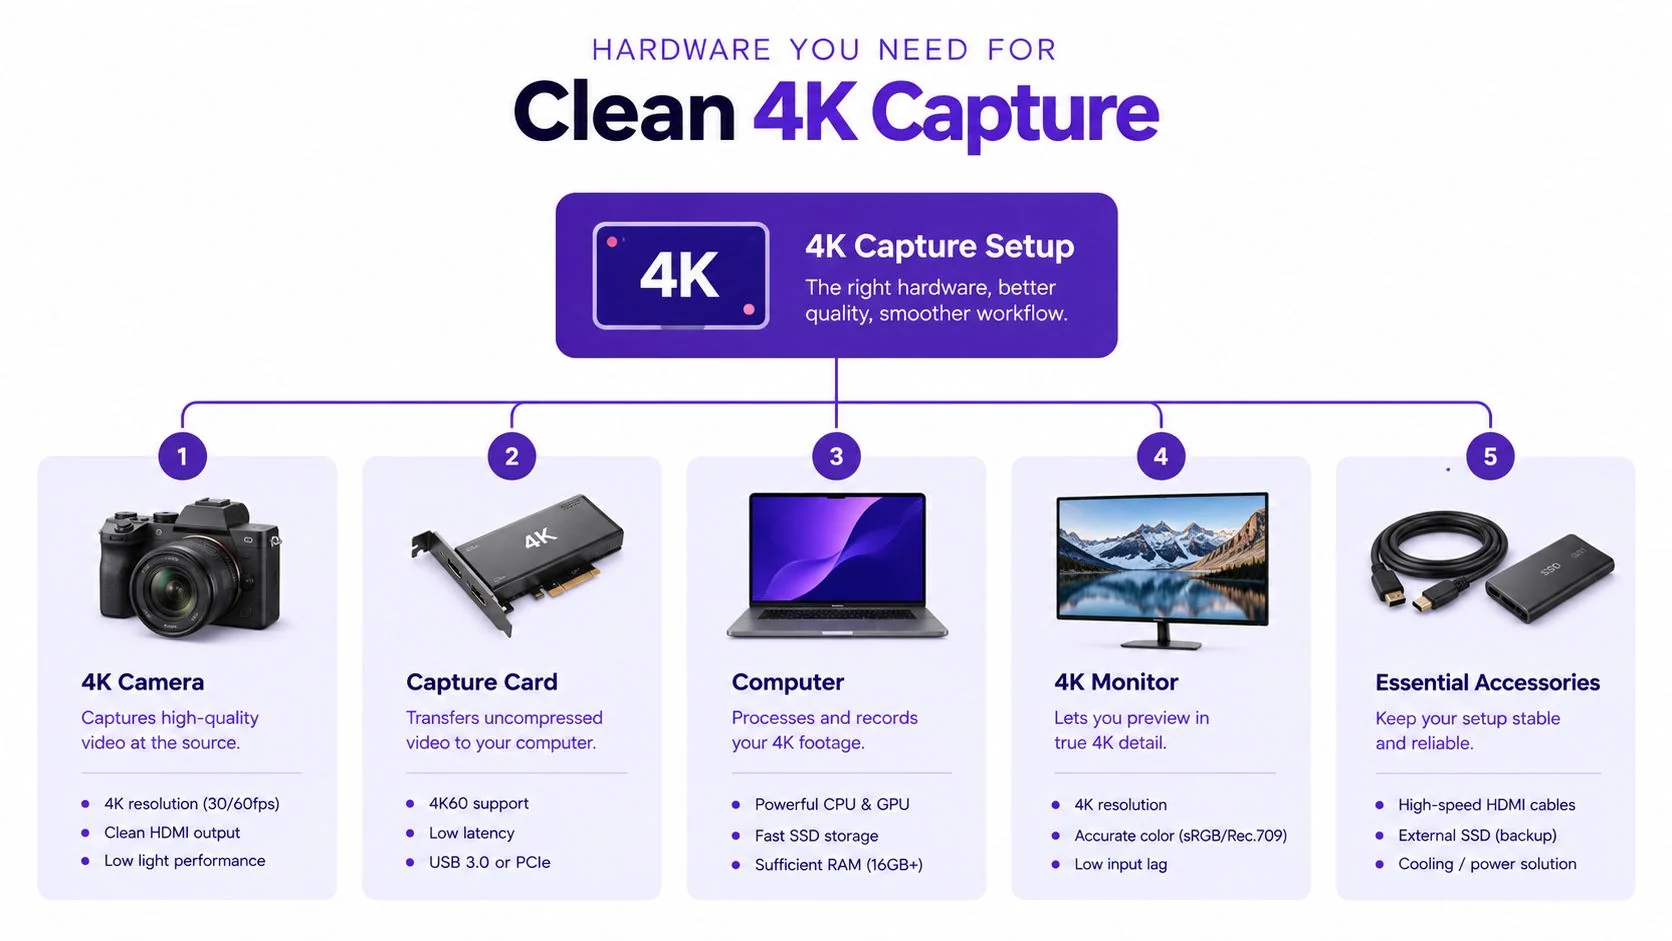
Identify the component that will actually fail
The monitor is part of the source chain. If the desktop itself isn’t running at 3840 × 2160, your recorder can’t recover genuine 4K interface detail later. A capture card becomes relevant when the source is another computer or a camera, but internal screen capture avoids that additional signal path and its compatibility constraints.
Storage performance also matters more than advertised peak speed. A drive may report impressive burst performance and still struggle with a long, continuous write. Prefer a fast internal SSD for active capture, keep the destination drive reasonably empty, and avoid routing a demanding session through a slow hub or crowded external enclosure.
Memory affects the whole workflow rather than the initial capture alone. The recorder needs room to operate while the browser, design application, and communications tools remain open, and the editor needs additional working space for previews and media caches. Close unnecessary applications before a long session, but don’t assume that freeing memory fixes an encoder or storage bottleneck.
Practical rule: For software screen recording, choose the strongest stable hardware-encoding path your editor supports, then verify sustained storage writes with a real capture test. Extra CPU capacity helps, but an overloaded encoder or throttling drive is what usually ruins the take.
Good lighting won’t improve a direct screen capture, but it matters if the tutorial includes a presenter, camera shot, or physical product. Use videography lighting guidance when the workflow combines screen footage with a talking-head introduction.
Codecs, Bitrate, and Frame Rate Tradeoffs
A software tutorial can look sharp in the recorder’s preview and still fail after export. Small interface text blurs, scrolling becomes uneven, or the review team has to transcode every clip before playback works. The codec, bitrate, frame rate, and storage path need to be chosen as one recording decision.
The codec determines how the recorder compresses each frame, as explained in this overview of what a video codec is. Bitrate sets how much data the codec can use to preserve detail. Selecting a codec first and adjusting bitrate later often creates blurry text or files that are unnecessarily difficult to transfer and edit.
For 4K at 30 fps, typical H.264 recording can land around 35 to 45 Mbps, while H.265 can often use roughly 15 to 25 Mbps for comparable clips, according to this 4K bitrate reference. H.264 has broad support and remains the safer interchange choice. H.265 produces smaller files, but older editing systems and playback environments may decode it less smoothly.
| Codec | 4K at 30 fps bitrate | Relative file size | Editing headroom |
|---|---|---|---|
| H.264, AVC | 35 to 45 Mbps is common | Larger than HEVC at comparable quality | Broad compatibility and predictable playback |
| H.265, HEVC | Roughly 15 to 25 Mbps is common | Smaller than H.264 at comparable quality | More efficient, but may require stronger decoding support |
| AV1 | Depends heavily on recorder and hardware support | Potentially efficient | Use only after confirming smooth encode and decode support |
| ProRes | Much larger than delivery codecs | Very large | Strong editing performance and intermediate quality |
| MJPEG | Typically much larger than interframe codecs | Large | Simple frame access, but inefficient storage |
| Frame-server capture | Depends on the capture pipeline | Depends on the source stream | Useful for specialized workflows rather than general delivery |
The practical variable behind the table is the relationship between bitrate and motion. A static software panel compresses efficiently. Animated menus, scrolling pages, cursor emphasis, and video playing inside the application require more information. Increasing bitrate protects those details, while also increasing write pressure and storage use.
Frame rate adds another storage and processing demand. A product walkthrough usually works well at 30 fps. Choose 60 fps when viewers need to follow rapid cursor movement, animation, or other fast action. The higher setting is not automatically better for a tutorial, especially when it creates larger files and a heavier editing workload.
Codec choice is a storage decision and an editing decision at the same time. A smaller HEVC file creates no practical benefit if the review team must transcode every clip before it plays smoothly.
For a tutorial shared across varied systems, H.264 remains a practical delivery choice. An intermediate format can suit an internal master or a project where editing responsiveness takes priority. Test a short sample with small text, scrolling, cursor movement, and a video preview inside the application. A paused frame can look clean while motion footage breaks up during playback.
Storage Planning and Thermal Realities
You can estimate a recording’s storage requirement directly from its bitrate. The practical formula is file size in megabytes ≈ bitrate in megabits per second × duration in seconds ÷ 8, as explained in this video storage calculation guide. That formula lets you plan from the recording dialog instead of guessing from the word “4K.”
The examples below use common 4K bitrate values and show the approximate media required before container overhead.
| Bitrate | 10 min | 30 min | 1 hour | 2 hours |
|---|---|---|---|---|
| 15 Mbps | 1,125 MB | 3,375 MB | 6,750 MB | 13,500 MB |
| 25 Mbps | 1,875 MB | 5,625 MB | 11,250 MB | 22,500 MB |
| 35 Mbps | 2,625 MB | 7,875 MB | 15,750 MB | 31,500 MB |
| 45 Mbps | 3,375 MB | 10,125 MB | 20,250 MB | 40,500 MB |
Sustained write speed matters more than a drive’s short burst result. A recorder writes continuously, and a drive or enclosure that performs well for a brief test can slow down once its cache fills or its temperature rises. Capture to a fast internal SSD when possible, and leave enough free capacity for the recording plus project files, proxies, and exports.
Thermals create a second failure mode. Phones and compact cameras can stop recording when heat, battery, and storage constraints converge. Independent guidance recommends reducing frame rate, disabling wireless features, and using external power when appropriate. It also notes that fast, sustained write speed is one reason some devices struggle to record 4K reliably to external microSD cards. Newer hardware is improving, but a device’s advertised resolution still doesn’t guarantee a long uninterrupted session. See this guide to long-session 4K camera recording for the broader thermal and media trade-off.
Before a production take, run a recording for the expected duration while watching the drive temperature, available capacity, dropped-frame counter, and device behavior. If the drive slows, the preview begins to stutter, or the camera becomes hot enough to change behavior, fix the enclosure, power, ventilation, or bitrate before recording the actual tutorial.
Editing and Export Workflow for 4K Files
A 4K file doesn’t need to remain at full resolution during every editing action. Generate lower-resolution proxies for the timeline, edit against those lightweight files, and relink to the original media for the final render. This keeps cursor placement, cuts, captions, and narration timing responsive without throwing away the captured master.
Organize the project before importing everything. Keep the original recordings read-only, place proxies and cache files on a fast working drive, and separate the final exports from temporary renders. If a screen recording contains private customer data, create a review copy with the sensitive regions blurred before sending it to collaborators.
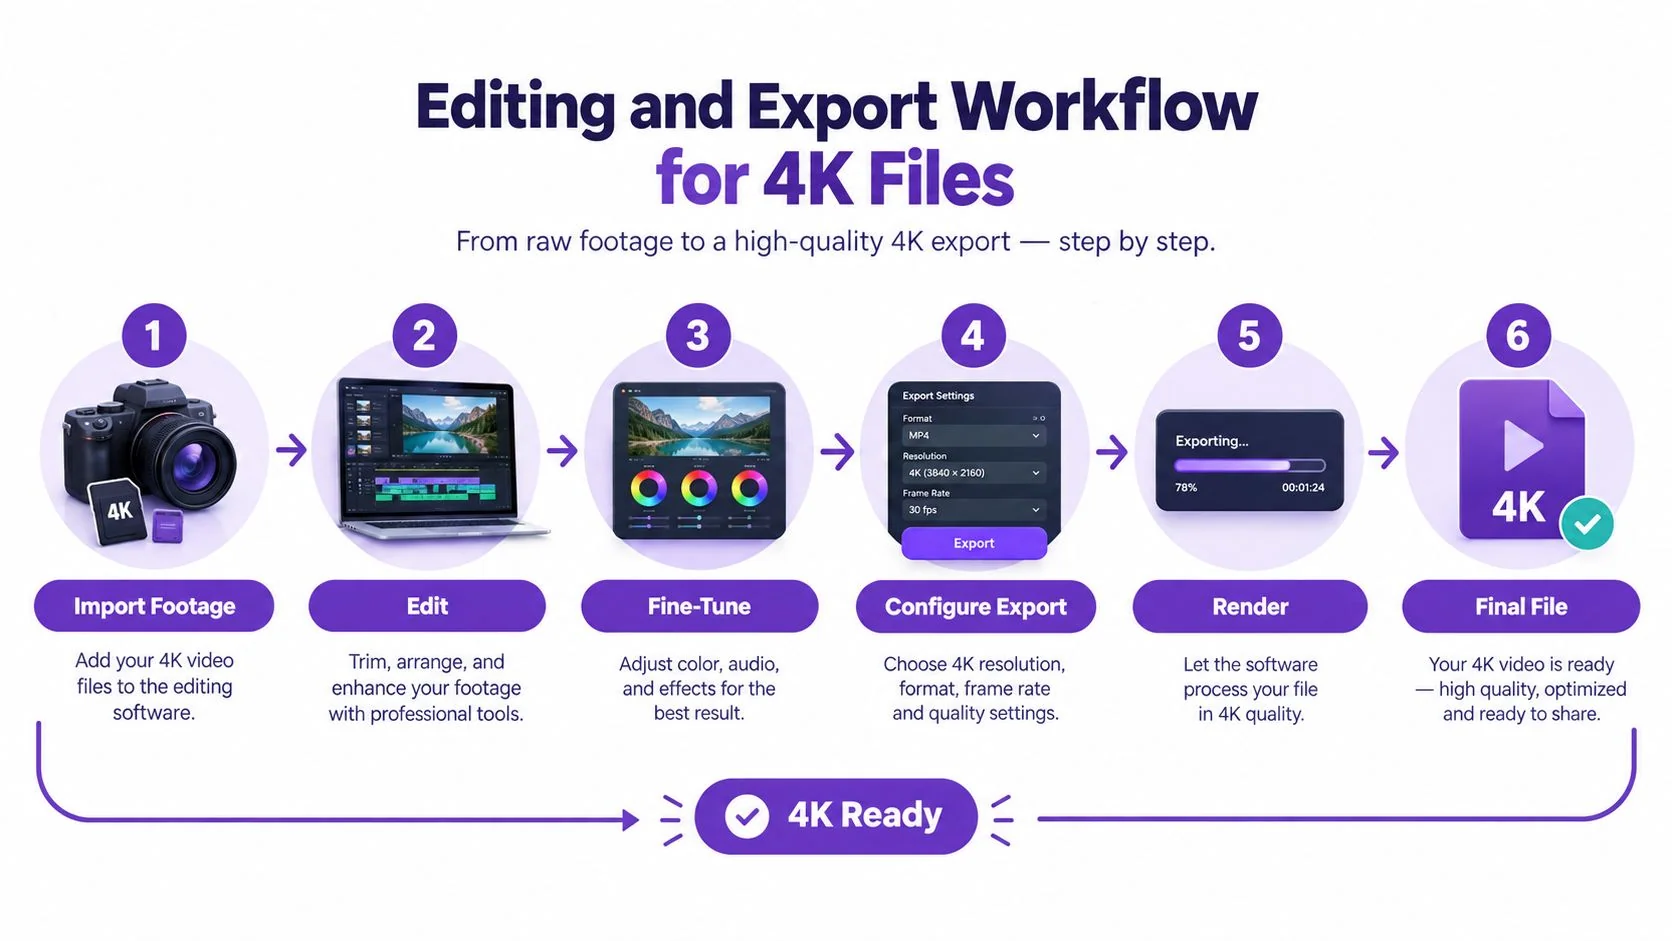
Match the export to the audience
Use H.264 when compatibility across browsers, documentation systems, and review tools is the priority. H.265 can produce a smaller file at similar visual quality, but confirm that the intended players and editors support it smoothly. ProRes or DNxHR are better suited to archival masters and handoff files than to routine help-center delivery.
Don’t choose a delivery bitrate by copying a camera setting without testing. Export a short passage containing small labels, a scrolling page, a cursor highlight, and a transition. Check it at the actual display size and at full size. A file can look excellent in the editor and lose important text after platform processing.
Color handling deserves the same discipline. If the source uses 4:2:0, keep the project consistent unless you need an intermediate workflow for significant correction. Setting a 4:2:2 timeline doesn’t create color information that wasn’t captured. For a straightforward software tutorial, legibility, contrast, cursor visibility, and clean audio are usually more important than a heavier color pipeline.
Recording 4K Tutorials and Product Walkthroughs
Consider a product marketer documenting a new software feature. The task is to demonstrate the feature, explain the change, and publish both a video and written instructions without scripting the entire process from scratch.
The operator launches Tutorial AI, records the software screen while completing the task, and narrates the decisions that matter. The recording becomes the source for a polished tutorial video and a written guide with screenshots. The operator then reviews the generated script, narration, steps, and visuals, correcting terminology and removing actions that don’t help the viewer.
4K helps when the product interface contains compact controls, tables, menus, or technical labels. It gives the editor more room to reframe a dense area without immediately making the text soft. It overdelivers for a static slide deck or a simple screen with large controls, where a well-compressed 1080p recording may already be sufficient.

Capture the screen, not the distractions
Before recording, hide operating-system notifications, close unrelated tabs, and set the cursor behavior deliberately. Cursor smoothing and post-recording cursor effects can make a long movement easier to follow, but they can’t repair a cursor that was hidden by a busy interface or captured at an inconsistent scale.
Treat microphone audio and system audio as separate signals. The microphone records the presenter’s explanation, while system audio records application sounds, alerts, and any media played inside the demonstration. Record a short test of each, confirm that the narration is clear, and avoid letting notification sounds compete with the instruction.
A regional capture can also be more efficient than recording the entire desktop. Capturing only the relevant application or screen area reduces wasted pixels and makes later zooms more intentional. After the recording, review the generated video and written guide together. If a step is unclear in one format, revise the source explanation before publishing either version.
Pre-Record Checklist for Reliable 4K Sessions
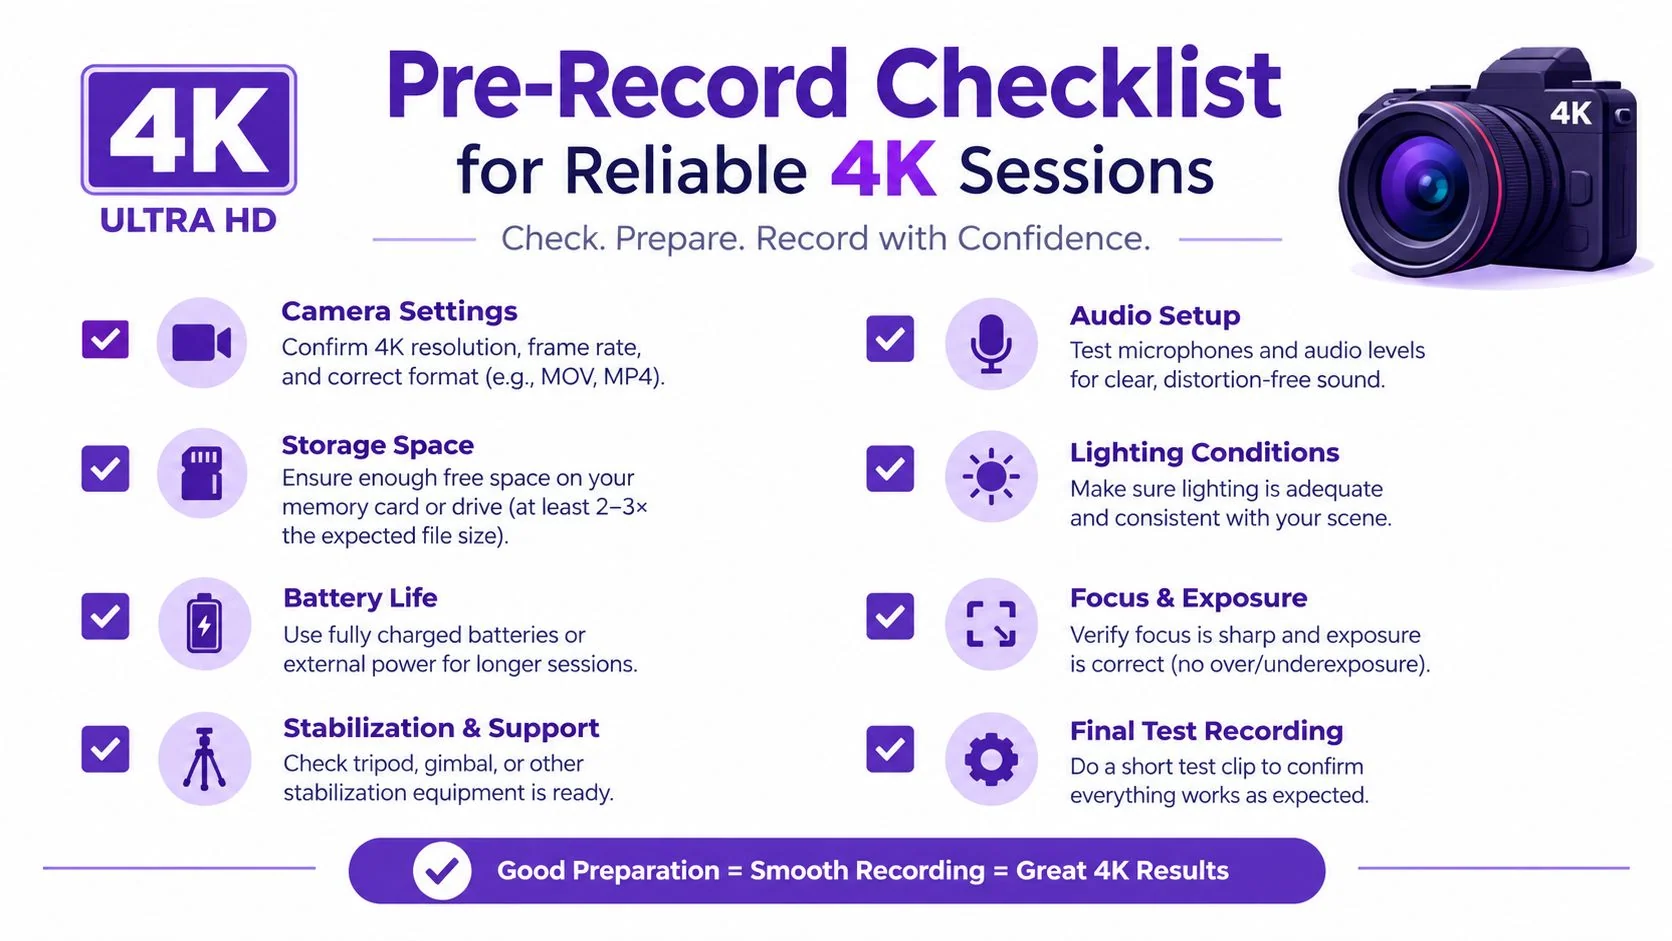
Run this verification pass immediately before the actual session. Each check targets a failure that is difficult to hide once the tutorial has been published.
- Match the source and capture settings: Confirm that the display or camera source and the recorder use the intended UHD resolution and frame rate. A mismatch can create scaling softness or uneven motion.
- Read the codec and bitrate fields: Open the recording dialog and verify the actual values instead of trusting a saved preset. A low default bitrate can make small interface text break apart during movement.
- Size the destination: Apply the bitrate-to-duration formula, then compare the result with available space and the room required for project files, proxies, and exports. Running out of capacity ends the session cleanly only if you notice it first.
- Check refresh alignment: Confirm that the source refresh rate and capture cadence work together. A 60 Hz source captured at 30 fps can introduce subtle stutter that may not be obvious until the final render.
- Free processing headroom: Close unrelated applications and disable unnecessary overlays. Background CPU or GPU activity can produce dropped frames or a sluggish interface.
- Test power and temperature: On a laptop or compact camera, connect suitable external power, check ventilation, and run a short sustained test. Thermal throttling often appears after the recording has been running for a while.
- Listen before you explain: Record a brief audio sample and play back both microphone and system audio. Confirm that narration is present, application sounds are at the intended level, and no notification has entered the take.
Tutorial AI turns a software screen recording into a tutorial video and written guide with screenshots, so you can demonstrate a process once and review the generated script, narration, steps, and visuals before sharing. Visit Tutorial AI to connect your 4K screen-recording workflow with software training, onboarding, product walkthroughs, and process documentation.