You’re probably sitting at a keyboard right now with a mix of excitement and doubt. Your fingers are ready, but your brain is asking practical questions. Which key is middle C? Why do both hands feel clumsy? How do people go from pressing random notes to playing music?
That’s a normal place to start.
A good tutorial piano approach doesn’t throw everything at you at once. It gives you a clear path. First, you learn how to sit and place your hands. Then you learn how the keyboard is organized. Then you play a few notes that sound musical. After that, you practice in a way that helps you improve instead of repeating the same mistakes. If you want to teach others later, the same step-by-step mindset also helps you record lessons people can follow.
Welcome to the World of Piano
The first time a student sits at a piano, I usually see the same thing. They touch a few keys softly, then a few more loudly, and almost immediately they realize this instrument responds to emotion. A hesitant hand makes one sound. A confident hand makes another. That response is part of what makes piano so compelling for beginners.
That expressiveness didn’t happen by accident. The piano was invented by Bartolomeo Cristofori in Italy around 1700 to 1720, and the oldest surviving piano still in existence was crafted by Cristofori in 1720, according to this overview of piano history. His innovation introduced the hammer mechanism, which let players vary volume by pressing keys with different force. That changed musical expression in a way earlier keyboard instruments couldn’t match.
Why the piano feels intuitive
A beginner can make sense of the keyboard faster than many other instruments because the layout is visible. Low notes sit to your left. High notes sit to your right. The black keys form a repeating pattern, so the instrument gives you landmarks before you even know note names.
That’s one reason so many people are drawn to it. An estimated 40 million people worldwide play the piano, and the instrument remains one of the most widely learned in the world, as noted in these piano statistics and facts. You’re not stepping into a niche hobby. You’re joining a long, active tradition of learning, teaching, and sharing music.
Practical rule: Your first goal isn’t to sound impressive. It’s to get comfortable enough that the keyboard starts feeling familiar.
What progress actually looks like
Beginners often expect a dramatic leap. Real progress usually looks quieter than that.
It looks like this:
- Day one: You find middle C and keep a steady hand shape.
- A few sessions later: You recognize note patterns instead of hunting key by key.
- Soon after: You can play a simple melody without freezing between notes.
- Then: You start hearing when something is wrong and fixing it on purpose.
That’s the right direction. Not flashy. Just solid.
If you stay patient, piano becomes less about “Can I do this?” and more about “What should I work on next?” That shift matters. Once you start asking the second question, you’re learning like a musician.
Setting Up for Success at the Keyboard
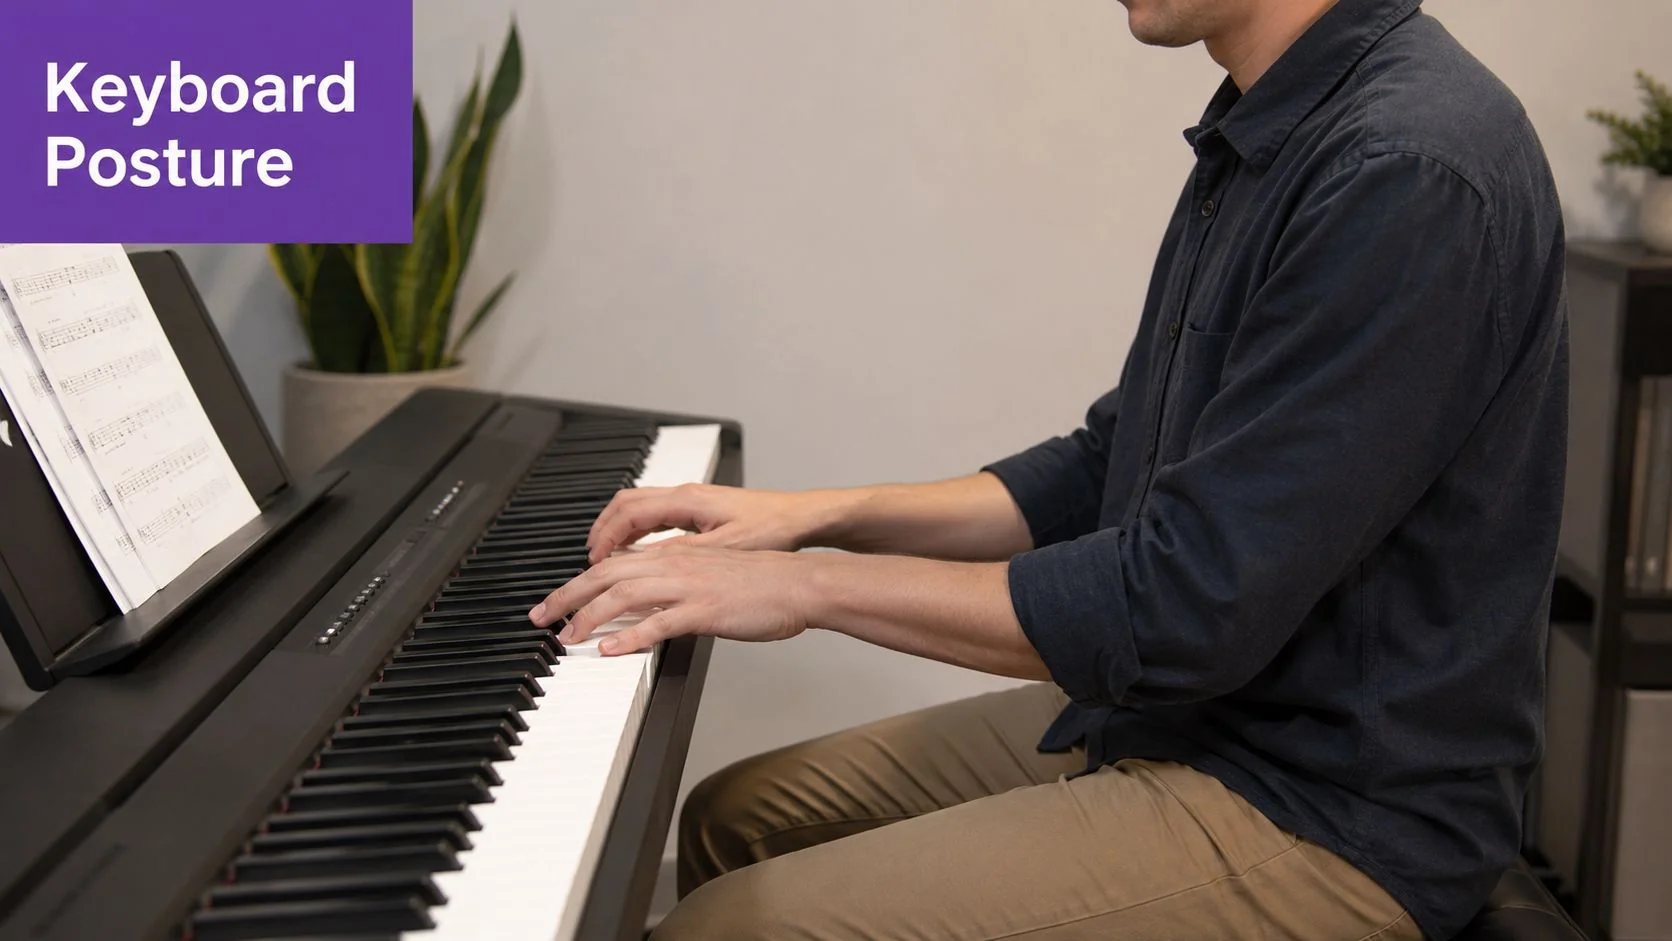
Before you worry about scales or songs, fix your setup. Bad posture doesn’t just look awkward. It makes control harder, creates tension in the wrists and shoulders, and turns simple passages into a struggle.
Start with bench position
Sit at the center of the keyboard, not too far left or right. Your elbows should be slightly in front of your body rather than pinned behind you. When your hands rest on the keys, your forearms should look roughly level with the keyboard.
If the bench is too low, your wrists collapse. If it’s too high, your shoulders lift and tighten. You want a position that lets your arms hang naturally and then move forward to the keys without strain.
A quick self-check helps:
- Feet grounded: Keep both feet stable. Don’t dangle or twist.
- Back tall: Sit upright, but don’t stiffen like you’re posing for a photo.
- Shoulders loose: If you feel them creeping upward, reset.
- Elbows free: They should move easily, not lock against your sides.
Shape the hand, don’t flatten it
A beginner’s hand often does one of two things. It either flattens completely, or it curls too tightly. Neither works well.
The better image is this: pretend you’re holding a small ball. Your fingers curve naturally, your knuckles stay lifted, and your fingertips contact the keys with control. The wrist stays flexible, not sagging and not rigid.
If your fingers collapse at the last joint, don’t push harder. Reset the shape and play more lightly.
That shape matters because it helps each finger move with less effort. It also prepares you for scales, chords, and hand independence later.
Build a setup you can repeat
Consistency matters more than perfection. If your body starts from a reliable position every day, you remove one variable from the learning process.
Try this short pre-play routine:
- Sit first, then place hands. Don’t reach for the keyboard while still adjusting yourself.
- Check wrist height. It should feel neutral, not dropped.
- Relax the jaw and shoulders. Tension often starts there.
- Play five slow notes. Listen for even tone rather than speed.
If you’re recording your practice or making lesson clips, your physical setup affects video quality too. A clear camera angle and visible hand position make instruction easier to follow. Good lighting helps more than most beginners expect, especially for finger detail and key visibility, which is why this guide to lighting for video recording is worth a look if you plan to share your playing.
What beginners usually get wrong
Here’s a quick comparison that I use with new students:
| Habit | What it causes | Better option |
|---|---|---|
| Sitting too close | Cramped elbows and stiff wrists | Leave room for arm movement |
| Flat fingers | Weak control and uneven notes | Curved fingers with lifted knuckles |
| Raised shoulders | Fatigue and tension | Let arms drop naturally |
| Looking only at hands | Poor keyboard awareness | Glance, then return attention to feel and sound |
Good posture won’t make you sound advanced overnight. It does something more important. It gives you a stable physical base so your practice is effective.
Decoding the Keys Notes Scales and Basic Chords
The keyboard looks intimidating until you notice that it repeats. Once you see the pattern, the piano becomes much easier to play.
Find the pattern before the notes
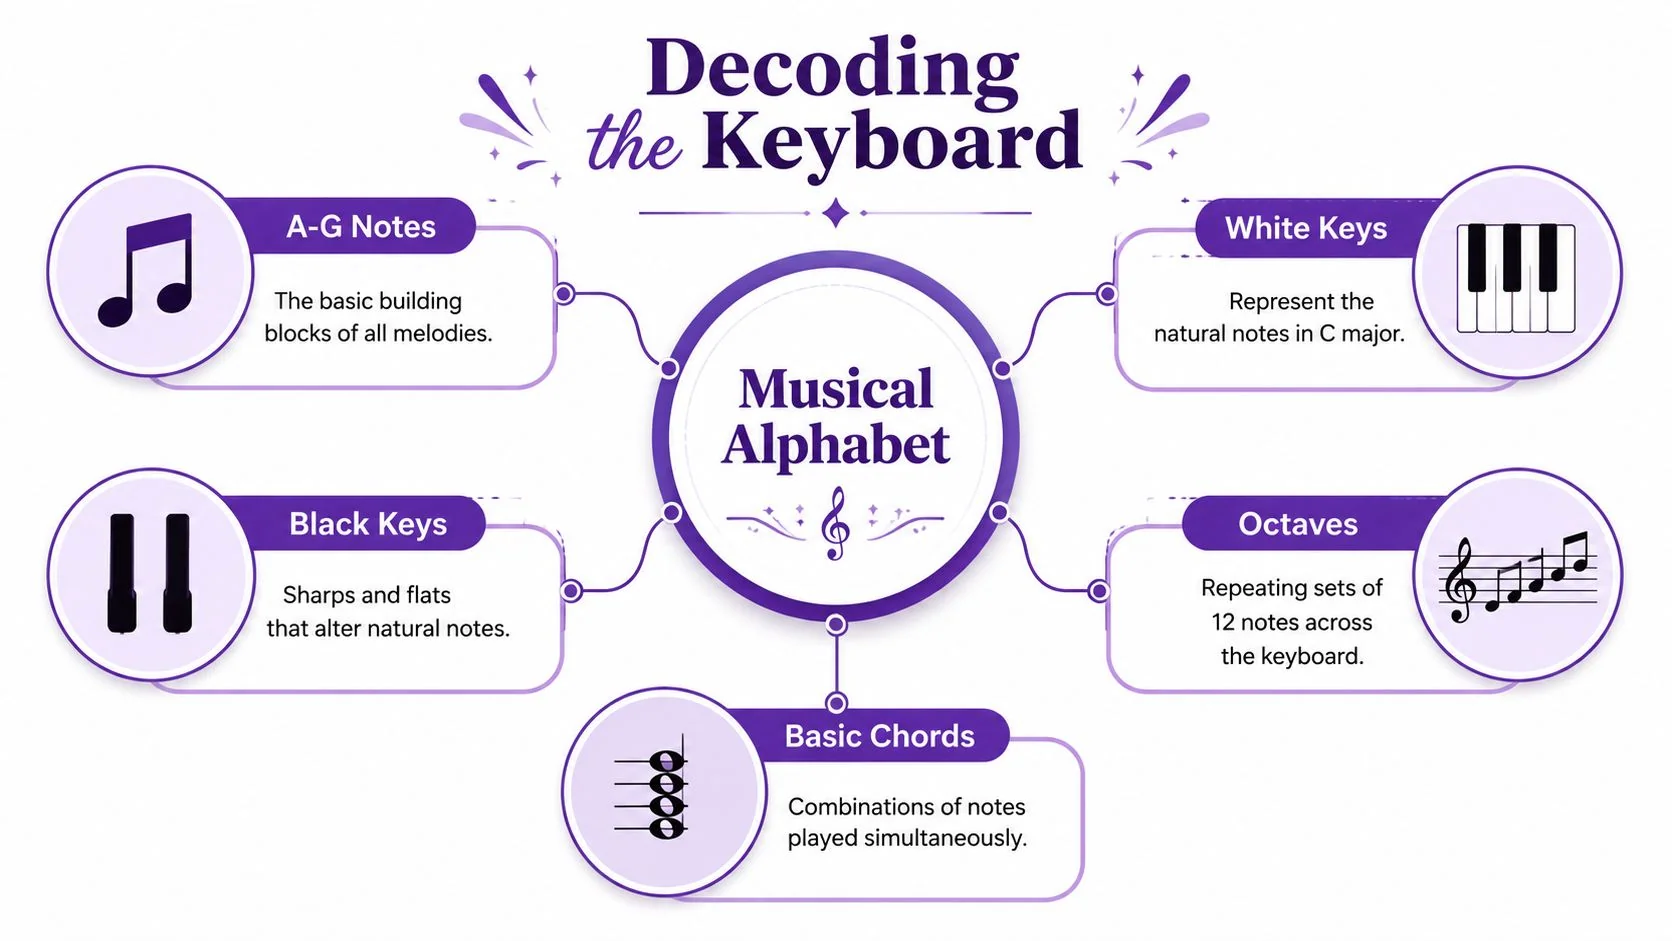
Look at the black keys. They appear in groups of two and three. That pattern repeats all the way across the keyboard.
The white key immediately to the left of any group of two black keys is C. Once you can spot that quickly, you can find middle C by locating the C nearest the center of the keyboard. That note becomes your anchor.
From there, the musical alphabet moves like this:
- A to G: then it repeats
- White keys: natural notes
- Black keys: sharps and flats
- Same pattern again: a new octave
An octave is one full repeat of the note cycle. If you play C and then the next C above it, you’ve crossed an octave.
Sharps and flats without confusion
Black keys get overexplained. Keep it simple.
A black key usually has two names because it sits between two white keys. For example, the black key between C and D can be called C sharp or D flat. Sharp means one step up. Flat means one step down.
You don’t need to memorize every enharmonic spelling on day one. You do need to understand that black keys are part of the keyboard’s structure, not “extra” notes.
Think of white keys as the main road and black keys as side streets that connect nearby places more precisely.
Your first scale
The C major scale is the easiest place to begin because it uses only white keys:
C, D, E, F, G, A, B, C
Play it slowly with your right hand first. Listen for even sound. Don’t rush to fingerings if the note order itself still feels new. The point at this stage is orientation.
Then ask yourself two questions:
- Can I say each note as I play it?
- Can I find it again without guessing?
If the answer is no, slow down. Naming notes out loud builds stronger memory than silent wandering.
A useful way to remember note locations is spaced review. The same principle students use for memorization also helps with note recognition and chord recall. If you want a simple explanation of that process, Cramberry’s spaced repetition guide gives a clear overview that maps well to music study.
Build three basic chords
Now make the keyboard sound full.
A major chord uses three notes played together. Start with these:
- C major: C, E, G
- G major: G, B, D
- F major: F, A, C
Play each chord slowly. Let it ring. Hear the difference between single-note melody and stacked harmony.
These three chords matter because they show you how piano works at a structural level. Music isn’t only a line of notes. It’s also groups of notes that support the melody. That’s why chord learning helps even if your first goal is reading sheet music.
If you’re teaching yourself, step-by-step writing helps here just as much as step-by-step playing. This resource on how to write step-by-step instructions that actually work is useful because piano learners often improve faster when they turn fuzzy ideas like “practice scales” into clear actions like “play C major slowly, name each note, repeat until you can find them without hesitation.”
A simple keyboard map
| Concept | What to notice at the keyboard |
|---|---|
| Middle C | The C nearest the center |
| White keys | Natural note names |
| Black keys | Sharps and flats |
| Octave | One full repeat from a note to the next same note |
| Chord | Notes played together |
Once these ideas click, the keyboard stops looking like a long row of identical keys. It starts looking organized, which is exactly what a strong tutorial piano method should make possible.
Playing Your First Songs and Practicing Smart
Your first song should be simple enough that you can focus on learning well, not surviving the piece. A tune like “Mary Had a Little Lamb” works nicely because the melody is familiar and the note movement is manageable. Use any beginner-friendly sheet you like, or write the note names out yourself if that feels less intimidating.
The common beginner mistake is predictable. You start at the beginning, play until something breaks, go back to the start, and repeat the whole thing again. That feels like practice, but it often trains the error right into your hands.
Use segmented accumulation
A stronger method comes from expert piano practice guidance. According to these piano practice tips from Musiah, students should isolate 1 to 2 bar segments, then practice Left Hand 5 times, Right Hand 5 times, and Both Hands 5 times slowly before moving on. That segmented accumulation approach is more effective than repeatedly playing the entire piece because it prevents the reinforcement of mistakes.
That sounds strict, but it’s freeing. You stop asking, “Can I play the whole song yet?” and start asking, “Can I play this tiny part cleanly?”
What this looks like on a beginner tune
Let’s say the opening phrase uses only a few neighboring notes.
Work it like this:
- Choose one small segment. Don’t take the full line if the first two notes already feel uncertain.
- Play the left hand alone five times if the song includes left-hand notes.
- Play the right hand alone five times.
- Put both hands together for five slow repetitions.
- Advance only when that piece feels settled.
If the song is one-hand only, the same principle still applies. Isolate a tiny section. Repeat it slowly. Add the next section only after the first one is stable.
Small sections feel slow in the moment, but they save time because you don’t spend the next session untangling the same mistakes.
Learn in layers, not in a straight line
Beginners often think a song should be learned from first note to last note in one pass. That’s not how strong players usually work. They learn in layers.
Try this approach for your first piece:
- Layer one: Note names only
- Layer two: Rhythm without worrying about expression
- Layer three: Fingering and hand coordination
- Layer four: Smoothness and musical shape
Each layer solves a different problem. If you try to solve all of them at once, your brain jams.
A short troubleshooting list helps too:
- If rhythm falls apart: Clap or tap it away from the piano first.
- If hands won’t coordinate: Reduce the segment until it feels almost too easy.
- If wrong notes keep repeating: Stop immediately and rebuild the pattern slowly.
- If you tense up: Play softer. Tension often rises with volume and speed.
Keep early songs musically satisfying
There’s no prize for choosing a hard first piece. Early wins matter. A recognizable tune, a short folk melody, or a children’s song can teach note reading, hand shape, and phrasing without overload.
That’s the hidden value of beginner repertoire. You aren’t just learning a song. You’re learning how to learn songs.
Building a Sustainable Practice Routine
A lot of students ask the wrong opening question. They ask, “How long should I practice?” A better question is, “What kind of practice can I realistically sustain?”
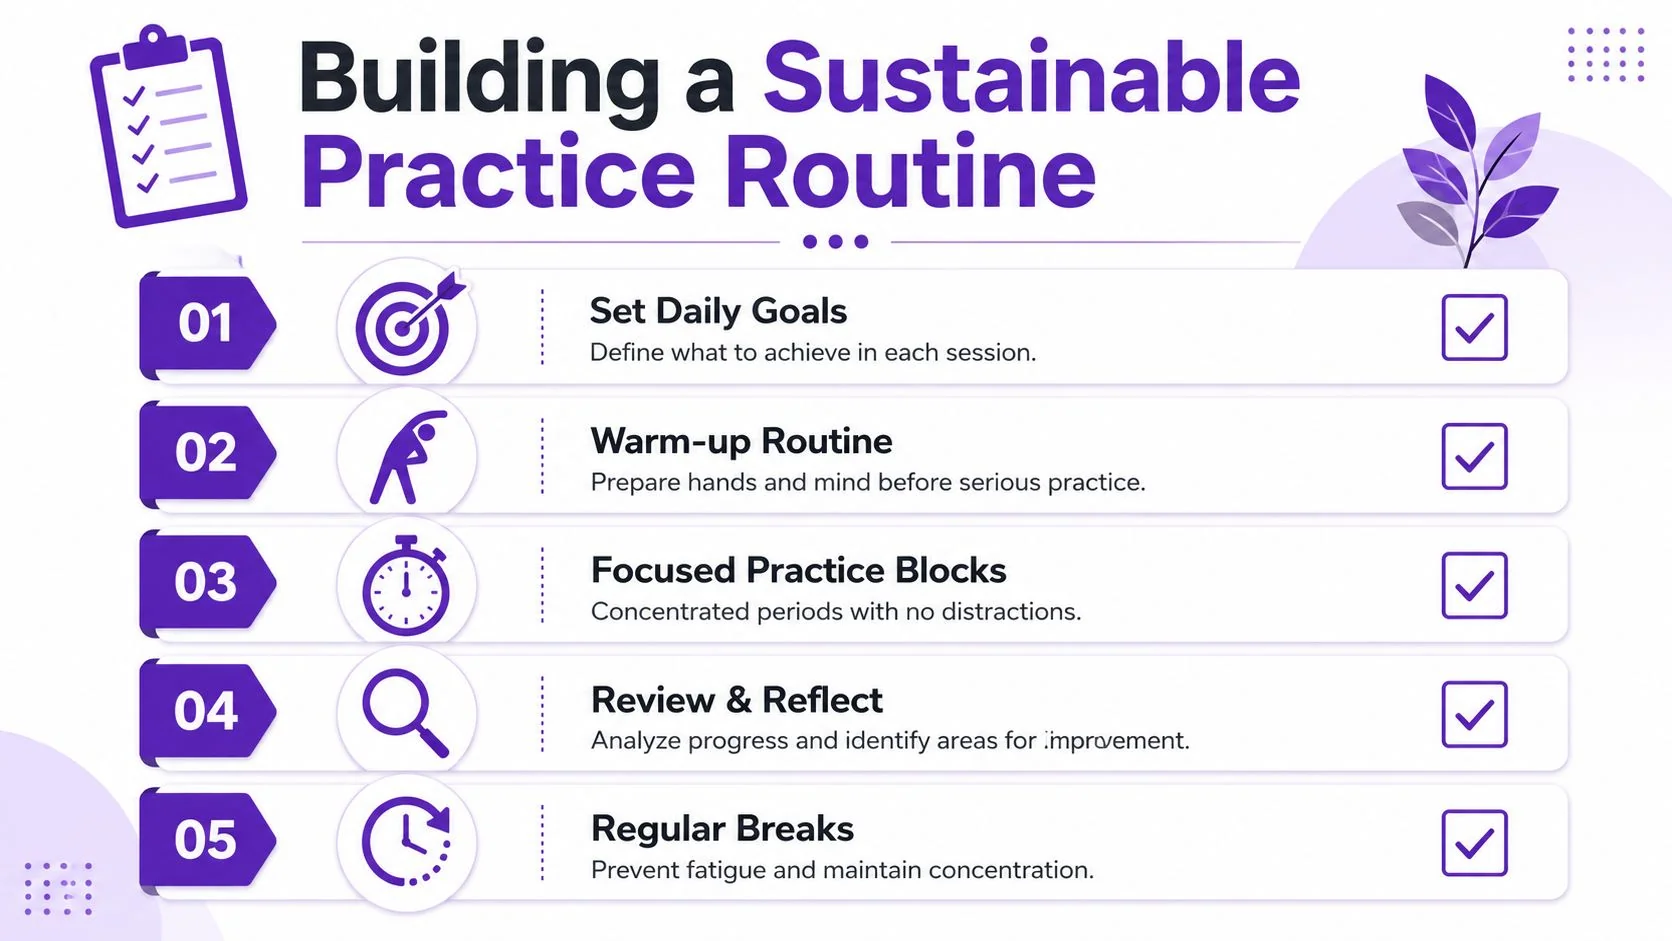
Research summarized in this practice-focused video resource says that short, focused practice blocks of 15 to 25 minutes produce better retention than one long session, and that around 30 minutes per day is optimal for most students. Going longer without breaks can reduce neural encoding. In plain terms, your brain starts getting less from the effort.
A routine that most beginners can keep
Here’s a practical 30-minute structure:
| Time | Focus | Purpose |
|---|---|---|
| First block | Warm-up and hand reset | Loosen the body and reestablish control |
| Second block | Notes, scale, or chord review | Build fluency with basics |
| Third block | Current song work | Apply focused practice to real music |
| Final block | Easy play or sight reading | End with something engaging and low-pressure |
That structure works because each part has a job. You don’t sit down and vaguely “practice piano.” You move through tasks that support each other.
Make consistency easier than motivation
Students don’t quit because they lack interest. They quit because the routine feels messy. If every session begins with deciding what to do, friction builds.
A few habits reduce that friction fast:
- Leave your music ready: Put the current piece on the stand before you stop for the day.
- Define one target: “Fix measure two” works better than “practice piano.”
- Track what improved: One sentence after each session is enough.
- End before burnout: Stopping while you still feel fresh makes tomorrow easier.
If you like building your own learning structure, this article on self-directed learning is helpful because it frames practice as an active skill, not just a scheduled activity.
The best routine is the one you can repeat when you’re busy, distracted, or not especially inspired.
A weekly rhythm that stays realistic
Not every day has to feel identical. In fact, a little variation helps.
Try this pattern:
- Some days: focus on note reading and keyboard geography
- Other days: spend more time on one song segment
- One lighter day: play familiar material for enjoyment
- One review day: revisit older pieces and notice what feels easier now
That last part matters. Review shows progress more clearly than constant new material.
A sustainable tutorial piano routine should leave you challenged, not drained. If you finish a session knowing exactly what to repeat tomorrow, you’re on the right track.
Sharing Your Progress with Video Tutorials
At some point, many piano learners do something surprisingly useful. They record themselves. Sometimes it starts as a private check-in. Sometimes it becomes a lesson clip for a student, a short social post, or a simple walkthrough of a beginner exercise.
That habit matters because recording changes how you pay attention. You notice hesitations, uneven rhythm, unclear explanations, and camera angles that hide the very thing you’re trying to teach. There’s a real gap here. As noted in this discussion of piano keyboard video ideas, piano tutorial content often teaches playing technique but doesn’t do enough to show educators how to record and edit clear visual lessons for digital distribution.
Why video helps teachers and learners
When you explain a concept out loud, you find the weak spots in your own understanding. If you can demonstrate middle C, show a C major chord, and talk through a small practice segment clearly, you understand that material better than if you only play it to yourself.
Video also helps in practical teaching contexts beyond music. The same habits used in piano instruction show up in:
- Product demos
- Feature release videos
- Customer onboarding
- Help-center and knowledge-base videos
- Support article videos
- Internal training
- SOPs
- Sales enablement walkthroughs
In all of those formats, people need to see the actual demonstration. That’s one reason synthetic talking-head tools such as Synthesia, HeyGen, or Vyond solve a different problem. They generate presenters. They don’t replace the need to show the actual interface, hand movement, or on-screen process.
The production problem most beginners hit
A casual screen recorder can capture a lesson quickly, but raw recordings often include rambling, pauses, and retakes. Verified guidance notes that editing tools which automatically tighten pacing can reduce tutorial length by 50 to 100 percent compared with raw screen recordings, as described in this video on automated tutorial editing. Traditional editors like Camtasia, Adobe Premiere Pro, and Final Cut can absolutely polish the result, but they also expect editing skill that many teachers and subject-matter experts don’t have.
If your goal is to explain a fingering pattern, a scale, or a software workflow, you usually don’t want to become a video editor first.
A quick example helps. A piano teacher recording a beginner lesson may need:
- a top-down hand view
- clear narration
- pacing that removes dead space
- zooms that emphasize a specific key or finger
- a written version of the same lesson for students who prefer reading
That’s very close to what documentation teams and support teams need when they create software tutorials.
Here’s a product walkthrough that shows the workflow in action:
Tools built for tutorial creation can help by automating the polish instead of requiring manual timeline work. For people creating repeatable instruction, that means one recording can become both a polished video and a written guide. If you want to learn more about that process, this guide on how to make tutorial videos is a useful starting point.
Teaching piano in the digital age isn’t only about playing well. It’s about showing clearly, pacing wisely, and sharing material in a format people will find useful.
If you want a faster way to turn one recording into both a polished tutorial video and a matching help article, take a look at Tutorial AI. It turns a single screen recording plus spoken narration into an edited-looking tutorial, tightens pacing with AutoRetime, supports narration in 74 languages, and generates documentation from the same recording. Teams use it for product demos, onboarding, knowledge-base videos, support articles, internal training, and sales enablement. It also supports Brand Kits, Multilingual Player, SSO/SAML, and SOC 2 + GDPR requirements, and it’s used by organizations including Bosch, Deutsche Bahn, Intesa Sanpaolo, Microsoft, and UNICEF.