You’re staring at a half-finished support reply or product update, and a screenshot just won’t cut it. The workflow needs movement, cursor context, and a voiceover that explains what’s happening on screen. On a Mac, that usually means starting with the built-in recorder, then deciding whether the raw capture is already good enough or whether it needs to be turned into something cleaner, tighter, and easier to share.
Why Mac Is the Default Home for Tutorial Recording
The moment a support lead stops trying to explain a workflow with still images and starts hitting record is usually the moment the Mac earns its reputation. For many teams, the reason is simple, Apple made screen capture video on Mac a default capability, not a special project. With macOS Mojave in 2018, Command + Shift + 5 brought the Screenshot toolbar into everyday use for both stills and recording, which moved tutorial capture out of the “install another app” bucket and into the standard Mac workflow Apple support on screen capture and recording.
What changed when Apple standardized it
Before that toolbar, a lot of teams treated screen recording like a side quest. You’d open a separate app, check permissions, and then hope the output looked usable. Apple’s native flow changed the starting point, because the Mac now ships with two no-cost recording paths, the Screenshot toolbar and QuickTime Player, and both support recording the entire screen or a selected portion Apple Mac Help on taking a screenshot and recording.
That matters for knowledge-base authors, trainers, and product marketers because the first pass no longer needs procurement or IT approval just to capture a walkthrough. You can open the toolbar, choose the capture area, and get a file fast enough to answer a ticket, draft a release demo, or document an SOP while the context is still fresh. The Mac became the default because it removed friction, not because the built-in output is finished enough to publish as-is.
Practical rule: Use the native recorder when the job is to capture the truth of the interface quickly. Use an editor when the job is to make that capture watchable for someone who wasn’t in the room.
Where native recording stops being enough
The built-in tools are excellent for raw capture, but they stop at capture. They don’t tighten pacing, rewrite a rambling script, add branded motion, or generate a matching help article from the same material. In practice, that’s the line many teams hit after the first few tutorial videos, because the file is technically correct but still too rough for customers or employees to consume easily.
If you need developer-grade automation or a benchmark for strong capture, Apple’s AV Foundation guidance says a real-time screen-to-movie workflow needs an AVCaptureSession, an AVCaptureScreenInput, and an AVCaptureMovieFileOutput Apple AV Foundation QA1740. That’s useful operationally, because it shows how much control sits behind dependable capture pipelines. For most tutorial work, though, the native Mac tools are the clean starting point, and the editing layer is where the polished asset gets built.
Recording Your Screen With the Built-In Mac Tools
Start with the Screenshot toolbar if you want the fastest path to a usable raw clip. Press Shift + Command + 5, choose either Record Entire Screen or Record Selected Portion, and then click Record. When you’re done, stop from the menu bar using the stop control, and macOS saves the result as a .mov file in the location you chose or the default save location Apple Mac Help on recording the screen.
Use the Screenshot toolbar for quick clips
The toolbar is the right choice when you want speed and don’t need to overthink the setup. It’s the simplest route for support clips, short product demos, and internal walkthroughs where you mostly care about capturing the screen cleanly. Apple’s current guidance also shows that the same toolbar can start a recording from the unified Screenshot interface that launched with Mojave, so capture and recording live in one place Apple support on screen capture and recording.
The one thing to keep straight is the recording region. Record Entire Screen works best when the workflow jumps between apps or when the cursor needs room to move. Record Selected Portion is better when you want to keep the frame tight around one product area and avoid distractions from everything else on the desktop.
For a quick side path, if you ever need a different desktop workflow for comparison, LesFM has a useful walkthrough on capture desktop video in VLC. It’s not the first tool I reach for on a Mac, but it’s a practical reference when you’re comparing built-in capture with third-party options.
Use QuickTime when you want a little more control
QuickTime Player is the second native path. Open it, choose File > New Screen Recording, or press Control + Command + N, then pick the recording region and start capture Apple Mac Help on taking a screenshot and recording. QuickTime is the better fit when you want to preview the flow before saving, or when the team expects a slightly more deliberate capture process.
A lot of guides mention that QuickTime can feel more convenient when you care about audio selection and controlled saving behavior, which matches real tutorial work better than a bare, one-click recorder. In practice, I use the toolbar for fast clips and QuickTime when I want to sanity-check the setup before I commit the file. Both paths are native, both are free, and both get you to a usable .mov without installing anything.
Setting Up Microphone, System Audio, Resolution, and Frame Rate
A usable tutorial dies fast if the audio is thin, the cursor stutters, or the frame is too tight to show what matters. The built-in Mac tools do handle the basics, but the quality choices still matter more than expected. If the narration sounds like it was recorded across the room, nobody cares how clean the interface capture is.
Pick the right microphone first
In the Screenshot toolbar and in QuickTime, the audio step is where the wrong trade-off often happens. The built-in MacBook mic is fine for emergency capture, but a dedicated USB headset or a solid Bluetooth headset usually gives you cleaner narration because it isolates your voice better and keeps desk noise down. QuickTime’s screen recording mode even exposes a small arrow next to the Record button so you can choose a microphone before you start, which is exactly the control you want when the tutorial needs spoken narration alongside the UI Animoto on screen recording audio selection.
If you’re recording product demos, onboarding walkthroughs, or internal training, use the microphone you’d trust for a customer call. That’s usually the one that forces you to speak a little closer and a little more steadily, which makes the edit easier later. You’re not recording a podcast, but you are creating something that people may watch without headphones.
Practical rule: If you can hear room reflections in the test clip, fix the microphone before you touch the app settings.
Balance resolution and frame rate with clarity
For most tutorial work, 1080p at 30fps is enough because the goal is readable UI and stable narration, not cinematic motion. 60fps only makes sense when cursor movement, drag interactions, or animated UI details need extra smoothness. Higher-resolution capture can help on Retina displays, but it also increases the burden on storage and later handling, so only push it when the interface needs the extra detail.
That trade-off is why the best setup is the one that matches the content, not the one that looks most impressive in a settings panel. If the tutorial shows form fields, menus, or short navigation steps, clarity beats motion. If it shows design tools, live dragging, or cursor-heavy product work, smoother playback starts to matter more.
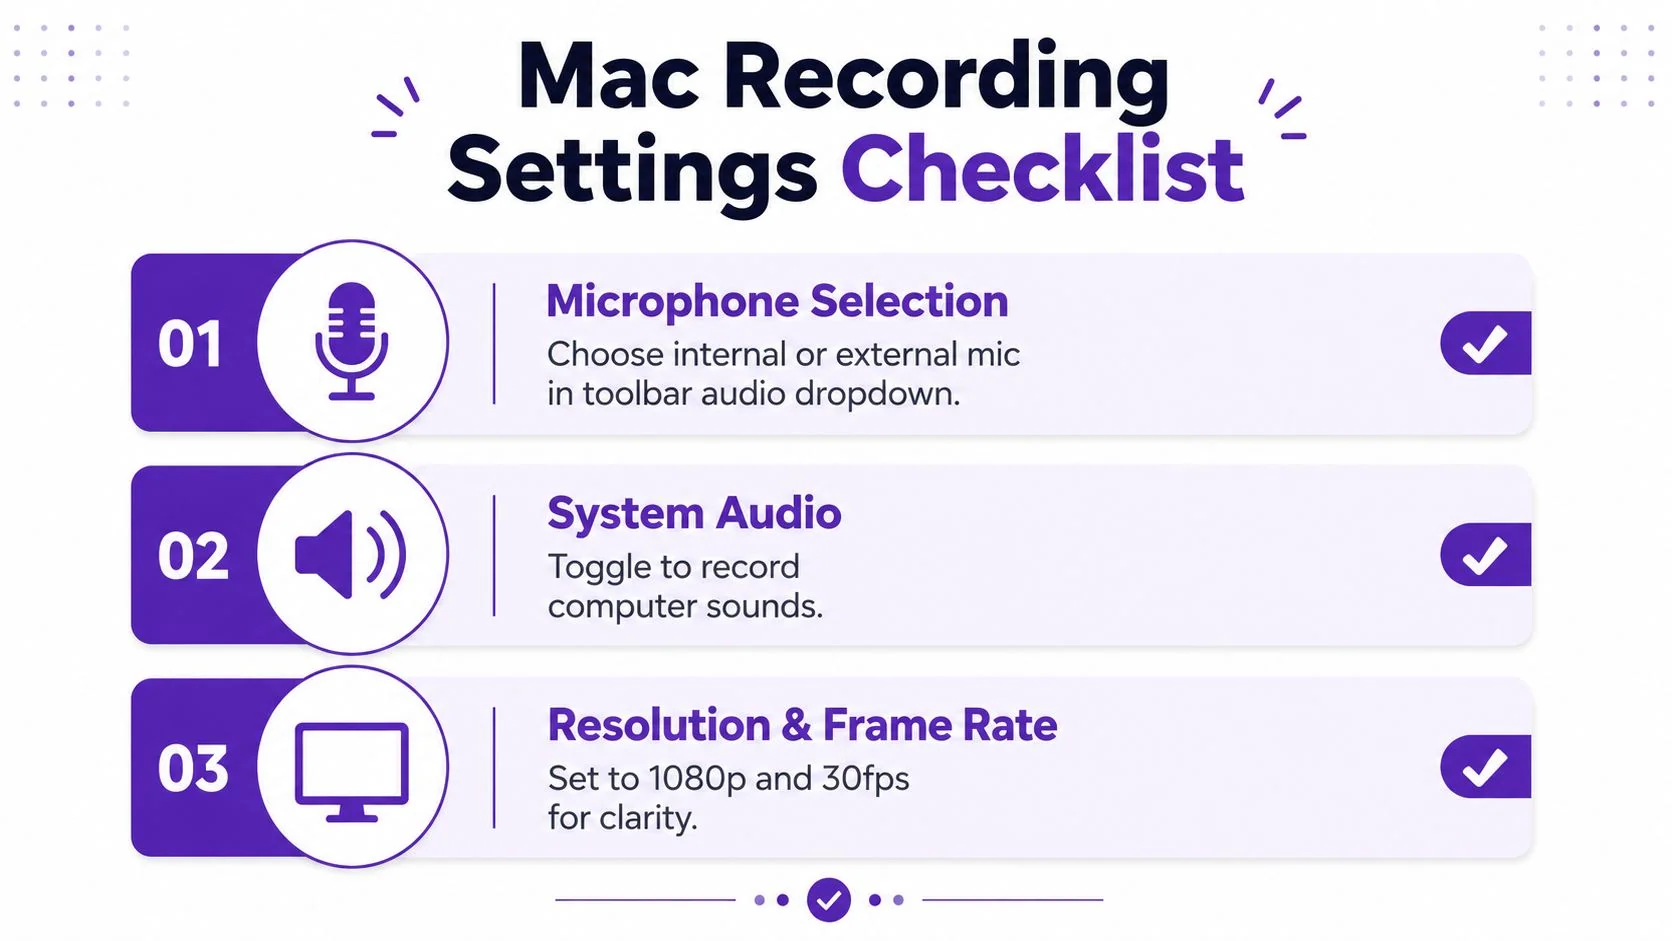
Before every session, run the same checklist.
- Microphone selection: choose the headset or external mic that sounds the most even in a 10-second test.
- System sound needs: decide whether the workflow needs computer audio captured separately, which is where the Mac’s native tools may need a different approach.
- Resolution target: keep the frame large enough that text stays readable after export.
- Frame rate: stay at a moderate setting unless the cursor motion really needs more.
- Save location: point the file somewhere you can find it immediately after recording.
For a deeper look at handling computer audio alongside Mac recordings, the internal guide on record computer audio on Mac is the right companion. If you’re comparing frame timing choices for later editing, MyImageUpscaler has a practical reference on video frame rate tips that’s worth reading before you settle on an export workflow.
Troubleshooting the Most Common Mac Recording Problems
The fastest way to waste a recording session is to assume the file will be fine because the timer started. Most Mac recording failures are predictable, and the fix is usually one setting deep. If you know what to check first, you can tell the difference between a quick permission issue and a deeper limitation in what macOS is willing to capture.
Diagnose the output by symptom
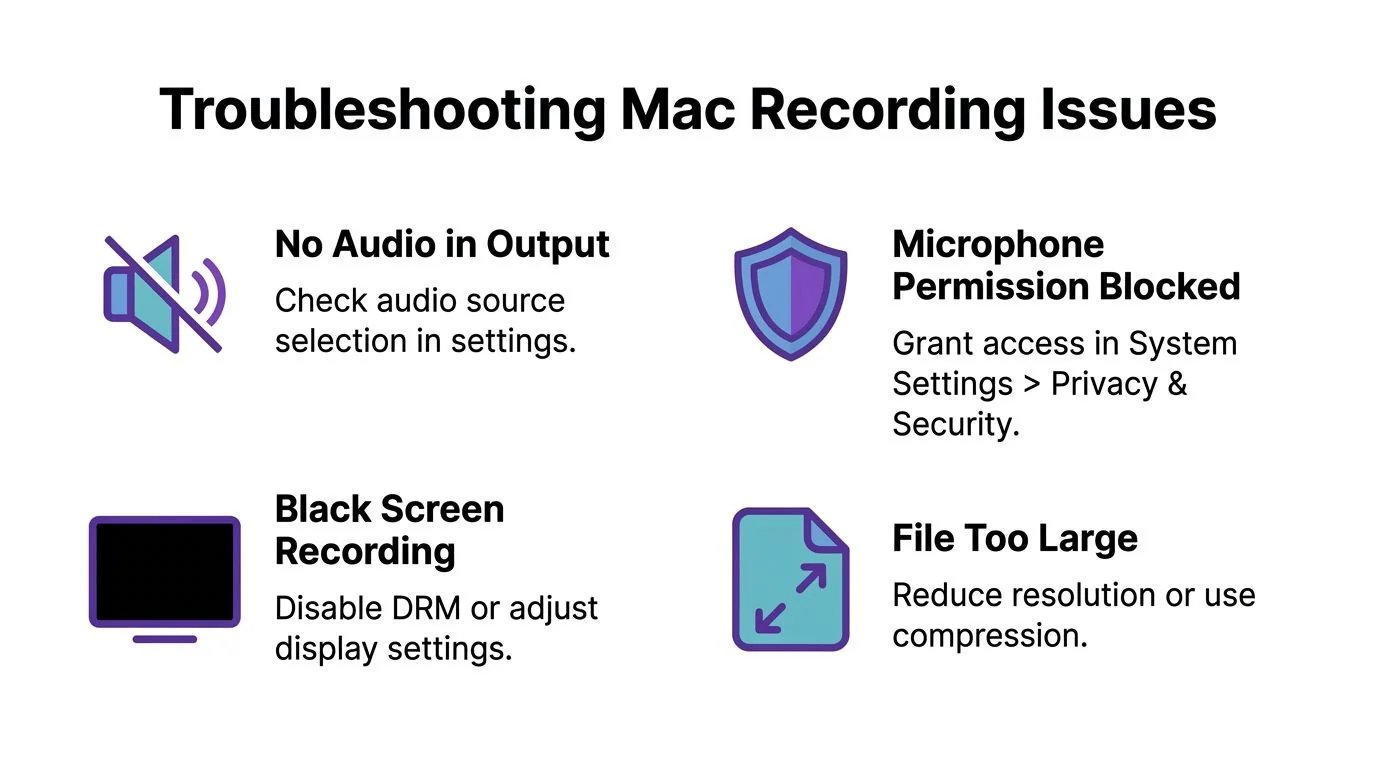
No audio in the finished clip usually points to the wrong input source, or to the fact that the narration mic wasn’t selected before recording. The fix is to revisit the audio dropdown in QuickTime or the microphone control in the Screenshot toolbar and confirm that the intended source is active. If the voice is present but the in-app sound is missing, that’s a different problem, because macOS doesn’t expose every internal audio stream the same way.
A black screen is often a privacy or DRM issue rather than a recorder failure. Some apps protect their video surfaces, so the capture starts cleanly but the recording looks blank where the protected content should be. That isn’t something you solve with a better stop button. You solve it by changing the source, disabling protected playback, or avoiding that content path entirely.
Check permissions and save behavior before you re-record
If macOS blocks the microphone, the permission dialog is the first thing to inspect. Go to System Settings > Privacy & Security and make sure the relevant microphone or screen access toggle is enabled for the app you’re using. If the file appears in the wrong place, check the save location in the Screenshot toolbar options or the QuickTime save flow before you record again. The file isn’t lost, it’s usually just sitting where the app was told to place it.
Stutter on playback is usually a sign that the system was busy or the file was recorded at a quality level the machine handled poorly. Close unneeded apps, record with fewer background tasks, and back off the capture settings if the machine struggles. That’s especially true when the recording looked smooth during capture but gets rough once you open it again.
Practical rule: When a recording fails, identify whether the problem is source, permission, protection, or performance. That order saves far more time than re-recording blindly.
For a separate workflow focused on fixing timing issues between spoken narration and the captured video, the internal guide on fix audio sync with video is the one to keep handy. If the problem is strictly internal audio capture, treat it as a workflow limitation first and a recording mistake second.
From Raw Capture to Polished Tutorial Video
A raw .mov from the Mac proves the workflow exists. It doesn’t prove the tutorial is ready for customers, employees, or a help center. The difference usually shows up in the first thirty seconds, where a good recording still feels long, unstructured, and a little too honest about how many pauses were in the live narration.
What the native Mac file still needs
The built-in Mac output gives you the screen and, if you set it up correctly, the narration. It doesn’t automatically remove ums, flatten dead air, zoom the important cursor moments, or add branded opening and closing frames. It also doesn’t produce a written article from the same source material, so teams still have to re-create the lesson in another format after the video is done.
That’s why casual screen recorders often leave teams with recordings that run 50 to 100 percent longer than needed. They capture everything, including pauses, false starts, and the parts of the explanation that sounded fine live but drag in playback. By contrast, editor-grade tools like Camtasia, Adobe Premiere Pro, and Final Cut can produce polished output, but they expect actual editing skill and time in the timeline.
Where an editor changes the workflow
A middle path is to keep the native Mac capture, then hand the file to an editor that can tighten pacing automatically and reuse the same recording for documentation. Tutorial AI is one option in that category, because it turns a screen recording and narration into a tutorial video, then generates a matching written article from the same recording. It also supports AutoRetime, Brand Kits, narration in 74 languages, and a Multilingual Player, which matters when one tutorial needs to serve more than one audience.
That distinction is important. The recorder still has to capture the UI and your voice, which is exactly what teams need when viewers must see the actual product surface. AI avatar tools like Synthesia, HeyGen, and Vyond generate synthetic talking heads instead, which is a different problem entirely.
| Workflow | Editing Skill Needed | Output Polish | Best Fit |
|---|---|---|---|
| Mac Screenshot toolbar or QuickTime only | Low | Raw, functional | Fast internal captures and first drafts |
| Camtasia, Adobe Premiere Pro, or Final Cut | High | High, if edited well | Teams with experienced editors |
| Tutorial AI after Mac capture | Moderate | High, with scripted tightening and doc output | Product demos, onboarding, help center videos, SOPs |
If you’re comparing broader editing options, the internal guide on easy video editing software fits this decision point well. The common thread is simple, the Mac gets you the recording, and the editor decides whether the asset is just recorded or publishable.
Building a Repeatable Screen Capture Workflow on Mac
The best Mac recording workflow is boring in the right ways. Notifications are off, the microphone is already chosen, the capture region is obvious, and the edit path is known before anyone presses Record. That is what makes tutorial production dependable, especially when the request is for a product demo one day and an SOP the next.
A practical end-to-end loop
Start by clearing the desktop, disabling distractions, and choosing the right capture region in the Screenshot toolbar or QuickTime. Record the walkthrough with the microphone you already tested, then stop from the menu bar and inspect the .mov before you call it done. If the clip is just for internal use, that might be enough.
If the recording needs to become a customer-facing asset, move it into an editor that can tighten pacing, add branding, and generate the written companion piece. That’s where teams save time across formats, because the same source recording can become a video, a help article, and, when needed, localized versions for global audiences. Teams at Bosch, Deutsche Bahn, Intesa Sanpaolo, Microsoft, and UNICEF use that kind of one-recording workflow to support video plus article publishing across different markets.
Publish where people actually watch
A link-only handoff works for quick reviews, but product education usually needs a more durable destination. Shared players are better when the tutorial should live inside a knowledge base, a training portal, or a customer success flow. If the audience spans languages, use a player that can present localized narration and captions without making the team rebuild the content from scratch.
The payoff is consistency. One Mac recording session, one edit pass, and one source of truth can support support docs, onboarding, sales enablement, and internal training without forcing every team to reinvent the same walkthrough.
If you want a cleaner path from raw Mac capture to a polished tutorial plus companion article, visit Tutorial AI and try it on your next screen recording. It keeps the screen and voice workflow intact, then handles the pacing, branding, captions, and documentation layer after the capture is done.