You’re presenting a product demo, and someone asks you to enlarge the tiny menu label you can barely read on the shared screen. A shortcut gets the image bigger, but the wrong zoom mode can hide the surrounding interface, distort a responsive page, or leave viewers watching your cursor wander through an oversized screen.
Learning how to zoom in on screen means choosing among several routes, not memorizing one command. Windows Magnifier suits live demonstrations, macOS trackpad zoom works well for everyday inspection, iPhone and iPad window zoom helps with one-handed navigation, and browser zoom keeps web text readable while allowing the page to reflow. Recorded tutorials add another option, smart zoom, which focuses the viewer on the same UI detail the presenter intended to show.
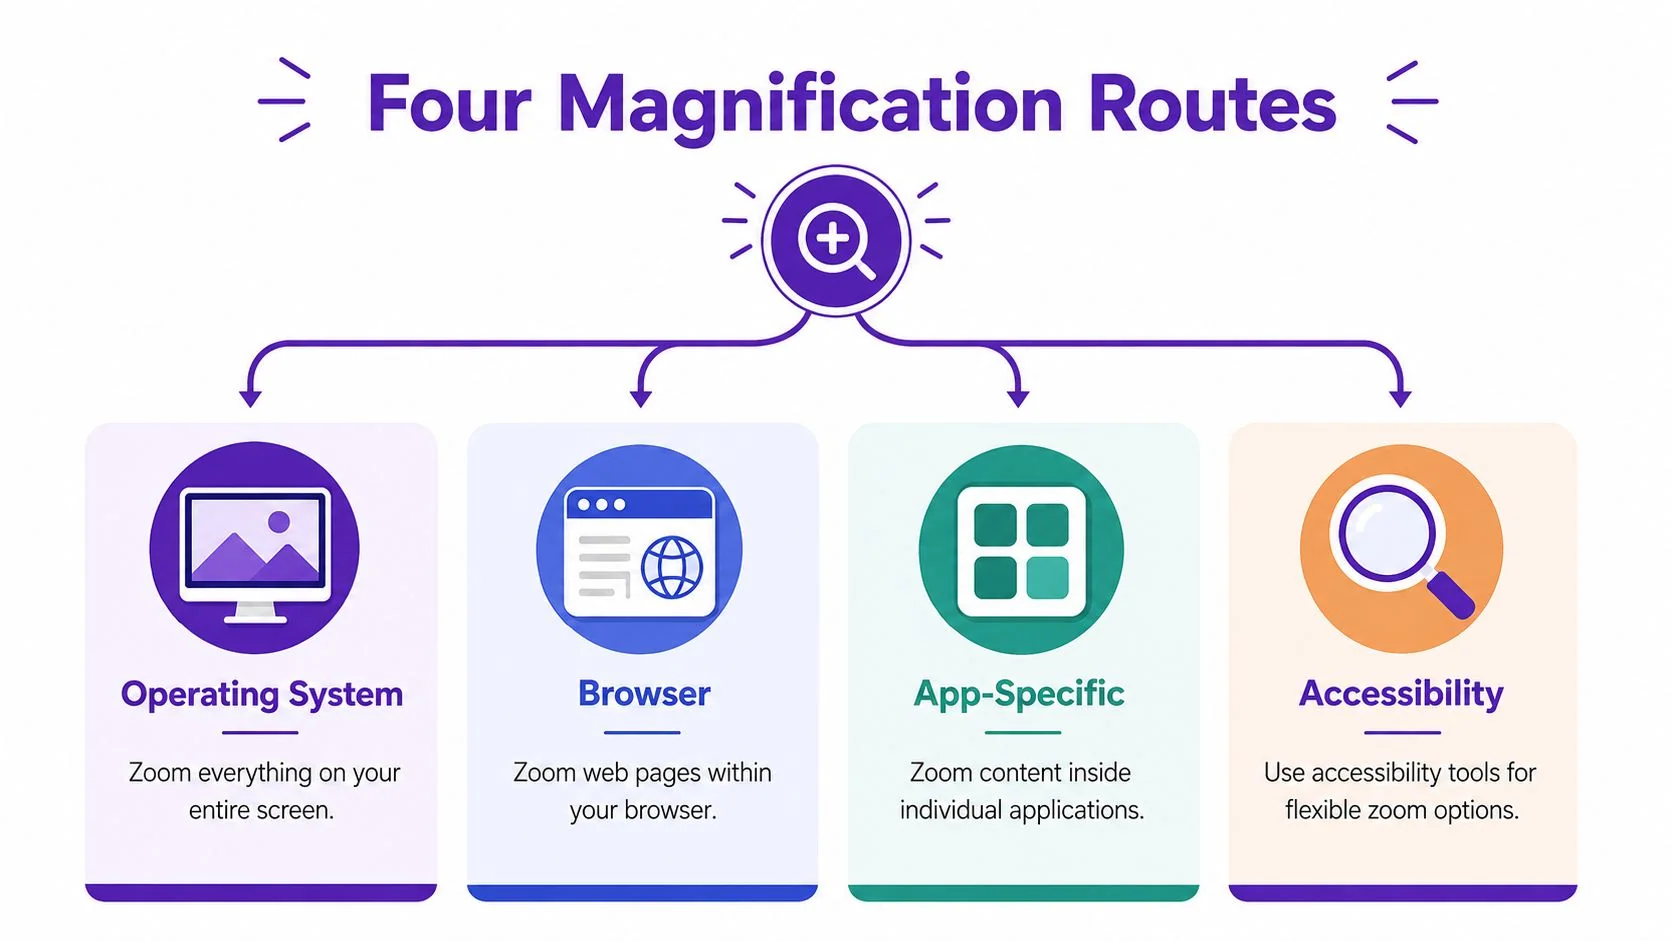
The right mental model is simple: match the mode to the task’s time horizon and audience. Use persistent accessibility zoom for repeated reading, temporary magnification for inspection, browser or document zoom when layout matters, and editorial zoom when the final audience needs guided attention. That principle also supports visual learning and screen-based instruction, where seeing the relevant control clearly often matters as much as hearing the explanation.
Why Zooming Matters Beyond Bigger Text
A small interface element creates a disproportionate support problem. The presenter may know exactly where the control is, but a teammate on a projector or a customer watching a compressed video sees a blurred label and waits for clarification. Zoom solves the immediate visibility issue, yet the choice of magnification route determines whether the rest of the workflow remains usable.
Accessibility data shows why “zoom in on screen” isn’t merely a convenience request. A major survey of people with low vision found that 45.2% used screen magnification software and 44% used browser zoom controls. The same survey reported that 18% enlarged web content beyond 400%, while only 22% didn’t enlarge content at all. It also reported 48.4% using screen magnification software, reinforcing that system-level and browser-level tools both belong in everyday accessibility workflows. The survey data and accessibility context are documented here.
Four routes, four jobs
- Operating system magnification enlarges the whole desktop or a selected area. Windows Magnifier and macOS Accessibility Zoom are useful when text, controls, or icons remain too small across several applications.
- Browser zoom enlarges web pages and can trigger responsive reflow. It’s usually the cleaner choice for reading a long article because the page can adapt instead of showing a larger crop.
- App-specific zoom keeps the adjustment inside a document, design tool, spreadsheet, PDF reader, or presentation application. It preserves the operating system’s normal scale for everything else.
- Accessibility zoom adds persistent controls, gestures, contrast options, or alternate views for users who need more than an occasional enlargement.
Match the tool to the moment
Windows Magnifier’s lens view is effective during a live demo because it enlarges the control while preserving context. A Mac trackpad gesture is faster for inspecting a chart or paragraph during daily work. On an iPhone, window zoom can beat full-screen magnification when you need to keep a dense app navigable with one hand.
For tutorial videos, the principle changes slightly. Capture enough context to preserve the workflow, then apply a controlled zoom that directs attention without forcing the viewer to follow a magnified cursor across the entire desktop.
Practical rule: If the user needs to read for minutes, favor stable layout and persistent settings. If the user needs to point at one control for seconds, favor a temporary lens or editorial zoom.
Windows Magnifier Setup and Shortcuts
Windows Magnifier is a system-level feature, so it can enlarge content across applications instead of changing the zoom setting inside one browser or document. Open Settings > Accessibility > Magnifier, review the startup and view preferences, and turn Magnifier on. You can also launch it immediately with Windows key + Plus (+), then close it with Windows key + Esc.
The view determines how much context survives. Full-screen view enlarges the entire desktop and works well for reading documents, reviewing code, or supporting someone with low vision. Lens view follows the pointer inside a movable magnified region, which makes it a strong choice for live demos because the audience can still see the surrounding interface. Docked view reserves an area at the top of the screen for magnification, making it useful during video calls when you want the shared workspace to remain stable.
Core controls
The shortcut table below focuses on the commands that matter during support sessions and presentations.
| Shortcut | Action | Best for |
|---|---|---|
| Windows key + Plus (+) | Launch Magnifier and enlarge the view | Starting a live demo quickly |
| Windows key + Minus (-) | Reduce magnification | Restoring context without closing Magnifier |
| Windows key + Esc | Close Magnifier | Returning to the normal desktop |
| Ctrl + Alt + mouse scroll | Adjust zoom while pointing at an area | Fine inspection with a mouse |
| Ctrl + Alt + D | Switch to docked view | Screen sharing and stable workspaces |
| Ctrl + Alt + L | Switch to lens view | Demonstrations and localized inspection |
| Ctrl + Alt + F | Switch to full-screen view | Reading and maximum enlargement |
| Ctrl + Alt + I | Invert colors | High-contrast review and visual comfort |
Microsoft also documents Windows key + Ctrl + M for opening Magnifier settings, Ctrl + Alt + Minus (-) for returning to 1x magnification, and Ctrl + Alt + Spacebar for a temporary full-screen reveal in its Windows accessibility keyboard shortcut guidance.
Pin Magnifier to the taskbar if you support colleagues regularly. Check high-DPI display settings too. A display resize may require signing out before the new scale takes effect, and that delay can look like a failed zoom configuration. Magnifier can also retain per-app zoom behavior, so test the target application rather than assuming one setting represents every window.
macOS Accessibility Zoom and Gestures
macOS puts screen enlargement under System Settings > Accessibility > Zoom. Enable the input methods you’ll use, including keyboard shortcuts, scroll gestures, or hover text. The keyboard option needs to be turned on before the shortcuts work, a setup detail that causes many failed support calls.
Apple’s current workflow uses Option + Command + 8 to toggle zoom, Option + Command + Equal Sign (=) to enlarge, and Option + Command + Minus (-) to reduce it. Apple documents additional controls for trackpad and scroll-based magnification in its Mac Zoom accessibility guide. Because older third-party articles may show different modifier keys, check the active macOS settings instead of copying a legacy combination.
Choose the view that preserves your context
macOS offers several visual treatments. Full-screen zoom enlarges the complete display, which helps during sustained reading. Picture-in-picture places a magnified window over the workspace, a useful compromise when you need to inspect a button without losing the surrounding layout. Split-screen zoom dedicates part of the display to the enlarged content and leaves the rest available for navigation.
The three-finger trackpad gesture is excellent for quick inspection while editing an image, reviewing a spreadsheet, or checking a small control. Keyboard shortcuts are better for long reading sessions because your hands stay on the keyboard. Scroll-based zoom keeps the pointer as the inspection center, while hover text enlarges UI elements on demand without changing the underlying layout.
| Control | Behavior | Best for |
|---|---|---|
| Option + Command + 8 | Toggle Zoom on or off | Temporary inspection |
| Option + Command + Equal Sign (=) | Increase magnification | Keyboard-driven reading |
| Option + Command + Minus (-) | Decrease magnification | Regaining surrounding context |
| Three-finger double-tap | Toggle trackpad zoom | Fast visual checks |
| Modifier key + scroll | Zoom around the pointer | Detailed UI inspection |
| Hover Text | Enlarge an element under the pointer | Reading labels without changing layout |
| Keyboard, trackpad, or scroll settings | Select the preferred input method | Repeated personal workflows |
Smooth image rendering can make enlarged graphics easier to inspect, but it may trade some responsiveness for visual quality. Flash-screen behavior can make a zoom transition obvious during demonstrations, although some users find it distracting. External displays can retain zoom settings separately from the built-in screen, so configure and test both before presenting.
iPhone and iPad Zoom Options
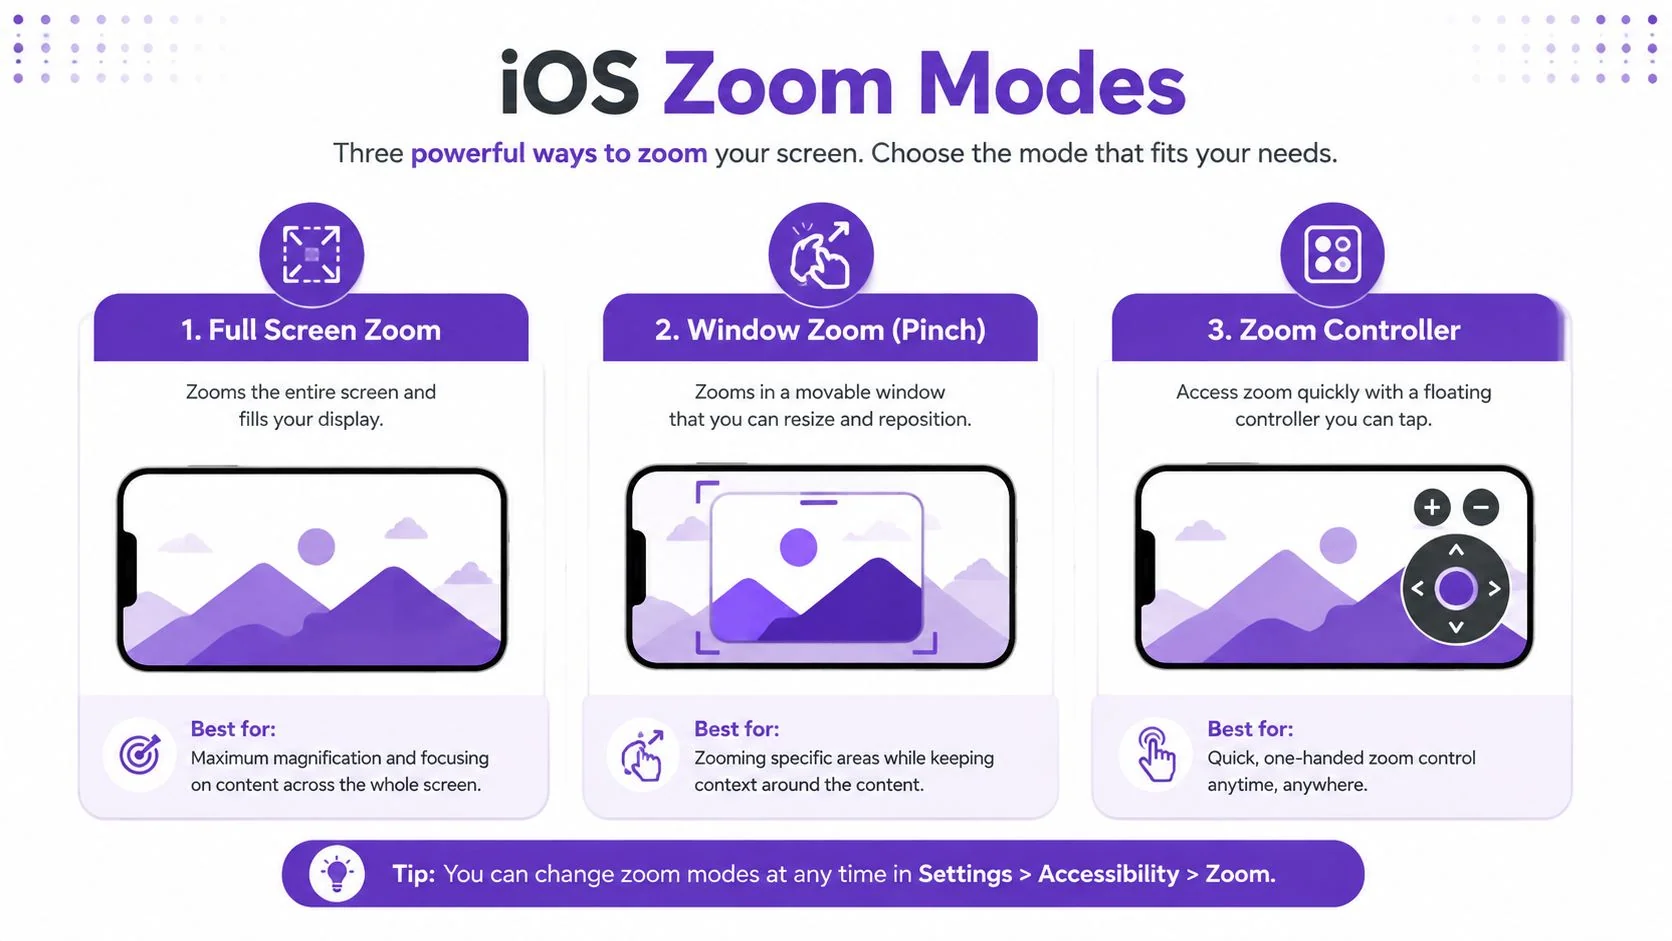
iPhone and iPad provide three useful Zoom modes: Full Screen Zoom, Window Zoom, and the Zoom Controller. Go to Settings > Accessibility > Zoom, turn Zoom on, and choose the mode that matches the task. Full Screen Zoom is effective for reading because the entire display enlarges, while Window Zoom keeps a movable magnified region over the normal interface.
The standard three-finger gesture toggles magnification on or off. A three-finger triple-tap opens Zoom controls, and a two-finger double-tap followed by a drag changes the magnification level. On iPad, a connected mouse or trackpad can provide more controlled movement, and the Zoom Controller can remain visible for direct access to the available controls.
Make the lens fit the way you hold the device
Window Zoom is usually better than full-screen magnification inside a dense app. You can move the window over a label or form field, inspect it, and still see the navigation around it. On iPad, drag the Zoom Controller toward the thumb zone so it doesn’t cover the content you’re trying to read. Pair Zoom with Display & Text Size > Larger Text when a document needs both larger typography and a temporary magnifier.
Full Screen Zoom wins for sustained reading, especially when the interface itself is not important. Window Zoom wins for navigation, forms, maps, and apps where you must understand the relationship between the enlarged control and nearby controls.
The iPhone speech-to-text for meetings resource from iScribe Live Transcribe can also help users who are adjusting visual and listening workflows together, particularly when a meeting requires readable on-screen content and a written record.
Browser and Document Zoom Essentials
Browser zoom deserves its own decision lane because it changes the page rather than just enlarging a crop of the desktop. Use Ctrl + Plus (+) to enlarge, Ctrl + Minus (-) to reduce, and Ctrl + Zero (0) to restore the browser’s default. On macOS, use Cmd instead of Ctrl. Ctrl or Cmd plus the mouse wheel offers a pointer-driven alternative, although trackpad scrolling can make accidental changes easier.
Chrome, Firefox, and Safari expose zoom through their menus, but the labels and placement vary. Look under the browser’s main menu or View > Zoom, then check whether the browser has stored a site-specific preference. Per-site zoom is useful when one news site needs enlargement but your other everyday pages already fit comfortably.
The important accessibility benchmark is reflow. W3C guidance says text should remain readable at 200% zoom, and at 400% browser zoom content should reflow into a single column so users don’t need to scroll in more than one direction. W3C’s low-vision accessibility research explains the technical expectation behind these milestones.
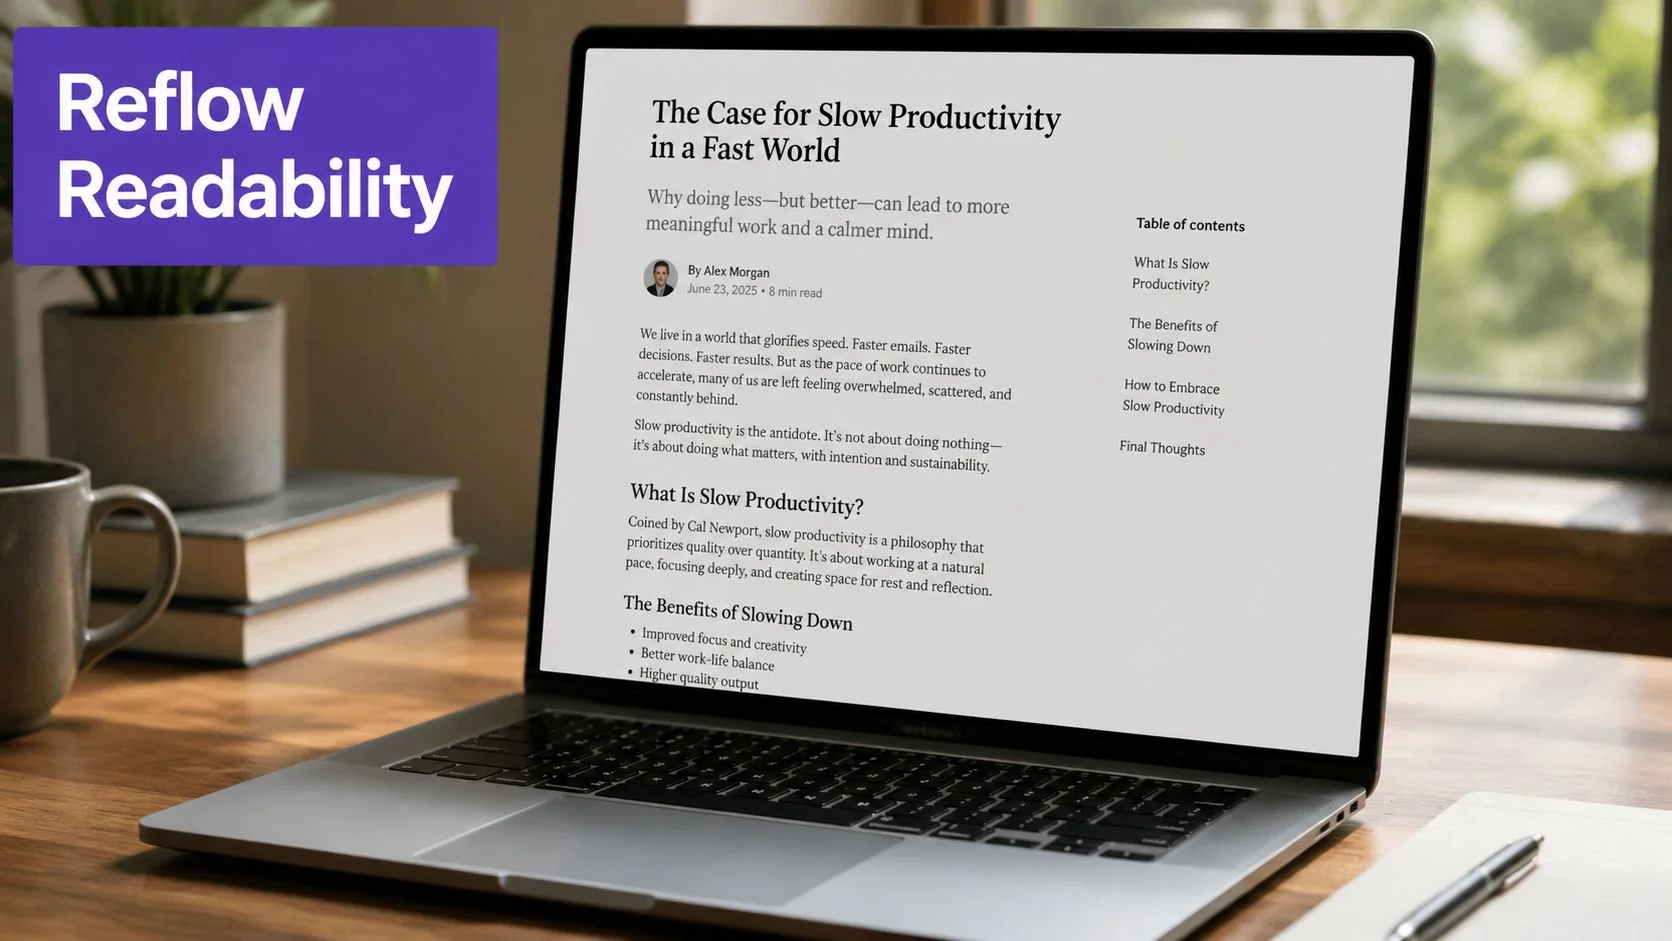
Documents need a layout check
Word, Google Docs, and PDF readers each have their own document zoom. That distinction matters because headers, footers, tables, side panels, and page boundaries may respond differently from a web page. A document zoom level can make text easier to inspect without changing the exported file, while browser zoom changes how a web application presents its interface.
For spreadsheets, app-specific zoom often beats full-screen magnification because you need to see row and column relationships. The same principle applies to zooming in Google Sheets, where preserving the surrounding grid can matter more than making one cell enormous.
Browser zoom usually preserves responsive layouts, but fixed-width sites can still create horizontal scrolling or clipped controls. If a page becomes awkward, reset the browser zoom, try the site’s own text-size controls, or switch to a system magnifier for a temporary inspection.
Smart Zoom in Screen Recordings and Tutorials
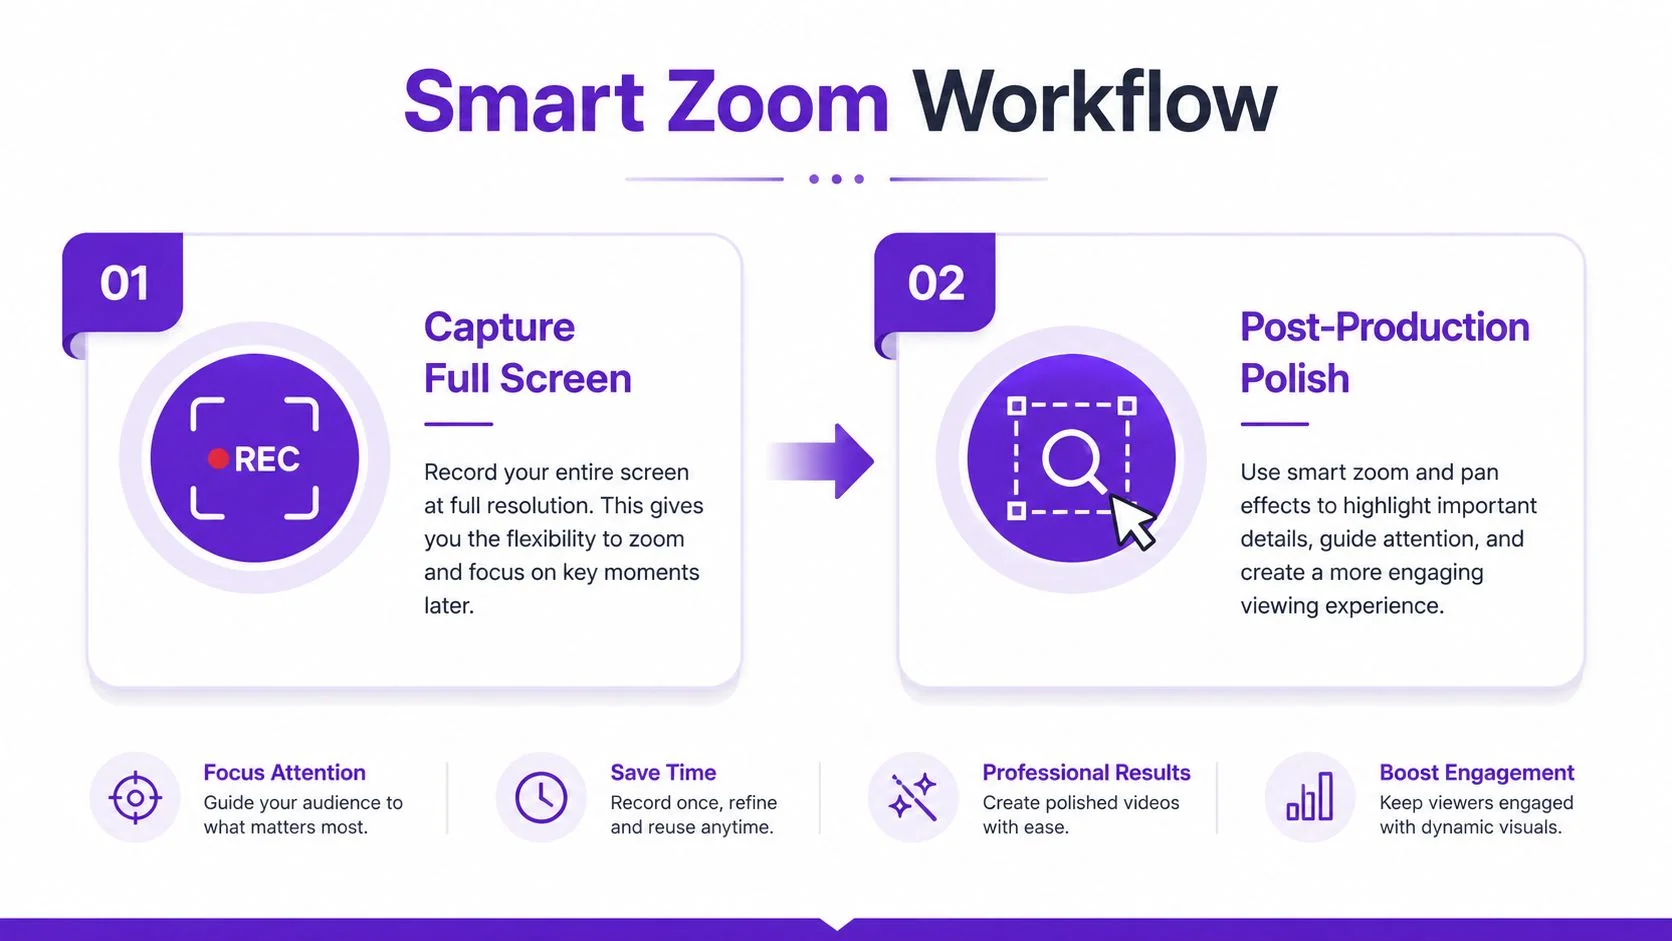
A tutorial has two zoom decisions. The first happens during capture, when the presenter chooses how much of the interface to show. The second happens in post-production, when the editor focuses attention on a button, field, menu, or cursor pause. Treating those as separate decisions lets you record the full workflow once and refine the viewer’s focus without reshooting.
Tutorial AI turns a single screen recording and spoken narration into a polished tutorial video with the visual finish associated with Adobe Premiere Pro. It also generates a matching written article from the same recording, allowing teams to produce a video and help article in one workflow. That supports product demos, feature release videos, customer onboarding, help-center videos, support article videos, internal training, SOPs, sales enablement walkthroughs, and similar screen-led instruction.
Capture context, then focus the interaction
Start with the complete workflow visible. Don’t crop so tightly that viewers lose the navigation path or wonder which application they’re watching. After recording, smart zoom can enlarge the area around clicks or cursor pauses, while manual keyframes give you control when an automated focus lands too early, too late, or on the wrong nearby element.
Layering improves comprehension. A cursor highlight shows where the presenter is pointing, a click ring confirms the interaction, and a click sound effect can reinforce the moment for viewers who are following through a busy interface. The zoom should arrive smoothly and leave enough context for the next action. TechSmith’s screen-recording guidance recommends animated zooms for smoother movement and warns that excessive enlargement reduces image quality, especially when the final video is smaller than the original capture. Its screen-recording editing guidance explains that trade-off.
Editing rule: Zoom to explain a decision, not to decorate a transition.
Use the Tutorial AI zooming documentation when you need to adjust zoom timing and positioning, then review the result at the size your audience will watch. Teams comparing screen-recording patterns may also find this Loom design breakdown useful for thinking about cursor movement, framing, and visual hierarchy.
Bake zoom into the capture when the presenter must demonstrate a physical gesture, a tiny control that won’t survive scaling, or a live audience interaction. Add it in the editor when the target area may change, when several outputs need different framing, or when you want one recording to serve a help article, onboarding video, and internal SOP. Tutorial AI’s AutoRetime, Brand Kits, multilingual narration in 74 languages, Multilingual Player, cursor effects, document generation, and enterprise controls such as SSO, SAML, SOC 2, and GDPR support can fit into that broader publishing workflow, but the zoom decision remains editorial: preserve context first, then direct attention.
Troubleshooting Quick Fixes and FAQ
Start with the least disruptive reset. If Magnifier or browser zoom looks blurry, return to 100%, check GPU or hardware-acceleration settings, then apply the zoom again. A browser restart can help after changing hardware acceleration, while a system-level Magnifier may remain sharper when the browser’s own scaling produces a poor result.
If zoom resets after a reboot, check whether Magnifier or Accessibility Zoom is enabled for startup or sign-in. On macOS, confirm the selected keyboard, trackpad, or scroll trigger under Accessibility > Zoom. If a trackpad pinch gesture doesn’t respond, check Zoom’s gesture settings rather than Hover Text, because those are separate features.
iPhone zoom jitter often comes from Reachability and Zoom responding to overlapping gestures. Move the Zoom Controller away from the active control, disable the conflicting Reachability behavior temporarily, and test Window Zoom with a deliberate two-finger gesture.
Four questions that come up repeatedly
Why does Ctrl + 0 restore the default size only inside one app?
Browser and document zoom are often scoped to the active application. Ctrl + 0 resets that app’s zoom state, not Windows Magnifier or macOS Accessibility Zoom. If the entire desktop remains enlarged, turn off the system magnifier separately.
How do I zoom only one monitor on Windows?
Use a lens or docked Magnifier view and position it on the display you’re presenting. Full-screen Magnifier is less suitable when viewers need to compare two monitors because it changes the visual treatment across the workspace.
Does browser zoom break responsive layouts?
Usually not when the site supports reflow. Fixed-width layouts can still clip controls or introduce horizontal scrolling, so reset the site zoom and use a system lens when you need temporary enlargement without changing the page layout.
What’s the fastest way to teach a coworker the shortcuts?
Write the launch, reduce, and close commands on a sticky note next to the keyboard, then demonstrate the exact view mode they’ll use. People remember a short action sequence better when it’s attached to a real task, such as enlarging a menu during a support call.
The fastest fix is rarely “zoom further.” It’s choosing the right layer, browser, document, application, operating system, or recording editor, then restoring context before the interface becomes harder to use.
Tutorial AI lets you record a full screen workflow with spoken narration, apply smart zoom and cursor effects after capture, and generate a matching help article from the same recording. Visit Tutorial AI to turn clear on-screen demonstrations into focused tutorials, support videos, and documentation without building the edit manually.