You’re looking at a half-finished Google Doc, your wrists are tired, and the next paragraph is already clear in your head. Instead of typing it letter by letter, you can speak and watch Google Docs turn your words into text. That’s the basic idea behind voice typing, but the setup differs sharply between a computer and a phone.
On a desktop, Google Docs has a built-in Tools > Voice typing feature. On Android and iPad, the Docs app doesn’t provide that same standalone tool. You’ll use your device keyboard’s microphone instead. This guide covers both paths, along with English-only commands, punctuation, microphone problems, mid-session dropouts, and ways to use dictation when you’re drafting process documentation.
What Voice Typing in Google Docs Actually Does
Google Docs voice typing is a built-in speech-to-text feature. It listens through your microphone and places the recognized words directly into the document while you speak. Google first introduced voice typing in Google Docs publicly in September 2015, with launch coverage describing support for 40 languages at release. Google’s current Help documentation lists a much broader range of languages and accents, including regional English variants and languages such as Arabic and Chinese, so the feature has grown into a multilingual input method rather than an English-only dictation tool (Google Docs voice typing Help).
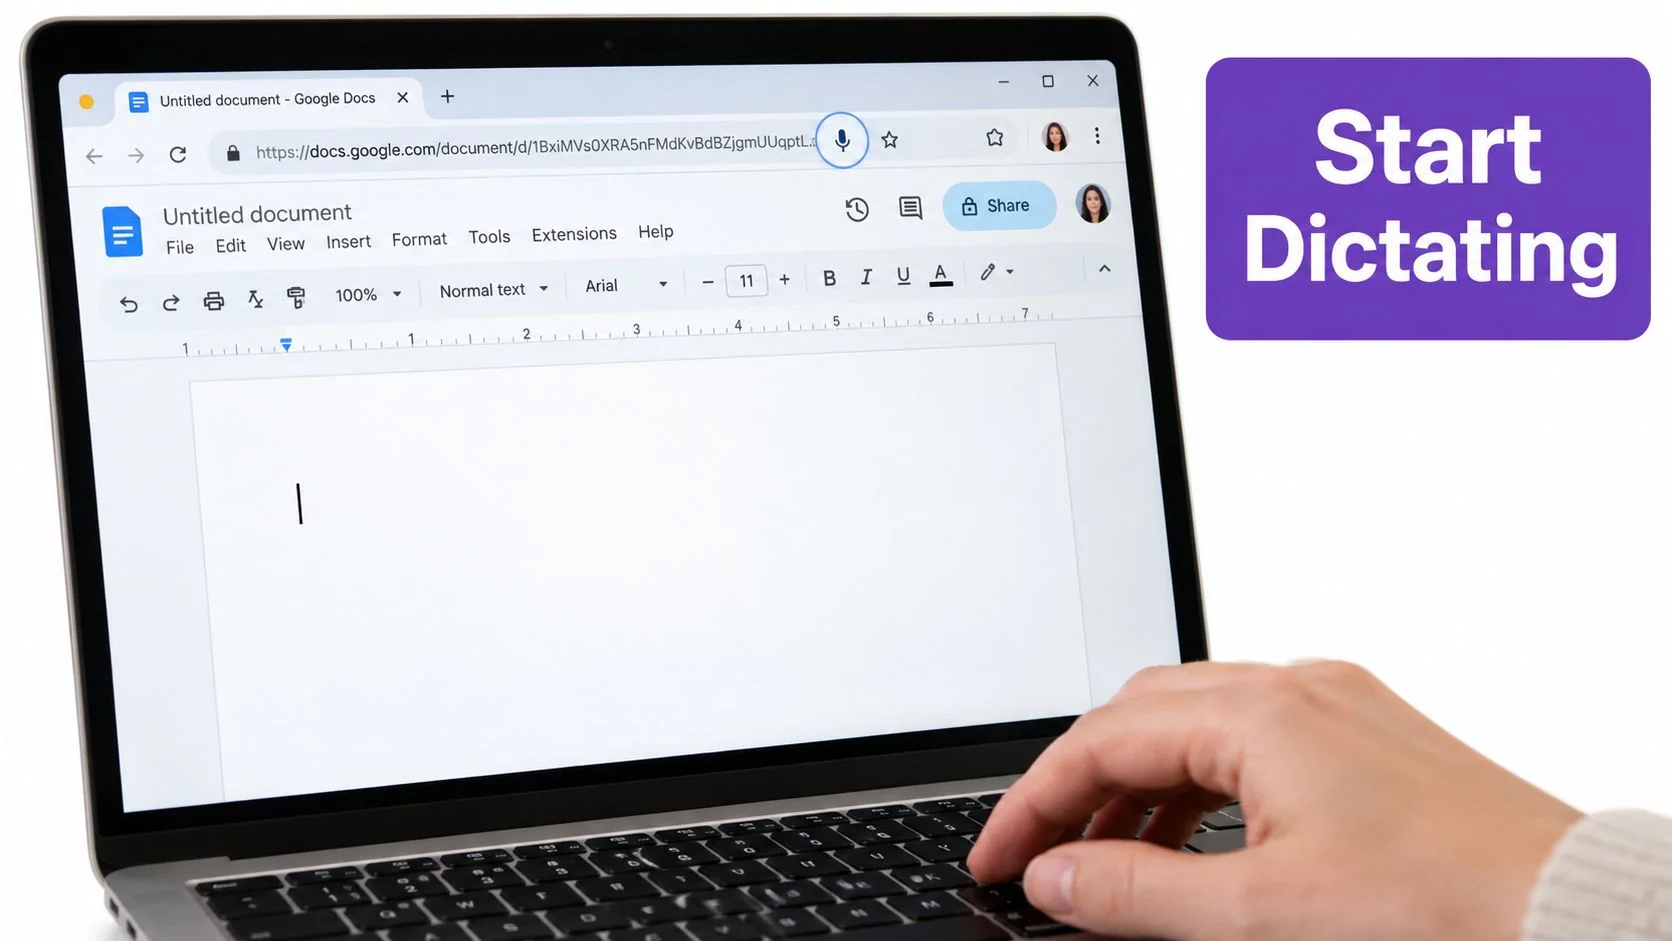
The full Docs voice typing tool is intended for desktop use in a supported browser. On a computer, you open the document, select Tools > Voice typing, and click the microphone icon. The icon switches into a listening state, and your text appears as you dictate. Click it again when you’re finished.
Important distinction: Dictation can support many languages, but voice commands remain limited to English.
That distinction causes confusion for bilingual users. You may dictate content in a supported language, yet still need to say commands such as “new paragraph,” “bold,” or “delete last word” in English. Punctuation behavior and editing commands also work best when you pause briefly and speak clearly.
Voice typing is useful for drafting an article, capturing meeting notes, or getting an outline out of your head before you polish it. If you need to turn recorded speech into text outside Docs, a resource on transcript extraction via API can help you think about transcription as part of a broader documentation workflow. For ideas on combining voice input with drafting support, see this guide to using AI to assist your writing in Google Docs.
Enabling Voice Typing on Desktop Chrome
Start with a Google Docs file open in Google Chrome on your Windows, Mac, Linux computer, or Chromebook. Sign in to the Google account that has access to the document, then click inside the document where you want the dictated text to appear.
Open the tool and allow the microphone
- Click Tools in the top menu.
- Choose Voice typing.
- Look for the floating microphone icon beside the document.
- Click the microphone once.
- If Chrome asks for permission, choose Allow.
Google’s documented workflow is to open a document, choose Tools > Voice typing, grant microphone access, and then click the microphone to dictate (Google’s official setup guidance). The permission prompt usually appears the first time the site tries to use your microphone. If you accidentally block it, you can change the setting from the microphone or camera icon in Chrome’s address bar.
You can also open voice typing with a shortcut. Use Ctrl+Shift+S on Windows or Command+Shift+S on Mac. If the shortcut doesn’t work, use the Tools menu, since browser or operating-system shortcuts can sometimes conflict with other commands.
Dictate your first sentence
Click the microphone again after permission is granted. When the icon turns red, Google Docs is listening. Say a simple test sentence, such as:
This is my first dictation in Google Docs.
The words should appear in the document as you speak. Keep your voice at a normal volume and pace rather than shouting or whispering. A small help prompt near the microphone provides starter commands, and clicking the red microphone stops recording.
The feature is desktop-only in Google’s official documentation. Browser support has expanded beyond its original Chrome-only scope in some independent guidance, but Chrome remains the clearest setup path and the one to try first when troubleshooting.
Voice Commands for Punctuation and Editing
Voice typing becomes much more useful once you stop treating it as a simple record button. You can speak punctuation, control paragraph breaks, select text, and apply basic formatting. Use a short pause before a command so Google Docs can separate the words you want written from the instruction you want performed.
| Job | Say this | What it does |
|---|---|---|
| Punctuation | “period” | Inserts a full stop |
| Punctuation | “comma” | Inserts a comma |
| Punctuation | “question mark” | Inserts a question mark |
| Punctuation | “exclamation point” | Inserts an exclamation point |
| Punctuation | “colon” or “semicolon” | Inserts the selected punctuation |
| Parentheses | “open parenthesis” or “close parenthesis” | Adds parentheses |
| Capitalization | “capitalize” | Capitalizes the next word |
| Capitalization | “all caps” | Applies capital letters as directed |
| Structure | “new line” | Starts a new line |
| Structure | “new paragraph” | Starts a new paragraph |
| Indentation | “tab” | Adds a tab |
| Editing | “undo that” | Reverses the latest action |
| Selection | “select last word” | Selects the previous word |
| Selection | “select last paragraph” | Selects the previous paragraph |
| Deletion | “delete last word” | Removes the previous word |
| Cursor movement | “move to end of paragraph” | Moves the cursor |
| Formatting | “bold” or “italic” | Applies formatting |
| Lists | “create bullet list” or “create numbered list” | Starts a list |
| Font controls | “increase font size” or “decrease font size” | Adjusts text size |
| Links and cleanup | “insert link” or “remove formatting” | Opens link insertion or clears formatting |
Try a sentence like this:
Project update, comma, the review is complete, period, new paragraph, next step, colon, schedule the client call, period.
Don’t expect every command to behave perfectly when you speak quickly. Commands are recognized in English, even when the document’s dictation language is another supported language. That means a Spanish paragraph may still require “new paragraph” in English.
For special symbols and less common characters, you may need to switch back to the keyboard. This guide to using special characters in Google Docs is useful when voice commands don’t produce the symbol you need.
Using Voice Typing on Phones and Tablets
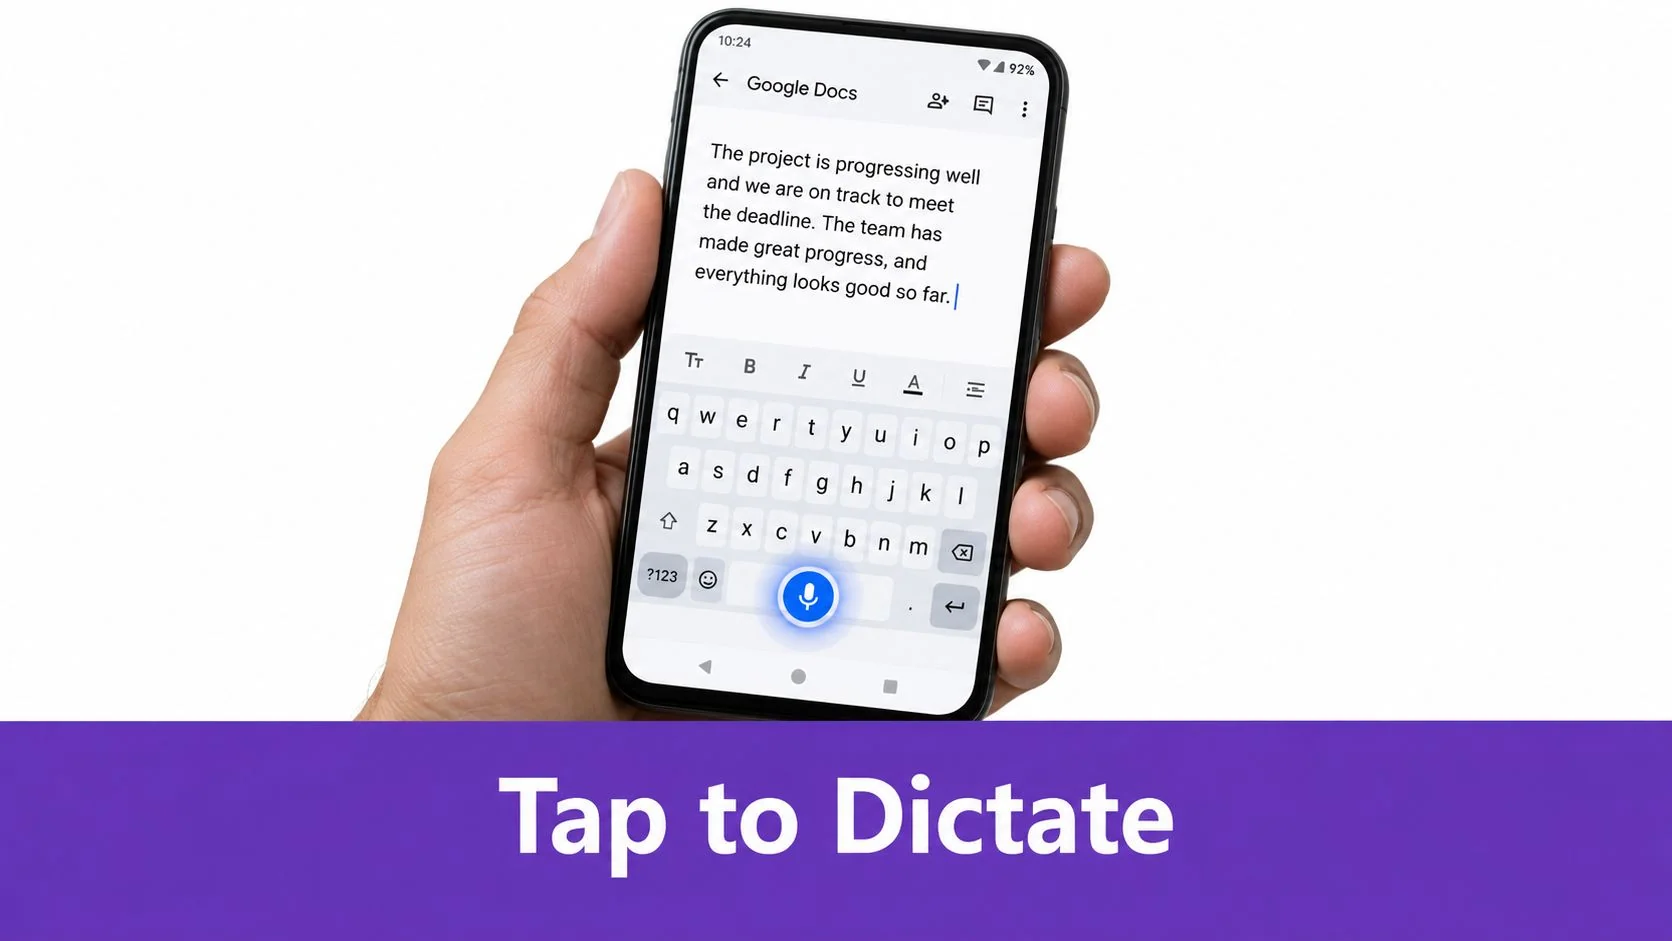
The mobile reality is simple but easy to miss: Google Docs on Android and iPad doesn’t include the same Tools > Voice typing feature used on desktop. The Docs app relies on the microphone built into your device keyboard. You won’t open Tools and find the desktop voice typing panel.
Android setup
Open a document in the Google Docs app and tap the place where you want text to appear. When the keyboard opens, tap the microphone key on Gboard, then speak. If you use Samsung Keyboard or SwiftKey, use that keyboard’s microphone icon instead.
If Gboard isn’t enabled, open your Android settings and look for:
Settings > System > Languages & input > On-screen keyboard
Enable Google voice typing and approve microphone access when Android asks. Menu names can vary by device manufacturer, but the setting is usually under keyboard or input options.
iPhone and iPad setup
On an iPhone or iPad, you can use Apple’s keyboard dictation if it’s enabled. Another option is Gboard. Install Gboard from the App Store, then go to Settings > General > Keyboard > Keyboards > Add New Keyboard and add it. Open the Gboard settings and allow microphone access, then switch to Gboard inside Google Docs and tap its microphone.
Mobile dictation is best for getting words onto the page quickly. Punctuation and editing commands are more limited than on desktop, so expect to adjust paragraph breaks, formatting, names, and punctuation by hand afterward.
Fixing the Most Common Voice Typing Problems
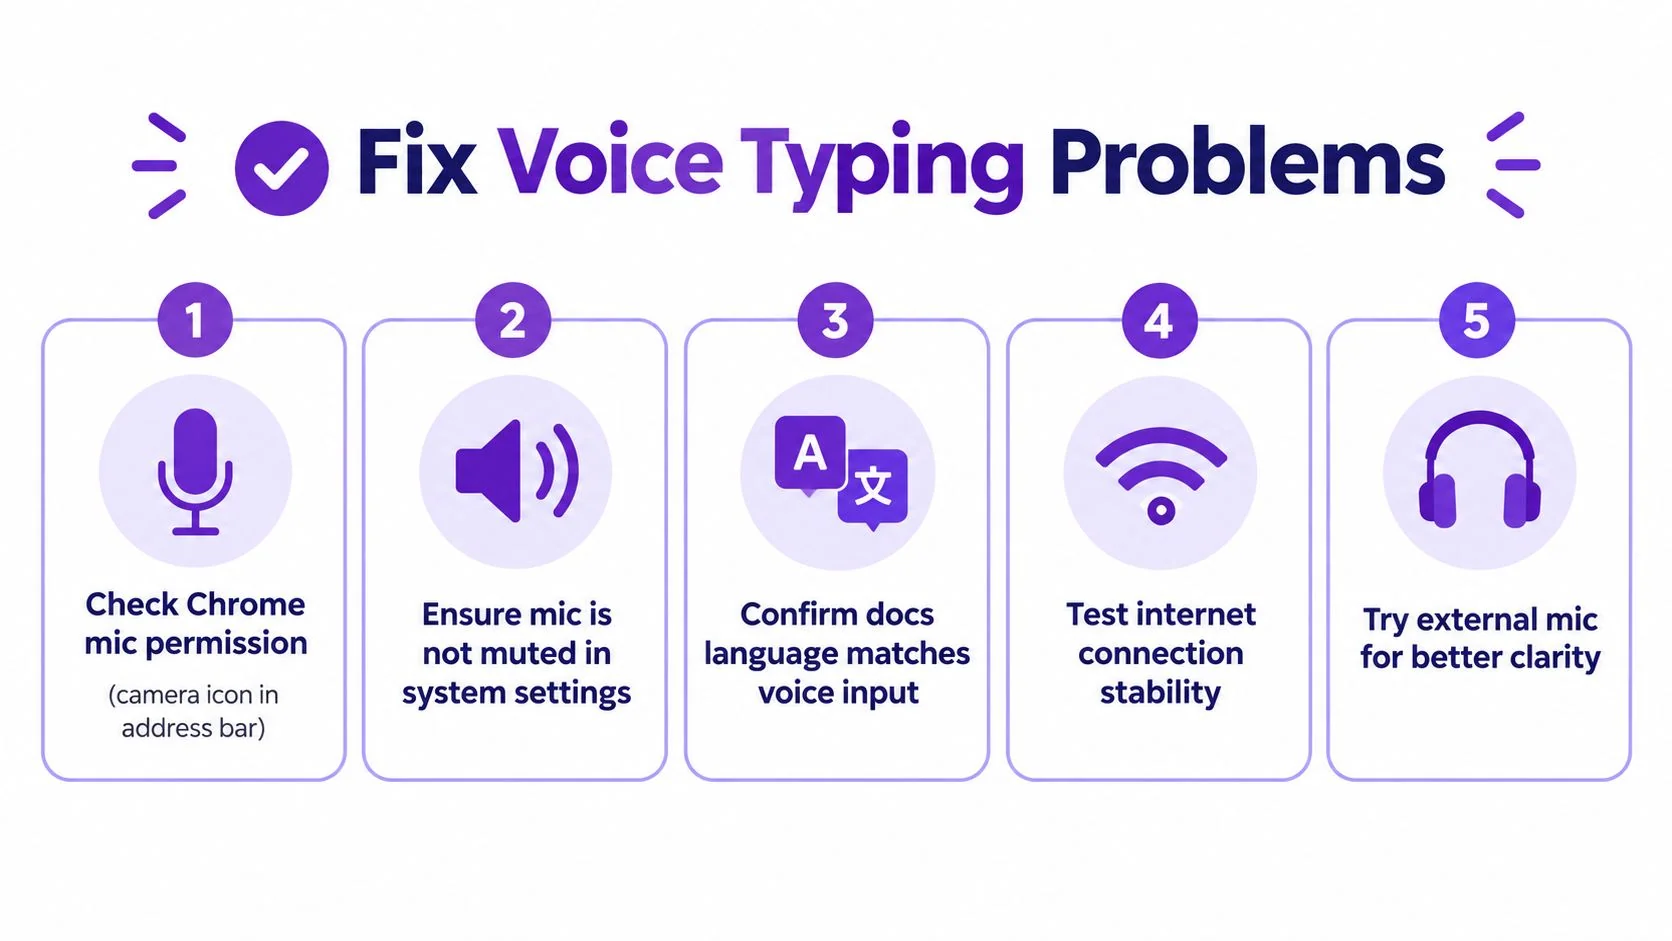
If the microphone is missing or inactive, check permission before blaming the document. In Chrome, click the camera or microphone icon in the address bar and allow Google Docs to use the microphone. Reload the document, then open Tools > Voice typing again. If another application has control of the microphone, close it before retrying.
Browser choice also affects the desktop feature. Google’s instructions focus on supported desktop browsers, and Chrome usually provides the clearest setup. In Firefox or Safari, Tools > Voice typing may be unavailable or behave differently. Chrome on a phone or tablet is another case entirely. Mobile Docs relies on the keyboard’s microphone, not the desktop Voice typing panel.
When dictation stops
Google Docs can stop listening during a long transcription. A classroom dictation study, as discussed in third-party discussion of Google Docs voice typing, found Google Voice Typing performed better than Windows Speech Recognition for native and non-native speakers, while also describing cases where Google stopped mid-transcription. A dropout is therefore a practical interruption, especially during a long passage.
Use this recovery sequence:
- Pause and check the microphone button.
- Click it again if it is not red.
- Wait for the listening indicator.
- Repeat the sentence that was missed.
- Review or save the text before continuing.
Noise, a muted system microphone, switching tabs, or changing permissions can interrupt listening. Move somewhere quieter, close applications that may be using the microphone, and try a headset. Short dictation sessions are easier to check than one uninterrupted recording.
Commands may fail if the language setting does not match your speech. Voice typing supports multiple languages and accents, but formatting and editing commands are English-based. Say commands such as “new paragraph,” “bold,” or “delete that” in English, pause briefly, and then continue dictating. If a command is inserted as text, undo it and repeat it more slowly.
Accuracy Tips and Best Practices for Cleaner Dictation
Treat Google Docs voice typing as a strong first-draft tool, not a finished copy editor. Accuracy usually falls in quiet, predictable conditions and drops noticeably with background noise, strong accents, or technical vocabulary. Proofread names, acronyms, product terms, links, numbers, and proper nouns before sharing the document.
Speak at a steady conversational pace. A quiet room helps the recognizer separate your words. A headset or USB microphone can reduce room echo compared with a laptop’s built-in microphone. Keep the microphone close enough to capture your voice clearly, but avoid speaking directly into it, since breath sounds and harsh consonants may become more noticeable.
Use a repeatable drafting pattern:
- Headings first: Dictate a heading, pause, and check its wording.
- Body second: Speak one idea at a time, using “new paragraph” deliberately.
- Commands last: Pause before saying “bold,” “italic,” or a selection command.
- Proofreading afterward: Check names, abbreviations, numbers, links, and industry vocabulary.
Short pauses work like punctuation for the recognizer. They also give you a chance to notice a misheard word before it gets buried in the next sentence. Leave room for cleanup. Fast dictation can produce a useful draft, but it should not be your final review.
Create a small cheat sheet for commands you use often. Keep it in a document comment or at the bottom of a private reference file. After a few sessions, you’ll remember the commands that fit your writing style.
Beyond Dictation and Documenting Workflows
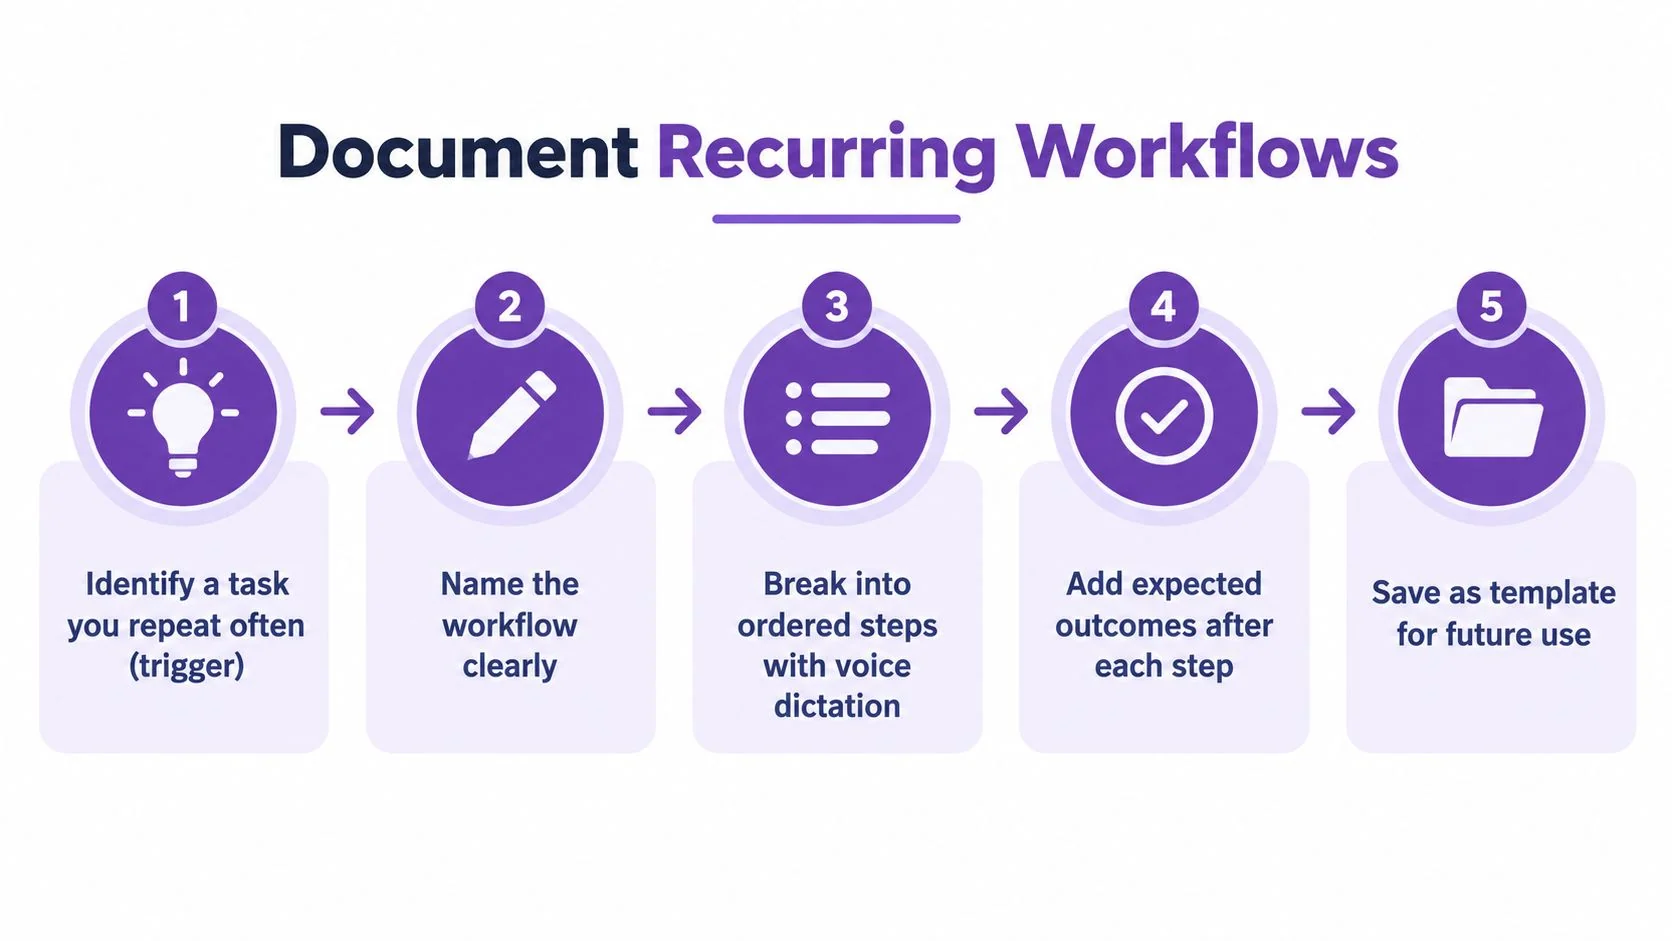
Voice typing helps when the knowledge is already in your head and you need a draft. It’s less suitable when a teammate or customer needs to watch the exact sequence of actions inside a software product. For that work, start by defining the workflow before you record it.
Write down the trigger, the ordered steps, and the tools touched at each stage. For example, an onboarding document might begin when a new hire receives a shared Google Doc, then cover adding a comment, mentioning a teammate, resolving the thread, and checking the final version. Voice typing can help you outline those steps quickly, while a screen recording can show where each control sits.
A practical workflow with Tutorial AI is straightforward: record the software process, let the platform tighten the recording with AutoRetime and editable script controls, review the result, then generate both the tutorial video and written documentation from the same recording. The subject-matter expert records the interface, so viewers can follow the exact clicks instead of watching an abstract avatar presentation. Teams can use the outputs for customer onboarding, internal training, SOPs, support articles, product demos, and knowledge bases.
A Google Docs-heavy team might record how to review a shared folder for a client, or how to manage comments during a content approval process. The resulting video supports visual learners, while searchable documentation gives experienced users a faster way to scan the steps. For related document workflows, see this guide to generating documents in Google Docs with Gemini AI.
Pair voice typing for fast drafting with recorded tutorials for repeatable software tasks. Dictate the outline, perform the workflow once on screen, review the generated script and documentation, and publish the format each audience prefers.
Tutorial AI turns a screen recording and narration into a polished tutorial video, then generates matching written documentation from that same recording. Visit Tutorial AI to record a Google Docs workflow once and create a shareable video and step-by-step guide for onboarding, training, or your knowledge base.