You’re about to record a software demo. The product is ready, the flow is clear, and then the recorder asks one annoying question: 24, 30, or 60 FPS?
That dropdown looks simple, but it affects whether your viewer can follow what you’re doing. In tutorials, frame rate isn’t a film-school detail. It changes how clearly people can track cursor movement, read UI transitions, and understand each step without replaying the video.
Most advice about how many frames per second to use falls into two camps. One side talks about cinema. The other talks about gaming. Neither is especially helpful when you’re making product demos, feature release videos, customer onboarding, help-center videos, support article videos, internal training, SOPs, or sales enablement walkthroughs.
For instructional content, the key question isn’t “What looks cinematic?” It’s “What helps someone follow the interface without friction?” That’s the standard that matters.
Why Choosing Your Frame Rate Matters
A bad frame rate usually doesn’t fail dramatically. It fails in small ways that make a tutorial feel harder than it should.
You see it when the cursor jumps instead of gliding. You see it when a dropdown opens and the text looks slightly smeared in motion. You see it when a user pauses, rewinds, and watches the same step again because the interface changed faster than the video could show it clearly.
That’s why FPS matters for tutorial creators. It affects comprehension, not just aesthetics.
What viewers actually experience
A subject-matter expert often knows the product so well that the workflow feels obvious. The viewer doesn’t. They’re trying to do three things at once:
- Track the cursor: They need to know where the action is happening.
- Read the interface: They’re parsing labels, menus, and small text in motion.
- Map action to outcome: They’re learning cause and effect, not just watching clicks.
When frame rate is too low for the pace of the recording, each of those tasks gets harder. The result isn’t always “this video looks bad.” More often, it’s “this video feels tiring.”
Practical rule: In software tutorials, smoothness is useful because it protects clarity.
Why generic FPS advice misses the point
Filmmaking guidance often treats lower frame rates as desirable because motion blur can feel natural. Gaming guidance pushes high frame rates for responsiveness and precision. Tutorial recording sits in between, but it behaves much closer to a precision task than a cinematic one.
If you’re recording a UI, your viewer needs to see the actual interface clearly. That’s different from watching a drama scene or playing a competitive match. The best frame rate for tutorials is the one that reduces visual friction during instruction. That single setting does more for perceived polish than many people expect.
What Is Frames Per Second Anyway
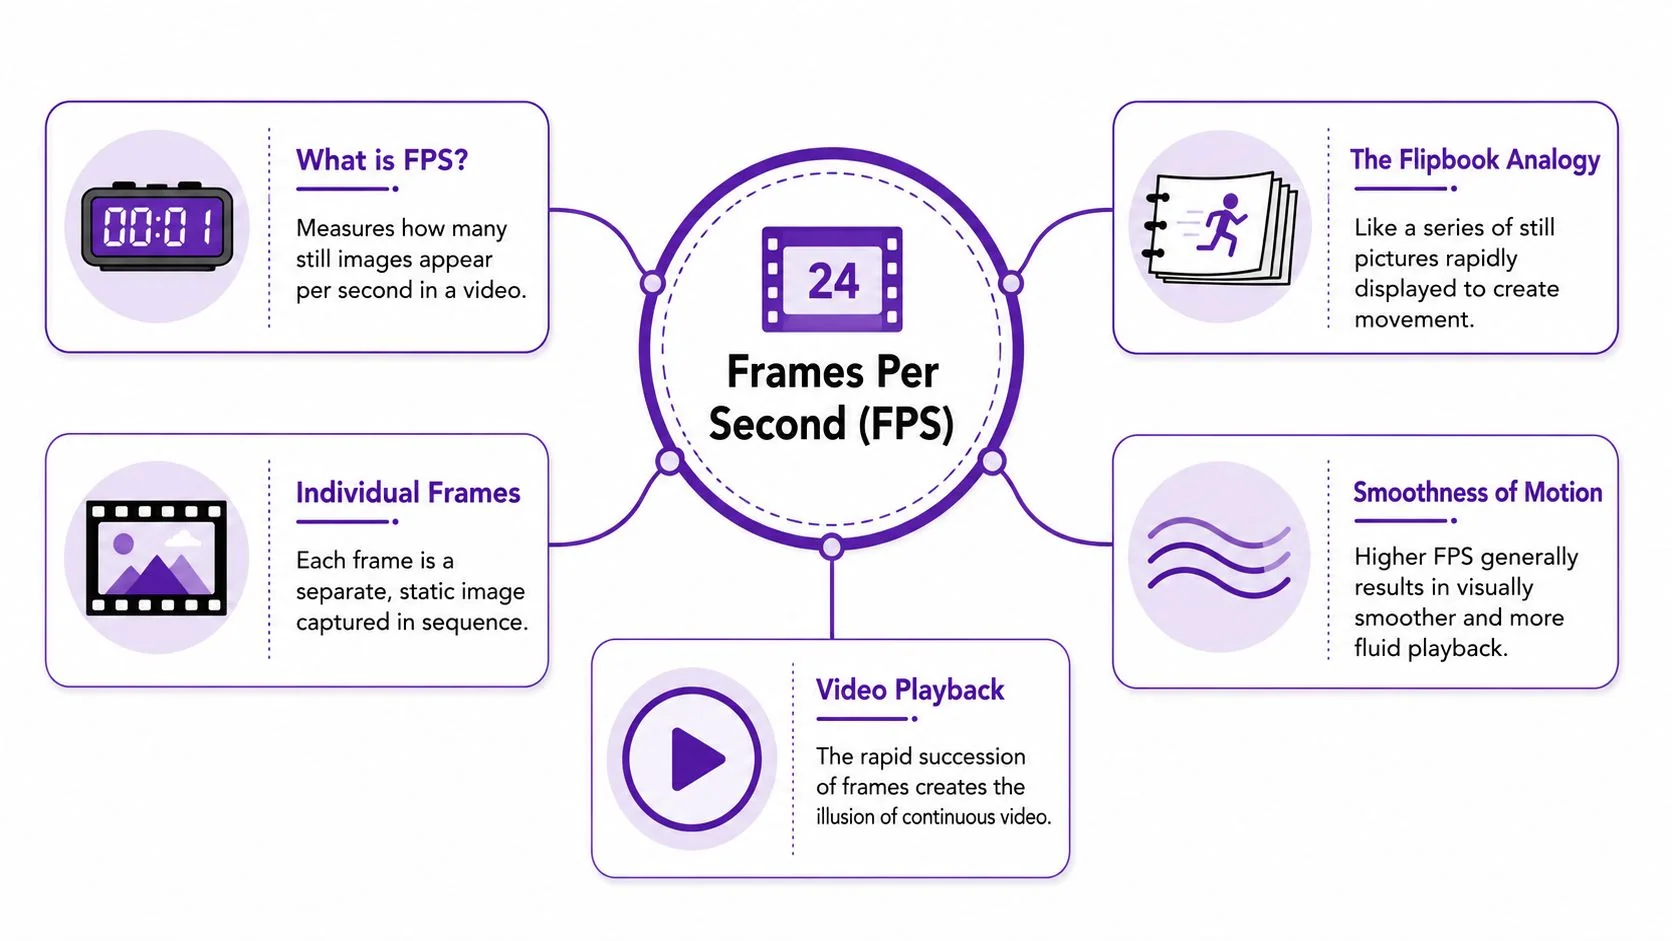
Frames per second, or FPS, is the number of still images shown each second in a video.
The easiest way to think about it is a flipbook. Each page is a static image. Flip the pages fast enough, and your brain sees motion. Video works the same way. More frames in each second generally means motion looks smoother because the gaps between images are smaller.
The flipbook model
A screen recording isn’t one continuous moving object. It’s a rapid sequence of frames:
- Each frame is a single snapshot.
- Playback speed determines how those snapshots appear over time.
- Motion quality depends on how much change happens between one frame and the next.
When the cursor moves quickly across a dashboard, a low frame rate leaves bigger visual jumps between positions. When a panel slides open or a menu animates, those gaps become easier to notice.
This visual lays out the concept clearly:
Why 24 FPS became the default people remember
A lot of confusion starts with cinema. In 1929, the film industry standardized 24 frames per second for motion pictures because synchronized sound required it. Before that, silent films ran at variable speeds ranging from 16 fps to about 24 fps. 16 fps had functioned as the unofficial standard because it balanced smooth motion with film cost, but sound systems pushed the industry to lock in 24 fps as the workable compromise for audio sync and image playback, as noted in this history of 24 fps in cinema.
That matters because people still treat 24 fps as if it’s the universal “correct” frame rate. It isn’t. It’s a legacy standard that came from technical constraints in film production.
FPS is not the same as resolution
People often mix up frame rate with resolution. They’re different settings.
| Setting | What it controls | Tutorial impact |
|---|---|---|
| FPS | How many images appear each second | Smoothness of cursor and UI motion |
| Resolution | How many pixels are in each frame | Sharpness of text and interface details |
A crisp 4K recording at the wrong frame rate can still feel choppy. A smooth recording at the wrong resolution can still make text hard to read. You need both settings working together. If you want a broader practical view of how recording settings fit together, this guide to video specs for YouTube is useful.
Comparing Common Frame Rates 24 vs 30 vs 60 FPS
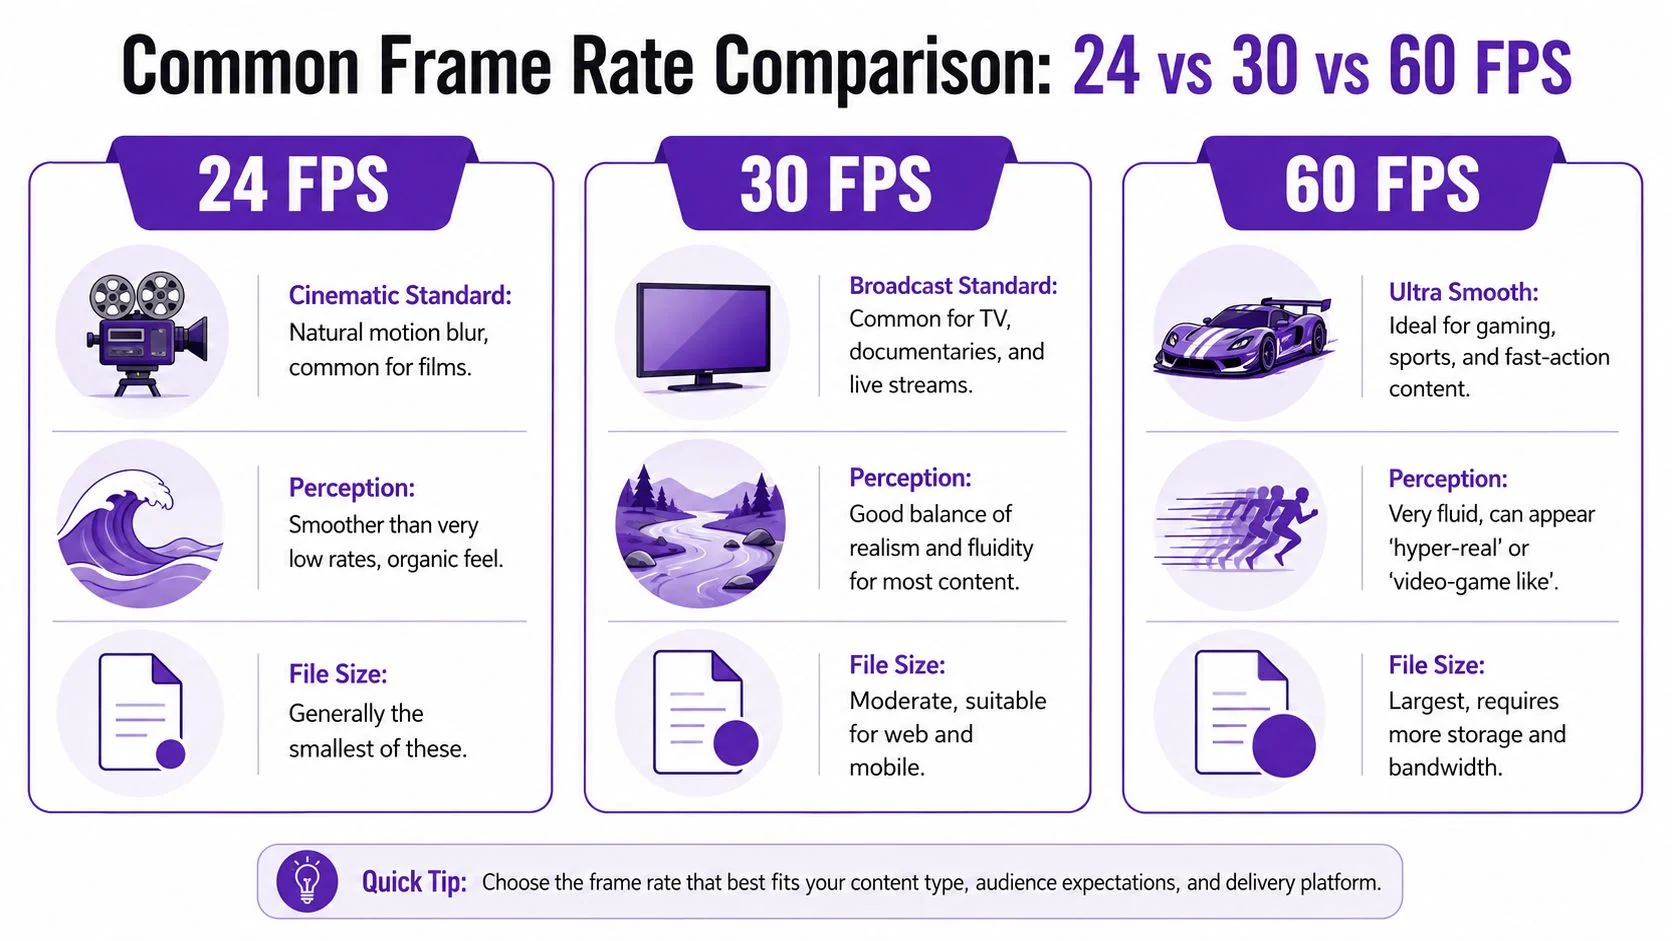
For tutorial work, the meaningful comparison is 24 vs 30 vs 60 FPS. These aren’t just numbers in a menu. They create different viewing conditions.
24 FPS and the cinematic look
24 FPS works when storytelling is the priority. It carries the visual cadence people associate with film, and that can be appealing in brand videos or narrative product trailers.
For software tutorials, though, 24 fps usually creates the wrong trade-off. Cursor motion can feel uneven. Fast UI transitions can look soft in motion. The viewer spends more effort tracking what happened between frames.
That’s acceptable when mood matters more than exact action. It’s weak when the point is to teach a workflow.
30 FPS and the old default
30 FPS has been the practical default for a lot of web video, live video, and simple screen captures. It’s serviceable. For slow walkthroughs with limited movement, it can still be enough.
But “enough” is the issue. In tutorials, you often have:
- quick cursor travel across large monitors
- animated sidebars and modals
- short interactions that depend on timing
- viewers watching on laptops or phones where interface details are smaller
At 30 fps, those moments can still feel slightly rough. Not broken. Just less readable than they should be.
60 FPS and the clarity standard
60 FPS is where tutorial recording starts to feel reliably clean. Motion has less visible stepping. Cursor paths are easier to follow. UI changes are easier to parse at normal speed, which means fewer replays.
There’s a useful parallel from precision-based tasks. Research on competitive gaming found that moving from 30 fps to 60 fps produced a statistically significant 15.8% increase in player performance, and the same research positions 60 fps as a critical benchmark where real-time precision matters. The findings are discussed in this frame rate and performance study. A tutorial viewer isn’t playing a match, but they are doing something similar at a perceptual level: tracking motion, interpreting changes, and responding accurately.
If the task depends on precise visual tracking, higher frame rate helps before anyone talks about “cinematic quality.”
Side-by-side practical trade-offs
| Frame rate | Where it works | Where it breaks down for tutorials |
|---|---|---|
| 24 FPS | Brand storytelling, cinematic promos | Fast cursor movement, UI readability in motion |
| 30 FPS | Simple walkthroughs, slower-paced recordings | Dense interfaces, animation-heavy flows, smaller screens |
| 60 FPS | Product demos, onboarding, support, training | Higher raw file demands, which you need to manage well |
If you want another practical comparison of video frames per second, that resource is a helpful companion because it frames FPS choices in plain production terms.
The Best FPS for Every Kind of Tutorial Video
For instructional content, there’s a practical sweet spot. It’s usually 60 FPS.
That recommendation doesn’t come from gamer culture or production snobbery. It comes from what tutorials ask viewers to do. They’re following a cursor, reading small interface text, and interpreting software behavior in motion. Those are clarity problems.
One reason the old “30 fps is enough” advice feels weak is that the visual system can perceive changes well beyond that threshold. The human eye can perceive visual changes up to 200+ FPS, and for SaaS demos where viewers need to track cursor actions quickly, 30 fps often introduces motion blur that obscures steps and increases cognitive load in ways 60 fps can prevent, as discussed in this article on how many frames per second the human eye can see.
Recommended FPS for tutorial videos
| Video Type | Recommended FPS | Why |
|---|---|---|
| Product demos | 60 FPS | Demos often include animated UI, fast navigation, and moments where polish affects trust. |
| Feature release videos | 60 FPS | New features need clear visual proof. Smooth motion helps the viewer see what changed. |
| Customer onboarding | 60 FPS | Early learning benefits from easy-to-follow cursor movement and cleaner transitions. |
| Help-center / knowledge-base videos | 60 FPS | Support content should minimize replay friction, especially on dense workflows. |
| Support article videos | 60 FPS | Short, task-based clips work best when each click is easy to track. |
| Internal training | 60 FPS in most cases, 30 FPS if the workflow is very slow and file constraints dominate | Training often covers real tools with real movement. Slow SOPs can sometimes tolerate 30. |
| SOPs | 60 FPS for software procedures, 30 FPS as a fallback for static admin tasks | SOPs are often reviewed repeatedly, so clarity matters more than cinematic feel. |
| Sales enablement walkthroughs | 60 FPS | Reps need to understand both product flow and positioning moments without visual ambiguity. |
When 30 FPS is still acceptable
There are cases where 30 FPS can be a reasonable fallback:
- Static screens: A mostly verbal explanation over a dashboard with minimal movement.
- Extreme bandwidth limits: When distribution constraints matter more than motion quality.
- Low-priority internal reference videos: Quick recordings where perfect polish isn’t required.
Even then, I’d treat 30 fps as a constraint decision, not the ideal. If the viewer needs to follow active software behavior, 60 fps is the safer choice.
The decision rule that holds up
A simple way to decide is this:
Record at 60 FPS when the viewer needs to follow movement. Drop to 30 FPS only when the screen is mostly static and the delivery constraint is more important than motion clarity.
If you’re also planning the broader structure of an instructional video, Direct AI’s video making guide is a useful reference for aligning recording choices with teaching goals.
Managing File Size Bandwidth and Motion Blur
The biggest objection to 60 FPS is usually file size. That concern is real, but it’s often framed too narrowly.
A higher frame rate produces a heavier raw recording than a lower one. But final delivery size and usability depend on more than FPS. Duration matters. Resolution matters. Export choices matter. Most of all, a tight video usually serves viewers better than a long one, regardless of the capture setting.
Shorter wins over merely smaller
A common mistake is optimizing the wrong variable. People lower FPS to keep files light, then leave in every pause, restart, and dead section. The result is a smaller-quality video that still feels slow.
Casual recorders also tend to encourage that pattern. Recordings often run 50–100% longer than needed because of rambling, pauses, and retakes. A tighter cut has a bigger effect on final usefulness than shaving motion quality down too early.
If file size is your recurring bottleneck, this practical guide on how to reduce video file size is worth bookmarking.
Motion blur is the hidden problem
Frame rate doesn’t work alone. Motion rendering also depends on shutter behavior, a detail that screen recording advice often skips.
Nearly all “how many frames per second” content ignores the relationship between frame rate and shutter speed or shutter angle. For tutorials with fast mouse movement, incorrect settings at 60 fps can create either strobing or smeared cursor trails, which directly hurts clarity, as explained in this piece on frame rate and shutter angle.
For tutorial creators, that matters because the usual cinematic goal is not your goal. Film often wants natural-looking blur. Screen tutorials usually need the opposite. You want motion that stays readable.
What works in practice
Here’s the practical hierarchy I use for screen-recorded instruction:
- Prioritize readable motion: A crisp cursor path matters more than a cinematic feel.
- Cut duration aggressively: Dead air adds weight and weakens pacing.
- Match settings to the interface: Fast-moving software benefits more from 60 fps than static admin screens.
- Export for delivery, not archive: Keep your master if needed, then compress for actual viewing environments.
The right setup isn’t “highest quality at all costs.” It’s the best balance of smooth motion, legible UI, and manageable delivery.
Your FPS Preset for Flawless Software Demos
If you want one default setting for software tutorials, use 60 FPS.
That’s the cleanest answer to how many frames per second you should record for product demos, onboarding, support walkthroughs, and most internal training. It gives the viewer a smoother cursor path, clearer UI transitions, and less visual friction during step-by-step instruction.
The preset to keep
Use this as your baseline:
- Frame rate: 60 FPS
- Use case: Product demos, customer onboarding, help-center videos, support clips, internal software training, SOPs, sales enablement walkthroughs
- Fallback: 30 FPS only when the recording is very static or delivery constraints are unusually tight
That recommendation is practical because instructional content depends on precision. The viewer needs to see the actual UI clearly, not just absorb a general impression of it.
Why polished pacing matters just as much
Smooth motion alone doesn’t fix a bloated recording. Good tutorial pacing still depends on trimming hesitation, dead air, and awkward gaps.
Manual editors often work in structured passes, removing dead air and then trimming 0.2–0.4 seconds from mid-sentence gaps. That rhythm work is one reason polished tutorials feel tight without sounding rushed. The same editing logic is described in this overview of manual editing passes and flow calibration.
A clear tutorial usually feels deliberate, not fast. The difference is that unnecessary time has been removed.
If you’re refining your overall recording workflow, this guide to screen recording for tutorials is a strong companion read.
The practical final answer
For most software instruction, don’t overthink the dropdown. Set your recorder to 60 FPS and move on.
That choice holds up across real-world tutorial formats because it serves the learner first. It also leaves room for professional finishing later, whether you’re publishing a single help-center clip or producing a full set of multilingual training materials with matching documentation.
Tutorial AI is built for teams that need polished tutorials without learning Adobe Premiere Pro. It turns one screen recording and spoken narration into an edited video that looks professionally finished, then generates a matching written article from the same recording so you can publish video and documentation together. That’s useful for product demos, feature release videos, customer onboarding, help-center content, support article videos, internal training, SOPs, and sales enablement walkthroughs. It auto-tightens recordings that would otherwise run 50–100% longer than needed, supports narration in 74 languages, includes Brand Kits, Multilingual Player, SSO/SAML, and SOC 2 + GDPR, and it’s used by teams at Bosch, Deutsche Bahn, Intesa Sanpaolo, Microsoft, and UNICEF.