You finish a clean product demo, customer onboarding clip, or internal training walkthrough. The screen capture looks sharp. The narration is clear. Then you play it back and notice the mouth clicks, cursor movements, or UI actions don’t line up with the words anymore.
That kind of audio sync with video problem ruins otherwise useful content fast. In help-center videos, support article videos, and SOPs, viewers depend on tiny timing cues. They need to hear the explanation exactly when the button is highlighted, the field is filled, or the workflow changes on screen. When sync slips, even slightly, the tutorial feels careless.
The worst part is that many recordings aren’t “bad.” They’re just misaligned. A strong take becomes hard to publish because the audio starts a little early, ends up drifting, or gets mangled during editing and export. That’s why the practical fix isn’t only about post-production. It’s about identifying the failure mode, tightening the recording setup, and choosing a workflow that doesn’t introduce desync in the first place.
When Good Recordings Have Bad Audio Sync
You record a release walkthrough in one pass. The mic sounds clean. The screen capture is sharp. During review, the first click matches the narration, but a minute later the cursor reaches the setting before you say its name. By the end, the timing is off enough that the demo feels unreliable even though both tracks are technically usable.
That is what makes audio sync problems so frustrating. The recording itself may be good. The failure often shows up later, during capture, conversion, trimming, or export.
For product demos, customer onboarding, sales enablement walkthroughs, and internal training, timing is part of the instruction. If the spoken line says “click Save” before the Save action appears, viewers pause and check the screen again. If the audio lands after the action, they wonder whether they skipped something.
Why viewers catch it quickly
People notice timing errors fast, especially when speech drives an on-screen action. Audio that arrives early usually feels wrong immediately. Audio that trails slightly behind the screen can pass for a moment, then starts to feel careless once the pattern repeats.
That matters more in instructional content than in casual video. In a demo or SOP, sync is not a polish issue. It affects whether the viewer can follow the task without stopping and replaying.
Practical rule: If narration consistently leads the visual action, fix that first. Early audio draws attention faster than slightly late audio.
Why good source files still fall out of sync
Many sync failures start after recording, not during it. A camera, screen recorder, or browser tab may play back fine on its own, then drift once the file is converted, edited, or exported with mismatched settings. Frame rate conversion is a common culprit. So is a bad transcode caused by choosing the wrong video codec for your recording and export workflow.
Manual cleanup creates another failure point. Subject-matter experts often record long takes with pauses, retries, and side comments, then trim the timeline by hand. Each cut is small, but enough small edits can separate narration from cursor movement, typed input, or UI state changes. I see this often in screen recordings where the editor removes dead air from the voice track without making the exact same adjustment to the screen capture.
Transcript-based editing changes that trade-off. Instead of slicing waveforms and hoping every ripple edit stays aligned, you edit the spoken content as text and keep the media tied to that transcript. That removes a lot of the accidental desync introduced during cleanup, especially for training videos, walkthroughs, and internal explainers.
Where bad sync does the most damage
Some formats can tolerate rough timing. Instructional video usually cannot.
- Help-center and knowledge-base videos: People are already trying to solve a problem. Bad sync makes each step harder to confirm.
- Support article videos: The clip has to match the written fix closely. Timing errors create doubt about the procedure.
- Customer onboarding: New users are learning the product and judging the team behind it.
- Internal training and SOPs: Staff need repeatable steps they can trust.
- Sales enablement walkthroughs: A polished product looks unfinished when the demo timing slips.
A lot of teams treat sync as an editing problem because that is where they notice it. In practice, the better approach is to prevent drift during capture and use an editing workflow that does not create new alignment errors after the fact.
Finding the Root Cause of Your Audio Desync
A video can look fine for the first ten seconds and still be unusable by the end. That usually means the fix is not in the timeline yet. It starts with identifying whether the problem is a fixed timing mismatch, timing drift, or both.
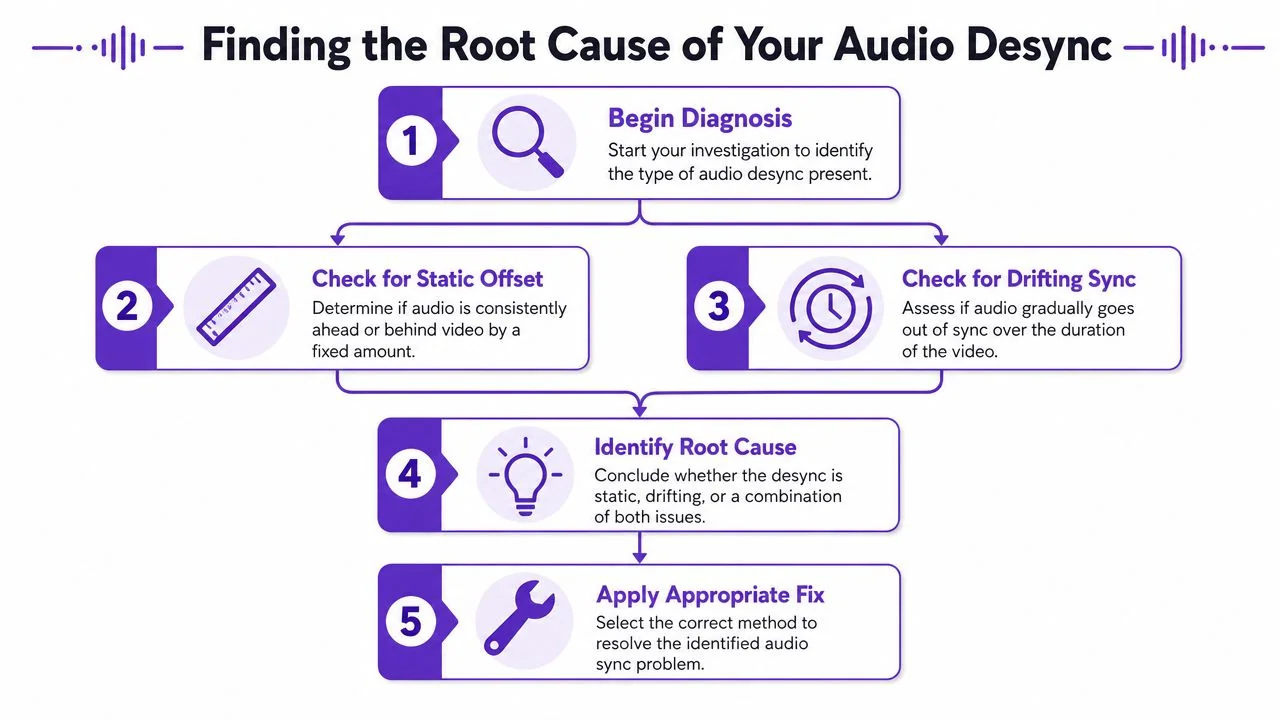
Run two checks before editing anything
Open the exported file in the player where you noticed the issue. Then inspect one clear sync event near the start and one near the end. Good markers include a mouse click, a keypress, a plosive sound, a notification sound, or a visible UI change.
- Check the opening. If audio is early or late from the first moment by a consistent amount, you are looking at a static offset.
- Check the ending. If the gap grows over time, you are looking at drift.
- Compare the two. A file can start with a fixed offset and then drift farther out as playback continues.
This distinction saves time. A static offset usually needs one correction. Drift points to a problem in capture, playback, or conversion, and repeated timeline nudges will not solve the source.
Static offset has a pattern
With static offset, the error stays stable. The voice is always ahead of the cursor, or always behind the screen action, from start to finish.
Common causes include:
- Consistent device latency: Some microphone, interface, webcam, and capture combinations add the same delay every time.
- Timeline interpretation errors: Imported media can line up incorrectly even when both files are otherwise healthy.
- Repeatable workflow quirks: Certain recording setups produce the same offset on every take.
Stable offsets are annoying, but they are predictable. If a team sees the same mismatch on every recording, the better move is to document it and correct it once at import, or avoid the setup that creates it. Transcript-based editing can also reduce how often these small mismatches get introduced later, because spoken edits stay tied to the source media instead of being manually split into dozens of independent cuts.
Drift points somewhere else
Drift behaves differently. The beginning looks acceptable, then lip sync, cursor timing, or UI actions slowly slide out of place.
Playback issues can cause that even when the source file is not badly recorded. Helge Klein’s analysis of Windows 10 Realtek streaming drift is a good example. The sync problem worsens during playback, and the fix may involve the audio device path rather than the edit.
Recording format also matters. Variable frame rate capture, CPU spikes during screen recording, and conversion tools that reinterpret timestamps can all create drift. If you need a quick refresher on containers, compression, and timing behavior, review what a video codec is before changing export settings. Audio format choices can contribute too, especially after repeated conversions. This guide on comparing audio file types is useful if your workflow passes through multiple recording or export formats.
Use the symptom to choose the first fix
| Symptom | Likely issue | Best first move |
|---|---|---|
| Audio is wrong from the first second and stays equally wrong | Static offset | Apply one fixed timing adjustment |
| Audio starts in sync and gets worse later | Progressive drift | Check recording format, player, device path, and system load |
| Audio starts wrong and drifts farther off | Mixed issue | Correct the fixed offset first, then find the drift source |
Treat diagnosis as part of the workflow, not cleanup. Once you know whether the problem was created during recording, introduced during export, or only appears in playback, the fix gets narrower and a lot less frustrating.
Recording Best Practices for Flawless Audio Sync
The cheapest sync fix happens before you press Record.
Many teams creating product demos, support walkthroughs, onboarding videos, or internal training don’t need a studio build. They need a recording setup that behaves the same way every time. Consistency prevents more audio sync with video problems than any editor trick.
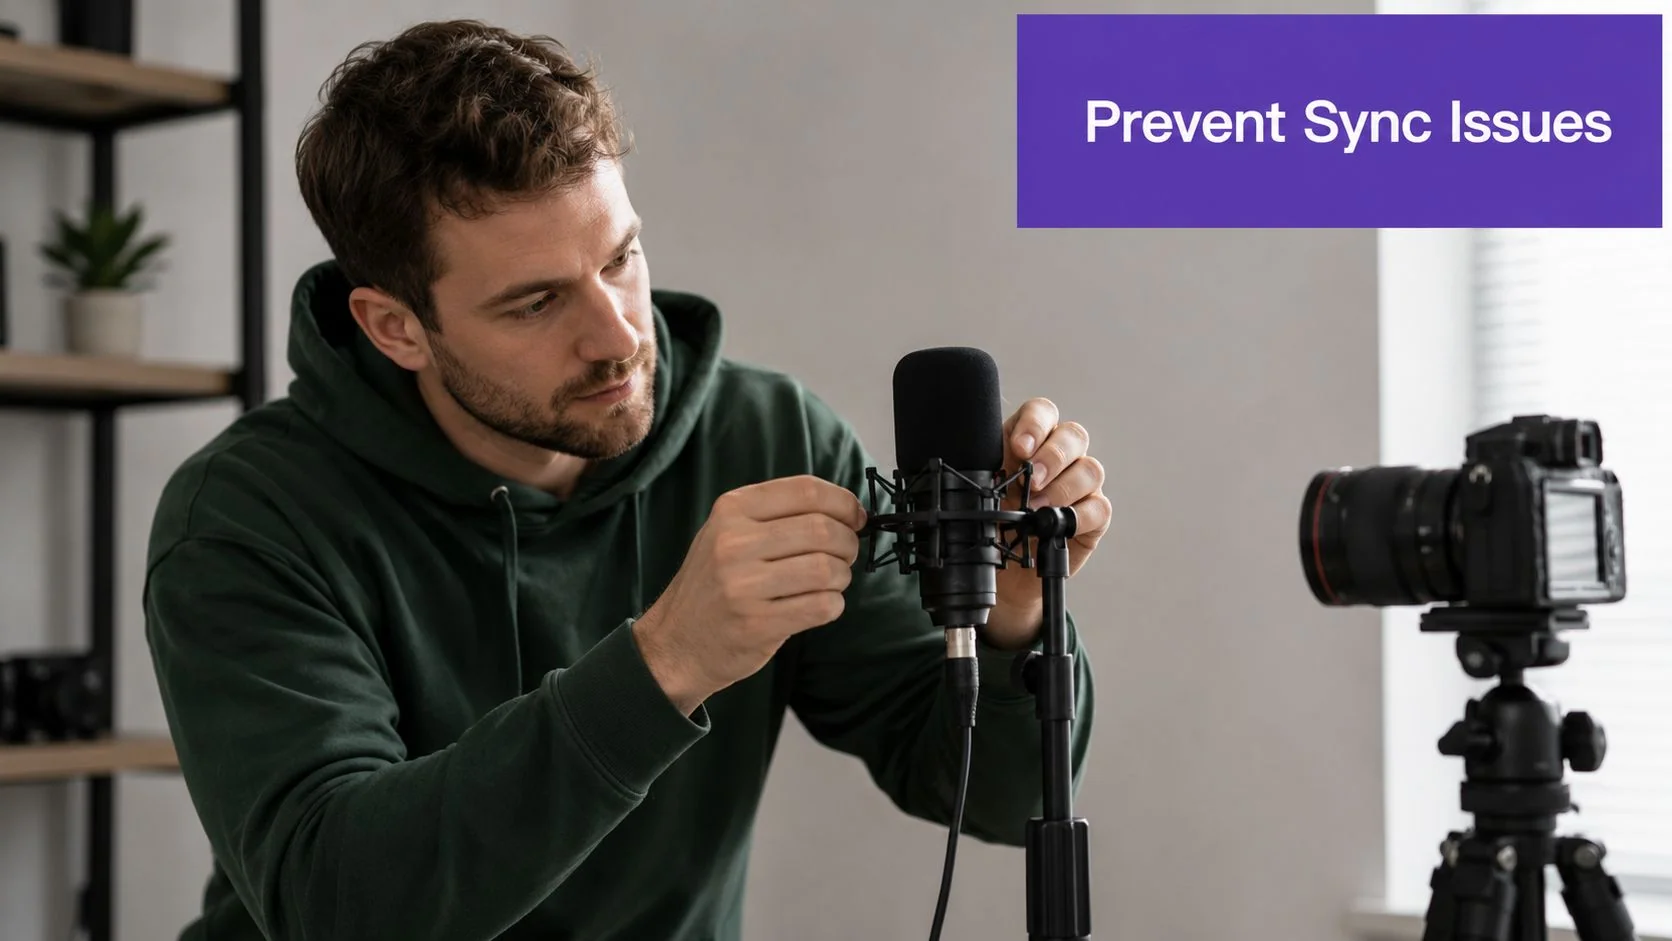
Build a boring setup on purpose
A dependable workflow beats a clever one.
- Use a wired microphone when possible: Wireless convenience can add latency and unpredictability. For tutorials, reliability matters more than mobility.
- Close unnecessary apps: Screen recorders, browsers with many tabs, design tools, and chat apps all compete for resources during capture.
- Prefer constant frame rate if your recorder supports it: Variable frame rate is convenient for lightweight recording, but it can create trouble later when editors or players interpret timing differently.
- Record a short test before the main take: A thirty-second test catches obvious sync issues without forcing a full redo.
- Keep one repeatable device path: Don’t switch between built-in mic, USB mic, Bluetooth headset, and dock audio from video to video unless you need to.
Add a visible sync marker
If your workflow uses separate audio and screen capture tools, create a sync point at the start. The old hand clap still works because it gives you a sharp sound and a visible motion at the same time.
That single marker makes manual alignment much faster later. It’s especially useful for customer onboarding and sales enablement walkthroughs where you might be capturing webcam, screen, and external mic separately.
Field note: If your setup changes, your offset may change. If your setup stays identical, your offset often stays identical too.
Treat recurring offsets like a process problem
Many teams lose hours. They know a setup always records slightly off, but they never document the correction.
The better approach is to measure it once, confirm it across a few recordings, and standardize the fix. As noted earlier, creators often report fixed offsets such as -450ms for some hardware combinations and -50ms for some Descript-based setups in this discussion of recurring sync offsets. That doesn’t mean your setup will match those values. It does mean repeated offsets are real.
A practical preflight checklist
Before recording, check these in order:
- Input path: Confirm the exact microphone and speaker routing you’re using.
- Recording format: If you can choose, prefer settings that are easier for editors to interpret consistently.
- System load: Pause cloud sync, close heavy apps, and avoid background exports.
- Audio format compatibility: If you’re moving audio between tools, this guide to comparing audio file types is useful for avoiding unnecessary conversion mistakes.
- Test playback: Watch the opening and end of a short test clip before recording the full version.
If you’re capturing software walkthroughs regularly, a dedicated workflow for screen recording with sound helps keep the process repeatable. That’s what matters. Not cinematic gear. Predictable input, predictable capture, predictable output.
Quick Fixes for Audio Sync in Editors and Players
Sometimes you need the old-fashioned fix. The file is recorded. The deadline is today. You just need the narration and visuals to line up well enough to publish.
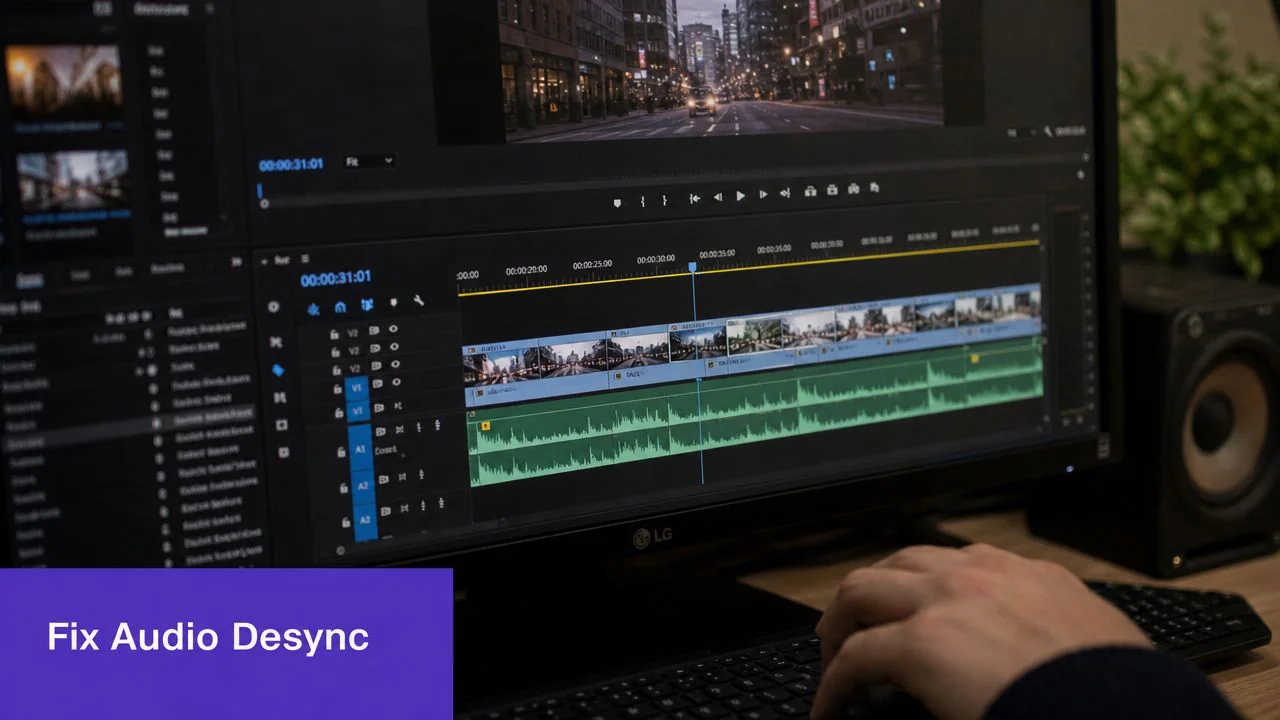
Fixing a static offset in an editor
In Adobe Premiere Pro, Camtasia, and similar editors, the manual workflow is straightforward in concept and tedious in practice.
- Unlink audio and video if they imported as one locked clip.
- Find a sharp sync point such as a click sound, key tap, or a plosive consonant.
- Zoom into the timeline until you can make very small adjustments.
- Nudge one track left or right until the sound aligns with the visible action.
- Check several places in the video, not just the opening.
This is why timeline editing demands skill. A subject-matter expert can explain the product perfectly and still lose time doing frame-level cleanup that a video specialist finds routine.
Know what “close enough” means
You don’t need to chase perfection blindly. There is a useful perceptual threshold.
A key benchmark came from ITU-R BT.1359-1, which found that viewers can detect audio leading video by as little as 45 milliseconds, while audio lagging video is tolerated up to 125 milliseconds, according to The Broadcast Bridge’s explanation of the standard.
That doesn’t mean you should aim for the edge of tolerance. It means when you nudge clips manually, small timing errors are not equally visible. Audio that fires early tends to look worse than slightly delayed audio.
If you’re deciding between “a hair early” and “a hair late,” late is usually less distracting than early.
When the player is the problem
Not every sync issue belongs to the editor. Browser playback, local media players, drivers, and hardware acceleration can all create misleading results.
Try this sequence:
- Test the exported file in more than one player: If VLC looks wrong but another player looks right, don’t assume the edit is broken.
- Check browser playback separately: Streaming preview can behave differently from local playback.
- Disable one variable at a time: Hardware acceleration, audio device switching, and browser extensions can all interfere.
- Export a short sample: A short clip is easier to compare across players than a long tutorial.
If you need an editor without buying a full professional suite, this roundup on choosing free video software can help narrow the options.
For a visual walkthrough of sync correction, this example is useful:
Why manual fixes break down
Manual repair works best for one-off clips with a simple, fixed problem. It gets painful when you’re producing repeated content like release videos, customer onboarding, knowledge-base clips, or support article videos every week.
Then the trade-off becomes obvious:
| Approach | Works well for | Friction |
|---|---|---|
| Manual timeline nudging | One short clip with fixed offset | Slow, detail-heavy, easy to get wrong |
| Player-side workaround | Temporary playback issue | Doesn’t fix the source asset |
| Re-recording | Short clips with obvious errors | Wastes a good take |
| More automated editing workflow | Repeated tutorial production | Requires changing the workflow, not just the clip |
That’s where newer editing approaches become much more attractive.
Automated Sync with Transcript-Based Editing
Most sync advice assumes the timeline is the center of the workflow. That’s the old constraint.
A more reliable method is to treat the spoken script as the source of truth and let the visuals follow the words. That changes how audio sync with video gets managed. Instead of pushing waveforms around by hand, you edit the transcript and let the timing update with it.
Why transcript-first editing avoids common desync
This approach is especially useful for product demos, feature release videos, help-center videos, support article videos, internal training, and SOPs, where the on-screen sequence needs to stay tightly attached to the narration.
When the script changes, the edit changes with it. Delete a rambling sentence, remove a retake, or tighten a pause, and the system updates the timing around the spoken content instead of leaving you to re-cut every segment manually.
That matters because many sync issues are introduced after recording. Casual screen recorders often produce takes that run 50 to 100% longer than needed because people pause, restart phrases, and think out loud while recording. A transcript-editable workflow tightens that material without requiring expert use of Adobe Premiere Pro, Final Cut, or Camtasia.
What this changes in practice
A transcript-based workflow is useful in a few specific ways:
- Shortening without drift risk: Removing dead space, retakes, and filler words no longer means slicing a timeline by hand.
- Safer narration fixes: If one line is wrong, you correct that line instead of rebuilding the edit.
- Cleaner multilingual production: When the narration changes length in another language, pacing can be adjusted around the script rather than rebuilt shot by shot.
- Better fit for real UI walkthroughs: Unlike avatar tools such as Synthesia, HeyGen, or Vyond, this model works for real screen recordings where viewers need to see the actual product interface.
For readers who want the underlying concept, video transcription in editing workflows is the key mechanism.
Why modern tools are different
Some tools now let teams record one screen capture with spoken narration, then clean it up by editing text rather than pushing clips on a timeline. In practice, that means a single recording can become a polished tutorial video that looks edited in Adobe Premiere Pro, while also generating a matching written article from the same source recording.
That workflow suits teams producing customer onboarding, knowledge-base content, sales enablement walkthroughs, and internal training because the subject-matter expert can stay focused on the product instead of becoming a part-time editor.
It also lines up with newer post-recording correction methods. As shown in this demonstration of transcript-based correction and authorized voice regeneration, users can fix misspoken parts by regenerating specific script segments while keeping natural pacing and sync intact.
The less you touch a timeline directly, the fewer opportunities you create for accidental desync.
The strongest version of this workflow also helps with pacing. Features such as AutoRetime can automatically adjust scene timing and cuts when narration changes, including delivery in 74 languages. Add Brand Kits, a Multilingual Player, and enterprise requirements such as SSO/SAML, SOC 2, and GDPR, and the workflow becomes practical for large documentation and training teams, not just solo creators. Named customers include Bosch, Deutsche Bahn, Intesa Sanpaolo, Microsoft, and UNICEF.
Beyond Lip-Sync Creating Trust with Your Audience
Audio sync with video is easy to treat as a technical nuisance. It isn’t. It’s a credibility issue.
When a support tutorial is slightly off, viewers don’t describe it as a frame-rate problem or an offset problem. They just feel that the video is harder to trust. The presenter seems less precise. The product feels less polished. The instruction feels less reliable.
Trust comes from alignment
For product demos and onboarding, alignment tells the viewer that the person teaching them understands the tool and respects their time.
For internal training and SOPs, sync supports accuracy. Staff members need to connect the spoken instruction to the exact action on screen. If those cues separate, people slow down, replay, and make avoidable mistakes.
- Diagnose first: Determine whether you have a fixed offset, drift, or both.
- Prevent next: Use a stable recording setup, test it, and document recurring behavior.
- Automate where possible: The less manual timeline repair you do, the less chance you have to create new sync problems.
One recording can support more than one output
The bigger opportunity isn’t just cleaner playback. It’s a cleaner publishing workflow.
A modern tutorial workflow can turn one recording into both a polished video and a matching written article. That matters for knowledge bases, support teams, and customer education because viewers don’t all learn the same way. Some want the walkthrough. Others want a skimmable article with steps and screenshots.
The same logic extends to multilingual delivery. Video tools now support translation of recordings under one hour while automatically adjusting timing and captions to fit the new voiceover length, as shown in this overview of translated video timing and caption matching. That’s a practical way to keep one source recording useful across languages without rebuilding timing manually.
The important part isn’t cosmetic polish. It’s trust. When words, visuals, captions, and documentation all agree, the tutorial feels dependable.
If you’re tired of fixing sync by hand, Tutorial AI is worth a look. It turns a single screen recording and spoken narration into a polished tutorial video, auto-tightens rambling takes, supports narration in 74 languages, and generates a matching written article from the same recording. For teams producing product demos, onboarding, support content, internal training, and sales enablement, it’s a practical way to ship video and documentation together without needing expert editing skills.