Think of your video tutorial script as the blueprint for your entire project. It’s what separates a clear, valuable guide from a rambling, hard-to-follow recording. Honestly, it's the most critical piece of the puzzle for making a tutorial that respects your viewer's time and actually helps them learn.
Why a Script Is Your Secret Weapon for Great Tutorials
Before you even dream of hitting that record button, your script is already shaping the outcome. It forces you to clarify your message, keeps you focused, and makes sure every second on screen has a reason to be there. This isn't just a nice-to-have; it's essential.
Consider this: tutorial videos are the preferred format for 25% of viewers, a massive chunk of the content pie. And since 90% of these videos are watched on mobile—often while someone is trying to do the very thing you're teaching—there's simply no patience for fluff or confusion.
The Danger of "Winging It"
So many of us have been there. You need to make a quick tutorial, so you fire up a simple screen recorder like Loom and just start talking through the process. It feels fast and easy at the moment, but this "winging it" method almost always creates videos that are 50-100% longer than they need to be.
The result? A recording full of long pauses, filler words like "um" and "uh," and backtracking over steps. Viewers get frustrated and click away. It’s a surefire way to see your drop-off rates spike.
The Trade-Offs in Creating Tutorial Videos
Creating a great tutorial has always involved a trade-off. You could go fast and unstructured, or you could invest a ton of time and resources to produce something polished. Let's break down the common approaches.
Comparing Video Creation Approaches
A look at three common ways to create tutorial videos, highlighting the trade-offs between efficiency, quality, and the required skill level.
As you can see, the traditional options force a choice between speed and quality. For a busy subject matter expert who isn't a video editor by trade, neither is a perfect fit.
A Modern, Script-First Alternative
This is where a new wave of AI-powered tools is completely changing the equation. They bridge the gap between a casual screen recording and a highly polished video, giving you a professional result without needing a professional editor.
Tutorial AI’s tools let you generate video tutorials based on screen recordings. You can speak freely without any practice, and your video will still look professional, as if it was edited in Adobe Premiere Pro. It allows the subject matter expert to create on-brand videos extremely efficiently.
The real power here is empowerment. A subject matter expert can now focus entirely on sharing their knowledge, confident that the technology will handle the complex post-production work to create a professional, engaging, and concise tutorial.
This script-driven workflow is incredibly versatile and works perfectly for:
- Demos and explainer videos that need to be clear and persuasive.
- Onboarding videos that get new hires productive faster.
- Feature release videos that crisply explain what's new.
- Knowledge base videos and support article videos that solve customer problems on the spot.
To get a broader perspective, exploring tips on making your own marketing video tutorials can provide a fantastic foundation. By embracing a script-first mindset from the start, you set the stage for a video that not only teaches but also holds your viewer's attention.
Figure Out Your Goal and Who You're Talking To
Before you even think about writing a script, you have to nail down two things. First, what’s the one key takeaway for your viewer? What will they be able to do after watching? And second, who are they? Getting this right from the start is what separates a genuinely helpful tutorial from one that just adds to the confusion.
Without a clear goal, your video is just a rambling tour of a product, not a focused guide. You might be making a quick demo for a new feature, a detailed video for a support article, or a full-blown onboarding guide—whatever it is, your objective needs to be sharp. A vague goal like "show how to use the dashboard" is a surefire way to create a long, boring video that helps no one.
Let's get specific. A much better goal is something like, "Show new users how to create their first project and invite a team member in under three minutes." Now that's a goal. It immediately tells you what to include, what to leave out, and when you’re done. It becomes the north star for your entire script.
Define Your One Core Objective
Every tutorial you create should solve one single problem. Don't try to cram three different workflows into a single video. That just overwhelms people and makes it impossible for them to find the one specific answer they were looking for in the first place.
Put yourself in their shoes. What are they trying to do? Are they stuck on a specific task, trying to grasp a new concept, or just troubleshooting something that's gone wrong? Your goal should be a direct answer to their problem.
Here are a few examples of sharp, actionable goals I've seen work well:
- For a feature announcement: Show users how the new "Auto-Tagging" feature can organize their customer feedback.
- For a help doc video: Walk a user through the three steps to reset their API key.
- For an internal training video: Teach a new sales rep how to log their first call in the company CRM.
A great tutorial doesn't try to teach everything; it teaches the right thing, and teaches it well. When you narrow your focus to one objective, you create a resource that people will actually find useful and come back to.
Sketch Out a Quick Viewer Profile
Once you know your "what," you need to figure out your "who." You don't need a massive marketing persona document, but having a simple picture of your viewer will completely change your script's tone, pacing, and how deep you need to go. A video for a seasoned developer will sound totally different from one made for a first-time user who's still learning the ropes.
Ask yourself these quick questions to get a handle on your audience:
- What do they already know? Are they a total beginner who needs every button explained, or an expert who just wants to see the new workflow? If you assume too much, you'll lose the newbies. If you over-explain, you'll bore the pros.
- How tech-savvy are they? Are they comfortable clicking around, or do they need a slower pace with a bit more hand-holding?
- Why are they even watching? Are they trying to save time, fix a nagging problem, or learn something new for their job? Knowing their motivation helps you frame the tutorial in a way that connects with them.
Find Real-World Audience Insights
The good news is, you don't have to guess. Your company is probably sitting on a goldmine of information that can help you build this profile and make your script a thousand times better.
A fantastic place to start is with your customer-facing teams. Dive into support tickets and see the exact words customers use when they get stuck. Chat with your sales reps about the most common questions they get during demos. These conversations give you a direct line into your users' biggest headaches and knowledge gaps, ensuring your script speaks their language and solves problems they actually have.
How to Structure Your Script for Maximum Impact

The secret to a great video tutorial isn't just the information you share—it's how you organize it. A solid structure is what guides your viewer from "How do I do this?" to "Aha! I get it," making the entire process feel natural and easy.
Think of your tutorial like a short story with a beginning, a middle, and an end. This classic three-act approach works wonders because it grabs attention, walks the viewer through the process, and then wraps everything up neatly.
Act 1: The Hook
You have about 8-10 seconds to convince someone your video is worth their time. That's it. Your opening needs to hit two key points right away: identify the problem and promise the solution.
Forget generic intros like, "Today, I'm going to show you how to use our dashboard." Instead, connect with the viewer's pain point. Try something like, "Tired of spending hours sifting through customer feedback? In the next 90 seconds, I'll show you how to set up a filter that does it all for you."
This instantly tells the viewer you understand their struggle and have a fast, direct solution. They’re hooked.
Act 2: The Core Steps
Here's where you deliver on your promise. This is the "how-to" meat of your tutorial, and your main job is to be incredibly clear and precise.
Break the process down into the smallest possible actions. Each click, each keystroke, and each menu selection should be treated as its own distinct step. This prevents you from accidentally skipping over something that seems obvious to you but might not be to a new user.
Keep your narration tight and directly tied to what’s happening on screen. Focus on the doing. Explain what to click and why, but save the deep-dive explanations for another time. The goal is to build momentum and help the user achieve a quick win.
Act 3: The Wrap-Up
You've shown them how to do the thing. Now what? A good ending reinforces the lesson and gives the viewer a clear next step, so they don't just click away and forget everything.
First, do a quick recap. Briefly restate the problem from the beginning and remind them how the steps they just learned solved it. For example, "And that's it! Now you have an automated filter that will save you hours of manual work each week."
Then, give a clear call to action. What should they do next? Maybe it's trying the feature themselves, watching a more advanced tutorial, or reading a related blog post. This transforms your video from a one-off watch into a genuine learning resource. For some great ideas, check out this handy sample script outline.
Using the Two-Column Script Format
The single most effective tool for scripting tutorials is the two-column format. It’s an industry standard for a reason: it forces you to think about what the viewer sees and hears at the same time.
Your script is split into two columns. The left column is for Visual Cues, detailing every single on-screen action—cursor movements, clicks, highlights, zooms, you name it. The right column is for the Narration, the exact words you'll say as those actions happen.
The two-column format is your single source of truth. It removes guesswork during recording and editing, ensuring your narration perfectly aligns with the visual demonstration and creating a seamless viewing experience.
Here’s a simple example of what this looks like in practice for a software tutorial.
Example Two-Column Script Format
By scripting this way, you can spot potential issues before you ever hit record. You'll notice where you need to slow down your narration or add a visual cue to make a step clearer. This simple structure is the key to producing a tight, professional, and genuinely helpful tutorial every single time.
Writing Narration That Sounds Genuinely Helpful
The visuals in your tutorial show the what, but your narration explains the why and how. It’s what transforms a dry set of instructions into a helpful conversation with an expert who’s got your back. Your word choice and delivery are everything when it comes to building that trust and keeping people watching.
The main thing to remember is that you want to sound like a person. Nobody likes being lectured. Viewers want to feel like they're learning from someone who is genuinely invested in their success. That means writing in a conversational, active voice.
So, instead of a formal phrase like, "The software is then configured by accessing the settings menu," try something more direct: "Okay, let's get the software configured. Go ahead and open the settings menu." It’s a subtle shift, but it feels like you're doing it with them, not just telling them what to do.
Embrace Simplicity and Clarity
When you know a subject inside and out, it's incredibly easy to forget what it's like to be a beginner. The best narration breaks down complex topics into short, simple sentences that are easy to follow. A great habit is to avoid packing multiple actions or ideas into a single breath.
A good rule of thumb I always follow is "one idea per sentence." This little constraint forces you to be concise and stops you from accidentally overwhelming your viewer.
You also have to be ruthless about cutting jargon. Unless your tutorial is explicitly for an advanced crowd that speaks in acronyms, swap them for plain English. So instead of saying, "Next, you’ll need to instantiate the container," you could simply say, "Next, you’ll need to create the container." That small change makes your content instantly more approachable.
The most helpful narration doesn't try to sound smart; it focuses on making the viewer feel smart. Clarity always wins over complexity. When you simplify your language, you empower your audience to follow along and succeed.
Master Your Pacing and Flow
The rhythm of your narration is just as critical as the words themselves. A script that flows well uses strategic pauses and clear transitions to guide the viewer smoothly from one step to the next.
Here are a few tips I've picked up over the years for improving a script's flow:
- Read it Aloud: This is non-negotiable. Always read your script out loud before you even think about recording. It’s the fastest way to catch clunky phrasing, run-on sentences, and awkward words that look fine on paper but sound totally unnatural when spoken.
- Use Transitional Words: Simple phrases like "Next," "Now that we’ve done that," "First," and "Finally" are like signposts for your viewer. They signal that a new step is coming, giving them a moment to mentally prepare for the next action.
- Script Your Pauses: Don't be afraid of silence. A brief pause after explaining a key concept or a tricky step gives the viewer a moment to process the information and catch up. I often write "(pause)" or "..." right into my scripts to remind myself during the recording session.
From Good to Great: A Before-and-After Example
Let's look at how tiny tweaks in wording can make a world of difference.
Before:
"The user must first locate the primary navigation element at the top of the interface and click on it to reveal a dropdown menu from which the 'Analytics' option should be selected to proceed."
This is technically correct, but it's a mouthful. It's formal, dense, and just plain hard to follow in real time.
After:
"First, find the main menu at the top of your screen. Click on it. A dropdown menu will appear. Now, select 'Analytics' to continue."
See the difference? The "After" version is so much clearer. It breaks one complicated instruction into three simple, manageable steps. It feels effortless for the viewer to follow along.
To learn even more about refining your delivery, our guide on how to do a compelling voice-over offers some excellent pointers. By focusing on these details, your narration will not only instruct but also connect.
The Modern Way to Create Polished Videos with AI
What if you could focus entirely on sharing your expertise and let technology handle all the tricky video editing? A new wave of AI tools is making this possible, completely rethinking the process of turning a video tutorial script into a finished product. This approach lets you transform a simple screen recording into a studio-quality tutorial, no traditional editing skills required.
The whole process is surprisingly simple. You just record your screen and speak your mind. Don't worry about ums, ahs, long pauses, or fumbling a sentence. The AI is designed to clean all of that up for you later, taking the pressure off of a perfect, one-take recording.
From Unscripted Recording to Polished Video
The old way of making a tutorial always felt like a frustrating compromise. A quick screen recorder like Loom is fast, but you often end up with a video that’s 50-100% longer than it needs to be, packed with rambling moments that make viewers tune out. On the flip side, professional software like Camtasia or Adobe Premiere Pro delivers a gorgeous result but requires serious expert video editing knowledge.
This is exactly where AI tools come in. Tutorial AI’s tools let you speak freely without any practice, and your video will still look professional, as if it was edited in Adobe Premiere Pro. It allows the subject matter expert to create on-brand videos extremely efficiently. It’s the perfect method for generating video tutorials based on screen recordings, such as:
- Crisp and clear demos and explainer videos.
- Efficient onboarding videos for new team members.
- Concise feature release videos to showcase what's new.
- Helpful knowledge base videos and support article videos.
As you can see here, the entire video is driven by the text script generated from your voice. This "edit like a doc" workflow makes refining your video as easy as deleting a word in a sentence.
How AI-Powered Editing Works
The magic really starts after you hit "stop recording." The AI tool gets to work transcribing your narration, turning your spoken words into an editable text script. This script is your new editing timeline. Instead of fumbling with video tracks, you just read the text and delete any words, phrases, or sentences you don't like. As you delete the text, the corresponding video and audio are instantly removed, tightening up your presentation on the fly.
It gets even better. For those who want to take it a step further, exploring advanced AI speech-to-text solutions can really accelerate the process, especially for generating clean narration. Once your script is tightened up, the AI can re-generate the entire voice-over using a hyper-realistic synthetic voice, guaranteeing a perfectly paced, crystal-clear audio track.
This completely flips the script on video creation. You don’t need to spend hours practicing a delivery. Just speak your mind, capture your workflow, and let the AI make it look and sound like it was meticulously edited by a pro.
Finally, the AI perfectly re-times every on-screen action—your mouse movements, clicks, and typing—to sync up with the polished narration. The end result is a professional, concise video created in a fraction of the time. If you want to see this in action, check out our guide on how to create training videos with AI. It’s a powerful, script-driven method that lets experts share what they know without getting bogged down by the tech.
Your Final Polish and Pre-Publish Checklist
Before you hit record, a final quality check on your script can save you from a world of headaches later on. Think of this as the last line of defense against awkward re-records and tedious post-production fixes. This is where you iron out the wrinkles and make sure your script is truly ready for prime time.
First, do a table read. I can't stress this enough. Read your entire script out loud, exactly as you intend to narrate it. You will immediately hear clunky phrasing, run-on sentences, or jargon that just doesn't sound right when spoken. It's the single best way to catch these issues and smooth out your delivery for a more natural, conversational feel.
Next, run a quick consistency check. Is it the "Project Dashboard" or the "Main Hub"? Pick one and stick with it. Inconsistent terminology is a surefire way to confuse your audience. Keeping your terms uniform throughout the script makes your tutorial feel polished, professional, and trustworthy.
Planning Visuals and Localizing with AI
Modern video tools, especially those driven by AI, have completely changed the game for creators. They allow for a much more flexible workflow where you can focus on getting your message right first and let the technology handle the heavy lifting of editing and polishing.
This diagram gives you a simple look at how AI tools are streamlining the video creation process.
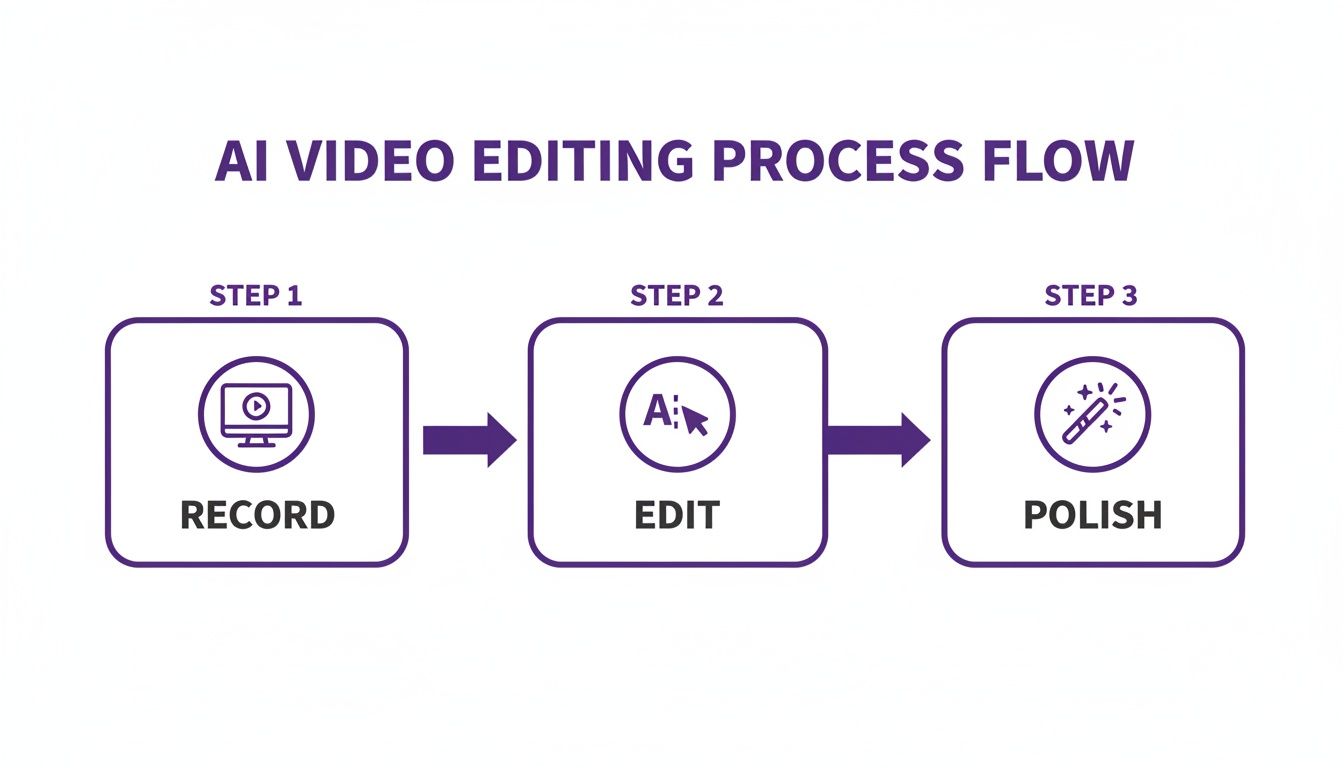
The big takeaway here is that you no longer need to be a video editing wizard to create professional-grade content. Subject matter experts can now record freely, confident that the final product will look sharp.
Tools like Tutorial AI make this incredibly straightforward. You can just record your screen for a product demo or support video without having to memorize a script perfectly. We’ve all seen videos made with casual recorders like Loom that end up being 50-100% longer than they need to be, while powerhouse software like Adobe Premiere Pro requires a steep learning curve.
Tutorial AI bridges that gap. Its tools let you speak freely without any practice, and your video will still look professional, as if it was edited in Adobe Premiere Pro. It allows the subject matter expert to create on-brand videos extremely efficiently.
Finally, think about your global audience from the very beginning. A well-structured script is a gift to your future self when it comes time for translation and localization. When your narration and visual cues are clearly mapped out, AI tools can more easily auto-retime scenes and captions for different languages. This opens your content up to the world with surprisingly little extra effort. A little foresight—planning for on-screen text, callouts, and even where to blur sensitive info—pays off big time down the road.
Got Questions? We've Got Answers.
We get a lot of questions about scripting and creating video tutorials. Here are some of the most common ones we hear, along with some straight-to-the-point answers from our experience.
What's the best way to format my script?
Honestly, the most reliable format I've ever used is a simple two-column script. It's a classic for a reason.
One column is dedicated to the visuals—every click, every screen change, every mouse movement you plan to show. The other column has the matching narration or voiceover. This side-by-side approach is a lifesaver for making sure what you're saying lines up perfectly with what's happening on screen. It’s the single best way to avoid that awkward mismatch between audio and video.
How long should my video tutorial be?
The sweet spot for most software tutorials is somewhere between 2 and 5 minutes. Anything longer and you start to see viewer engagement drop off. People are busy, and they're looking for quick answers.
As for your script, a good rule of thumb is to aim for about 130-150 words of narration for every minute of video. That pace is generally easy for viewers to process without feeling like they're being rushed or, even worse, getting bored waiting for you to get to the point.
Is it possible to make great videos if I'm terrible at editing?
Yes, absolutely. This used to be a huge barrier, but now there are tools designed specifically for this problem. You can use a platform like Tutorial AI to turn a messy, unscripted screen recording into a clean, professional-looking video.
Think of it this way: you can record your screen just like you would with a simple tool like Loom, talking through the steps naturally. That raw recording might be 50-100% longer than it needs to be, full of "ums," long pauses, and mistakes.
That's where the AI comes in. Tutorial AI’s tools let you speak freely without any practice, and your video will still look professional as if it was edited in Adobe Premiere Pro. It allows the subject matter expert to create on-brand videos extremely efficiently for things like demos, feature releases, or knowledge base articles without becoming a video editor overnight.
Ready to create studio-quality tutorials in minutes? With Tutorial AI, you can turn raw screen recordings into polished, on-brand videos without any editing experience. Try Tutorial AI for free today!