A great voice-over isn't just about reading words aloud; it's about making a connection. You're bringing a script to life, guiding your audience with clear, engaging audio that feels personal and direct. It all begins with a little prep work—getting your voice and script ready, finding a quiet space, and using a decent microphone. From there, it’s about capturing the performance and polishing it up.
This guide will walk you through that entire journey, step-by-step, so even if you're just starting out, you can get some fantastic results.
Your Foundation for a Flawless Voice-Over

A solid voice-over can make or break a tutorial, demo, or marketing video. It's the element that transforms a simple screen recording into an authoritative, trustworthy guide, keeping your viewers locked in and helping them understand your message. When your narration is clear and confident, it just hits differently.
The numbers back this up. The professional voice-over market is a massive, multi-billion dollar industry. A recent survey showed that 58% of buyers believe digital channels and social media are the most effective forms of paid media, and a compelling voice is at the heart of that content. It’s clear that brands understand the power of an authentic human voice to tell a story effectively.
The Shift to Modern, Efficient Workflows
Not too long ago, producing high-quality narration was a real chore. It was a complex, multi-step process that demanded specialized software and a ton of technical know-how, often putting a wall between the expert and the final recording. Thankfully, things have changed. Today's workflows make it surprisingly easy for anyone to create professional-grade audio.
A strong voice-over starts well before you hit record. Proper vocal preparation is key. Spending a few minutes on vocal warm-ups and tongue twisters for actors can make a huge difference in getting your voice ready for a clean performance.
New tools and techniques mean you no longer need access to a professional studio or years of audio engineering experience. You can go from a simple idea to a polished final product right from your desk. This guide is here to show you exactly how.
We'll cover all the essentials, from foundational prep to final delivery. By the end, you'll have a clear understanding of how to:
- Prep your script and warm up your voice for recording.
- Pick the right gear for your specific needs and budget.
- Record clean, professional-sounding audio the first time.
- Edit and polish your recording for maximum clarity and impact.
So, whether you're creating your very first product demo or just want to level up your existing skills, this guide will give you the practical, actionable steps you need to get it done right.
Setting the Stage with Scripts and Gear
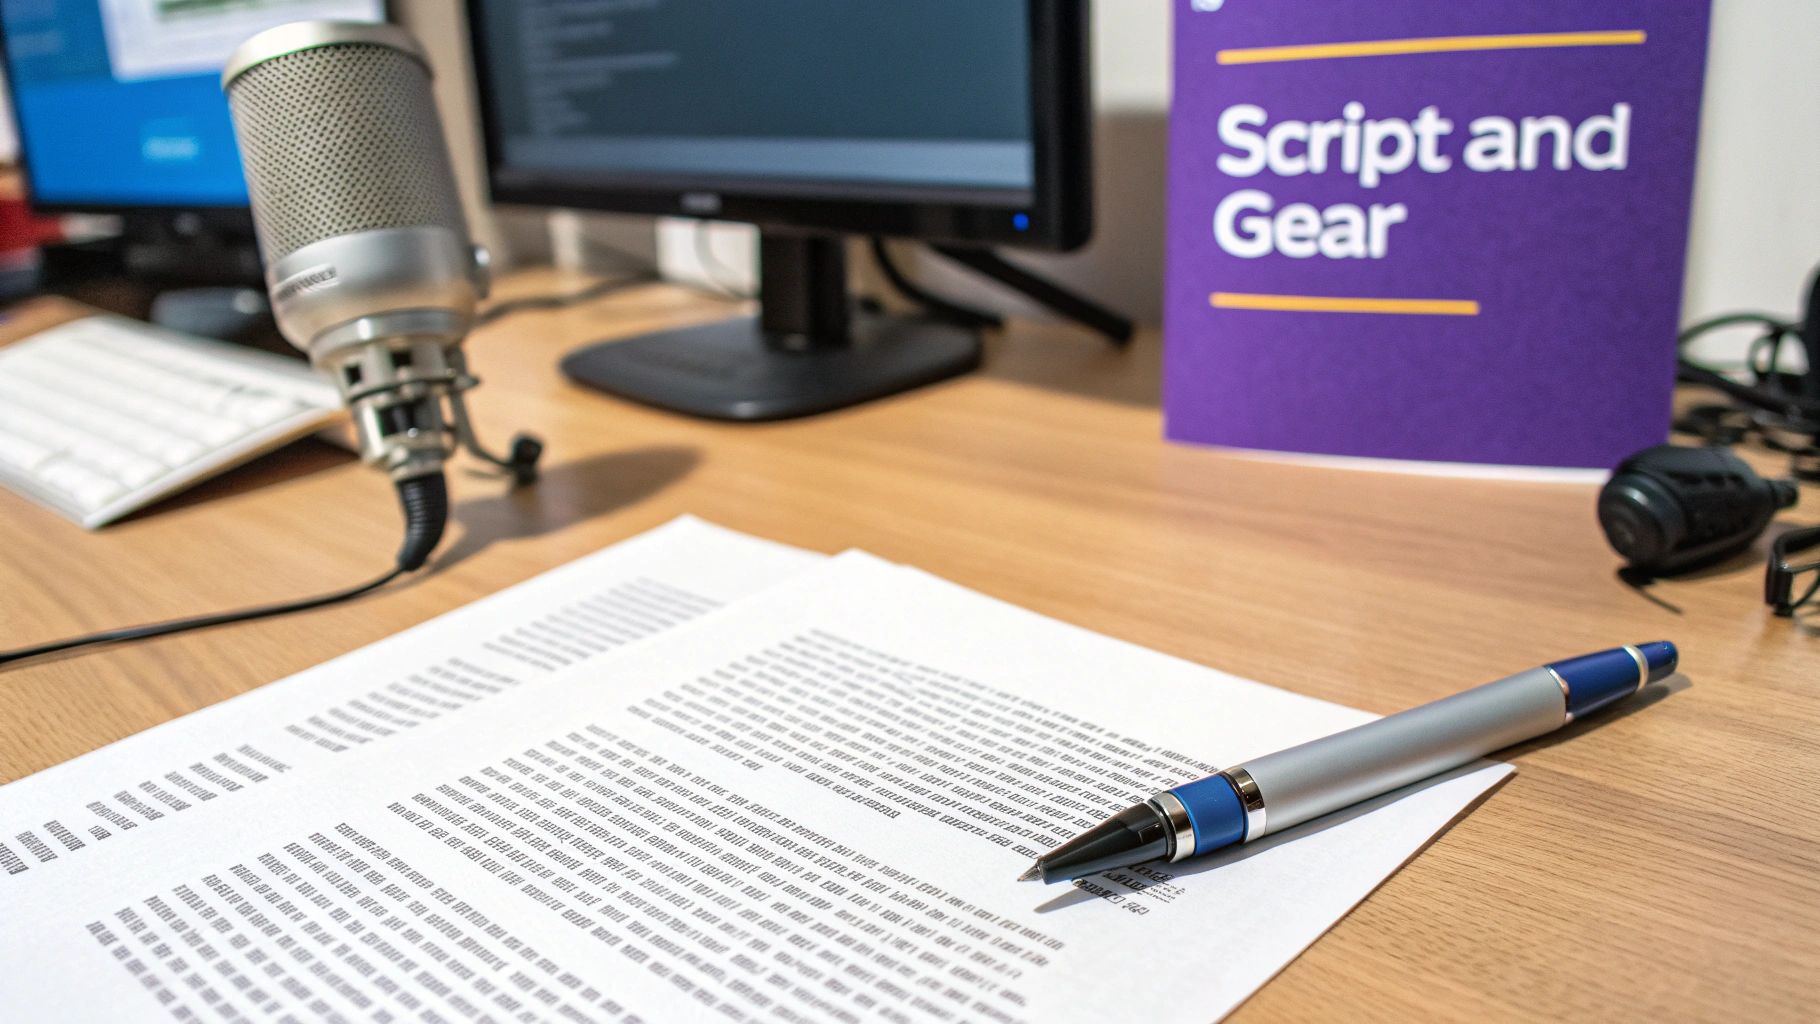
Before you even think about hitting that record button, your success is already being decided by two things: your script and your gear. Honestly, a brilliant performance can't salvage a confusing script, and even the most perfect script will fall flat if the audio is terrible.
Getting these two fundamentals right from the start makes everything else downstream so much easier.
Crafting a Script That Connects
First things first, let's talk about the script. The goal isn't just to jot down what you want to say; it’s to write for the ear. This means using simple, conversational language that rolls off the tongue.
Steer clear of complicated sentences and stuffy jargon, unless you're absolutely sure your audience lives and breathes that technical world. Here's a trick I've used for years: read every single line out loud as you write it. If you stumble, get tongue-tied, or find yourself gasping for breath, that’s your cue to rewrite and simplify.
A well-crafted script is your roadmap. It’s what guides you through the recording, giving you the confidence to deliver a great take. Think of it less like a document and more like a performance guide.
To really make it work for you, mark it up. Use bold for words you want to hit with a little more punch, drop in slash marks (/) for intentional pauses, and don't be afraid to scribble notes in the margins like (slow down) or (smile here). This simple act transforms your script from static text into a dynamic tool for a much more engaging delivery. To see exactly how this works, check out our guide with a complete voice over script example.
The best voice-over scripts feel like a natural conversation, not a stuffy presentation. If it’s easy for you to say, it will be easy for your audience to hear and understand.
Ultimately, your script is your single source of truth. It locks in your message, keeping it consistent and concise—which is absolutely critical for tutorials where clarity is king. A tight script stops you from rambling and keeps your content laser-focused on what your viewers actually need to know.
Choosing Your Microphone and Gear
With a solid script in hand, it's time to look at your recording gear. It’s easy to get lost in a sea of technical specs, but the main goal is simple: find a microphone that captures your voice clearly without costing a fortune. And let's be real, the built-in mic on your phone or laptop just isn't going to cut it for professional-sounding work.
For most people starting out, a USB microphone is the perfect on-ramp. They’re plug-and-play, surprisingly affordable, and offer a massive leap in quality over any standard computer mic.
If you have a bit more to spend and want to level up, an XLR microphone setup is the next logical step. This involves the mic itself, an audio interface to connect it to your computer, and an XLR cable. Yes, it's more of an investment and requires a little more setup, but the superior sound quality and flexibility for future upgrades are well worth it.
No matter which mic you choose, a pop filter is non-negotiable. It's that simple mesh screen that sits in front of the mic, and it works wonders by diffusing the harsh puffs of air from "p" and "b" sounds (known as plosives). These can cause those ugly, distracting pops in your audio. It's a cheap tool that makes a huge difference.
To help you get started, here's a quick breakdown of your gear options at different price points.
Table: Essential Voice Over Recording Gear
This chart isn't exhaustive, but it gives you a solid idea of what to look for as you build your kit. The key is to start with what you can afford and upgrade as you grow.
Creating a Quiet Recording Space
You don’t need to build a professional studio to get clean audio, but you absolutely have to manage your recording environment. Your two biggest enemies are reverb (echo) and background noise.
Hard, flat surfaces—like bare walls, ceilings, and desks—are your enemy. They reflect sound, creating that hollow, unprofessional echo. The fix is simple: surround yourself with soft stuff. Throw some blankets over a couple of chairs to make a makeshift fort, hang up heavy comforters, or even record in a walk-in closet full of clothes. These everyday items are fantastic at absorbing sound.
Next, hunt down and eliminate ambient noise. Turn off fans, air conditioners, and any electronics that have a low hum or buzz. Let your family or roommates know you need quiet time. The less noise you capture in the recording, the less you'll have to fight with in post-production, and that will save you a ton of time and headaches.
Capturing Your Voice with Confidence
Alright, your script is polished and your recording space is prepped. Now for the fun part: bringing your voice-over to life. All that prep work means you can now stop worrying about the technical stuff and focus entirely on your performance. The aim here is to capture clean, crisp audio that won't give you a headache in the editing phase.
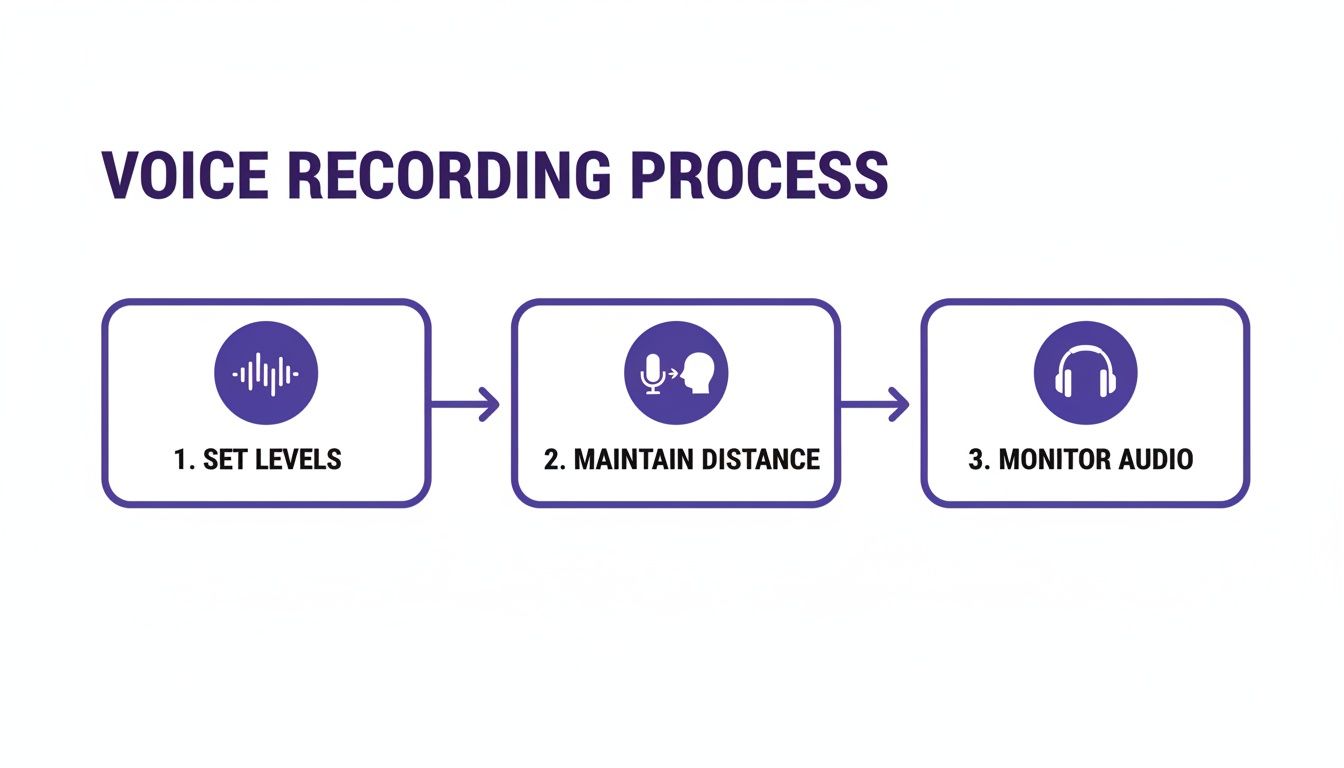
First things first, let's talk about your microphone technique. It's more than just speaking clearly—it’s about your physical relationship with the mic. How far you are from it is single-handedly one of the biggest factors in getting a consistent, professional sound.
Finding Your Sweet Spot
You'll want to find a comfortable and consistent distance from your microphone, usually somewhere between 6 to 12 inches. Think of this as your personal performance zone.
Get too close, and you'll trigger the "proximity effect," which makes your voice sound bass-heavy and boomy. While that might sound cool, it also introduces a huge risk of plosives—those ugly, distorted "p" and "b" sounds—and potential clipping.
On the other hand, if you're too far back, your voice will sound thin and distant. Your mic will start to pick up more of the room's natural echo and less of you. Consistency is the name of the game. A classic trick is to use the "shaka" or "hang loose" hand sign: put your thumb on your chin and your pinky on the mic. It’s a simple, repeatable way to keep your distance steady.
A controlled, even delivery is crucial, especially when you're tackling projects for a wider audience, like narrating Spanish stories for listeners around the world. Keeping your technique consistent ensures your message lands clearly, regardless of the language.
Setting and Monitoring Your Audio Levels
Before you hit that big red record button, you have to set your levels. This is often called "gain staging," and it's all about making sure your signal is strong enough without being so loud that it distorts.
Look at the audio meter in your recording software. As you speak into the mic at the volume you plan to use for the actual recording, watch the levels. You want the meter to bounce around in the -12dB to -6dB range.
- Too Quiet (deep in the green): If you're barely tickling -18dB, your audio will be too quiet. You can always boost it later, but doing so will also raise the noise floor, bringing up all that subtle background hiss with it.
- Just Right (nicely in the yellow): This is the sweet spot. A strong, healthy signal with plenty of "headroom" to handle any moments where you might get a little louder unexpectedly.
- Too Hot (hitting the red): If that meter ever hits 0dB, you're "clipping." This is a nasty digital distortion that sounds terrible and is practically impossible to fix later. Don't do it.
A word of advice from experience: Always err on the side of recording a little too quiet rather than too loud. You can easily add volume later, but you can never, ever fix clipping.
And please, always wear headphones while you record. This isn't optional. Monitoring lets you hear exactly what the mic is picking up in real-time. You'll catch mouth clicks, plosives, or the neighbor's dog barking as it happens and can simply re-do the line on the spot. This will save you an incredible amount of time during editing. For a more technical look at this, our guide on how to record computer audio on a Mac gets into the nitty-gritty of audio routing.
Choosing Your Recording Workflow
For tutorials and demos, you generally have two ways to approach recording your narration. The right one for you really boils down to your personal style and the kind of video you're making.
- Narrating Live: This is where you record your screen and voice at the same time. Some people find this more natural because you’re reacting to what’s happening on-screen in the moment. It's great for informal walkthroughs or when you want a more off-the-cuff vibe. The big downside? It's tough to nail a perfect take when you're juggling your script, mouse movements, and on-screen actions all at once.
- Recording Voice-Over Separately (The "Silent Movie" Method): With this approach, you record your screen capture first, totally silent. Your only job is to get the on-screen actions perfect. Then, you watch the video back and record your narration to match the visuals. This method gives you way more control and is how most polished, professional tutorials are made.
For most high-quality projects, recording the voice-over separately is the way to go. It lets you perfect each component—visuals and audio—on its own, leading to a much cleaner and more professional final video.
Using AI for a Smarter Voice Over Workflow
While the traditional way of recording and editing voice overs certainly works, creators of tutorials and product demos now have a much more direct route. Modern AI-powered platforms are designed to tackle the most common production headaches, completely rethinking how a voice over gets done.
In the past, you were stuck between two less-than-ideal options. An easy-to-use recording via Loom is often 50-100% longer than necessary, full of mistakes and dead air. The alternative was aiming for a professional look with software such as Camtasia or Adobe Premier Pro, which requires expert video editing knowledge.
From Rough Take to Polished Tutorial in Minutes
This is where a new, smarter workflow changes everything. Instead of obsessing over a flawless, one-take recording, you can just hit record and talk through your process. Explain what you're doing, think out loud—don't sweat the ums, ahs, or long pauses. Just let your expertise flow naturally.
Tutorial AI's tools let you speak freely without any practice and still your video will look professional as if it was edited in Adobe Premiere Pro. It allows the subject matter expert to create on-brand videos extremely efficiently for content like demos, onboarding videos, explainer videos, feature release videos, knowledge base videos, and support article videos.
Tools like Tutorial AI take your raw recording and automatically transcribe your narration into text. From that point on, editing your voice over feels just like editing a document.
- Delete a word or sentence in the text, and the corresponding audio and video clips vanish. This is the fastest way to tighten your pacing.
- Fix a misspoken word by simply typing the correction. The audio instantly updates to match the new text.
- Drag and drop paragraphs to completely restructure your tutorial. The video timeline rearranges itself automatically.
This text-based editing approach sidesteps the intimidating complexity of traditional video timelines. It puts the focus squarely back on your message, not the software.
Regenerating Your Voice for a Flawless Finish
Once you've polished the script, the platform can regenerate the entire narration using a crystal-clear, lifelike AI voice. This process smooths out all the rough edges from your original recording—it removes background noise, levels out the volume, and ensures perfect pacing. The new, polished audio is then synced to your video, turning a casual screen recording into a studio-quality tutorial in a matter of minutes.
The foundational steps of traditional voice recording are what make this AI process so powerful.
These core principles—setting levels, maintaining mic distance, and monitoring your audio—are all handled for you when an AI voice regenerates the final narration, guaranteeing a consistent, professional sound.
This shift couldn't be more timely. Recent data shows that 55% of consumers now use voice to interact with AI, making it the top way people engage with this technology. Yet, only 29% of companies have actually rolled out customer-facing voice AI. For anyone creating software tutorials, this reveals a huge opportunity: as customers come to expect high-quality voice interactions, the narration in your videos directly impacts their experience and trust in your product.
Empowering the Expert to Become the Creator
This fundamentally changes who gets to create high-quality video content. Video production is no longer just for those with specialized editing skills.
The subject matter expert is now empowered to be the creator. This efficiency means you can produce more content—from onboarding videos and feature releases to in-depth knowledge base articles—without sacrificing quality.
The result is a whole library of on-brand, professional videos created in a fraction of the time and cost. You can learn more about how an AI voice generator for videos can transform your own workflow.
By adopting an AI-driven workflow, you get to skip the most tedious parts of video production and focus on what actually matters: sharing what you know. It’s a smarter, faster way to teach, demonstrate, and connect.
Refining Your Audio in Post-Production
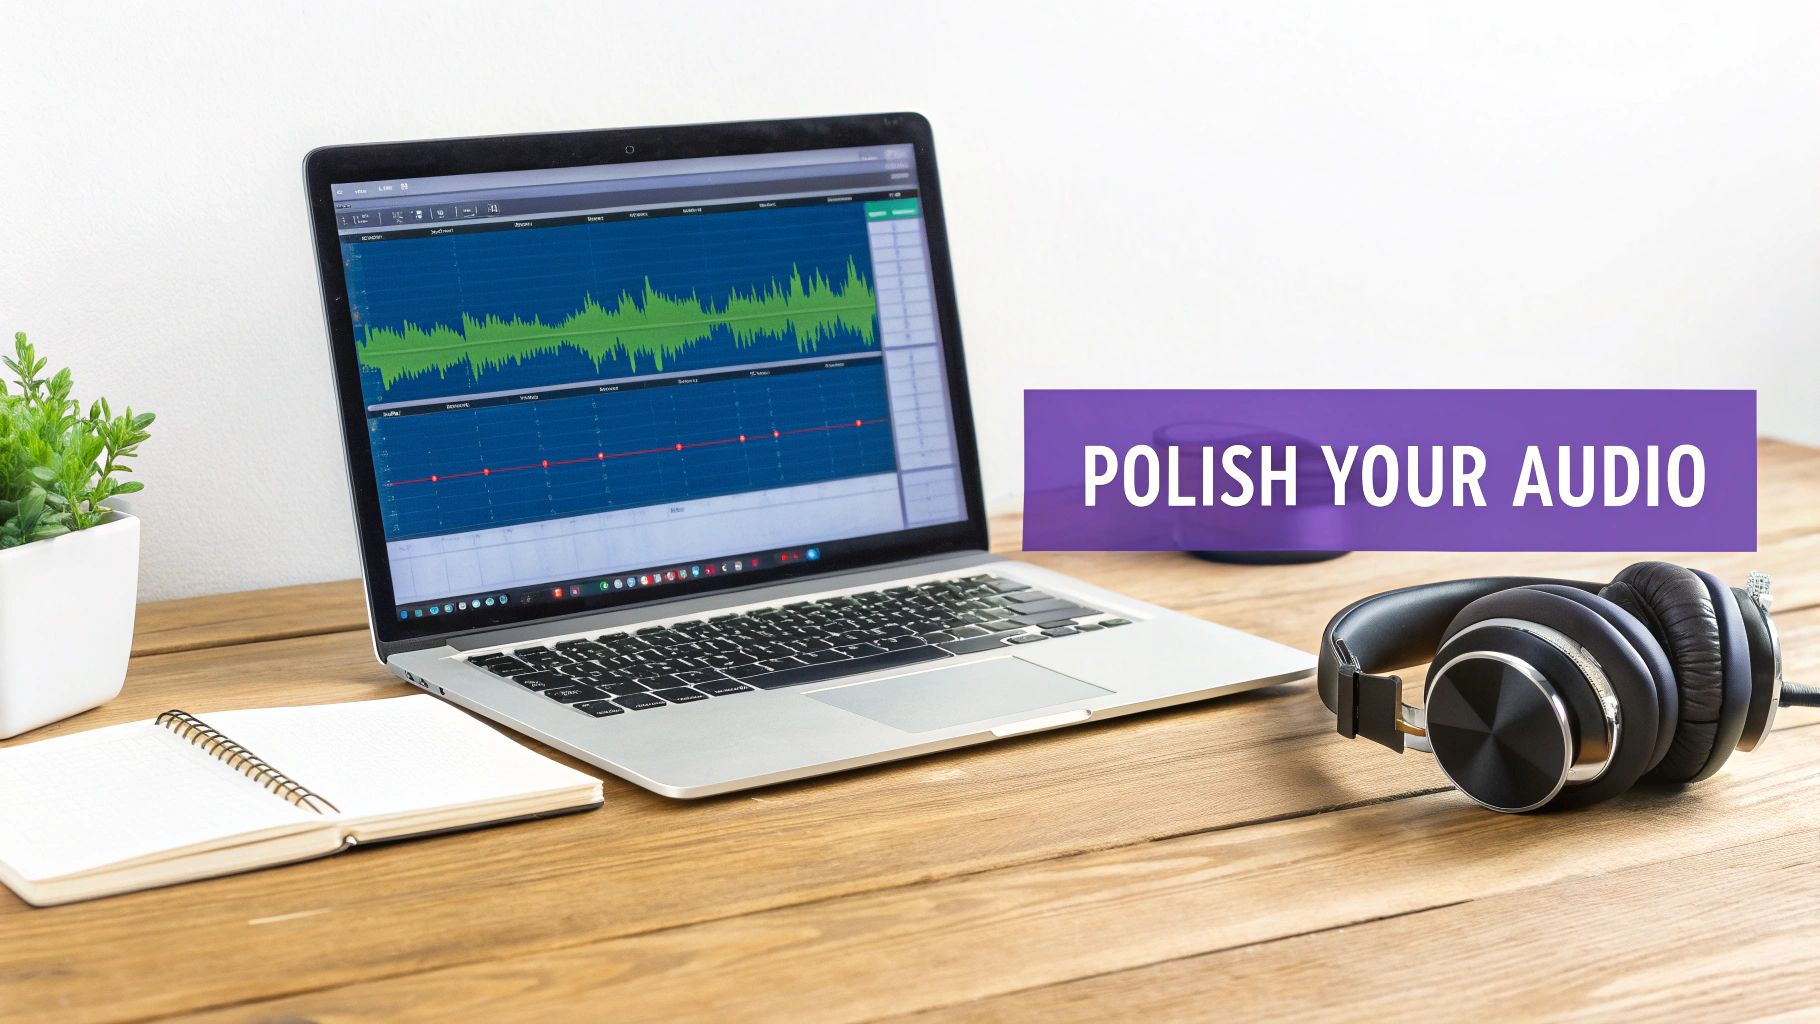
Getting a clean recording is a huge win, but it's only half the battle. The real secret sauce that turns a decent take into a professional voice-over happens in the edit. This is your chance to polish every word and create a listening experience that keeps your audience hooked.
This stage is about more than just snipping out mistakes. It's where you artfully shape the pacing, tone, and clarity of your entire narration.
The First Pass: Cleaning Your Raw Audio
Think of your first editing pass as basic housekeeping. Pop on your headphones, listen through the entire raw file, and start trimming the obvious stuff—flubbed words, accidental coughs, and those long, awkward pauses that kill the momentum.
Next, it's time to tackle background noise. No matter how quiet your room is, your mic likely picked up a subtle hiss from your computer fan or the air conditioner. Most audio software has a noise reduction feature that can isolate and remove this constant hum, which instantly makes your voice sound cleaner and more present.
Finally, let's talk about breaths. You can't just delete them all, or you'll sound like a robot. But a loud, sharp inhale between sentences can be really distracting. The trick is to manually lower the volume of each breath so it's audible but not jarring. This one small tweak makes a world of difference.
Enhancing Clarity with EQ and Compression
With the clutter gone, you can start enhancing the quality of your voice itself. Two of the most powerful tools for this are Equalization (EQ) and Compression.
- EQ (Equalization): EQ is like a sophisticated tone control for your voice. You can gently boost the lower frequencies to add a bit of warmth and authority or raise the higher frequencies to bring out more crispness and articulation, making your words easier to understand.
- Compression: This tool is all about consistency. A compressor automatically turns down the loudest parts of your speech and brings up the quietest parts. The result is a much smoother, more even volume level that's far more pleasant for your audience to listen to.
You don't need to be an audio engineer to use these tools effectively. Start with subtle adjustments; a little goes a long way. The goal is to make your voice sound like a better version of itself, not fundamentally change it.
Your editing should be invisible. The best post-production work enhances the listener's experience without ever drawing attention to itself. The focus should always remain on the message, not the audio processing.
Mastering for Final Delivery
The very last step is mastering. This is where you bring your final audio track up to the standard loudness level for whatever platform it's destined for, whether that’s YouTube, a podcast app, or an e-learning course.
A simple "limiter" plugin is all you usually need. It raises the overall volume of your track to a competitive level without letting it peak and distort. This ensures your voice-over sounds just as full and clear as other professional content, so your audience doesn't have to reach for the volume knob.
This final polish is what makes your hard work shine and ensures your voice-over connects with people, no matter how they're listening.
Common Questions About Voiceovers
As you get deeper into creating voiceovers, you'll start to notice the same questions and challenges pop up. Getting these sorted out early will make your whole process smoother and give your final audio that professional polish it needs.
How Can I Make My Voiceover Sound More Engaging?
Nobody wants to listen to a flat, monotone recording. The secret to a more engaging voiceover is simple: variety.
Think about modulating your pitch, pace, and volume. These are the tools you use to match the energy of what you're showing on screen. Before you hit record, just read the script out loud a few times. You'll quickly find the natural spots to add a little emphasis or take a dramatic pause.
Here's a simple trick that works wonders: stand up when you record. It helps with breath support and projection, giving your voice a richer, more present sound. Also, try smiling when you're delivering a positive or upbeat line. It might feel a bit strange, but listeners can actually hear that warmth in your tone. The goal is to sound like you're just explaining something interesting to a friend.
What Is the Best Software for Recording and Editing?
If you're just starting, you can't go wrong with a free tool like Audacity. It’s surprisingly powerful for both recording and basic editing. As you get more experienced, you might find yourself graduating to a subscription-based tool like Adobe Audition for its more advanced features.
But for tutorial and demo videos specifically, a more integrated platform is often the smarter path. These tools are built from the ground up to solve the headache of syncing your voice to the action on screen. They let you sidestep the steep learning curve of traditional audio software and keep your entire workflow in one place.
When you're making demos or support articles, the best software is the one that gets out of your way. Your focus should be on creating clear, helpful content, not fighting with a complex editing timeline.
Can I Create Professional Videos Without Expert Editing Skills?
Absolutely. This is where a new wave of AI-powered tools is really changing the game.
The old way meant you had two choices: either settle for a lower-quality result from a simple screen recorder or spend countless hours learning a professional video editor like Camtasia or Adobe Premiere Pro.
Now there’s a new approach. Platforms like Tutorial AI empower subject matter experts to create polished videos without the editing bottleneck. You just record your screen and speak naturally, explaining things as you go. The AI transcribes your voice, and then you can literally edit the video just by editing the text. You can ramble, make mistakes, and take long pauses—the final cut will still look clean and professional, as if it were cut by an editor.
This kind of workflow is perfect for churning out content quickly:
- Demos and explainer videos that get straight to the point.
- Onboarding and training videos for new customers or team members.
- Feature release videos to show off what’s new.
- Video-based knowledge base articles that offer visual, step-by-step help.
The platform does the heavy lifting, trimming a raw recording that might be 50-100% longer than necessary into a tight, on-brand tutorial. It lets the person with the knowledge be the creator, without needing a whole new skillset.
Should I Hire a Voice Actor or Use an AI Voice?
This really comes down to your project's goals and scale.
A professional human voice actor brings a level of emotional depth and nuance that’s hard to beat. They're perfect for high-stakes brand campaigns or any project that relies heavily on character and storytelling.
On the other hand, for content you need to produce at scale—like a library of knowledge base videos, product demos, or training modules that get updated all the time—high-quality AI voices are a game-changer. They offer incredible speed, consistency, and are far more cost-effective. Modern AI voices are stunningly lifelike and can be generated in minutes across dozens of languages, giving you a professional sound without the logistical back-and-forth of hiring and directing talent.
Ready to create studio-quality tutorials in minutes, not hours? With Tutorial AI, you can transform your raw screen recordings into polished, on-brand videos with lifelike AI narration. Start creating for free at tutorial.ai.