If you’ve ever tried to make a training video, you know the old-school process is slow, expensive, and a real headache for anyone who isn’t a professional video editor. We need a better way. Modern tools now let subject matter experts—the people who actually know the material—create polished, professional videos quickly and without a film crew.
Why Video Is So Important for Training Today
Let’s be honest, nobody wants to read a dense, 50-page PDF anymore. In a world of short attention spans, video is king. It’s the most effective way to create engaging demos, walk new hires through onboarding, or build out a knowledge base that people will actually use.
But here’s the problem: meeting the demand for video content often creates a massive production bottleneck.
The old way just doesn’t work. On one hand, you have traditional video production, which requires a team of specialists and a hefty budget. On the other, you have quick screen recordings from tools like Loom, which are a great start but often end up being 50-100% longer than they need to be. They’re full of ums, ahs, awkward pauses, and mistakes.
Then you have professional editing software like Camtasia or Adobe Premiere Pro. These are powerful, but they require serious expertise. This leaves the subject matter expert, the person with the knowledge, stuck.
A Smarter Way to Work with AI
This is where things get interesting. A new breed of AI-powered tools is completely changing how training videos get made. Platforms like Tutorial AI are built to solve this exact problem, turning your experts into creators.
Imagine generating professional video tutorials based on simple screen recordings. This is perfect for demos, onboarding flows, explainer videos, feature releases, and populating your knowledge base or support articles with visual guides. Easy-to-use recording tools like Loom are a good first step, but the resulting videos are often 50-100% longer than necessary. On the other hand, professional software like Camtasia or Adobe Premiere Pro requires expert-level video editing knowledge.
Tutorial AI’s tools bridge this gap. They let you speak freely during your recording without any practice, and the AI will still make your video look as professional as if it were edited in Adobe Premiere Pro. This empowers the subject matter expert to create on-brand videos with extreme efficiency. This shift from a slow, manual process to a fast, AI-assisted one is a game-changer.
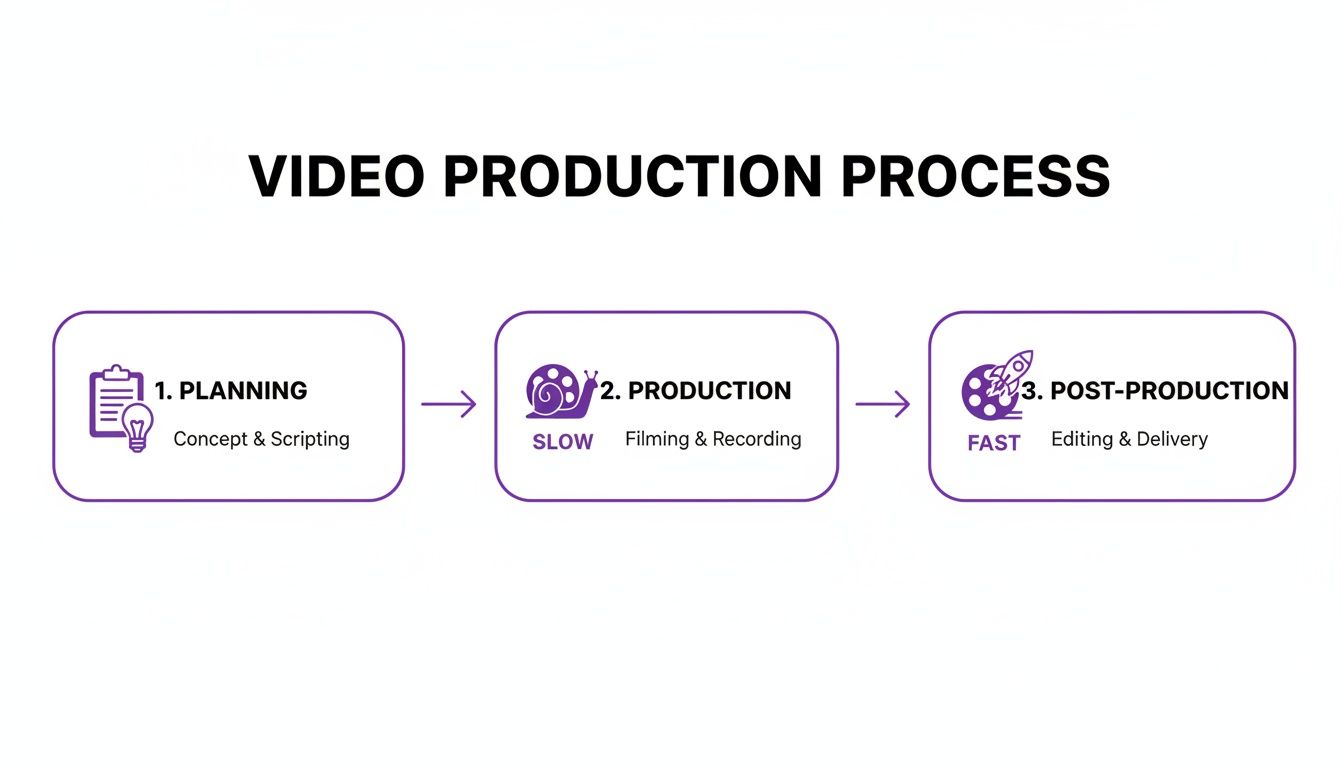
As the infographic shows, AI completely flips the script by making post-production the fastest part of the workflow. Traditionally, editing is where projects go to die, bogging down teams for days or even weeks. By automating it, you can finally produce training content at the speed your business needs.
The numbers back this up. The global eLearning market is on track to hit $1 trillion by 2028, and the video segment alone is projected to reach $625.3 billion by 2029. You can read more about this explosive growth to see just how massive the opportunity is.
Old School vs New School Video Production
Here’s a quick look at how the approach to making training videos has evolved, showing the clear advantages of modern, AI-driven workflows.
| Attribute | Traditional Approach | Modern AI-Powered Approach |
|---|---|---|
| Creator | Video specialist or dedicated team | Subject matter expert (SME) |
| Process | Slow, manual, multi-step | Fast, automated, integrated |
| Editing | Requires expert skills (Premiere, Camtasia) | AI handles cuts, zooms, and effects |
| Time | Days or weeks per video | Minutes per video |
| Cost | High (specialist salaries, software) | Low (SaaS subscription) |
| Scalability | Very limited | Highly scalable |
The bottom line is clear: leaning into AI isn’t just a nice-to-have; it’s becoming essential for any team that needs to create effective training content at scale. This guide will give you the playbook to do just that.
Laying the Groundwork: Planning and Scripting for Impact
Great training videos feel effortless, but they’re built on a foundation of careful planning. You can always spot the videos where someone just hit “record” and winged it—they’re rambling, confusing, and usually require a mountain of editing to make any sense. A little prep work upfront saves you a ton of pain later.
It all starts with a single, crucial question: What should the viewer be able to do after watching this?
That’s your learning objective. Think of it as your North Star. It guides every single decision you make, from the words you choose to the final edits. A vague goal like “show users the new dashboard” is a recipe for a fuzzy, unhelpful video. A strong learning objective sounds more like this: “After watching, the user will be able to add a new client and generate their first report from the dashboard.” See the difference? It’s specific and actionable.
Who Are You Talking To?
Once you know what you want to teach, you need to know who you’re teaching. Are you making this for brand-new employees who’ve never seen your software before? Or is it for seasoned pros who just need a quick rundown on a new feature? Your tone, language, and the level of detail you provide will be completely different for each.
Think about who’s on the other side of the screen:
- The New Hire: They need the basics, explained simply. Assume they know nothing and avoid jargon at all costs.
- The Existing Customer: They’re already familiar with your world. You can skip the intro and get right to what’s new or different.
- The Internal Team (Sales/Support): They need to know how things work so they can help customers. Their focus is on practical applications and troubleshooting common problems.
Trying to make one video for everyone is a mistake. You’ll end up with something that’s too slow for the experts and too fast for the beginners. Meet your audience where they are.
Scripting for Clarity, Not Complexity
Don’t let the word “script” intimidate you. We’re not writing a Hollywood blockbuster. For a training video, a script is just a guide to keep you on track and make sure you sound like a human.
Trying to read a formal, dense script is the fastest way to sound robotic. The trick is to write like you talk. Use short sentences, everyday language, and a direct, friendly tone. It’s a conversation, not a lecture.
A classic rookie mistake is packing too much into one video. A truly great training video does one thing exceptionally well. If you have a big, complex workflow, break it down into a series of shorter, bite-sized videos. Your viewers will thank you. A simple framework I’ve relied on for years is the “Tell-Show-Tell” method. It’s incredibly effective.
- Tell ‘em what you’re gonna show ‘em: Kick things off with a quick intro. State the video’s purpose and what they’ll be able to do by the end.
- Show ‘em: This is the heart of your video. Go through the process step-by-step. As you do something, explain why you’re doing it.
- Tell ‘em what you showed ‘em: Wrap up with a quick summary. Remind them of the key steps and reinforce the learning objective.
This structure creates a clean, logical loop that helps people actually remember what you taught them.
Sketch It Out with a Storyboard
You don’t need to be a professional artist for this. For a simple screen recording, a storyboard can be just a bulleted list in a document. It’s your visual roadmap, mapping out what happens on screen and what you’ll be saying at each point.
This simple outline forces you to think through the entire video from start to finish. You can use a sample script outline to help structure your thoughts to get a feel for how to pair your narration with the on-screen action. This little bit of prep is your secret weapon against awkward pauses and endless re-takes. It helps you get everything you need in one clean recording session.
How to Record Your Screen Like a Pro
Alright, you’ve got your plan nailed down. Now for the fun part: hitting record.
Getting clean, high-quality raw footage is the single best thing you can do to make your life easier in the editing phase. Seriously. A few minutes of prep work here will save you hours of headaches down the line.
Think of your screen as a stage. Before the curtain goes up, you need to set the scene. This means decluttering your digital workspace to get rid of anything that could distract your viewer. Hide your desktop icons, close every application you don’t absolutely need, and—this is a big one—silence all your notifications. A stray email alert or a chat pop-up can completely ruin an otherwise perfect take.
Preparing Your Digital Environment
A clean recording environment keeps your audience focused on what you’re teaching, not on your personal setup. Nobody needs to see your bookmarks bar, a desktop cluttered with screenshots, or the 37 random tabs you have open. The goal is a generic, professional-looking space.
Here’s a quick checklist to run through before you start recording:
- Use a Clean Browser Profile: Create a new, dedicated profile in your browser. This gives you a blank slate with no extensions, bookmarks, or browsing history to distract from the content.
- Set the Right Resolution: Record in a standard 16:9 aspect ratio. 1920x1080 (1080p) is the go-to standard for a reason—it looks sharp and fits perfectly on platforms like YouTube without those weird black bars on the sides.
- Pre-load Your Tabs: If your tutorial jumps between different web pages, open them all in separate tabs before you start. This avoids those awkward moments where you’re typing in a URL and waiting for the page to load.
Getting the Audio Right
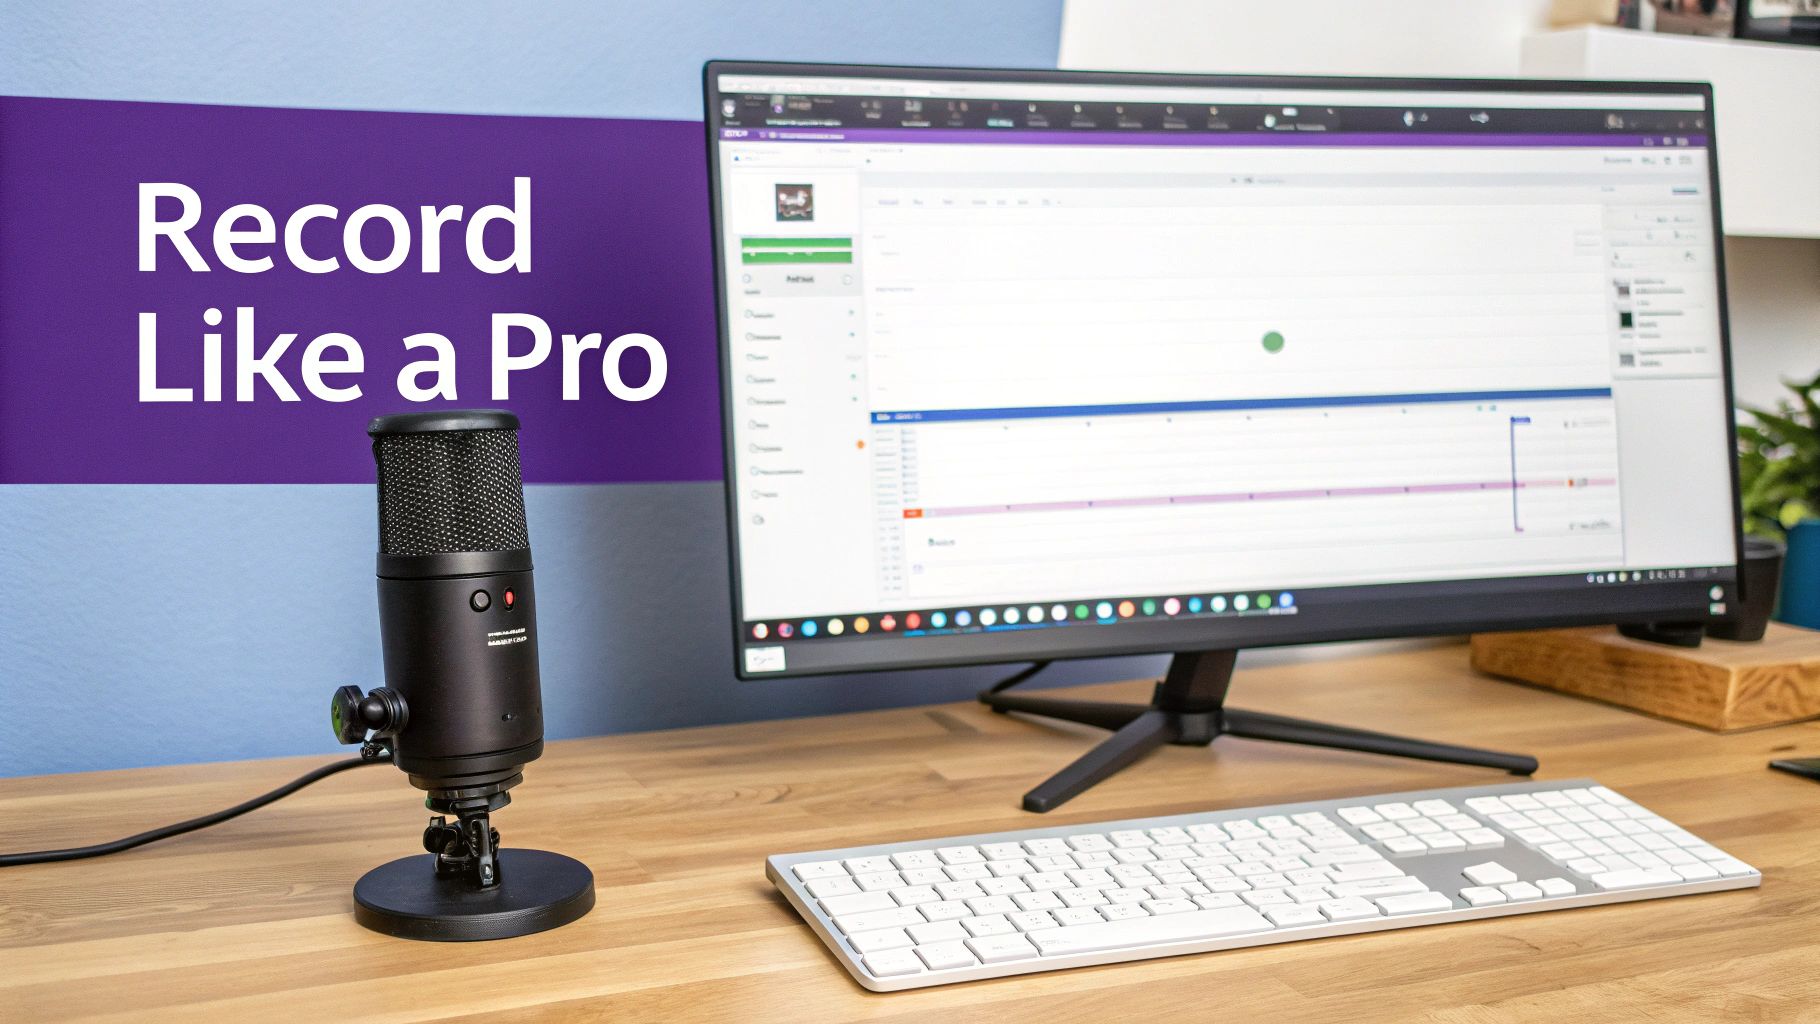
You could have the most beautifully recorded video on the planet, but if the audio is scratchy, distant, or full of echoes, people will bail. Fast. Bad audio is the number one killer of training videos.
Luckily, you don’t need a professional recording studio to get crisp, clear sound.
Just promise me you won’t use your laptop’s built-in microphone. It’s not your friend. It picks up everything—keyboard clicks, the hum of your computer, the echo in the room. Investing in a decent external USB microphone is one of the smartest, most impactful upgrades you can make. It’s a small price to pay to sound clear and authoritative.
When you’re speaking, aim for a clear, measured pace. It’s totally normal to talk a bit faster when you’re nervous, so make a conscious effort to slow down. Enunciate your words and remember to breathe. A calm, confident voice is so much easier for your audience to follow along with.
Pro Tip: Don’t obsess over ums, ahs, or long pauses. The biggest mistake I see people make is trying to nail a perfect one-take recording. Modern AI editors are built to slice out those imperfections automatically. Just focus on getting your message across clearly.
Mastering Your On-Screen Movements
In a screen recording, your cursor is the star of the show. It guides the viewer’s eye, so every movement should be deliberate and smooth.
Avoid frantic, jerky motions at all costs. When you need to click on something, move your cursor to the target calmly, pause for a beat, and then click. This simple technique gives the viewer’s brain a moment to process what’s happening. If you’re looking for tools to help with this, check out our guide on the best free screen capture software.
Effortless Recording with AI in Mind
The old way of recording involved memorizing rigid scripts and doing endless retakes to get that “perfect” footage. This put a ton of pressure on the subject matter expert and, honestly, was just inefficient.
That whole approach is becoming outdated.
Tools like Tutorial AI are changing the game. They let you generate a polished, professional video from a simple, casual screen recording. It’s a perfect workflow for creating:
- Software demos and feature release walkthroughs
- Employee and customer onboarding videos
- Explainers for complex internal processes
- Visual guides for your knowledge base and support articles
Easy-to-use recorders like Loom are a great start, but let’s be real—the final videos are often 50-100% longer than they need to be. On the other end of the spectrum, professional software like Camtasia or Adobe Premiere Pro requires a steep learning curve and serious editing skills.
Tutorial AI was designed to bridge that gap. It gives you the freedom to speak naturally and off-the-cuff, yet it still produces a video that looks like it came from a professional editing suite. This empowers your in-house experts to create high-quality, on-brand training videos efficiently, turning what used to be a daunting task into a simple part of their day.
The AI Editing Revolution: From Raw Footage to Polished Video
Once you’ve captured your screen recording, the real work begins. Traditionally, this is the most grueling part of the process—the editing phase, where great ideas often get stuck in a technical swamp. For anyone trying to make training videos without a background in film, this is where a project can easily grind to a halt. But today, AI is completely flipping the script on post-production.
Let’s be honest about a frustrating reality: a raw screen recording is almost always 50-100% longer than it needs to be. It’s inevitably filled with ums, ahs, long pauses while a page loads, and little mistakes you wish you could take back. That’s just a natural part of speaking and recording in one go.
In the past, the solution was a choice between two bad options. You could use simple tools like Loom for a quick-and-dirty recording, but they just don’t have the editing muscle to produce a truly professional video. The other route was diving into the deep end with software like Adobe Premiere Pro or Camtasia, which demand serious expertise to navigate complex timelines, keyframes, and audio mixing.
This difficult choice often sidelines the most important person in the whole process: the subject matter expert. They have all the knowledge but none of the specialized editing skills needed to turn that knowledge into a polished, usable asset.
Bridging the Gap with Text-Based Editing
This is exactly where AI-powered platforms like Tutorial AI are carving out a new path. The concept is simple but incredibly powerful: what if you could edit your video just by editing a block of text? It’s an approach that’s fundamentally changing how we create screen-based tutorials.
This workflow is a perfect fit for producing:
- Software Demos: Showcasing how your product works with crisp, clear steps.
- Onboarding Videos: Guiding new hires or users through those crucial first-time workflows.
- Explainer Videos: Breaking down a complex process into a simple visual guide.
- Feature Release Videos: Quickly creating content to announce and demonstrate what’s new.
- Knowledge Base & Support Videos: Building a library of visual answers to common questions.
The process itself is refreshingly straightforward. You just record your screen and speak naturally, without stressing over a flawless delivery. The AI platform automatically transcribes your entire narration into a text document. From there, editing is as easy as using Google Docs.
See an “um” in the transcript? Just delete the word, and the AI instantly snips out the corresponding video and audio. That long, awkward pause while the app loaded? Highlight and delete the gap in the text, and the timeline tightens up seamlessly. It’s a massive leap in efficiency. This text-based approach eliminates the need to fumble with a complicated timeline, making the editing process intuitive for anyone. The subject matter expert can finally focus purely on the content and message, confident that the technical cleanup is handled for them. Your video ends up looking like it was cut by a pro in Adobe Premiere Pro, but without the brutal learning curve. To learn more about this technology, you can check out our complete guide on AI video editing software.
Adding Professional Polish with Smart Effects
A good training video doesn’t just show information; it directs the viewer’s attention. This is another area where AI editors shine, adding a layer of professional polish with just a few clicks—applying effects that used to take a skilled editor a ton of manual effort.
Smart Zooms and PansInstead of manually setting start and end points for a camera move, AI can analyze the on-screen action. It automatically zooms in on important areas, like where your cursor clicks or where you start typing. This keeps the viewer focused on what matters without any jerky, distracting movements.
Cursor Highlighting and SmoothingYour cursor is your viewer’s guide. AI tools can automatically add a highlight or a click animation to make it stand out. Even better, they can smooth out shaky or frantic mouse movements, replacing them with clean, deliberate arcs that look far more polished and intentional.
Automatic Privacy BlursEver need to hide sensitive info like an email address, customer name, or API key? Manually tracking and blurring these elements frame-by-frame is incredibly tedious. AI can identify specific text or elements on the screen and automatically apply a blur that follows them throughout the entire video, protecting private data without the headache.
Even with AI doing the heavy lifting, it helps to think like an editor. Brushing up on essential video editing tips for beginners can help you make smarter decisions during production.
The Economic Impact of AI Editing
These efficiency gains aren’t just about saving time; they have a real financial impact. Professional video production is notoriously expensive. Standard educational videos can cost anywhere from $1,700–$2,300 per finished minute. For AI-generated synthetic videos, that cost can plummet to as little as $25 per finished minute. The savings are staggering.
By putting powerful, intuitive editing tools directly into the hands of your in-house experts, you can dramatically reduce your reliance on specialized video teams or pricey agencies. This doesn’t just cut costs—it accelerates how quickly you can create and deploy critical training materials, making your entire organization more agile.
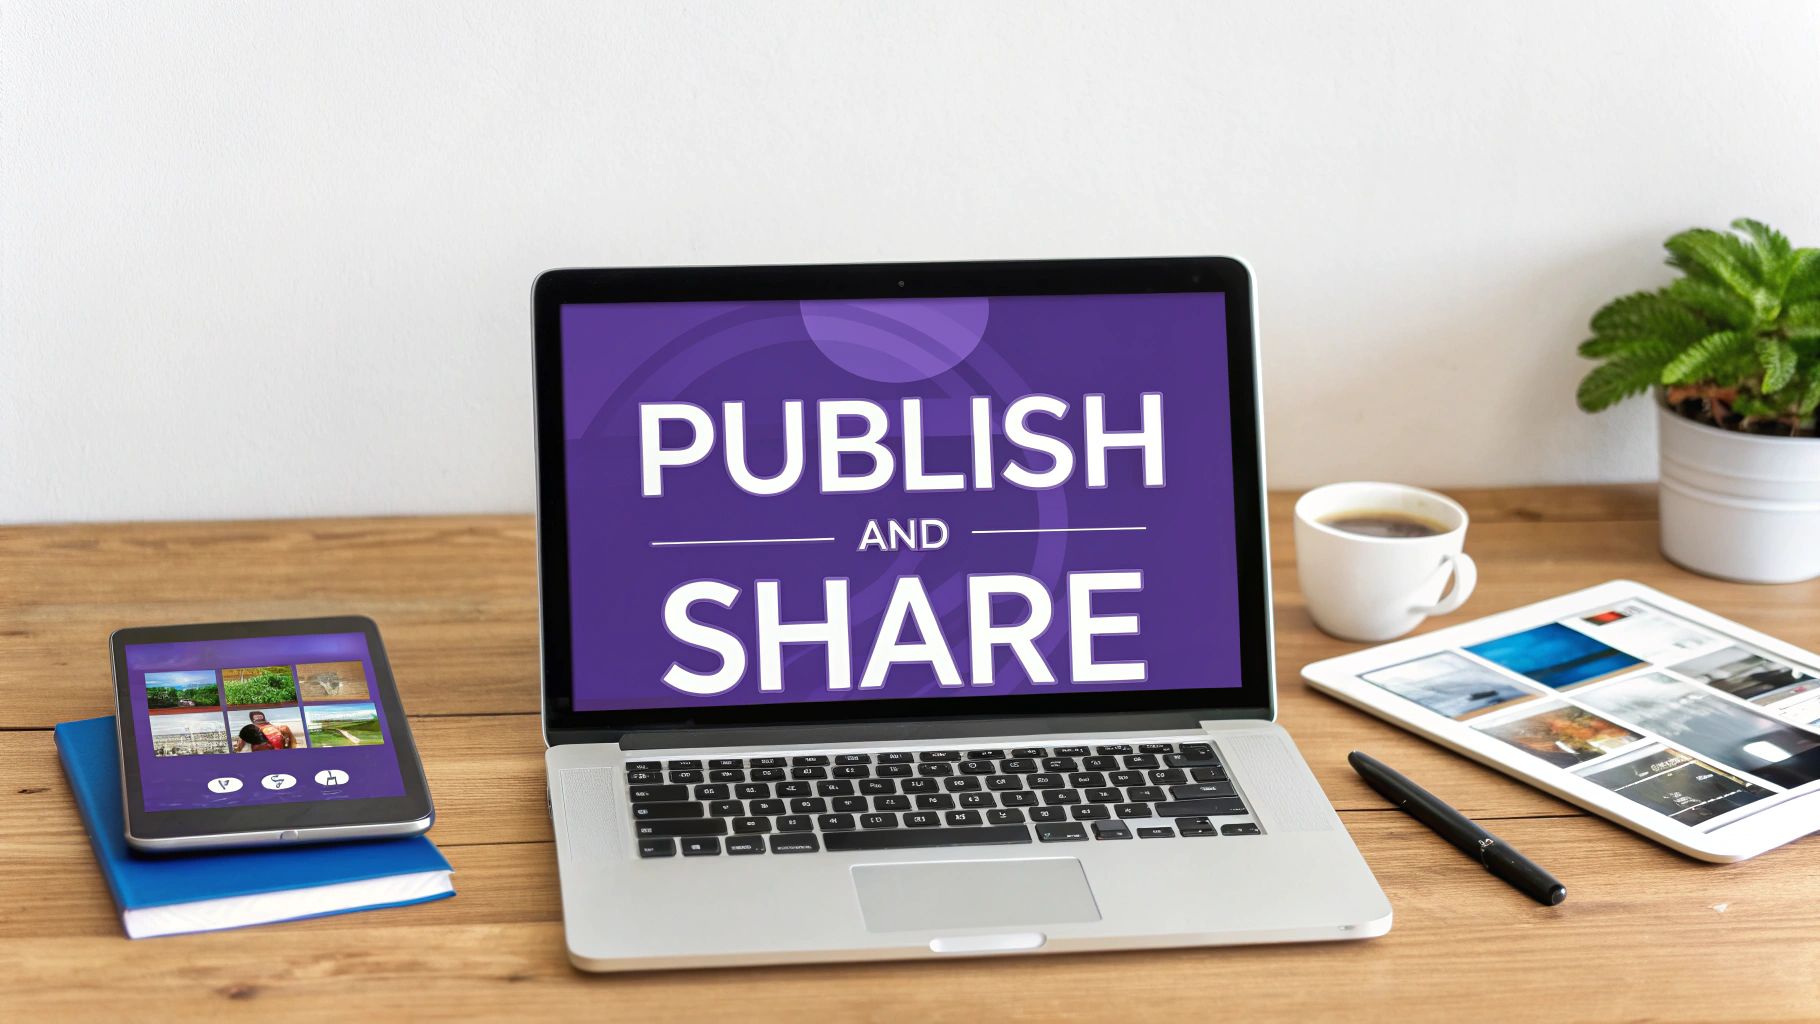
Enhancing and Distributing Your Final Video
So, you’ve wrangled your raw footage into a clean, tight narrative. The hard part is over, right? Well, almost. Now it’s time to add that final layer of polish and, most importantly, get your video in front of the people who need it.
This is where you graduate from simply making a video to creating a genuine learning experience. It’s about branding, accessibility, distribution, and actually knowing if your hard work paid off.
First things first: make it yours. Every video you produce should feel like it comes from the same place. Consistency is what builds trust and makes your content instantly recognizable. Most modern editing platforms let you create brand kits—basically, a one-click package of your company’s logos, color palettes, and fonts. It’s a huge time-saver and keeps you from fumbling with hex codes for every project.
Think about adding a standardized intro and outro, too. A quick, professional intro sets the stage and reinforces your brand from the jump. An outro can wrap up key points or, even better, point viewers to the next step. These bookends frame your content, giving it the feel of a professional series instead of a one-off recording.
Expanding Your Reach with Localization
In today’s global teams, creating training in only one language is a surefire way to limit its impact. This is where localization used to be a massive headache—a long, manual process of transcribing, translating, and then painstakingly re-timing every single visual element.
Thankfully, AI has completely changed the game here. Tools with features like AutoRetime can translate your script and captions into dozens of languages automatically. But here’s the magic: they also intelligently re-sync all your scenes and on-screen callouts to match the new voiceover’s timing. What used to take days of tedious manual work now happens in minutes. This makes supporting international teams and customers a realistic goal, not a logistical nightmare.
The whole point of a training video is for people to watch it and get it. Brevity is your best friend here. A focused, well-edited video will always be more effective than a long, rambling one because it respects the viewer’s time. The data backs this up, especially when it comes to e-learning. There’s a steep drop-off in completion rates as videos get longer. Videos under six minutes? People usually stick around. But that figure plummets to just 20% for videos over 12 minutes. This is the driving force behind the microlearning trend, where short, 2-5 minute videos focusing on a single task can boost engagement by over 50%.
Strategic Distribution and Measurement
Creating a great video is only half the battle. Now you have to get it to the right people. Where you host your video depends entirely on who it’s for.
- Internal Knowledge Bases: For your own team, embedding videos in tools like Confluence or Zendesk is perfect. It puts the answers right where they’re already looking.
- Learning Management Systems (LMS): If you’re building out structured courses for compliance or certification, an LMS is the way to go. It lets you track completion and quiz results.
- Public Platforms: For customer tutorials or marketing, platforms like YouTube or Vimeo are fantastic for reaching a broader audience and making your content discoverable.
Once your video is out there, don’t just walk away. The final piece is analytics. Tracking a few key metrics is how you figure out what’s working and what isn’t.
Pay close attention to these numbers:
- Completion Rate: What percentage of people finish the video? If it’s low, your video might be too long or the opening isn’t hooking them.
- Engagement Drop-off: Is there a specific point where most viewers bail? You’ve likely found a confusing section that needs to be reworked.
- Re-watches: Are people replaying a certain part? That’s a great sign you’ve explained a complex but critical step really well.
Looking at this data transforms video creation from a one-way street into a feedback loop. You learn what resonates, which helps you start creating engaging online course videos that are more effective and impactful every single time.
Answering Your Top Questions About Making Training Videos
Even with the best playbook in hand, questions always pop up once you get down to the business of actually creating training videos. I’ve been there. So, let’s walk through some of the most common hurdles I see people face and get you some straightforward, practical answers.
How Long Should a Training Video Be?
This is the big one, and the answer is almost always “shorter than you think.” While the perfect length depends on your topic’s complexity, the data shows a pretty steep drop-off in viewer engagement right around the six-minute mark.
To keep people locked in, think in terms of microlearning. Aim for videos in the 2-5 minute sweet spot. This forces you to be concise and dedicate each video to a single, digestible task or idea. If you have a beast of a topic, don’t try to cram it all into one video. Break it down into a playlist of shorter, focused segments. Your audience will thank you for it, and they’ll actually remember what they watched.
Can AI Really Replace Professional Video Editors?
Honestly, for most internal training and customer-facing tutorials, yes—and it’s a game-changer. For years, there’s been a massive gap between two extremes.
On one side, you have simple tools like Loom, which are great for quick, informal recordings. The problem is that the raw footage is often 50-100% longer than it needs to be, full of “ums,” long pauses, and repeated clicks. On the other end, you’ve got behemoths like Camtasia or Adobe Premiere Pro, which are incredibly powerful but require a steep learning curve.
Tutorial AI was designed to live in that gap. It lets an expert just talk and demonstrate naturally, without worrying about a perfect take. The AI then swoops in and does the heavy lifting, cleaning up the audio, trimming out dead air, and producing something that looks like it came out of a professional editing suite. This means your own team—the people who actually know the product—can create polished videos for all sorts of things:
- Product Demos and Onboarding: Walking new customers through the setup process.
- Explainer Videos: Untangling a complex workflow step-by-step.
- Feature Release Updates: Showing off what’s new and how it works.
- Knowledge Base & Support Videos: Giving visual answers to frequently asked questions.
What Is the Biggest Mistake to Avoid?
Without a doubt, the number one mistake is hitting record without a plan. People just start talking, clicking around, and trying to cover way too much ground. The result is a rambling, confusing video that’s a nightmare for the viewer and nearly impossible to edit down into something useful.
The fix is simple: have a basic outline. Know the one thing you want to teach in that specific video. Then, when you record, use deliberate, clear on-screen actions. A well-planned recording gives an AI-powered editor a fantastic foundation to work with, allowing it to easily tighten the pace and make it flow.
How Can I Make My Videos Look More Professional?
A professional-looking video isn’t about fancy graphics; it’s about intentionally guiding your viewer’s attention. This is where a few key post-production effects can turn a basic screen recording into a genuinely helpful tutorial.
Look for tools that can automatically add effects like smart zooms. These zooms follow your cursor and on-screen actions, making it obvious what the viewer should be looking at. Cursor effects, like a highlight or a subtle click animation, are also incredibly helpful for keeping the viewer on track.
And don’t forget security. If you’re showing any sensitive data like names, emails, or account numbers, using a privacy blur tool is non-negotiable. It keeps your data safe and shows your audience you take privacy seriously.
Finally, top it all off with a branded intro and outro. These simple bookends give your videos a consistent, polished feel and instantly elevate them from one-off recordings to a cohesive library of training assets.
Ready to create polished, professional training videos in minutes, not days? With Tutorial AI, your subject matter experts can record freely and let our AI handle the rest—from cutting out mistakes to adding smart zooms and branding. Start creating better training videos today.