Why Great Lighting Is a Game-Changer for Your Videos
Before you press record, let’s talk about the one thing that can make or break your video: lighting. It’s the unsung hero of great content. Get it right, and you look credible and professional. Get it wrong, and you risk looking like you’re filming from a cave, completely undermining your expertise.
Think about the last time you saw a product demo filmed in a dark room. The presenter was a silhouette, the screen was covered in glare, and the whole thing just felt… off. You probably clicked away. Now, picture that same expert in a well-lit space. You can see their face clearly, the product is sharp, and the video instantly commands respect. That’s the power of intentional lighting.
This isn’t just about looking good—it’s about clear communication. Your lighting directly affects how your audience perceives you and your message, whether you’re creating a quick explainer or a detailed training series.
To help you get started, here’s a quick look at the core concepts we’ll be diving into.
Key Lighting Principles at a Glance
This table breaks down the fundamental ideas of lighting. Understanding these will give you the foundation you need to make smart choices, no matter your budget.
| Concept | What It Is | Why It Matters for Your Videos |
|---|---|---|
| Color Temperature | The "warmth" (yellow/orange) or "coolness" (blue/white) of a light source. | Mismatched temperatures look unnatural and can be distracting. |
| Soft vs. Hard Light | The quality of the shadows created. Soft light has faint, soft-edged shadows. | Soft light is flattering and professional; hard light is harsh. |
| Exposure | The overall brightness or darkness of your video image. | Properly exposed video is clear and easy to watch; too dark or bright hides detail. |
We’ll unpack each of these principles with practical examples in the sections below, so you can see exactly how to apply them to your own setup.
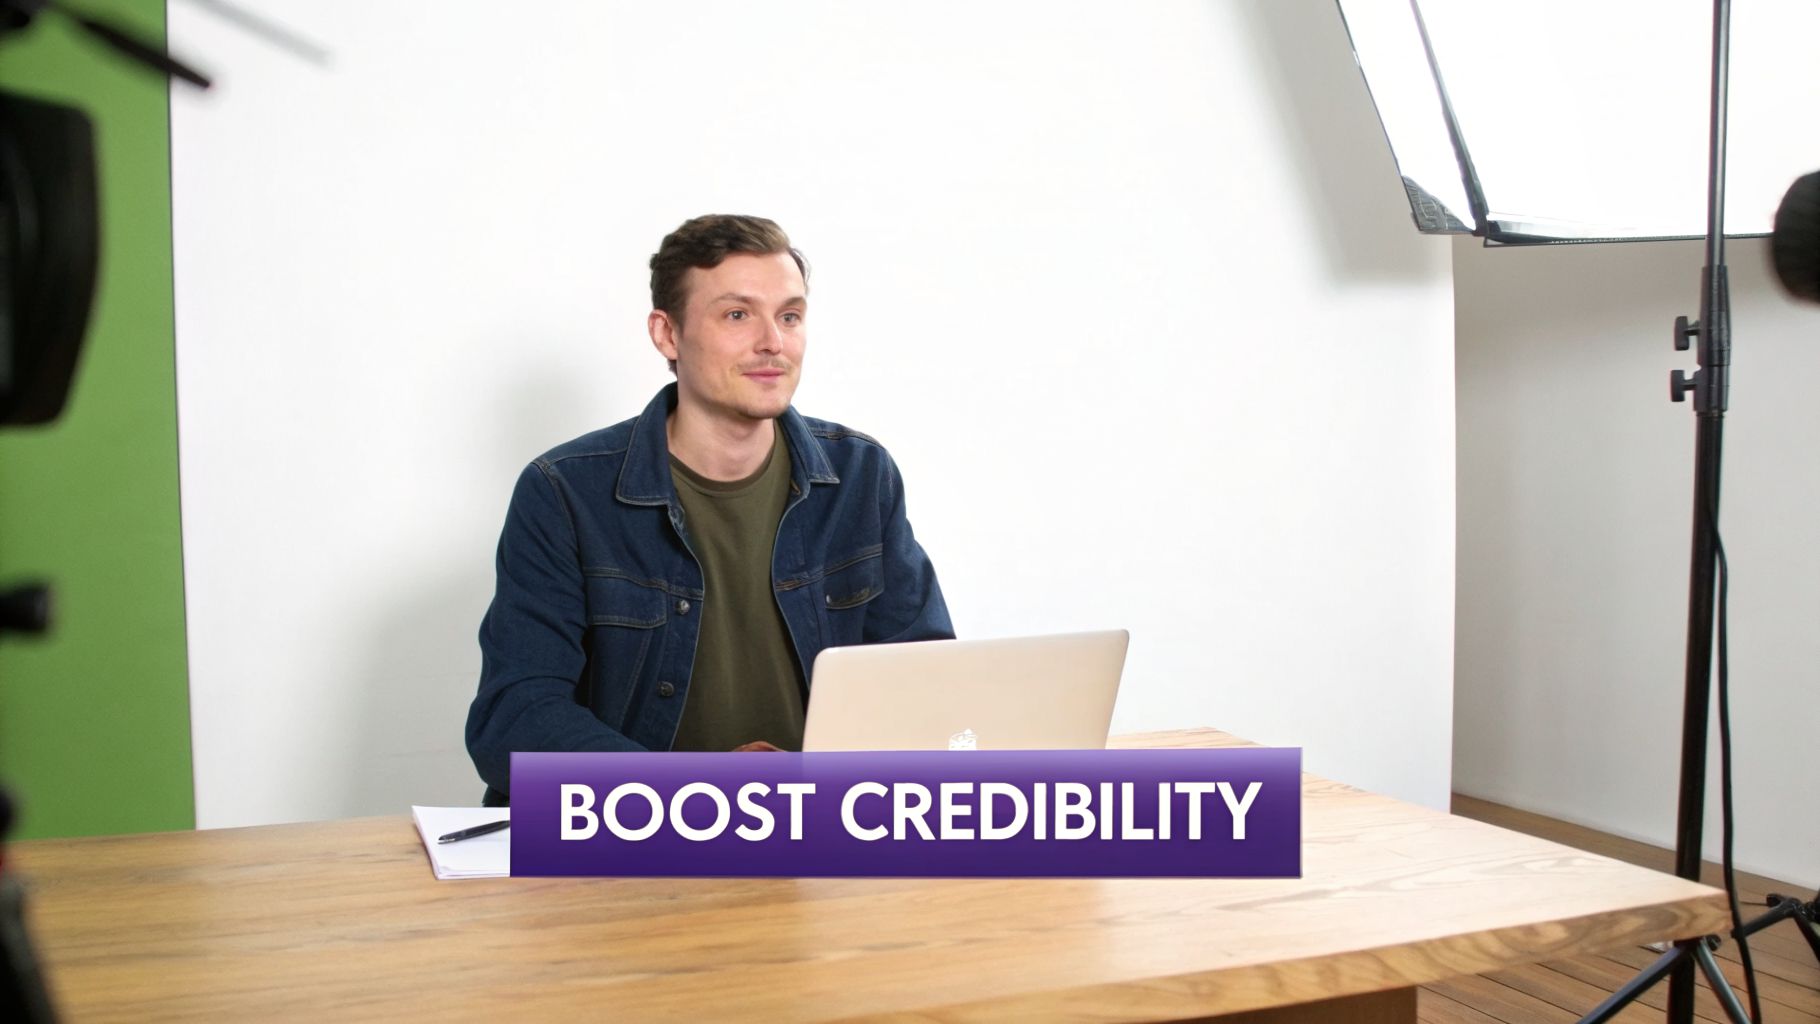
Boost Your Credibility and Keep Viewers Engaged
It’s no secret that the bar for video quality is higher than ever. Content creators understand that good lighting is a non-negotiable part of standing out. The global studio lighting market, valued at US$18.4 billion in 2026, is even projected to hit an incredible US$41.99 billion by 2034.
Why the boom? Because great lighting puts the focus squarely on you, the expert. It eliminates distracting shadows and helps you project confidence. This is especially vital for any kind of training or educational content where clarity is everything. If you want to take a broader look at improving your content, our complete guide on video production for training offers a ton of other useful strategies.
The goal isn’t to build a Hollywood-level film set. It’s simply to remove visual distractions so your audience can focus 100% on your message. Good lighting lets your content shine.
Look Beyond Lighting: Why Post-Production Matters
Getting your lighting right is the first huge step. But the editing process is often where things slow down.
Easy-to-use recording tools like Loom are great for getting your thoughts down, but the final videos are often 50-100% longer than necessary. On the flip side, professional video editing software such as Adobe Premiere Pro or Camtasia requires expert video editing knowledge.
That’s exactly where Tutorial AI comes in. It generates professional video tutorials based on your screen recordings, which is perfect for demos, onboarding videos, explainer videos, feature release videos, knowledge base videos, and support article videos. Tutorial AI’s tools let you speak freely without any practice and still your video will look professional as if it was edited in Adobe Premiere Pro. It allows the subject matter expert to create on-brand videos extremely efficiently.
Understanding the Basics of Great Light

You don’t need a degree in cinematography to make your videos look fantastic. Honestly, getting your lighting right comes down to just three core concepts that control how light looks on camera. Once you get a feel for these, you’ll be able to spot why a shot looks “off” and know exactly how to fix it.
Think of it like cooking. The three pillars—color temperature, light quality, and exposure—are your salt, fat, and acid. They all work together, and learning how to balance them is what separates an amateur from a pro.
Let’s break them down.
Nail Your Skin Tones with Color Temperature
Ever shot a video where you looked sickly blue or oddly orange? That’s almost always a color temperature issue. It’s a simple concept: color temperature just describes how “warm” or “cool” a light source is, and we measure it in Kelvin (K).
A lower Kelvin value gives you a warm, cozy, orange-yellow light—think of a classic lightbulb or candlelight (around 2700K to 3200K). A higher Kelvin value produces a cooler, blue-white light that feels more like bright daylight (around 5600K to 6500K).
Your camera has a “white balance” setting that tries to figure this out and make whites look white. But it gets easily confused when you start mixing different light sources, like a warm lamp in the corner and the cool blue light from a window. The camera can’t balance for both, so one part of your shot will look wrong.
Here’s the golden rule I tell everyone: ** match the color temperature of all your light sources**. If you’re using window light as your main source, dial your other lights to a “daylight” setting (usually 5600K). If you’re filming at night with indoor lamps, switch your video lights to a warmer setting (like 3200K) to get a clean, consistent look.
Choose Between Soft Light and Hard Light
Next up is the quality of your light, which really just boils down to one thing: shadows. This is the difference between soft light and hard light.
- Hard light comes from a small, focused source like the sun on a clear day or your phone’s flashlight. It casts harsh, well-defined shadows. While it can be used for dramatic effect, hard light is a nightmare for most talking-head videos because it highlights every pore, wrinkle, and imperfection.
- Soft light is the opposite. It comes from a large, diffused source that wraps gently around your face. This creates soft, flattering shadows with smooth edges—or sometimes no noticeable shadows at all. This is what you want for tutorials and professional videos. It’s clean, forgiving, and looks great.
Creating soft light is easier than you think. The key is diffusion. By placing something between you and the light source to spread it out, you effectively make the light source bigger. You can use a dedicated softbox, but even a white bedsheet or a sheet of parchment paper taped over a lamp will do the trick in a pinch.
Control Brightness with the Exposure Triangle
Finally, we have exposure—or, simply, the overall brightness of your video. You control this with three camera settings that work together: aperture, ISO, and shutter speed.
- Aperture (or f-stop): This is the opening in your lens. A lower f-stop number (like f/1.8) means a wider opening, which lets in more light and creates that beautiful blurry background (bokeh). A higher number (like f/16) gives you a tiny opening, letting in less light and keeping everything in focus.
- ISO: This is a digital boost to your camera’s sensitivity. A low ISO (like 100) needs plenty of light but gives you a super clean image. A high ISO (like 3200 or more) can help you shoot in darker conditions, but it comes at a cost: ugly digital noise or “grain.” A simple rule of thumb: ** always keep your ISO as low as possible for the cleanest shot.**
- Shutter Speed: This determines how long the sensor is exposed to light for each video frame. For video, you want the motion to look natural, not choppy or overly blurry. The standard practice is to set your shutter speed to double your frame rate. So, if you’re filming at 30 frames per second (fps), your shutter speed should be 1/60th of a second.
These three settings are constantly playing off each other. If you open your aperture to get more light, you might have to lower your ISO or raise your shutter speed to keep the image from blowing out. Getting comfortable with this balancing act is what gives you full creative control over the final look and feel of your videos.
Your Guide to Lighting Setups for Any Budget
Now that we’ve covered the basic principles of good lighting, let’s get to the practical part: building a setup that actually works for you and your space. You really don’t need a Hollywood-level budget to get fantastic results.
We’ll look at three common scenarios, from using what you already have to investing in a more professional kit.
The No-Budget Creator Setup
Working with absolutely nothing? Don’t worry. Your best light source is completely free—the sun. Natural light from a window is big, soft, and incredibly flattering if you know how to work with it.
The key is positioning. Simply sit so you’re facing the window directly. This immediately turns that window into a huge, soft key light that covers your face evenly. You’ll be amazed at the difference compared to sitting with the window at your back, which just turns you into a dark silhouette.
To really level this up, you can add a makeshift reflector.
- Find a piece of white poster board or foam core. Even a white t-shirt stretched over a box will do the trick.
- Place it on your desk or in your lap, just out of the camera’s view.
- Angle it to bounce that soft window light back onto the shadowed side of your face.
This simple move creates a fill light, softening up any harsh shadows for a balanced, polished look. All without spending a dime.
Expert Tip: If direct sun is blasting through your window and creating harsh hot spots, you can easily diffuse it. Just tape a thin white bedsheet or some parchment paper over the glass. This will instantly soften the light, giving you that smooth, professional quality.
The Beginner Budget Setup Under $100
Once you have a little cash to play with, investing in a dedicated light source gives you far more consistency and control. This is where modern LEDs have been a game-changer for creators. The demand is so high that the LED video lights market, which was at $3.5 billion in 2026, is on track to hit $7.8 billion by 2033. This boom means there are tons of affordable, high-quality options out there.
For under $100, your two best bets are a ring light or a small LED panel.
- Ring Lights: These are wildly popular for a reason. They create an even, flattering light and that signature circular catchlight in your eyes. For the best effect, place your camera right in the middle of the ring to get rid of shadows.
- Small LED Panels: A bit more versatile, a single panel can serve as a great key light. Just mount it on a small tripod and place it roughly 45 degrees to one side of your camera, aimed down at your face.
A word of warning for those who wear glasses: a ring light positioned head-on will create a seriously distracting glare. The easy fix is to raise the light higher and angle it down, or simply move it further to the side until you see the reflection disappear from your lenses.
Lighting Setup Comparison by Budget
Choosing the right lighting setup depends on your budget, your goals, and how much control you want. Here’s a quick comparison to help you decide which path is right for you.
| Budget Level | Recommended Gear | Pros | Cons |
|---|---|---|---|
| No Budget | A large window + white poster board (reflector) | Completely free, incredibly soft and flattering light. | Dependent on weather and time of day, less control. |
| Under $100 | A single ring light or small LED panel with a stand | Consistent results, good control, highly affordable and portable. | Can create flat light or harsh shadows if positioned poorly. |
| $100 to $400 | A three-point lighting kit (e.g., two softboxes and one smaller backlight) | Total creative control, creates depth, looks highly professional. | More complex to set up, requires more space. |
Ultimately, even a simple window can produce amazing results. But as your budget grows, you gain more consistency and creative freedom over your look.
The Prosumer Budget Setup: $100 to $400
When you’re ready to invest between $100 and $400, you can build the gold standard for talking-head videos: ** three-point lighting**. This classic setup uses a key, fill, and backlight to perfectly shape you, create depth, and make you pop right off the screen. You can find fantastic softbox kits in this price range that bundle everything you need to get started.
Here’s how the three lights work in harmony:
- The Key Light: This is your main and brightest light. Like in the beginner setup, place it about 45 degrees to one side of your camera, positioned slightly above eye level. This carves out your features and creates natural-looking dimension.
- The Fill Light: Positioned on the opposite side of the camera, this light’s job is to “fill in” the shadows created by the key light. The trick is to make it less intense—aim for about 50% of the key light’s brightness. This keeps some shaping shadows on your face without letting one side disappear into darkness.
- The Backlight: This is the secret ingredient for that truly professional look. Also called a hair light, it’s placed behind you and out of the shot, aimed at the back of your head and shoulders. It creates a subtle rim of light that cleanly separates you from your background, adding a fantastic sense of depth.
Of course, even the most beautifully lit video can be ruined by bad audio. To make sure your sound is as good as your visuals, check out our guide on finding the best mic for recording your videos. With a prosumer budget, you can finally take full control of your look and get consistent, high-quality video every single time.
How to Position Your Lights for Flawless Video
Having good lights is half the battle, but where you place them is what truly separates an amateur shot from a professional one. You can have the best gear in the world, but with poor placement, your video will still look flat and uninviting. Think of it as sculpting with light—the angles you choose will define the mood, shape your face, and make you pop on screen.
Let’s walk through the gold standard for talking-head videos and tutorials: the classic three-point lighting setup.
The Key Light: Your Main Source
Your key light is the workhorse of your setup. It’s your primary, and brightest, light source, responsible for most of the illumination on you. If your video just looks “off” and you can’t figure out why, chances are your key light placement is the culprit.
The best way to position it is by using what we call the 45/45 rule. It’s incredibly simple but works wonders.
- First, place the light about 45 degrees to the side of your camera, on either the left or right.
- Then, raise it so it’s roughly 45 degrees above your eye level, angling down towards your face.
This angle creates gentle, flattering shadows that give your face dimension. It avoids that flat, washed-out look you get from a light placed directly in front of you and helps you look more three-dimensional on a 2D screen.
A mistake I see all the time is placing the key light too low or right next to the camera. This kills all the shadows and gives you that classic “deer-in-the-headlights” look, which feels unnatural and highlights every little imperfection.
The Fill Light: Softening the Shadows
Once your key light is in place, you’ll see that one side of your face is nicely lit, but the other has some distinct shadows. That’s where the fill light comes in. Its only job is to soften those shadows, not get rid of them completely.
Position the fill light on the opposite side of your camera from the key light. The most important part? It needs to be less intense. I usually start by setting my fill light to about 50% of the key light’s brightness.
This brightness difference is what preserves the depth. If your key and fill lights are equally bright, you’re right back to that flat, uninteresting image. You need those soft shadows to give your face shape and character.
The Backlight: Creating That Professional Pop
The backlight (sometimes called a hair light or a rim light) is the secret sauce that gives your videos that polished, high-end feel. You place it behind you, high up and out of the camera’s view, so it casts a subtle glow on your hair and shoulders.
This little touch does something incredibly important: it separates you from your background. By creating a clean, bright edge, you add a real sense of depth to the shot and stop yourself from looking like a cardboard cutout pasted onto the scene.
This flowchart gives you a great visual for how to scale your setup, from using a window for free to building a more professional rig.
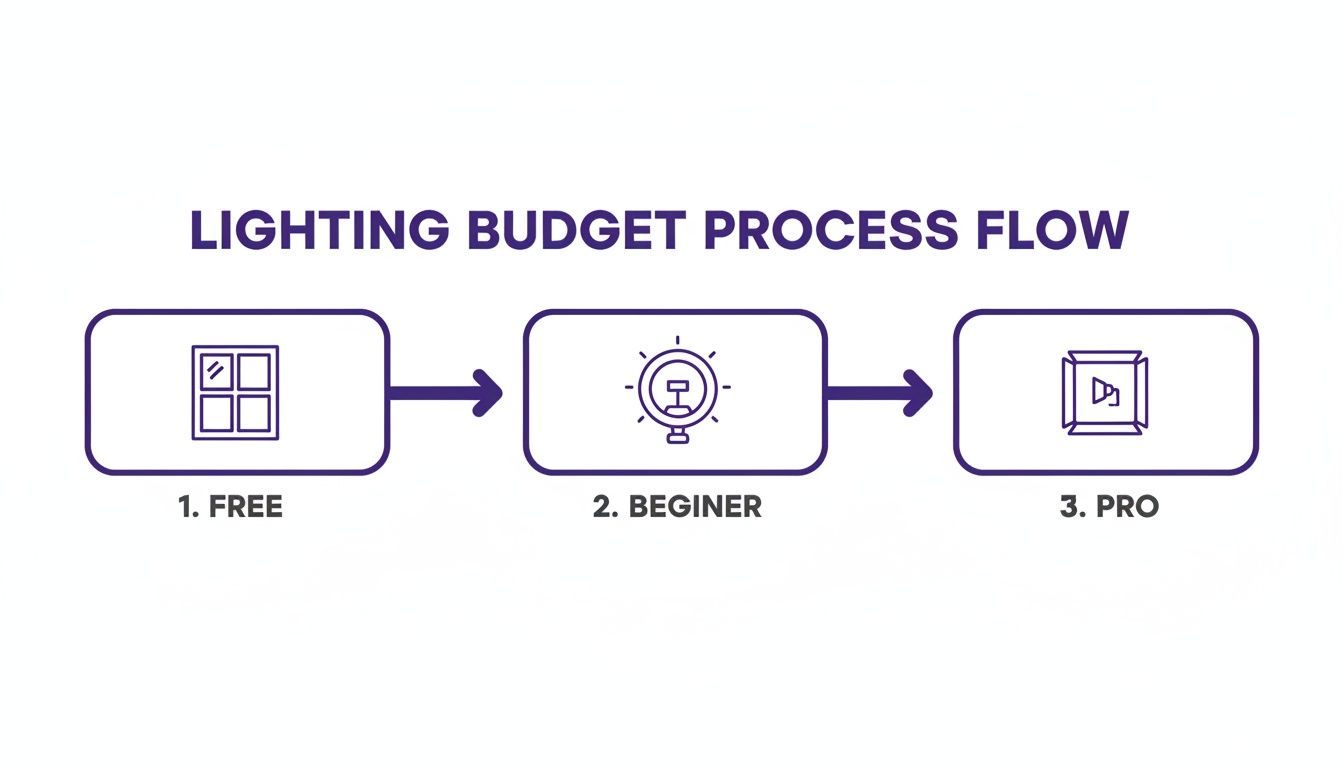
As you can see, you can get great results at any budget. This progress is largely thanks to massive improvements in lighting technology. The global lighting market, which hit USD 148.31 billion in 2026, is even projected to climb to USD 201.26 billion by 2031. LEDs are the driving force here, claiming a staggering 68.95% revenue share in 2025. For us creators, this means we get powerful, consistent light that doesn’t turn our recording space into a sauna.
To really get the hang of this, it helps to understand the fundamentals of photography lighting basics. Even tiny tweaks can make a huge difference. For example, if you wear glasses, try raising your key and fill lights a bit higher than 45 degrees. This simple adjustment changes the angle of reflection and can completely eliminate that distracting glare.
Let AI Handle the Hard Part: Editing Your Video
Getting your lighting just right is a huge win. It means your raw footage is crisp, clear, and professional. But then comes the next mountain to climb: editing. This is where so many great video projects grind to a halt.
For most experts, it feels like a no-win situation. You either use a dead-simple tool like Loom and publish your raw take, or you dive into the deep end with professional software like Adobe Premiere Pro and brace for a steep, frustrating learning curve.
The problem with the first option is that your videos end up being 50-100% longer than they need to be. They’re full of pauses, filler words, and re-dos that make your audience tune out. The second option? It demands serious video editing skills and eats up hours of your time.
This is exactly where an AI-driven approach to editing changes the game.
From Raw Recording to Polished Video, Instantly
Imagine this: you hit record, talk through your screen share, and explain a concept just like you would on a live call. No script, no pressure to be perfect on the first take. You just teach.
That’s the new reality. Tools like Tutorial AI are built to close the gap between your expertise and a finished video. You can create all kinds of high-impact content with incredible speed:
- Product Demos & Explainers that show off exactly what your software can do.
- Onboarding Videos to walk new users through your platform.
- Feature Release Updates to get customers excited about what’s new.
- Knowledge Base Videos that solve support tickets before they’re even created.
You just record your screen and voice, providing the raw ingredients. The AI then steps in to handle the tedious work, making the editing part feel almost magical.
Tutorial AI lets the subject matter expert do what they do best: share their knowledge. The technology takes care of the complex editing, making the final video look and sound like it came from a professional studio.
Edit Your Video by Editing Text
Here’s how it works. After you finish recording, Tutorial AI transcribes your audio into text. Instead of hunting through a timeline to find a mistake, you just read the transcript.
Found a sentence where you stumbled or a paragraph you want to remove? Just delete the text. The corresponding video and audio are cut instantly. It’s that simple.
The AI then goes a step further by regenerating your voice over the edits, smoothing out the cuts so the final narration sounds seamless and natural. This text-based editing is unbelievably fast and intuitive. If you want to see this in action, our guide on how to create AI video breaks it down.
The system also adds smart production details for you. It automatically zooms in on key actions, makes your cursor easier to follow, and can even add a professional background with one click. To really master the art of visual storytelling, a lot can be learned from other fields; top wedding videography tips, for instance, offer great insight into lighting and audio that can make any video more compelling.
When you combine great lighting with smart AI editing, any expert can produce high-quality, on-brand videos faster than ever. All your hard work setting up the perfect shot will finally pay off in a final product that looks and feels truly professional.
Troubleshooting Your Video Lighting
You’ve unboxed your new lights, followed a guide, and are ready to hit record… but something’s just not right. Don’t sweat it. Getting video lighting perfect is often a game of small tweaks. Let’s walk through a few of the most common lighting headaches and how to fix them.
How Do I Get Rid of That Weird Shadow on the Wall?
Ah, the dreaded shadow monster. That distracting silhouette lurking behind you is almost always caused by one thing: you’re sitting too close to the wall.
The simplest fix is to create more distance. Try pulling your desk and chair a good three to four feet away from the wall. This gives your key light room to wrap around you, and the shadow will soften and fall out of the camera’s frame.
If you can’t move your setup, or if you want a more pro-level look, add a backlight. Just place a small, hidden light behind you, pointed at your shoulders and the back of your head. This creates a subtle “rim light” that separates you from the background and completely wipes out any shadows your main lights were casting.
Can I Really Get Good Results With Just One Light?
You bet. A single light can look absolutely fantastic, as long as it’s the right kind of light. The secret is to go big and soft. A large softbox or a beefy ring light is perfect for this.
Position your single light slightly to one side and a bit above eye level. This creates a pleasing, dimensional shadow on the opposite side of your face. To take it up a notch, grab a cheap white foam board or even a piece of poster board and place it on the shadowed side, just out of frame. This will act as a reflector, gently bouncing light back to fill in the shadows for a balanced, dynamic look—no second powered light needed.
A Quick Tip from the Field: If you’re shooting near a bright window, your camera might overexpose the shot, even at its lowest ISO. An ND (Neutral Density) filter is a game-changer here. Think of it as sunglasses for your lens. It cuts down the amount of light coming in, letting you keep that wide-open aperture for a blurry background without blowing out your highlights.
How Do I Stop the Glare in My Glasses?
For anyone who wears glasses on camera, this is the ultimate battle. That distracting glare is just a direct reflection of your light source. To get rid of it, you have to change the angle of that reflection.
The most reliable way to do this is to raise your key light much higher than you think you should and angle it down sharply at your face. This forces the reflection to bounce downwards, away from your camera’s lens. You can also try moving the light further off to the side. It’s all about tiny adjustments, so watch your monitor and move the light bit by bit until the glare vanishes.
Great lighting is a huge step, but a truly efficient workflow is what turns a raw screen recording into a polished tutorial in minutes, not hours. That’s where Tutorial AI comes in, bridging the gap and handling the tedious parts of video editing for you.
Ready to create studio-quality videos effortlessly? Discover Tutorial AI.