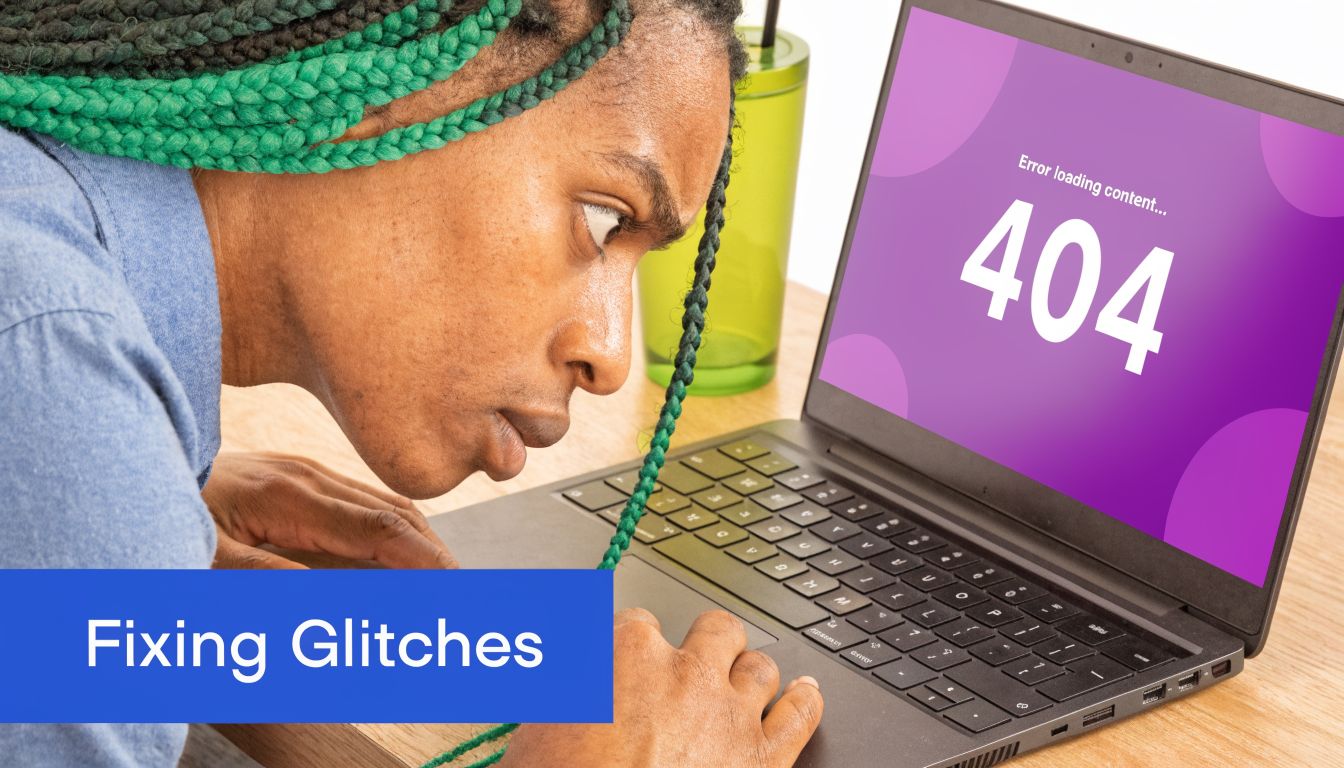
Yes, you can screen record on a Chromebook. Chromebooks include a built-in recorder you can open with Shift + Ctrl + Show Windows, and it saves WebM video with H.264 at 30 FPS by default, but recording a clean clip is only the first step if you need a polished tutorial.
That’s usually the underlying reason behind the question. Those inquiring "can you screen record on a chromebook" aren't merely seeking proof that the feature exists. They need to capture a demo, explain a workflow, send onboarding guidance, create a support video, or publish something that looks professional enough for customers or coworkers.
The Chromebook handles the raw capture part well. The friction starts after that. File format quirks, missing audio, limited editing, and compliance concerns all show up fast once you move beyond a quick internal clip. A practical workflow needs to cover the whole path from capture to final tutorial.
Getting Started with Chromebook's Built-In Screen Recorder
You are halfway through documenting a workflow, someone needs the video today, and the Chromebook in front of you is the machine you have. ChromeOS can handle the capture step quickly. The difference between a throwaway clip and a tutorial you can reuse comes down to a few setup choices before you press Record.
Press Shift + Ctrl + Show Windows to open the recorder. You can also open Quick Settings and select Screen Capture. Switch to video mode with the camcorder icon, then choose the area you want to record.

Choose the right recording mode
The built-in recorder gives you three capture modes, and that choice affects how professional the final video feels.
- Full screen fits walkthroughs that move between browser tabs, settings panels, and multiple apps.
- Partial screen keeps attention on one area and helps you avoid recording notifications, bookmarks, sidebars, or private data.
- Window mode is usually the cleanest option for product demos because it keeps the frame fixed on one app.
For SaaS demos, I usually start with window mode. It reduces distractions and cuts down the chance of exposing something you did not mean to show.
That small decision also helps later if you plan to turn the recording into a structured tutorial with steps, captions, and translations. Cleaner source footage is easier to edit, easier to process, and easier to repurpose.
Turn on audio before you hit record
Open the gear icon in the capture toolbar before the first take. That is where ChromeOS handles microphone input and save location settings.
If you need spoken narration, enable the microphone there first. If you need system or tab audio, confirm the relevant browser permissions as part of your setup. This guide to recording your screen in Chrome shows the same core workflow and is a useful reference if you want to standardize the process.
Use this sequence:
- Open the capture toolbar
- Switch to video mode
- Choose full screen, partial screen, or window
- Open the gear icon
- Enable the microphone if you need narration
- Confirm audio permissions if you need internal sound
- Start recording
ChromeOS gives you a 3-second countdown before recording begins. When you finish, click the red stop button on the Shelf.
Know what file you are getting
The built-in recorder saves your video as a WebM file in Downloads by default. You can change the save location, including a synced folder such as Google Drive, if your workflow depends on shared access or automatic backup.
That default is fine for quick internal clips. It is less convenient if your next step involves editing, branding, approval, localization, or publishing across teams. WebM is efficient for capture, but it is not always the format you want to pass into a broader production workflow.
Here is the practical view:
| Setting | What it means in practice |
|---|---|
| WebM output | Fast to save, sometimes awkward in older editing workflows |
| 30 FPS default | Good enough for most product demos and training clips |
| Display-matched resolution | Sharp output, assuming your screen is set to the resolution you want |
| Downloads default | Fine for solo work, easy to misplace in a team process |
If your goal is to send a quick explanation to a coworker, the built-in recorder is enough. If you are creating onboarding videos, support tutorials, or customer-facing documentation, treat the Chromebook recorder as the capture layer only. The polished result usually comes from what you do after the recording ends.
Troubleshooting Common Chromebook Recording Issues
A Chromebook screen recording usually fails in predictable ways. The capture starts fine, then the file slows down your editing process, the audio is missing, or the device heats up halfway through a longer tutorial.
When the WebM file becomes the problem
The built-in recorder saves in WebM. That is efficient for capture, but it can slow down the rest of your workflow if your editor, LMS, or review platform prefers MP4.
Convert first, then edit. It is faster than fighting import errors later.
ffmpeg -i input.webm output.mp4That simple step matters more than people expect, especially if you are turning a raw Chromebook capture into a branded walkthrough, a support asset, or a training module that needs approval across teams. For a quick survey of other tools that handle format flexibility better from the start, see this guide to best free screen capture software.
If your job includes clipping reference footage before recording your own explanation, Narrareach clipping strategies can help you prep source material cleanly.
When the video has no sound
Silent recordings usually point to permissions or input selection.
Check these in order:
- Recorder audio toggle. Confirm the microphone is enabled before you hit record.
- ChromeOS and Chrome permissions. Internal audio and mic access can both be blocked at the system or browser level.
- Correct input device. USB headsets, Bluetooth mics, and built-in microphones can switch unexpectedly.
- Fresh test after changes. Record five seconds, play it back, then continue.
I treat audio checks as a preflight step on Chromebooks because a bad microphone selection can look like a recording failure when the file itself is fine. This aligns with common professional experience. The fastest fix is usually a permission review and a short retest, not a full re-record.
When performance drops during long recordings
Long sessions expose the limits of entry-level Chromebook hardware. The usual pattern is smooth capture at the start, then lag, fan noise, heat, or a choppy cursor once memory and thermals start stacking up.
Use a lighter recording setup if the device is modest:
- Close extra tabs and Android apps
- Record in shorter sections
- Capture one window instead of the full desktop
- Reduce visual load, such as animated backgrounds or multiple active browser panels
For professional tutorial work, this is the trade-off to accept with the native recorder. It is fast for raw capture, but it does not give you much control once a recording gets longer or more production-heavy. My rule is simple. Capture in short, stable segments on the Chromebook, then hand those clips to an AI workflow for cleanup, structure, captions, and localization instead of forcing the device to do everything at once.
Expanding Your Toolkit with Alternative Recorders
The built-in tool is the fastest way to start, but it isn’t the only way to record on a Chromebook. Once you need MP4 export, webcam overlays, share links, or a few more controls around audio and frame rate, Chrome extensions and web-based recorders become more practical.

What changes when you use an extension
Tools such as Vento or BetterBugs shift the workflow from local raw capture to browser-centered production. Instead of saving a bare file and figuring it out later, you typically choose the source, set your mic and webcam, record, and get an exported file or share link immediately.
The workflow from Vento’s Chromebook recording guide includes tab, window, and full-screen capture, internal audio via “Share audio,” optional countdown, and selectable frame rates from 15-60 FPS. That source reports 95% success on ChromeOS 126+, direct MP4 export, and 25% higher battery drain than native recording. It also notes that free tiers may cap recordings at 5 minutes and add watermarks.
That trade-off is real. You usually get a smoother sharing workflow and better export options. You also spend more battery and depend on extension permissions.
Native recorder versus extension workflow
| Option | Strength | Friction |
|---|---|---|
| Built-in recorder | Instant access, no install | WebM output, limited post-capture options |
| Chrome extension | MP4 export, webcam, sharing links | More permissions, more battery drain |
| Web-based platform | Cloud handling and simpler collaboration | Depends on browser setup and account flow |
For teams clipping demos into shorter moments for social, sales follow-up, or help center snippets, it also helps to think beyond recording and plan the repurposing step early. A useful reference is these Narrareach clipping strategies, especially if your recording will later be cut into focused segments.
What works well and what doesn’t
A few practical observations matter here.
Extensions are good when you want a cleaner handoff. You record, stop, then immediately share or download an MP4. That beats dealing with WebM if your next stop is a standard editor or a content management workflow.
They’re less good on tightly managed school or enterprise devices. Permissions, admin policy restrictions, and browser conflicts can get in the way. If you want to compare the broader category before picking one, this list of free screen capture software options is a solid starting point.
Use native recording when speed matters most. Use an extension when export format and sharing matter more than battery life.
Transforming Raw Captures into Polished Tutorials with AI
Recording is easy. Editing is where most Chromebook workflows break down.
The problem isn’t only the file format. It’s that the native tool stops at capture. It gives you a raw recording, but not the production layer that makes a tutorial clear, concise, and reusable.
The editing gap is the real bottleneck
That gap is widely ignored in basic Chromebook tutorials. Google’s own support material focuses on capture and sharing, not serious post-production. The broader issue is documented in Google Chromebook support context cited here, which highlights that the built-in tool saves raw .webm files without timeline editing, script rewriting, cursor effects, or native trim, and notes an estimated 70% of Chromebook users in education and SaaS need more professional editing capability.
That’s why so many workflows turn clunky fast. A subject matter expert records a decent first pass, then gets stuck with cleanup work in another app. They trim pauses in one place, fix captions somewhere else, rebuild narration in another tool, and still don’t get smooth zooms, cursor emphasis, or consistent branding.
This is also where “easy” recording tools often disappoint. They lower the barrier to capture, but the resulting videos are often much longer than they need to be. A spoken walkthrough with hesitation, retries, filler phrases, and side comments can easily run 50-100% longer than necessary, while traditional editors like Camtasia or Adobe Premiere Pro assume real editing skill, patience, and timeline fluency. That’s fine for dedicated video producers. It’s a poor fit for technical writers, product marketers, support leads, or sales engineers who need output without becoming editors.
What a better workflow looks like
The most efficient workflow is to treat the recording as raw material, not the final asset.
A polished process usually looks like this:
- Capture the demo naturally. Don’t try to perform a perfect script on the first take.
- Generate a transcript immediately so the spoken content becomes editable text.
- Edit the script instead of a timeline. Remove filler, rewrite confusing lines, and tighten pacing.
- Apply presentation effects after recording. Cursor highlights, zooms, blurs, and focus cues are better when added intentionally.
- Export a final version built for the audience. That may be a demo, onboarding video, release video, support article video, or knowledge base asset.
For teams comparing what modern tools can do in this category, this roundup of AI video editor comparisons is useful because it frames the difference between simple trimming and true AI-assisted post-production.
Why AI changes the economics of tutorial creation
The old trade-off used to be simple. You could have speed, or you could have polish.
Loom-style recording made speed easy, but the final result often stayed rough. Premiere-style editing made polish possible, but demanded expert attention. AI-driven editing changes that balance by letting the subject matter expert speak naturally, then clean the content afterward without rebuilding the video manually.
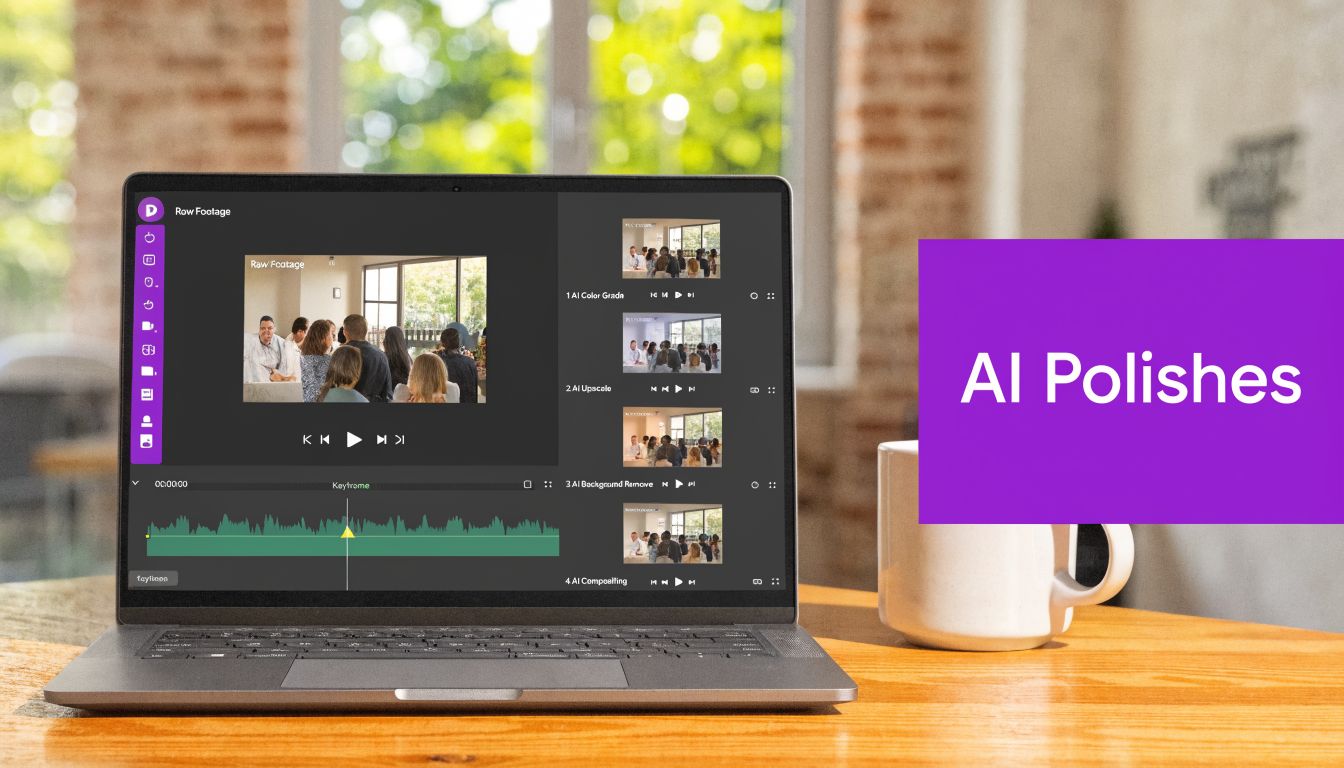
One option in that category is Tutorial AI, which turns screen recordings into tutorials, demos, onboarding videos, explainer videos, feature release videos, knowledge base videos, and support article videos by transcribing speech, letting you edit the script like a doc, and regenerating narration and timing from those text changes. It also supports cursor tracking, smart zooms, blurs, backgrounds, brand kits, and AI voices in 74 languages.
That workflow matters because it lets the expert stay in expert mode. They can explain the product as they work with it, speak freely without rehearsing every line, and still produce something that looks intentionally edited.
A strong tutorial rarely comes from a perfect first take. It comes from a rough but complete recording that gets tightened afterward.
That’s a major shift for teams who have always felt trapped between “fast but messy” and “good but expensive to produce.”
Editing like a writer instead of an editor
Most business video content doesn’t need cinematic editing. It needs clarity.
When a support lead updates a help video, they usually want to fix a sentence, remove a pause, blur a field, and re-export. When a sales engineer records a demo, they want to remove the tangent, tighten the intro, and swap in cleaner narration. When a technical writer creates a knowledge base video, they want the screen flow and the explanation to stay aligned without hand-editing every cut.
That’s why text-first editing is such a practical shift. The creator reads the transcript, rewrites the weak parts, and lets the system update voiceover, timing, and captions together.
Here’s a short way to think about the options:
| Workflow | Best for | Main downside |
|---|---|---|
| Built-in Chromebook recorder | Fast raw capture | No real editing layer |
| Loom-style recorder | Quick communication | Videos often stay too long and lightly edited |
| Premiere or Camtasia | Dedicated production work | Requires editing skill and more time |
| AI script-based editing | SMEs creating polished tutorials | Depends on the quality of the post-processing tool |
Later in the workflow, seeing the product in action helps more than another feature list:
For Chromebook users, this matters because the device is fully capable of generating the source material. The blocker isn’t whether the screen can be recorded. It’s whether the captured material can be transformed efficiently into something a customer, prospect, employee, or learner should watch.
Advanced Strategies for Secure and Global Video Content
Once recording moves into sales demos, internal training, customer education, and support documentation, the workflow changes again. The biggest issue is no longer how to start recording. It’s how to control risk, collaboration, and distribution.
A basic Chromebook setup usually saves the raw file to a local folder. That’s convenient for solo use, but it’s not ideal when the video contains account data, internal tooling, or sensitive workflows. The security concern is documented in this enterprise screen capture discussion, which notes that local raw files can expose sensitive data and that 62% of IT operators see this as a major concern.
Secure recording needs more than partial screen mode
Window mode and partial capture help, but they don’t solve the full enterprise problem. They reduce accidental exposure. They don’t add versioning, workspace controls, reusable brand standards, or post-recording protection.
For business teams, the practical requirements usually look like this:
- Protect sensitive UI elements with blurs or controlled framing
- Keep versions organized so old walkthroughs don’t keep circulating
- Share safely through managed players or workspaces instead of scattered local files
- Support collaboration across support, product, sales, and training teams
Security problems in tutorial creation usually start before publishing. They start at capture and storage.
That’s why a professional workflow has to think past the recorder itself.
Global teams need a scalable publishing model
The second major challenge is localization. A single English recording doesn’t help much if your help center, onboarding flow, or sales team supports multiple regions.
Manual localization is usually painful. Teams re-record voiceovers, re-time cuts by hand, update captions separately, and then try to keep every variant consistent with the original. A stronger workflow keeps one source recording and adapts it into multiple outputs with synchronized narration, captions, and pacing.
For teams planning multilingual documentation and discoverability together, this guide to hreflang and AI search strategies is worth reviewing because the publishing layer matters almost as much as the video itself.
What works well in practice is a system that combines:
- Script-based updates so one change flows through all outputs
- Language variants without rebuilding the project from scratch
- Embeddable players for LMS, help centers, and docs
- Consistent branding across every region and team
That’s the level where Chromebook recording becomes part of a real content operation instead of a one-off task.
If you record on a Chromebook and need to turn raw demos into usable onboarding videos, support tutorials, feature explainers, or knowledge base content, Tutorial AI is built for that workflow. It captures or imports screen recordings, converts them into editable scripts, regenerates polished narration and captions, and publishes branded, shareable outputs for teams that need speed without giving up production quality.