Making training videos used to be a massive headache. You either needed a whole production team or had to settle for a clunky, unedited screen recording. Thankfully, that’s no longer the case. Modern tools have completely changed the game, letting subject matter experts create sharp, professional tutorials in minutes.
The secret is a simple workflow: plan, edit, and distribute. This approach ditches the steep learning curves and high costs, turning a once-dreaded task into a powerful way to handle onboarding, support, and team training.
Why Great Training Videos Are a Competitive Advantage
Let’s be honest, most corporate training is instantly forgettable. But what if your videos could be your secret weapon? In a world of shrinking attention spans, mastering how to make effective training videos isn't just a nice-to-have skill—it's a critical driver for business growth.
The move to video-first content is impossible to ignore. A whopping 89% of businesses now rely on video as a core communication tool. This isn't just a trend; it's a reflection of how people actually prefer to learn today. Whether it's for a knowledge base article or a customer support guide, video just works. You can learn more about the rise of video in business and see the data for yourself.
Bridging the Gap Between Expertise and Execution
For years, creating a decent training video meant a frustrating trade-off. A subject matter expert could fire up a tool like Loom and record a quick demo, but the final cut was often 50-100% longer than necessary, littered with "ums," pauses, and mistakes. The alternative was handing the footage off to a pro with expert knowledge of software like Adobe Premiere Pro or Camtasia, creating a bottleneck that slowed everything down.
This is where a new generation of tools like Tutorial AI flips the script. It's built to generate polished video tutorials from simple screen recordings. Tutorial AI's tools let you speak freely without any practice, and still your video will look professional as if it was edited in Adobe Premiere Pro. This allows the subject matter expert to create on-brand videos extremely efficiently for a wide range of uses:
- Demos and Onboarding Videos: Guide new users through your product without a hitch.
- Explainer and Feature Release Videos: Clearly show off what’s new and why it matters.
- Knowledge Base and Support Article Videos: Give customers clear, visual answers to their problems.
This simple infographic breaks down the entire process. It’s all about planning, editing, and then getting your video out there.
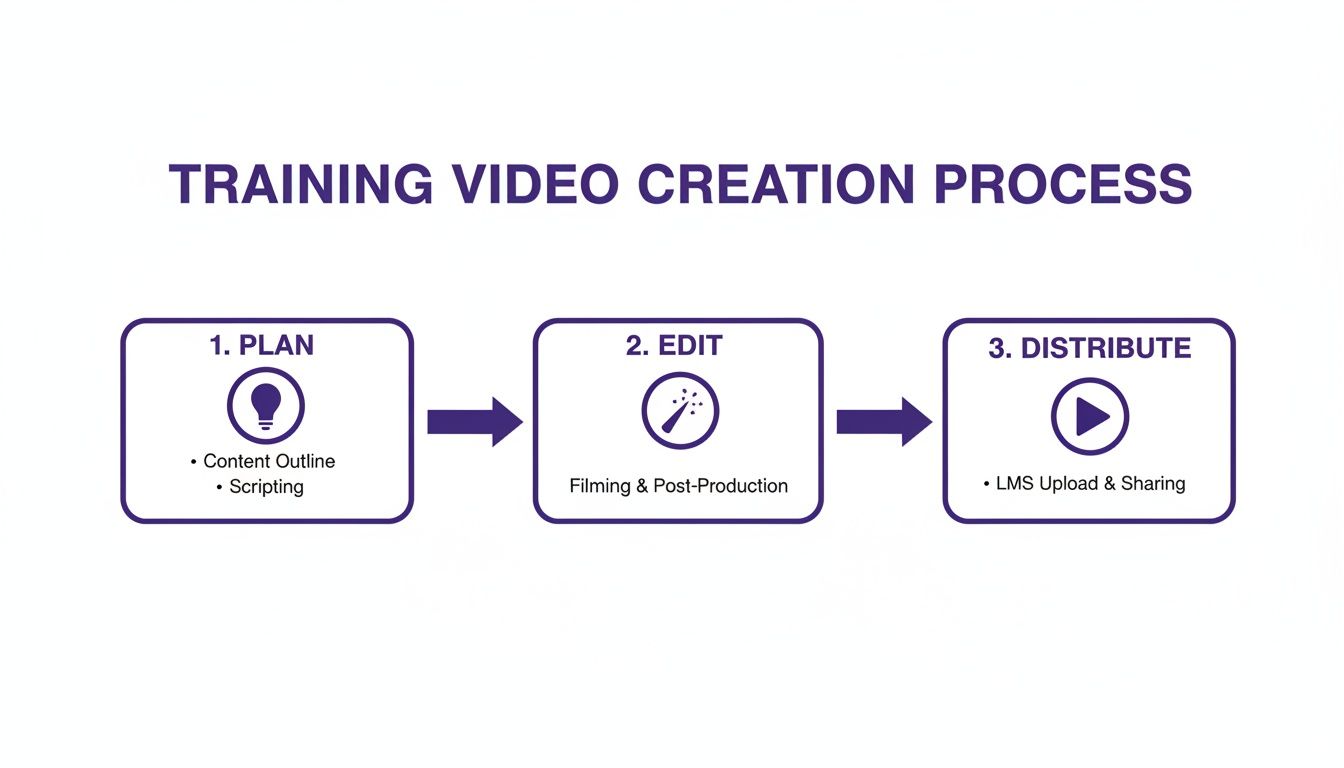
By breaking down each stage, this workflow removes the technical roadblocks and lets your team’s expertise take center stage. In this guide, we'll walk you through this exact roadmap, step-by-step, to help you turn internal knowledge into an invaluable training library.
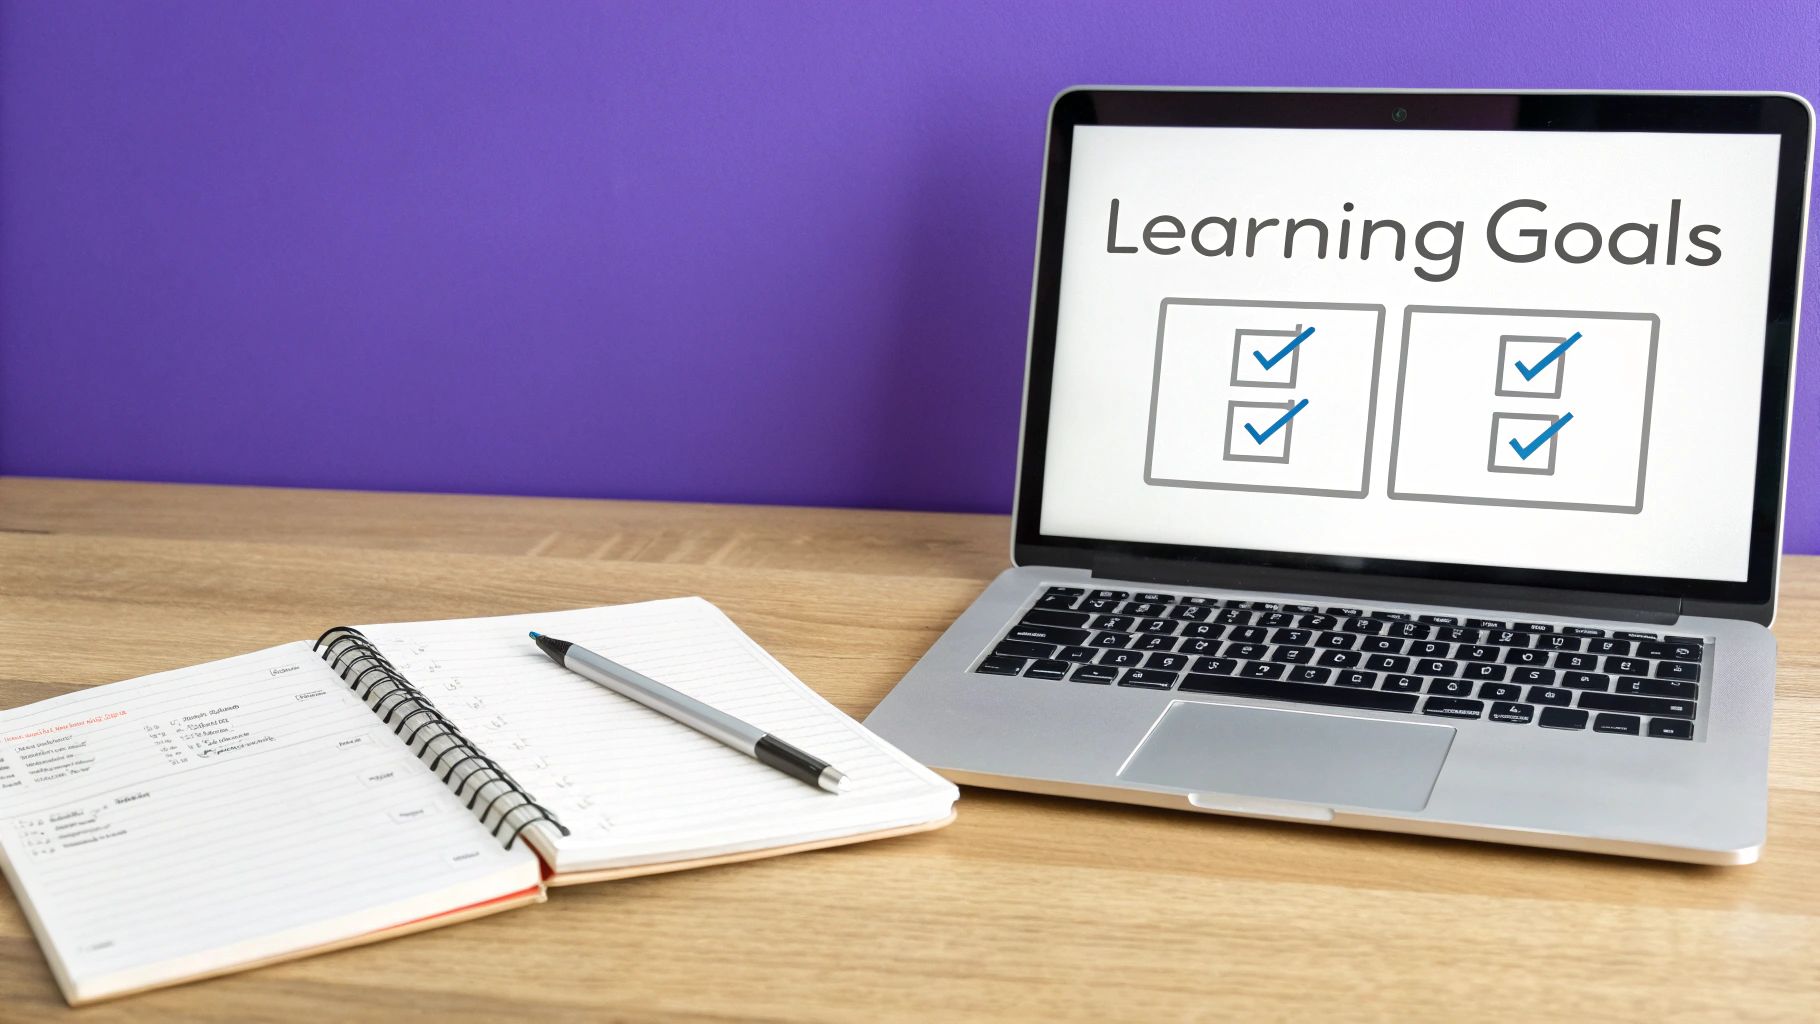
2. Plan Your Video Content for Maximum Impact
Before you even think about hitting that record button, you need a plan. Seriously. This is the single most important step, and it’s what separates a video that actually helps people from one that just confuses them.
Getting this foundation right saves a ton of headaches during recording and editing. It’s the difference between a smooth production and a chaotic one. A good plan ensures every second of your video has a purpose and guides your viewer from point A to point B without any detours.
Start with a Crystal-Clear Goal
First things first, ask yourself this simple question: "What, exactly, should someone be able to do after watching this video?"
Your answer is your learning objective, and it needs to be specific. Vague goals like "understand the new feature" are useless. A much better objective is something like, "Show a user how to create and send their first invoice using the new interface." This clarity guides everything—what you show on screen, what you say, and what you leave out.
To really nail your objectives, think in action verbs:
- Identify the three main benefits of the new dashboard.
- Configure the email notification settings.
- Troubleshoot the most common login error.
When your goals are this concrete, you stay on track and avoid stuffing your video with nice-to-know details that just distract from the main point.
Know Who You're Talking To
Once you know what you're teaching, you have to get clear on who you're teaching. The way you explain something to a brand-new customer is completely different from how you'd talk to a seasoned internal power user.
For example, a new user needs the big picture. They’re just getting their bearings, so they need context, encouragement, and a slow, steady pace. On the other hand, an internal team member watching a video about a new feature probably wants you to skip the basics and get straight to the technical details and workflow changes.
If you get this wrong, people will tune out in seconds.
The demand for this kind of targeted training content is exploding. The global eLearning market is on track to hit $325 billion in 2025—a massive leap from $165 billion in 2014. This just goes to show how central video training has become. You can discover insights into the eLearning market's expansion and see just how big this trend is.
Script for the Ear, Not the Eye
Okay, you’ve got your objective and you know your audience. Now it’s time to write. The trick here is to write like you talk. Your script should sound conversational and human, not like you're reading a technical manual out loud.
Think short sentences, simple words, and a friendly, approachable tone.
This is also where you map out the story of your video. A simple framework that always works is:
- The Hook: Grab their attention by stating the problem you're about to solve. "Tired of manually tracking your expenses? Here’s how to automate the whole process in under 60 seconds."
- The Steps: Walk them through the solution, one logical step at a time. Keep it concise.
- The Payoff: Quickly recap what they learned and what they can now do.
If you’re staring at a blank page, don’t worry. We’ve put together a sample script outline and template to help you get started.
When it comes to scripting, you have a couple of options. Let's look at how a traditional approach compares to a more modern, flexible one.
Scripting Approaches for Training Videos
While a word-for-word script has its place, I almost always lean toward a flexible, modular approach. It’s just so much more efficient in the long run. Breaking your content into reusable chunks means you can quickly assemble new training paths or update a single small piece without having to redo an entire 10-minute video.
Getting Your Screen and Voice Recording Just Right
This is where the rubber meets the road. All your planning comes down to capturing clean, high-quality footage. Nailing this step will save you a world of headaches in the editing room later.
Before you even think about hitting that record button, you need to set the stage. A clean digital workspace is non-negotiable; it's the little things that subtly scream "professional" to your audience. I always run through a quick pre-flight check to make sure my screen is ready for its close-up.
Prepping Your Screen for a Perfect Take
Think of your screen as a movie set. You wouldn't want random crew members wandering around in the background of a shot, right? The same principle applies here. Your goal is to eliminate any and all distractions.
Here's what I do every single time:
- Lock in Your Resolution. Always record in a standard 16:9 aspect ratio. 1920x1080 pixels (1080p) is the gold standard. This guarantees your video looks sharp and fits perfectly on platforms like YouTube without those ugly black bars.
- Declutter Everything. Hide your desktop icons and shut down every application that isn't essential for the video. A random Slack notification or email pop-up can derail a viewer's focus and instantly cheapens the production value.
- Clean Up Your Browser. Only have the specific tabs you need open for the tutorial. I even recommend using a separate, clean browser profile that doesn't show any personal bookmarks or extensions.
These simple housekeeping tasks create a distraction-free zone, keeping your learner's eyes exactly where you need them to be. For a deeper dive into the technical setup, our guide on how to screen record with sound has you covered.
Is Live Narration a Thing of the Past?
For years, the audio was the most nerve-wracking part of creating a training video. You had to find a quiet space, hope your USB mic sounded decent, and try to narrate perfectly while simultaneously clicking through a complex workflow. It was a recipe for endless retakes.
But the old debate—record silently or narrate as you go?—is quickly becoming irrelevant. Modern AI tools are flipping the script, allowing us to separate the visual recording from the audio narration. This is a massive breakthrough, especially for busy experts who just need to get content out the door.
The old way forced you to be a master presenter and a flawless software user at the same time. The new approach lets you focus on being an expert first and layer in the perfect narration later.
This shift completely removes the pressure.
Now, you can focus 100% on executing the on-screen steps smoothly and accurately. Just record your screen in silence. Take your time, get every click right, and navigate every menu without the mental load of speaking.
Once you have that perfect visual take, you can generate a flawless voiceover directly from your script using AI. This not only kills performance anxiety but makes your videos incredibly easy to update. Need to change a sentence a year from now? Just regenerate that single line of audio. You don't have to re-record the entire video. It's a modular, efficient workflow that will save you countless hours.
Using AI to Edit Videos Like a Professional
So, you've finished recording. Now the real fun begins—or at least, the most time-consuming part. Editing is where raw footage gets transformed into a polished, professional learning tool. But for most teams, this part of the process has always been a frustrating trade-off.
On one side, you have simple tools like Loom. They're great for quick, informal screen shares, but they often produce videos that are 50-100% longer than necessary. They’re packed with pauses, ums, ahs, and backtracking that can test a learner's patience and bury the key takeaways.
On the other side, there are the heavy hitters like Adobe Premiere Pro or Camtasia. These platforms give you incredible control, but they demand a serious time investment and expert-level skills. A simple 5-minute tutorial can easily become an all-day project, creating a bottleneck where subject matter experts have to wait on a small pool of trained editors.
A New Way to Edit Videos
This is where AI-powered editing tools like Tutorial AI completely change the game. They offer the best of both worlds: the simplicity of a basic recorder with the polish of a professional suite. The core idea is incredibly freeing—you can just hit record and talk through your process naturally, without memorizing a script or worrying about stumbles.
The AI then steps in and does the heavy lifting for you. It acts like your personal editor, taking a casual, off-the-cuff recording and tightening it into a professional video that looks like it was meticulously planned and executed. This puts the power back in the hands of the subject matter expert, allowing the person who actually knows the material to own the entire process.
This newfound efficiency is a massive advantage when building out a training library. You can crank out a whole range of on-brand content with surprising speed:
- Demos and Onboarding Videos: Guide new users through your product with clear, concise instructions.
- Explainer and Feature Release Videos: Show off new functionality without the long production cycles.
- Knowledge Base and Support Article Videos: Answer common questions visually and reduce your support ticket queue.
Editing Your Video by Editing Text
One of the biggest breakthroughs in modern video editing is the shift away from confusing timelines. Instead of hunting for tiny audio spikes and making precise cuts, AI platforms automatically transcribe your voiceover. Your entire video becomes a text document that you can edit as easily as a blog post.
Editing your video by simply editing its transcript is a genuine game-changer. Deleting a word or sentence in the text instantly snips out the corresponding audio and video, automatically stitching the gap back together seamlessly.
This text-based approach isn't just faster; it's far more intuitive. It completely removes the technical barrier that kept so many people away from creating high-quality video. If you can edit a Google Doc, you can now edit a professional training video. To really get a handle on the tools and techniques, it's worth exploring the world of AI-powered content creation.
Perfecting Audio Without Re-Recording
What happens when you flub a line or realize you could have explained something better? In the past, this meant a painful re-recording session. You'd have to get your setup just right again and try to recapture the same energy and tone—which is always harder than it sounds.
AI-powered voice regeneration makes this whole problem disappear. If you want to change a word or fix a mistake, you just type the correction directly into the transcript. The AI then regenerates that piece of audio in your own voice and patches it into the video perfectly. This feature alone can save you hours of rework. For a deeper look at the possibilities, check out our guide on https://www.tutorial.ai/b/ai-video-editing-software.
Guiding Viewer Attention with Smart Effects
A huge part of making effective training videos is making sure your audience is looking at the right thing at the right time. Manually adding zooms and highlights in traditional software is a tedious, frame-by-frame process. But here again, AI can automate the work with intelligent, dynamic effects.
These smart effects analyze your on-screen actions and automatically apply visual cues to boost clarity and keep learners engaged.
- Automatic Zoom-ins: The AI detects where you're clicking or typing and smoothly zooms in on that area. This makes tiny text or small interface elements crystal clear.
- Dynamic Cursor Highlights: Forget the generic arrow. You can add a subtle highlight, a ripple effect, or a spotlight that follows your mouse, drawing the eye exactly where it needs to go.
These automated effects are more than just fancy polish; they're powerful teaching aids. They ensure your audience follows every single step, which reduces confusion and makes the information stick. It’s this kind of dynamic, intelligent editing that finally empowers subject matter experts to create brilliant, on-brand training content with incredible efficiency.
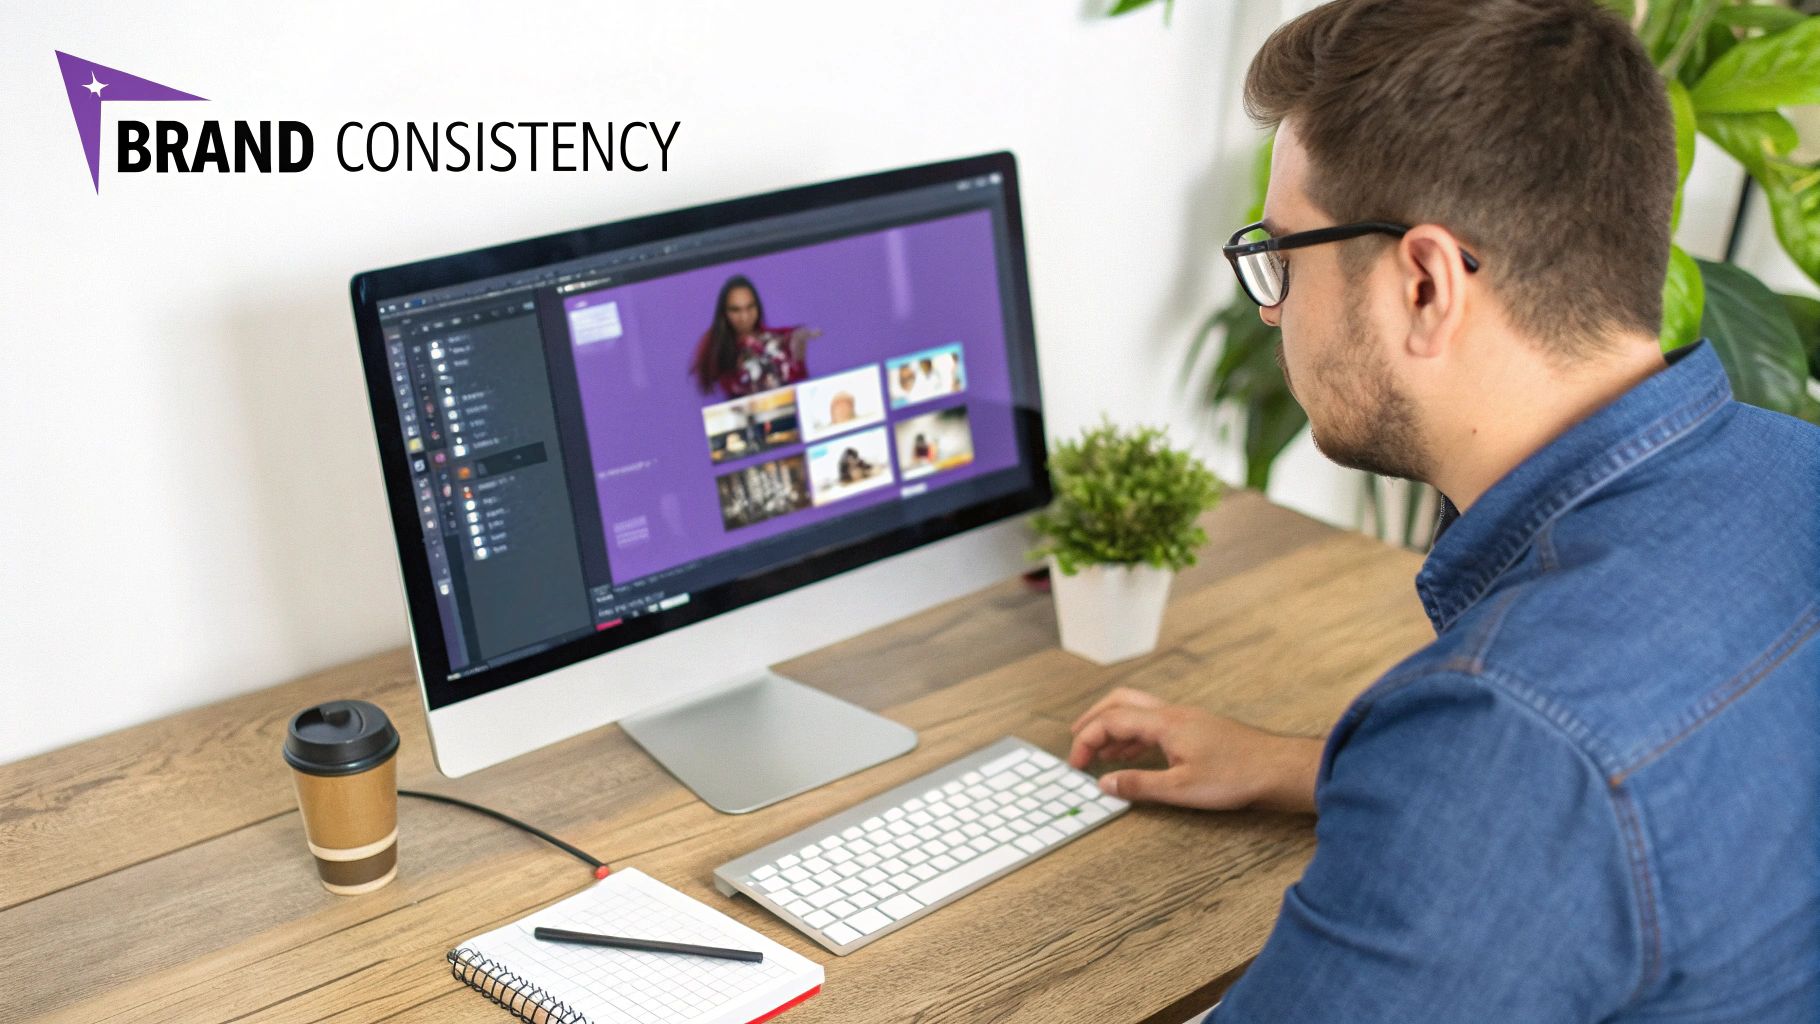
Adding Polish and Brand Consistency to Your Videos
A great training video does more than just get the point across—it reinforces your brand with every single frame. This is the stage where you add the final touches that turn a simple screen recording into a professional, cohesive experience that feels intentional and trustworthy. Without this polish, even the most helpful content can come across as amateurish or thrown together.
Think about it: consistent branding across your video library makes your content instantly recognizable. It builds a sense of authority. This means applying your company's unique visual identity—your colors, fonts, and logos—to every video you produce.
Streamline Branding with a Centralized Kit
Manually adding brand elements to each new video is a surefire way to waste time and introduce inconsistencies. A far better approach is to use a Brand Kit, a feature I've found to be a massive time-saver in modern video creation platforms. It lets you pre-load all your brand assets in one central place.
- Company Colors: You can upload your exact hex codes, so every highlight, background, and text element is a perfect match.
- Logos: Keep your primary and secondary logos ready to drop into intros, outros, or even as a subtle watermark.
- Fonts: Use your specific brand fonts for all on-screen text, from titles to captions, to lock in that consistent look.
Once your Brand Kit is set up, you can apply your entire visual identity to a new video with just a click. This not only guarantees consistency but saves an incredible amount of time, especially when you have multiple team members making training videos.
Frame Your Content Professionally
How you start and end your video really sets the tone for the entire learning experience. I like to think of animated intro and outro slides as professional bookends. They frame your content and reinforce your brand from the first second to the last. An intro slide is perfect for presenting the video title and what the viewer will learn, while an outro can offer a call to action or point them to related resources.
Similarly, a custom background can replace a cluttered or distracting desktop with a clean, on-brand image. This is especially useful when you can't record an application in full-screen mode. It keeps the look polished and helps the viewer focus on what matters. To get that professional look, it's also worth understanding 16:9 resolutions to make sure your videos look great on any screen.
Enhance Visuals and Protect Privacy
Beyond branding, a few small enhancements can dramatically improve clarity and professionalism. For instance, if you're recording a workflow that shows sensitive customer data or internal information, the ability to blur specific on-screen areas is absolutely essential for privacy and compliance.
Another subtle but effective technique is adding shadows to your main recording window. This little trick creates a sense of depth, making the video pop against your custom background and giving it a more refined, almost three-dimensional feel.
Go Global with AI-Powered Localization
A huge part of adding polish today is making your content accessible to a global audience. In the past, this was a nightmare—a costly and complex process of hiring transcription services, translation agencies, and voice actors for every single language.
Thankfully, AI has completely changed the game. Modern platforms can now:
- Auto-generate accurate captions in the original language, a huge win for accessibility.
- Translate both the captions and the script into dozens of different languages in just a few minutes.
- Regenerate your voiceover into a new language using a surprisingly lifelike AI voice.
This final step is a true game-changer. The technology doesn't just create a new audio track; it automatically syncs the new, translated voiceover with your original on-screen actions. The timing of your clicks, cursor movements, and visual cues stays perfectly aligned, making global distribution incredibly seamless and efficient.
Getting Your Video Seen and Measuring Its Impact
You’ve poured your energy into creating a fantastic training video, but the job isn't done yet. Getting that video in front of the right people and understanding whether it actually worked is where the real value comes in. Your distribution plan should hinge entirely on who the video is for and what you want them to do with it.
A polished product demo, for instance, is perfect for public platforms like YouTube or Vimeo where you want to attract new customers. But for an internal guide on a new software process? You’ll want that hosted right where your team works—embedded directly in your knowledge base, CRM, or a dedicated Learning Management System (LMS). This way, the information is right there when they need it, no hunting required.
Nail the Review Process Without the Headaches
Before you hit publish, you absolutely need a round of feedback. But we've all been there—lost in endless email chains with conflicting notes and no clue which version is the latest. This is where a collaborative review space becomes non-negotiable.
Modern video creation platforms let you send a single, secure link to all your stakeholders. Reviewers can then drop time-stamped comments right on the video timeline, pinpointing exactly what needs a tweak. This keeps all the feedback organized in one spot, making revisions simple and getting you to the finish line much faster.
Track the Metrics That Actually Tell a Story
Once your video is out in the wild, it’s time to see how it’s performing. It's so easy to get caught up in vanity metrics like the total view count. A big number looks great, but it doesn't tell you if anyone actually learned anything.
Instead, you need to dig into the engagement data to get real, actionable feedback.
Forget vanity metrics. The goal isn't just to get people to click play; it's to ensure they watch, understand, and can apply what they've learned. True success is measured by learner engagement and knowledge retention.
Here are the numbers I always keep a close eye on:
- Completion Rate: What percentage of people made it all the way to the end? If this number is low, your video is likely too long, a bit boring, or maybe just confusing.
- Viewer Drop-off Points: Pinpoint the exact moments where viewers are bailing. This is gold. It shows you which parts of your explanation aren't landing and need to be re-edited for clarity.
- Re-watch Rate: Are people constantly rewinding a specific part? That’s a clear sign that a concept is complex and might need its own dedicated micro-video to break it down further.
This kind of data gives you a clear path forward. You'll know exactly how to improve your next video, demonstrate the value of your training efforts, and keep getting better at making videos that genuinely help people.
Common Questions (and Answers) About Making Training Videos
When you get down to the nitty-gritty of creating training videos, a few questions always seem to surface. Let's tackle the most common ones I hear from teams just getting started.
How Long Should a Training Video Be?
It's tempting to cram everything into one long video, but resist the urge. Shorter is almost always better.
Aim for micro-learning videos between 2-7 minutes. Each video should have one clear goal: teach one specific task or concept. This makes it so much easier for people to absorb the information and find exactly what they need later without scrubbing through a 30-minute epic.
If you have a really complex topic, don't try to force it into one video. Instead, break it down into a series or a playlist of shorter, focused videos. This keeps learners engaged and prevents them from zoning out.
What’s the Best Software for Making Training Videos?
The "best" software is the one that fits your team's skills and goals. A tool like Loom is fantastic for quick, informal screen shares, but it might not give you that polished, professional feel you're after. On the flip side, something like Adobe Premiere Pro is incredibly powerful but requires a ton of training to use effectively.
This is where AI-powered platforms really shine. Tools like Tutorial AI hit the sweet spot, offering simple screen recording combined with automated, studio-quality editing. You get AI voices, smart zooms, and consistent branding without needing a video editor on staff.
It's the ideal setup for teams that need to produce high-quality tutorials fast.
Do I Really Need an Expensive Microphone?
You can absolutely get crisp, clear audio without breaking the bank on a high-end studio mic. A good quality USB microphone will do the job perfectly for most narration.
What's far more important is your recording space. Find a quiet room, away from humming refrigerators or street noise. A little echo can be dampened with soft furnishings like carpets or curtains.
Better yet, you can skip the microphone altogether. Modern AI tools let you record your screen in complete silence, then generate a flawless, human-sounding voiceover straight from your script. This completely removes any stress about background noise or having the right equipment.
Ready to stop wrestling with complicated editing software and start creating professional training videos in minutes? With Tutorial AI, you can record freely, edit your video like a document, and let AI handle the rest—from voiceovers to branding. See how Tutorial AI can transform your video creation workflow today.