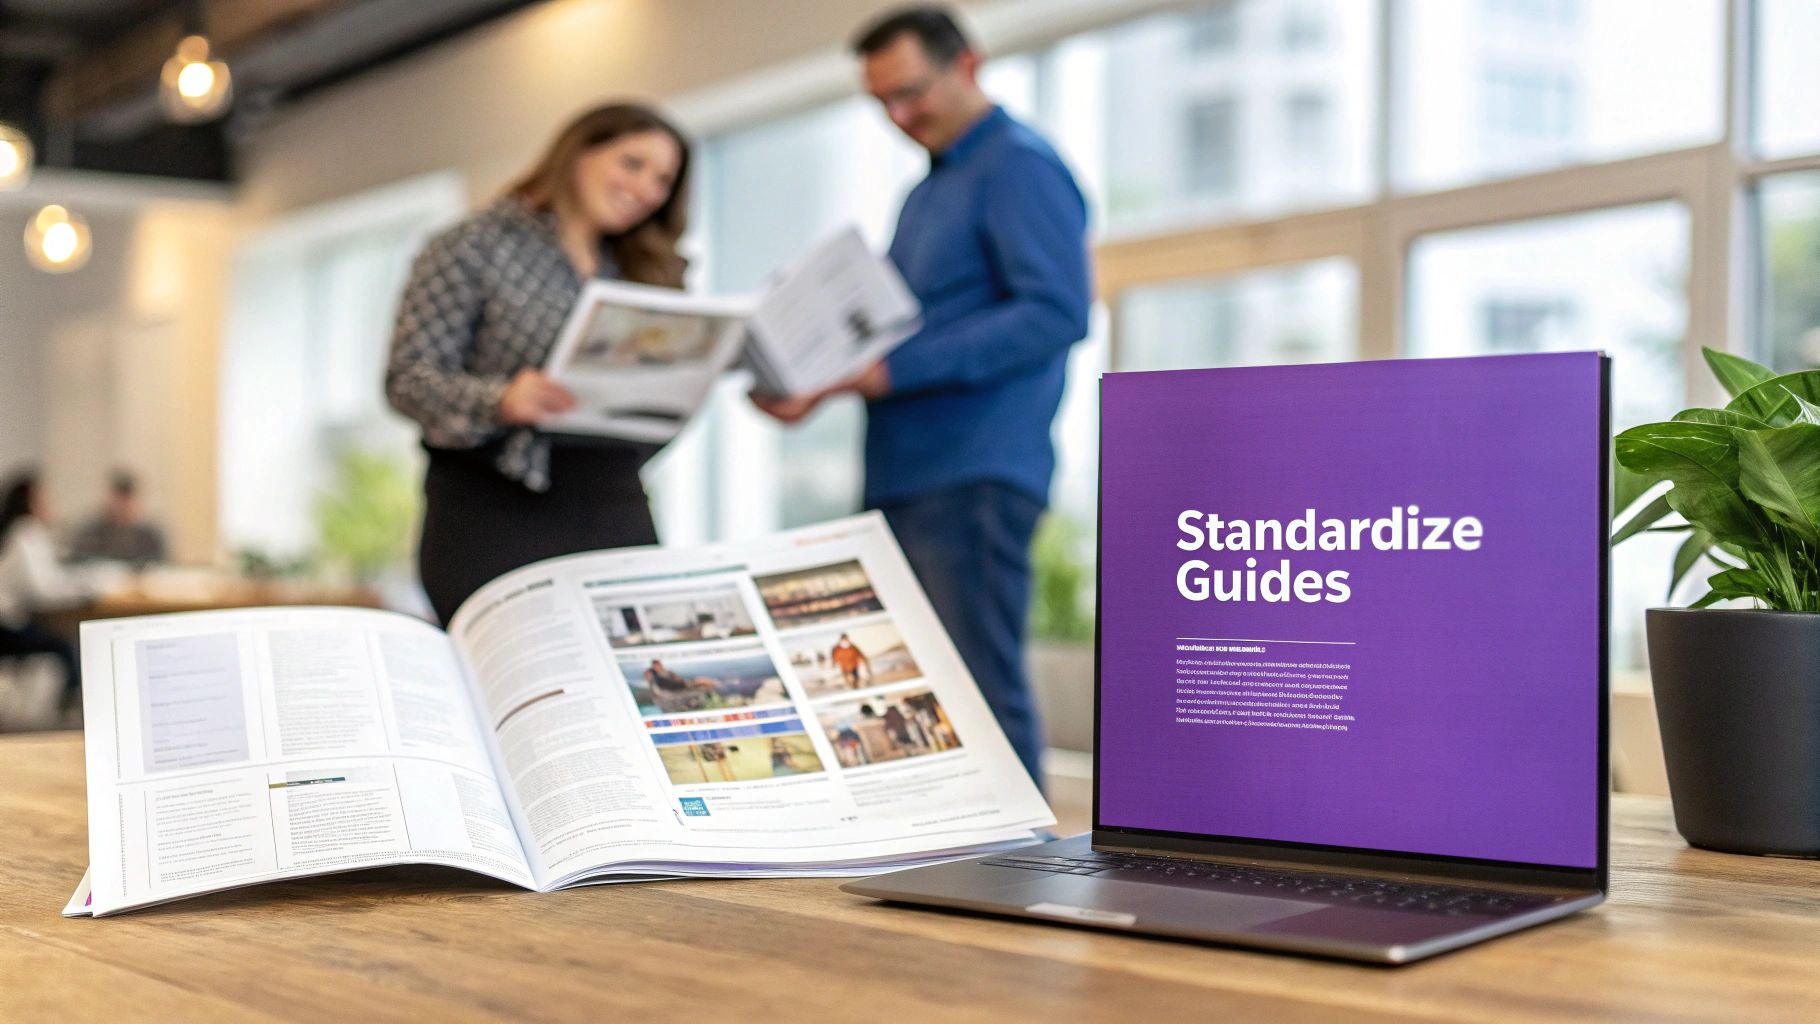
At its core, an instructional guide template is simply a pre-built framework for creating your training materials. Think of it as a blueprint that ensures every guide, whether it's a quick software demo or a deep-dive customer onboarding video, looks and feels consistent. This saves your creators a massive amount of time and stops them from reinventing the wheel with every new project.
Why a Standardized Instructional Guide Template Is a Game Changer
Shifting from creating one-off tutorials to using a structured template isn't just a minor organizational change—it's a fundamental strategic move. So many teams fall into the trap of creating guides "as needed," which results in a messy collection of content that varies wildly in quality, tone, and overall effectiveness. This approach creates a confusing experience for users and wastes time for your internal teams.
Standardization cuts through that chaos. By setting up a unified framework, you guarantee every piece of content meets a certain quality standard, making your brand feel more trustworthy and your help documentation far more reliable.
The True Cost of Inconsistency
When you don't have a template, you’re quietly leaking resources. Think about the subject matter expert who has to re-record a demo because the first take was too rambling or didn't match the company's voice. Or all the support tickets that pile up because your help articles are confusing or out of date.
These aren't just small headaches; they directly impact the business. Inconsistent guides often lead to:
- Slower Customer Onboarding: New users get frustrated trying to find clear answers and are more likely to churn.
- Brand Dilution: A mix of professional-looking videos and amateur screen shares weakens your brand's authority.
- Wasted Hours: Your team spends more time fussing with formatting and structure than sharing their actual expertise.
- Ineffective Sales Enablement: The sales team is stuck with clunky, unpolished demos that don't do your product justice.
A template-driven approach transforms this reactive, messy process into a well-oiled machine for producing quality content.
From Ad-Hoc Efforts to a Scalable System
Adopting a master instructional guide template turns content creation into something predictable and scalable. It empowers your subject matter experts—the people who know the product inside and out—to produce top-notch videos without needing a background in video production or content strategy. The structure is already there for them.
Let's quickly compare the outcomes of these two very different approaches.
Ad-Hoc Guides vs Templated Guides: A Quick Comparison
As you can see, the benefits of a template-driven system are pretty clear, especially when you start creating content at scale.
Modern tools are also closing the gap between raw and polished content. Easy-to-use recording via a tool like Loom is a great start, but it's often 50-100% longer than necessary, filled with ums, ahs, and mistakes. On the other end, professional video editing software such as Camtasia or Adobe Premiere Pro produces amazing results but requires expert video editing knowledge.
That’s the exact problem tools like Tutorial AI are built to solve. Tutorial AI generates video tutorials based on screen recordings for demos, onboarding videos, explainer videos, feature release videos, knowledge base videos, and support article videos. Its tools let you speak freely without any practice, and your video will still look professional, as if it was edited in Adobe Premiere Pro. It allows the subject matter expert to create on-brand videos extremely efficiently.
The numbers don't lie. A Content Marketing Institute survey found that 71% of B2B marketers reported greater success when using structured content templates. For SaaS companies, that translates directly to turning raw screen recordings into polished demos up to 5x faster—a huge productivity win. You can dig into the survey to learn more about the impact of structured content on marketing efforts.
Building Your Master Instructional Guide Template
Creating a master instructional guide template is all about crafting a reusable blueprint for success. It’s the foundational document that makes sure every tutorial your team produces is consistent, clear, and genuinely helpful, whether it’s a quick feature demo or an in-depth knowledge base article. Think of it like a master recipe; once you perfect it, anyone on the team can follow it and get a great result every time.
Much like a solid product launch strategy template gives you a proven path for growth, a good instructional guide template takes the guesswork out of content creation. The aim here is a flexible framework—one that provides structure but doesn't kill creativity.
Starting with the Core Components
Before you get lost in the weeds of steps and scripts, your template needs to start with a high-level overview. This part sets the stage for the entire guide, making sure the creator knows the "why" and "who" from the very beginning. I’ve seen teams skip this, and it’s like trying to build a house without a blueprint. You’ll end up with something, but it probably won’t be what you or your users needed.
Here are the non-negotiables I recommend putting right at the top of your template:
- Title: Just a working title for now. It should clearly state what the tutorial teaches.
- Primary Objective: In a single sentence, what will the user be able to do after this? Always start with an action verb, like "Configure user permissions" or "Integrate a new data source."
- Target Audience: Who is this really for? "New users" is way too broad. Something like "Marketing managers in their first 30 days" is infinitely more helpful.
- Prerequisite Knowledge: What should the user already know or have set up? This is key for managing expectations and avoiding user frustration.
This initial section forces your content creators to think strategically before they even dream of hitting the record button.
Structuring the Content Outline
With the strategy locked in, the next piece of your template should map out the content's structure. This is the skeleton of your tutorial. I find that breaking it down into logical, scannable modules makes the content so much easier for viewers to digest and, frankly, simpler for us to build.
Each module should represent a distinct phase of the process. A simple, effective structure that I’ve used for years includes:
- Introduction (The "Why"): Quickly explain the problem at hand and show how this tutorial is the solution. I’m a big fan of showing the end result or benefit right away—it gets people invested.
- Core Steps (The "How"): This is the meat of the tutorial. Break down the main process into clear, sequential actions. Each major action gets its own step or module.
- Summary & Next Steps (The "What's Next"): Wrap up with a quick recap of what they just accomplished and point them to their next logical action. Maybe it’s exploring another feature or reading a related article.
By standardizing this three-part structure—Why, How, and What's Next—you create a predictable and satisfying learning experience. Your audience knows what to expect, which builds trust and helps the information stick.
Detailing the Visuals and Narration
A truly great tutorial is a perfect marriage of clear visuals and concise narration. Your template needs dedicated space for both to make sure they work together in harmony. Don't leave this to chance. Meticulously planning the script alongside the on-screen actions is what separates a good tutorial from a great one.
In this part of the template, I swear by a simple two-column table. It just works.
This side-by-side format forces the creator to sync what the user sees with what they hear, which is critical for eliminating those awkward moments where the audio is out of sync with the visuals. It also becomes the final script, which is a lifesaver during recording and editing.
If you’re looking for more ideas on structuring documentation, our article on creating a quick reference guide template has some other frameworks you can adapt. Building out these core sections will give you a robust, master instructional guide template that’s ready for any software tutorial you throw at it.
Your Modern Workflow: From Raw Recording to Polished Tutorial
Having a solid instructional guide template is your strategic foundation, but the real magic happens when you pair it with a modern creation workflow. For years, making video tutorials felt like a frustrating trade-off.
On one side, you had simple screen recorders like Loom. They're incredibly easy to use, but the final video is often raw, unedited, and easily 50-100% longer than necessary. On the other side were powerful, professional video editors like Camtasia or Adobe Premiere Pro. These tools can produce incredible results, but they demand a steep learning curve and hours of meticulous work.
This gap left most teams with a tough choice: create tutorials quickly that look amateurish, or sink significant time and resources into getting it done professionally.
Fortunately, that's no longer a choice you have to make. A new breed of AI-powered tools is changing the game, finally bridging the divide between effortless recording and a polished final product.
The Problem with the Old Way of Recording
Let’s be honest: almost nobody nails a perfect take on the first try. The pressure of traditional recording is real. You're constantly worried about misspeaking, awkward pauses, a fumbling mouse, or forgetting a key step. One tiny mistake often meant scrapping the whole thing and starting over.
This pressure forces subject matter experts—the people who actually know your product best—into a corner. They either have to spend hours practicing a script or end up delivering a rambling, unrefined demo. This is a massive bottleneck, slowing down the creation of crucial content like:
- Demos and explainer videos for sales and marketing.
- Onboarding tutorials to get new customers up and running.
- Feature release videos to showcase product updates.
- Knowledge base videos that help cut down on support tickets.
- Quick visual guides to embed in support articles.
The old workflow just isn't built for the speed and scale that modern companies need. It puts all the pressure of performance and editing skill on the expert, instead of just letting them do what they do best: share their knowledge.
The "Record and Refine" Workflow: A Better Way
Imagine a process where your expert can just hit "record" and talk through a process naturally, without a rigid script or any practice. They can have their "ums," pauses, and restarts. When they're finished, that raw recording becomes the raw material for a studio-quality tutorial, all without ever touching a complex video timeline.
This is the power of a tool like Tutorial AI. Instead of wrestling with video tracks and audio waves, you edit your video by simply editing a text document.
Here’s how it works: the platform automatically transcribes your screen recording's narration into an editable script. From there, you can:
- Delete mistakes: Get rid of filler words, stumbles, and repetitive sentences just by deleting the text.
- Rephrase for clarity: Rewrite sentences to be more concise or impactful.
- Rearrange sections: Move entire paragraphs of the script to completely change the flow of the tutorial.
Once you’ve perfected the script, the AI generates a flawless, lifelike voiceover to replace the original audio. The video timeline, on-screen actions, and even the cursor movements automatically sync up to the new narration. Your expert’s off-the-cuff recording is transformed into a polished video that looks like it came straight out of a professional editing suite.
Of course, this modern workflow is most effective when it's built on a solid plan. The key steps in this process—defining the objective, knowing the audience, creating an outline, and planning visuals—are foundational to success.
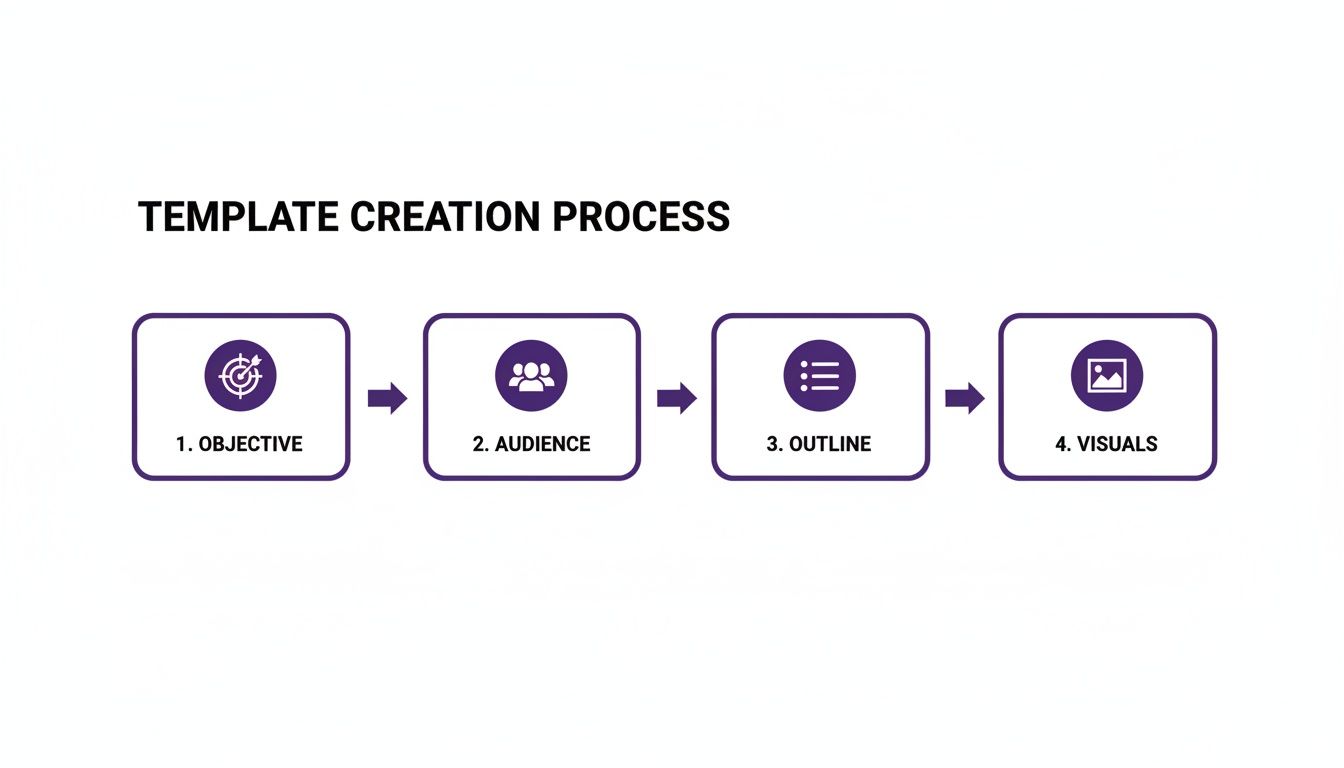
This simple flow chart drives home the point: great content begins long before you hit record, with a clear strategy guiding every decision you make.
Unlocking Expert Knowledge at Scale
This "edit-like-a-doc" approach is a game-changer. It completely removes the technical barriers that used to stop internal experts from creating content. Your product managers, support specialists, and solutions engineers can now produce professional tutorials without needing any video editing skills.
This is especially powerful when you're trying to build out a comprehensive knowledge base. Research from Venngage on training manual templates shows that guides using visual aids result in 50% faster task comprehension. Yet, only 36% of brands describe their product data as fully structured, highlighting just how badly teams need easy-to-create, templated guides. You can dig into the visuals in templates boost comprehension from Venngage's research for more on that.
By empowering the subject matter expert to create on-brand videos with incredible efficiency, you democratize content creation. The person with the deepest knowledge is now the person who can build the best tutorial in minutes, not days.
This newfound efficiency allows teams to produce a much higher volume of targeted, high-quality instructional content. Whether you need to build out an entire library of help articles or equip your sales team with custom demos, this modern workflow makes it possible to scale your efforts without scaling your budget or headcount.
If you're ready to see this in action, check out our deep dive into how to create training videos with AI and transform your team's output.
Making Pro-Level Recording and Editing Actually Simple
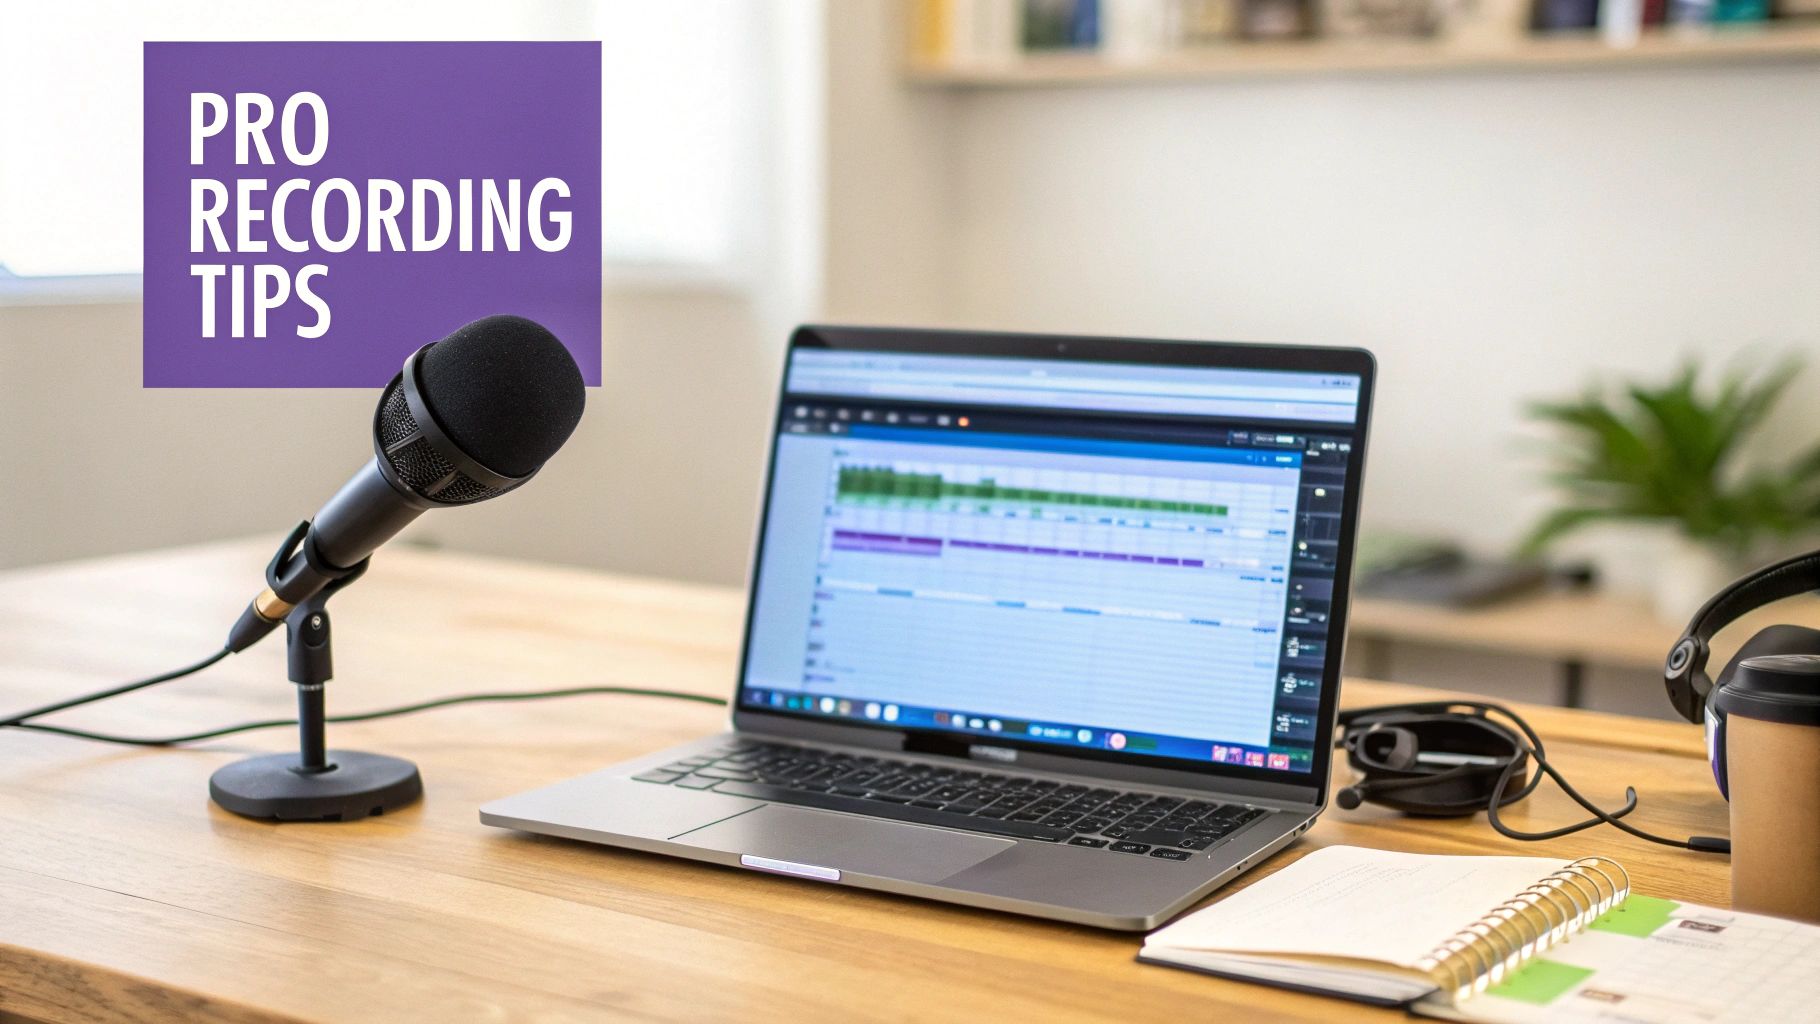
Once you've got your instructional guide template nailed down, it’s time to bring it to life on screen. This is where so many teams hit a wall. You're stuck between dead-simple recording tools that look amateurish and pro-level editing software that feels like it requires a PhD to operate. The secret is finding a workflow that gives you that professional polish without needing a dedicated video editor on staff.
Let’s be honest, quick-and-dirty screen recorders like Loom are great for a fast internal message. But for a customer-facing tutorial? Not so much. Those off-the-cuff recordings are often 50-100% longer than they need to be, full of "ums," awkward pauses, and misclicks. It's just not the sharp, professional look you want for your knowledge base or customer onboarding.
On the other end of the spectrum, you have heavy-hitters like Camtasia or Adobe Premiere Pro. These are incredibly powerful, but they also have a notoriously steep learning curve. The person who knows the product inside and out—your subject matter expert—is almost never a seasoned video editor. This mismatch creates a huge bottleneck.
How an AI-Powered Workflow Breaks the Logjam
This is exactly where a tool like Tutorial AI completely changes the game. It allows your product manager, engineer, or support lead to just hit record and talk through the process naturally. No practice runs needed, no pressure to be perfect on the first take.
The magic happens next. The platform transcribes their audio, and from there, they can edit the video just by editing the text. Think of it like editing a Google Doc. This simple workflow empowers your expert to produce a video that looks like it was meticulously edited in a pro tool, all without ever touching a complex timeline. It's a ridiculously efficient way to create on-brand, concise, and genuinely helpful videos.
Guide the Viewer’s Eye with Smart Effects
A truly great tutorial doesn't just show the screen; it directs the viewer's attention to precisely what they need to see at each moment. These small touches make a world of difference, and you no longer need a pro editor to add them in post-production.
Here are a few effects that can elevate your guide from a simple screen share to a polished, professional tutorial:
- Smart Zooms: Automatically zoom in on the action, like when a button is clicked or a form field is filled out. It cuts out the noise and keeps the viewer locked in on the important details.
- Blur for Sensitive Info: Need to hide a customer’s name, email, or an API key? You can instantly blur any sensitive information. This is a lifesaver for creating public-facing demos without needing a sanitized demo account.
- Cursor Effects: Turn the cursor into a helpful pointer instead of a frantic, distracting arrow. Adding a highlight or smoothing out jerky movements makes the entire experience feel more calm and deliberate.
These aren't just fancy bells and whistles. They are the details that separate a confusing screen recording from a professional tutorial. They create a seamless viewing experience that helps users follow along without getting lost, making even the most complex software feel intuitive.
These post-production effects used to be gatekept by professional video editors. But by pairing an instructional guide template with modern AI-driven tools, anyone on your team can apply them. This workflow means you can produce a higher volume of top-tier content, whether it's for internal training or your customer-facing knowledge base. You're not just making guides; you're building an entire library of crystal-clear, effective, and beautifully polished learning resources.
Taking Your Video Content Global

So, you’ve perfected your instructional guide template and your content engine is firing on all cylinders. What's next? For many, it's taking that content to a global audience, and that means one thing: localization.
Historically, this has been a massive headache. Translating a software tutorial for a new market often felt less like a simple translation and more like starting over from scratch. The whole process was slow, expensive, and painfully manual.
You’d have to hire voice actors for every single language, which gets costly fast and often leads to an inconsistent feel across your videos. But the real nightmare was re-editing the entire video to match the new audio. A quick phrase in English might take twice as long to say in German, completely throwing off the timing of your on-screen actions and visuals.
Moving Past Manual Re-Edits with Automation
Thankfully, we've moved past those days. Modern AI-powered platforms are designed to tackle this exact problem, turning localization from a production bottleneck into a simple, automated workflow. Think about it: you can take a single, well-crafted English tutorial and, in just a few clicks, have perfectly localized versions ready for dozens of international markets.
It sounds like magic, but it's now a reality. Using the script from your original video, you can instantly generate a realistic AI voiceover in over 30 languages. This completely removes the need for expensive voice talent and guarantees a consistent audio experience for every user, no matter their location. With the global market for instructional guides projected to become a $4.8 billion opportunity, tools with strong multilingual support are no longer a nice-to-have; they're essential.
Getting the Timing Right in Any Language
Of course, generating new audio is only half the story. The real breakthrough is a feature often called Auto-Retime, which automatically adjusts the video's pacing to match the new narration perfectly.
This technology is a massive win for product and growth teams. It intelligently analyzes the cadence of the new voiceover and automatically shifts all the visual elements—your scene cuts, zooms, captions, and highlights—to sync up. The result is a seamless, native-feeling video that looks like it was created specifically for that audience.
This kind of automation ensures every localized video has the same professional polish as your original. It means you can support international product launches, offer top-tier multilingual customer support, and equip global sales teams without the usual delays and budget overruns. For a more comprehensive localization strategy, you might also look into leveraging auto-translate devices for global content.
Ultimately, when you combine a solid instructional guide template with smart localization tools, you unlock the ability to deliver a high-quality, on-brand experience to everyone, everywhere. And to make sure your videos are accessible to all, don't forget to check out our guide on how to add captions to videos.
Got Questions About Your Instructional Guide Templates?
Even the best-laid plans come with questions. When you're rolling out a new instructional guide template, a few things are bound to come up. Let's walk through some of the common ones I hear from teams just getting started.
What’s the Single Most Important Part of the Template?
If I had to pick just one thing, it's the content outline. Hands down. This is the skeleton of your entire tutorial—your intro, the step-by-step process, and the wrap-up.
Think of it as the blueprint that ensures every guide feels consistent and logical. A solid outline not only makes it a breeze for your audience to follow along but also dramatically simplifies the creation process for your team. It's the secret sauce for creating predictable and effective tutorials every single time.
How Do I Keep All Our Tutorial Videos On-Brand?
The easiest way to nail brand consistency is to use a tool that lets you set up a brand kit. Forget about asking creators to manually hunt down and add the right assets. Instead, you can pre-load your company’s logos, fonts, specific color palettes, and even your standard intro and outro animations.
When you build these brand elements right into the template and workflow, every video automatically gets the right look and feel, no matter who creates it. It’s a set-it-and-forget-it approach that guarantees a professional, cohesive identity across all your content without any extra work.
What's the Best Way to Deal with Mistakes During a Recording?
We've all been there. You're in the middle of a great take and then... you trip over a word. With old-school recording software, that usually means a frustrating "cut, and let's start over."
This is where a modern workflow powered by something like Tutorial AI completely changes the game. You can just hit record and go, speaking naturally without worrying about being perfect.
The platform lets you record freely, knowing that any slip-up—a misspoken word, a long pause, or an "um"—is no big deal. It transcribes your audio into a script that you can edit just like a text document. Find the mistake, delete the text, and the AI instantly regenerates a clean voiceover, even re-syncing the video to match. It completely takes the pressure off.
This is how you empower your subject matter experts to create polished, on-brand videos with incredible efficiency. The final product looks like it was painstakingly edited in Adobe Premiere Pro, even though the recording was done off-the-cuff. It's a game-changer for creating amazing demos, onboarding flows, and support videos.
Tools like Loom are great for quick, casual recordings, but the final videos often end up being 50-100% longer than they need to be. On the flip side, professional software like Camtasia or Adobe Premiere Pro is just too complex for most team members who aren't dedicated video editors.
How Long Should a Software Tutorial Video Be?
Keep it short and sweet. For most software tutorials, the sweet spot is somewhere in the 2-5 minute range. The goal is to focus on a single, specific task or feature. People love these "micro-tutorials" because they're engaging and easy to digest.
If you have a more complex workflow to explain, resist the urge to create one long video. It's always better to break it down into a playlist of shorter, more focused videos. Your viewers will be far more likely to stick around and actually absorb the information. Using a good instructional guide template is key here, as it naturally encourages you to stay on point and trim the fat.
Ready to turn your screen recordings into polished, professional tutorials in a fraction of the time? With Tutorial AI, your team can create studio-quality demos, onboarding videos, and knowledge base articles—no video editing skills required. Give it a try and see for yourself. Get started with Tutorial AI today.