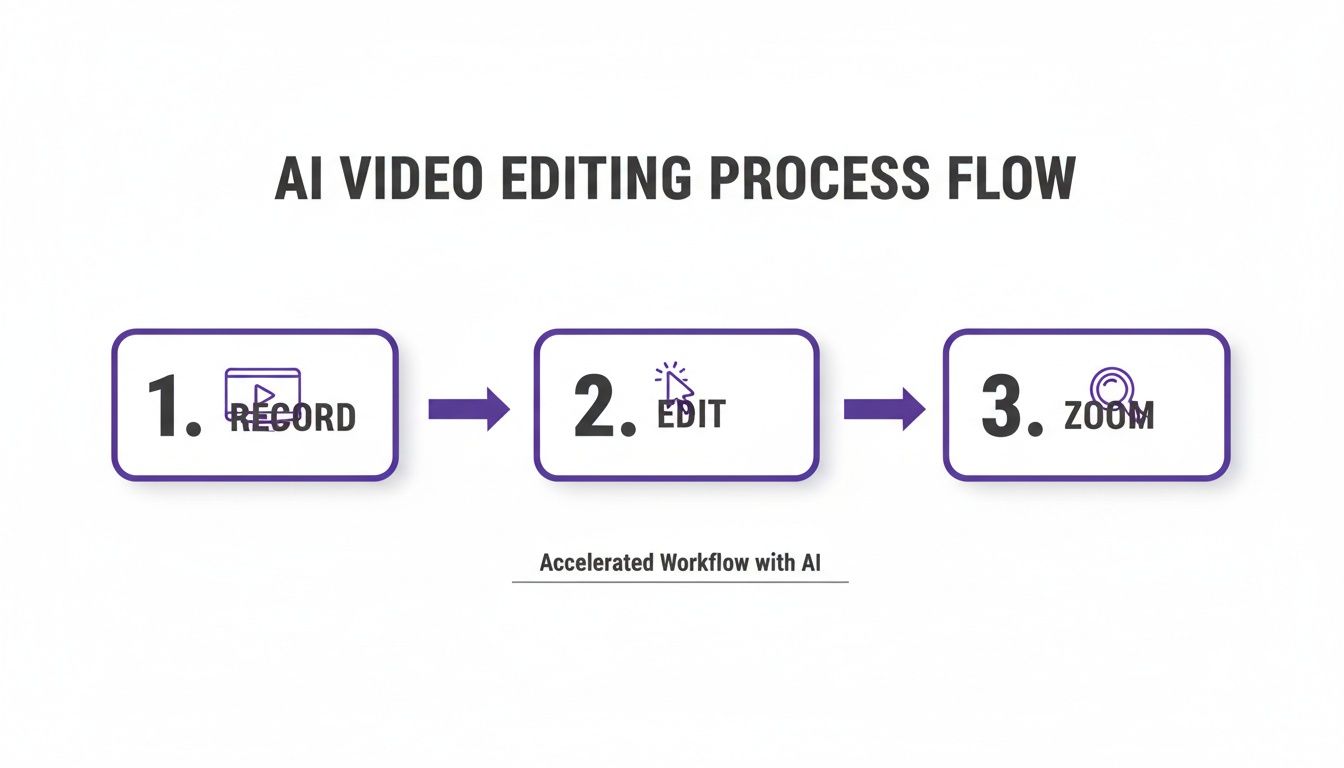
When you need to zoom in on a video, the classic method involves using a video editor to increase the 'scale' property of your clip with keyframes. But for a much faster approach, AI-powered tools like Tutorial AI can add smart zooms automatically, highlighting key actions without any manual work.
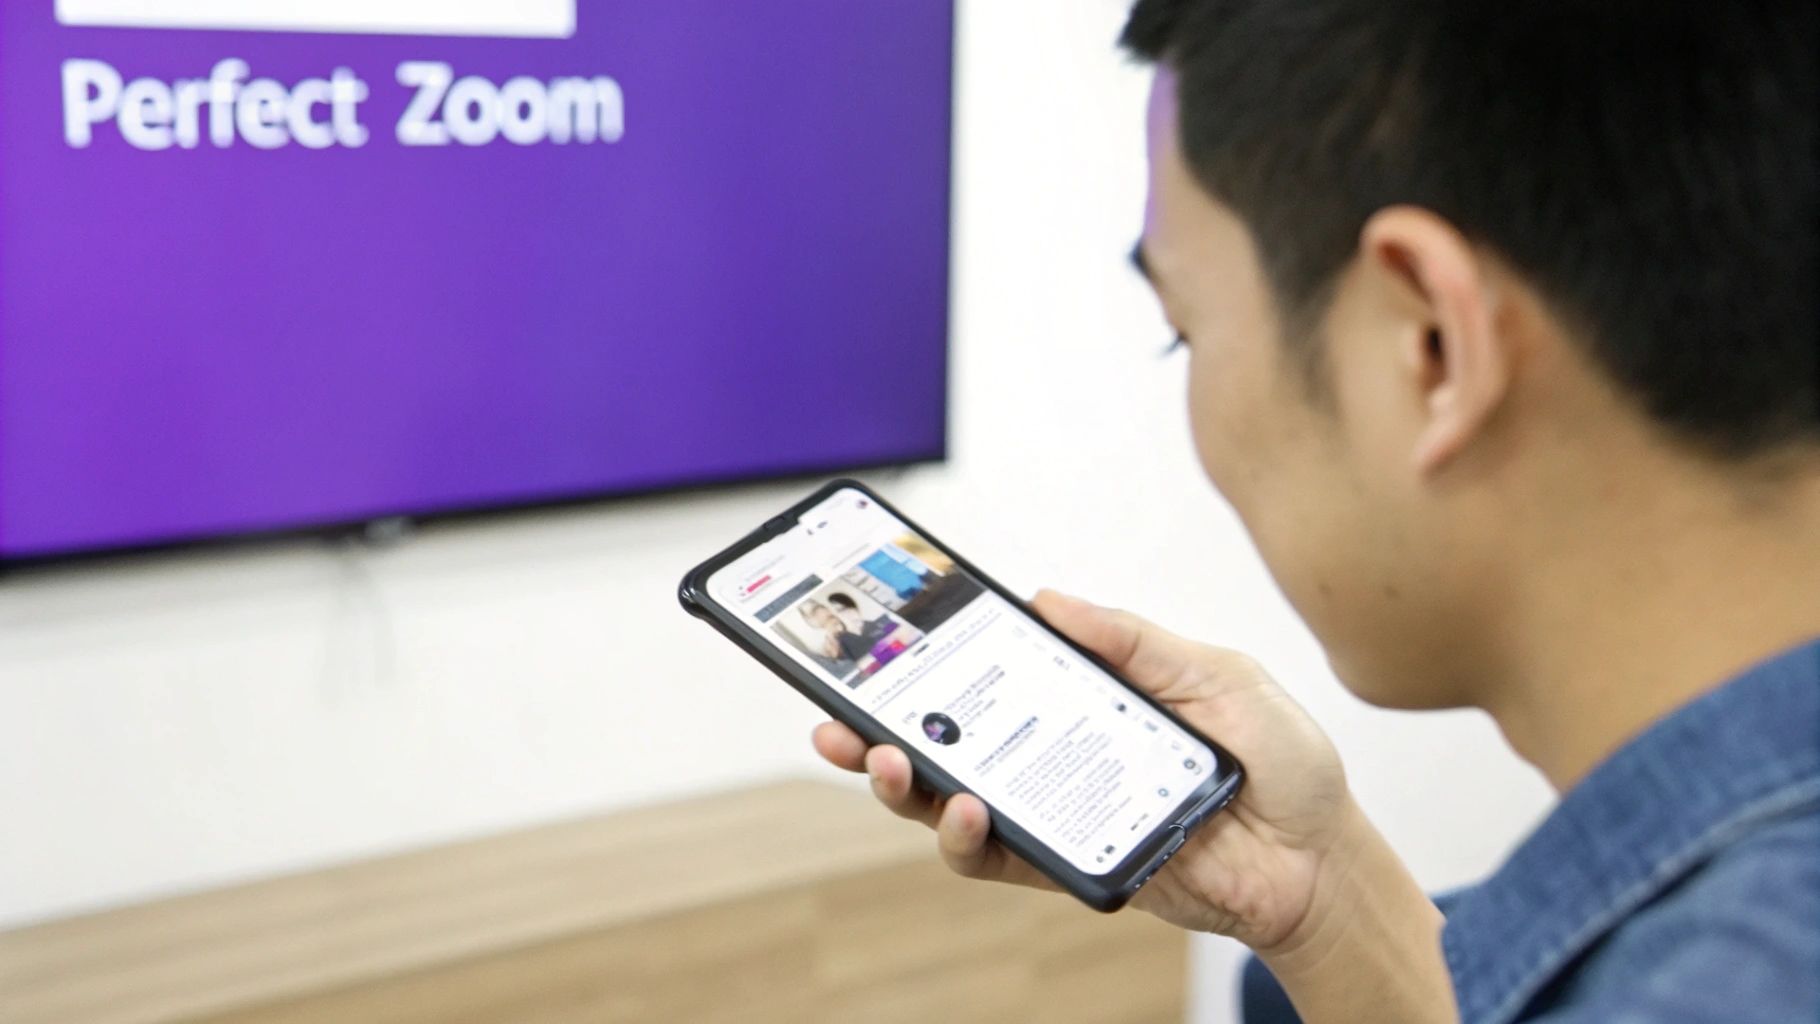
Why a Perfect Zoom Is Your Most Powerful Tool
We’ve all been there: leaning in, squinting at our screen, trying to make out a tiny menu option someone clicked in a tutorial. A good zoom isn't just a flashy effect; it's a fundamental tool for clarity. It directs your viewer's eyes exactly where you need them to go.
This is especially true now, with so many people watching content on their phones. When you’re trying to show a detailed interface on a small screen, a precise zoom is the difference between a video that helps and one that just frustrates.
The zoom has a surprisingly long history, starting as a storytelling device in cinema and becoming a staple of digital communication. It first appeared in Hollywood films back in the 1950s and 60s as a way to draw the audience's attention to a character's expression or a crucial object.
Fast forward to the 1990s, and digital editors like the early versions of Adobe Premiere let creators achieve the same effect by cropping and scaling frames in post-production. Today, that same cinematic language is being applied to software tutorials, with AI tools mimicking those techniques right on your laptop. If you're curious, you can read more about the complete history of video technology to see just how far we've come.
The Challenge with Traditional Video Editing
For a long time, creating this seemingly simple effect was anything but. Getting it right in professional editing software like Camtasia or Adobe Premiere Pro took a fair bit of skill.
You had to manually set keyframes—those little markers that define the start and end points of the animation—and then tweak the timing and smoothness over and over. It's a slow, painstaking process that often takes several rounds of adjustments to look polished and not jarring.
The Rise of Intelligent Automation with Tutorial AI
This is where new tools are completely changing the game. Instead of fighting with timelines and keyframes, you can now lean on automation.
Tutorial AI specializes in generating video tutorials based on screen recordings for things like demos, onboarding videos, explainer videos, feature release videos, knowledge base videos, and support article videos. Easy-to-use recording tools like Loom are great, but the raw footage is often 50-100% longer than necessary. On the other hand, professional software like Camtasia or Adobe Premiere Pro requires expert video editing knowledge.
Tutorial AI’s tools let you speak freely without any practice, and your video will still look professional as if it was edited in Adobe Premiere Pro. It allows the subject matter expert to create on-brand videos extremely efficiently.
The platform analyzes your recording and automatically adds smooth, professional-looking zooms to your cursor movements and clicks. It essentially makes your video look like you spent hours polishing it in a high-end editor. This intelligent approach takes a raw recording and turns it into a clear, focused, and effective tutorial, closing the gap between having the knowledge and creating a great video to share it.
Choosing Your Path: Automated AI vs. Manual Editing
When you need to zoom in on a video, you're standing at a fork in the road. Do you take the traditional path and fire up a manual editor, or do you jump on the superhighway of an automated AI tool? Each route gets you to a finished video, but the journey and the results can be worlds apart.
Traditional video editors like Adobe Premiere Pro or Camtasia give you absolute, down-to-the-pixel control. You can manually set keyframes, tweak easing curves to get the motion just right, and manage complex timelines. This is fantastic for creative projects, but all that power comes with a price: a steep learning curve and a serious time commitment.
The Manual Editing Dilemma
Let's be honest, if you're a subject matter expert, your goal is to share knowledge, not to become a professional video producer. You want to create a clear, on-brand video that explains a process, and spending hours learning software is a distraction.
While simple screen recorders like Loom get the job done quickly, the final product often looks unpolished. Raw recordings are frequently 50-100% longer than they need to be, packed with awkward pauses and mistakes that can feel unprofessional to the viewer. This is the classic problem: the tools are either too complex or too basic for the task at hand.
The Modern AI Advantage
This is exactly where AI-powered tools like Tutorial AI forge a new path. They're built for pure efficiency. You can just hit record, speak naturally, and go through your workflow without a script or a single practice run. No need to stress about getting it perfect on the first take.
Tutorial AI takes your raw footage and does all the tedious work for you. Its system analyzes your on-screen actions and automatically adds smart, professional-looking zooms that track your cursor. It highlights precisely what your audience needs to see, when they need to see it. The result looks like you spent hours meticulously editing in Premiere Pro, but you didn't touch a single keyframe.
The need for good, clear zooming has exploded right alongside online video consumption. Back in 2017, video already made up a staggering 75% of all consumer internet traffic, and that number has only climbed since. This means more people are watching tutorials on smaller screens where a crisp zoom isn't just a nice-to-have—it's essential for clarity.
This shift has made smart, data-driven zooming a default feature in modern software education. An AI tool can eliminate dozens of manual keyframes per minute, making it incredibly practical for experts to create high-quality, on-brand videos without the headache.
To see what else AI can do for your workflow, it's worth checking out the best AI tools for content creators available today.
This automated workflow is a game-changer for creating all kinds of content, fast:
- Demos and explainer videos that are tight and to the point.
- Onboarding and training videos that viewers can actually follow.
- Feature release videos that clearly show off new functionality.
- Knowledge base and support article videos that offer quick, visual solutions.
Here's a quick breakdown of how these two approaches stack up.
Comparing Zoom Methods: AI vs. Traditional Editors
This table breaks down the key differences between using an AI-powered tool and a traditional video editor to create zoom effects for your videos.
Ultimately, the best tool depends entirely on your goal. If you're a filmmaker who needs absolute creative freedom and you have the time to master the craft, a manual editor is your best friend.
But if you're an expert whose priority is creating clear, professional instructional videos as efficiently as possible, an AI-driven workflow is the obvious choice.
Nail the Perfect Zoom, Automatically, with AI
What if you could record your screen and have an editor automatically add all the right zooms, highlights, and cuts for you? That's exactly what an AI-powered workflow does. It transforms a truly tedious part of video editing into something that just… happens. The whole idea is to let you stay in your zone of genius—teaching your topic—while the software takes care of the technical editing stuff.
You can just hit record on your Mac or Windows machine and start talking through your process. Don't worry about ums, ahs, long pauses, or getting the pacing perfect on the first try. Just explain your workflow naturally. This completely removes the pressure of trying to nail a perfect, one-take performance, which is a huge hurdle for subject matter experts who aren't also professional video creators.
From Raw Screen Recording to Polished Tutorial
Once you stop the recording, the AI gets to work. A platform like Tutorial AI, for example, will immediately generate a full transcript of everything you said. This simple step changes the entire editing game. Instead of hunting and pecking through a video timeline, you edit your video by just editing text. See a sentence you stumbled on? Just delete it from the transcript, and the corresponding video and audio clip disappears. It’s incredibly fast and intuitive.
But the biggest time-saver of all is the Smart Zooms feature. The AI watches everything happening on your screen—where your cursor moves, what you click on, the fields you type in. It then intelligently applies smooth, professional-looking zooms to highlight the most important actions. This directs your viewer’s eye exactly where it needs to be, without you ever having to touch a single keyframe.
This one feature automatically builds a dynamic, engaging video that would honestly take a human editor hours of painstaking, manual work to replicate.
The Easiest Way to Create Professional Video
This kind of automated workflow is a perfect fit for any instructional content where clarity is absolutely key. The tech is really built from the ground up for creating things like:
- Product demos and explainer videos
- New employee onboarding and training
- Walkthroughs for new feature releases
- Videos for your knowledge base
- Video-based support and help articles
There's a massive gap between professional editing software like Adobe Premiere Pro or Camtasia and a basic screen recording. One requires a ton of expertise, while the other often feels amateurish and can be 50-100% longer than it needs to be.
Tutorial AI closes that gap. It lets an expert on any subject create a polished, on-brand, studio-quality video with almost no effort. You end up looking like a pro video editor, even if you’ve never seen a timeline in your life.
This efficiency is boosted by other automated effects, like highlighting your cursor or blurring the background, which all work in concert to give you a finished video in minutes. And as technology keeps pushing forward, platforms using AI video generation models like Sora 2 are raising the bar for what automated editing can do, including even more nuanced automatic zooms.
To get a jumpstart on using these features, our Quick Reference Guide is a great resource. By combining these smart tools, you can create tutorials that are not just informative but genuinely engaging and perfectly branded.
Getting Hands-On: Mastering Manual Zooms in Your Video Editor
For those of us who like to get our hands dirty and control every last detail, manually creating a zoom is the only way to fly. It gives you complete creative freedom, but you’ll need a bit more patience than you would with an automated tool. The core concept is pretty much the same no matter what software you're using: keyframes.
Think of a keyframe as a little bookmark on your timeline that tells the software what a specific property—like the video's size or position—should be at that exact moment. To create a zoom, you’ll set one keyframe at the start with the video at its original size, and another keyframe later on with the size cranked up. The software then magically fills in all the movement in between.
This diagram shows how AI tools can handle the whole process, but knowing the manual steps is what separates a beginner from a pro.
Understanding what happens under the hood gives you a much better grasp of the editing process as a whole.
How to Zoom in Adobe Premiere Pro
Adobe Premiere Pro is an industry workhorse, and building a zoom here is a fundamental skill. First, click on your clip in the timeline. Then, pop open the Effect Controls panel. This is where you'll find the Motion properties, which include Scale and Position.
Park your playhead right where you want the zoom to kick in. Click the little stopwatch icon next to both Scale and Position—this sets your first keyframes. Now, slide the playhead to where the zoom should finish, and crank up the Scale value. You’ll almost certainly need to tweak the Position numbers as well to keep your subject perfectly centered in the new, tighter frame.
Creating a Zoom in DaVinci Resolve
In DaVinci Resolve, the process is just as straightforward. Select your clip and look for the Inspector panel. Under the Video tab, you’ll see Transform settings with sliders for Zoom and Position.
Just like in Premiere, click the small diamond-shaped keyframe icon next to Zoom and Position at your starting point. Move the playhead to your end point, increase the Zoom, and nudge the Position until it looks right. Resolve is smart enough to add the second set of keyframes for you, creating the smooth motion.
The real secret to a professional-looking manual zoom isn't just setting the keyframes—it's controlling the motion between them. A hard, linear zoom can feel robotic and jarring. This is where you need to get familiar with keyframe interpolation.
Smoothing Your Zooms with Easing
To make your zoom feel more organic and less like a security camera feed, you need to apply "easing." In Premiere Pro, you can right-click your ending keyframe and choose Temporal Interpolation > Ease In. Then do the opposite for your starting keyframe: Ease Out. This simple change tells the animation to start gently, accelerate, and then slow down smoothly as it reaches its destination.
DaVinci Resolve gives you even more control. You can open the spline editor (it looks like a little curve icon) right in the Inspector. This shows you a graph of the zoom's speed, letting you physically drag the curve to create a perfectly fluid, buttery-smooth motion. If you're shopping around for an editor, we've got some great suggestions in our guide to the best video editing software for beginners.
Simple Zooms in iMovie
If you're on a Mac, iMovie keeps things simple, though you trade some of that fine-tuned control for ease of use. Just select your clip and hit the Cropping button that appears above the viewer window. From there, select the Ken Burns effect.
You’ll see two boxes overlaid on your footage: a Start frame and an End frame. All you have to do is drag and resize the Start box to set your initial view, and then do the same for the End box to set the final, zoomed-in shot. iMovie takes care of the rest, creating a slow, cinematic zoom automatically.
Pro Tips for Zooms That Truly Enhance Your Video
A bad zoom can wreck a perfectly good video. It’s jarring, pulls the viewer out of the moment, and just looks amateur. But a good zoom? That's a different story. It can guide your audience's eye, emphasize a crucial point, and make your entire video feel more dynamic and professional.
Getting it right isn't about fancy software; it’s about a few core principles I've learned over years of editing.
If you take away only one thing, let it be this: record in the highest resolution you possibly can. Seriously. A digital zoom is just a fancy way of saying you’re cropping your video and blowing up the remaining pixels. Start with a low-res file, and you’re guaranteed a blurry, pixelated mess.
Shooting in 4K is the gold standard here. It gives you a huge amount of data to play with, so you can punch in tight on a 1080p timeline and still have a crisp, clean image. If you're wondering how to get the most out of your high-res footage, we have a whole guide covering the best format for your video exports that's worth a read.
The Art of Timing and Easing
Resolution is the foundation, but the real secret to a great zoom is in the motion itself. You want it to feel smooth and natural, not like a sudden, robotic jolt.
The trick is a feature called easing. You’ll see it called "ease in" and "ease out" in most editors. This simply ramps the speed up at the beginning of the zoom and slows it down at the end. It's a tiny change that makes a world of difference, mimicking the way a real camera operator would move.
Timing is just as important. Don't zoom just to add movement. Every zoom needs a purpose—to highlight a specific button, draw attention to a line of code, or focus on a small detail.
I see this mistake all the time: a zoom that's way too fast. It's disorienting. A good rule of thumb is to keep your zooms between half a second and two seconds. Anything quicker is a blur, and anything longer can feel sluggish.
Common Mistakes to Avoid
Even with the best intentions, a few common slip-ups can turn a helpful zoom into a distraction. Here are the big ones to watch out for:
- Pushing low-quality footage too far. This is the number one offender. If your source video is only 1080p, try not to zoom past 130% or so. Any more than that and the pixelation starts to become really obvious.
- Zooming without a reason. A random zoom just confuses the viewer. Ask yourself: "What am I trying to show them here?" If you don't have a clear answer, skip the zoom.
- Forgetting to reframe your shot. When you zoom in, the composition changes. Make sure your subject is still centered and framed nicely. An off-kilter shot just looks like a mistake.
Got Questions About Zooming In? We’ve Got Answers.
As you start experimenting with zooms, a few common questions are bound to pop up. Let's run through some of the big ones so you can sidestep common pitfalls and get your edits looking sharp.
How do I zoom without my video getting blurry?
This is probably the most frequent question I hear, and the answer almost always comes down to your source footage. The secret is to record in a higher resolution than you plan to export.
Shooting in 4K is the gold standard here. If your final video will be in 1080p, that extra resolution from a 4K source gives you a ton of leeway. You're essentially working with a surplus of pixels, so you can crop and zoom in quite a bit before the image starts to look soft or pixelated.
What's the difference between optical and digital zoom?
It's crucial to know the difference. An optical zoom is the real deal—it happens in your camera when the physical lens elements move to magnify the image. Because it's a physical process, you don't lose any quality.
A digital zoom, which is what we're doing in editing software, is fundamentally different. It's really just an illusion. The software crops into the frame and blows up the remaining pixels to fill the screen. Push it too far, and you'll see a noticeable drop in quality, which is why starting with high-res footage is non-negotiable for clean digital zooms.
Pro Tip: To get that smooth, cinematic zoom effect, you need to work with "easing." In editors like Premiere Pro, you can apply "Ease In" and "Ease Out" to your keyframes. This little trick feathers the start and end of the motion, making it accelerate and decelerate gradually instead of starting and stopping abruptly. It feels much more natural.
Can I automatically zoom to follow my mouse?
Yes, you can, but this is a very specific feature that you won't find in most standard video editors. Trying to track a cursor manually in a program like Adobe Premiere Pro would be a nightmare—we're talking potentially hundreds of tiny, painstaking keyframes.
This is where specialized tools come into play. A platform like Tutorial AI is designed for this exact task. Its "Smart Zooms" feature analyzes your screen recording, automatically tracking your cursor movements and clicks. It then applies perfectly timed, smooth zooms to follow the action for you, saving an incredible amount of editing time.
This kind of AI-powered editing is a game-changer for anyone creating tutorials or demos from screen recordings. It's a perfect fit for:
- Product demos and customer onboarding videos
- New feature announcements and explainer videos
- Visual additions to knowledge base articles
Simple recording tools like Loom are great for quick messages, but the final videos often end up being 50-100% longer than they need to be. On the other end, powerful editors like Camtasia or Premiere Pro require a steep learning curve. Tutorial AI hits the sweet spot, letting experts record naturally while the AI ensures the final cut is tight, polished, and looks like it was edited by a pro.
Ready to skip the tedious manual work and let AI create your tutorials? With Tutorial AI, you just record your screen, and the AI handles all the zooms, cuts, and highlights for you. Give it a try and see how quickly you can produce a studio-quality video.