If you’re just looking for the quick-and-dirty answer, here it is: the best all-around video format for just about anything you do online is an MP4 container with an H.264 codec. It's the universal translator of web video, working flawlessly on almost any platform or device you can think of.
What Is the Best Video Format for Most People?
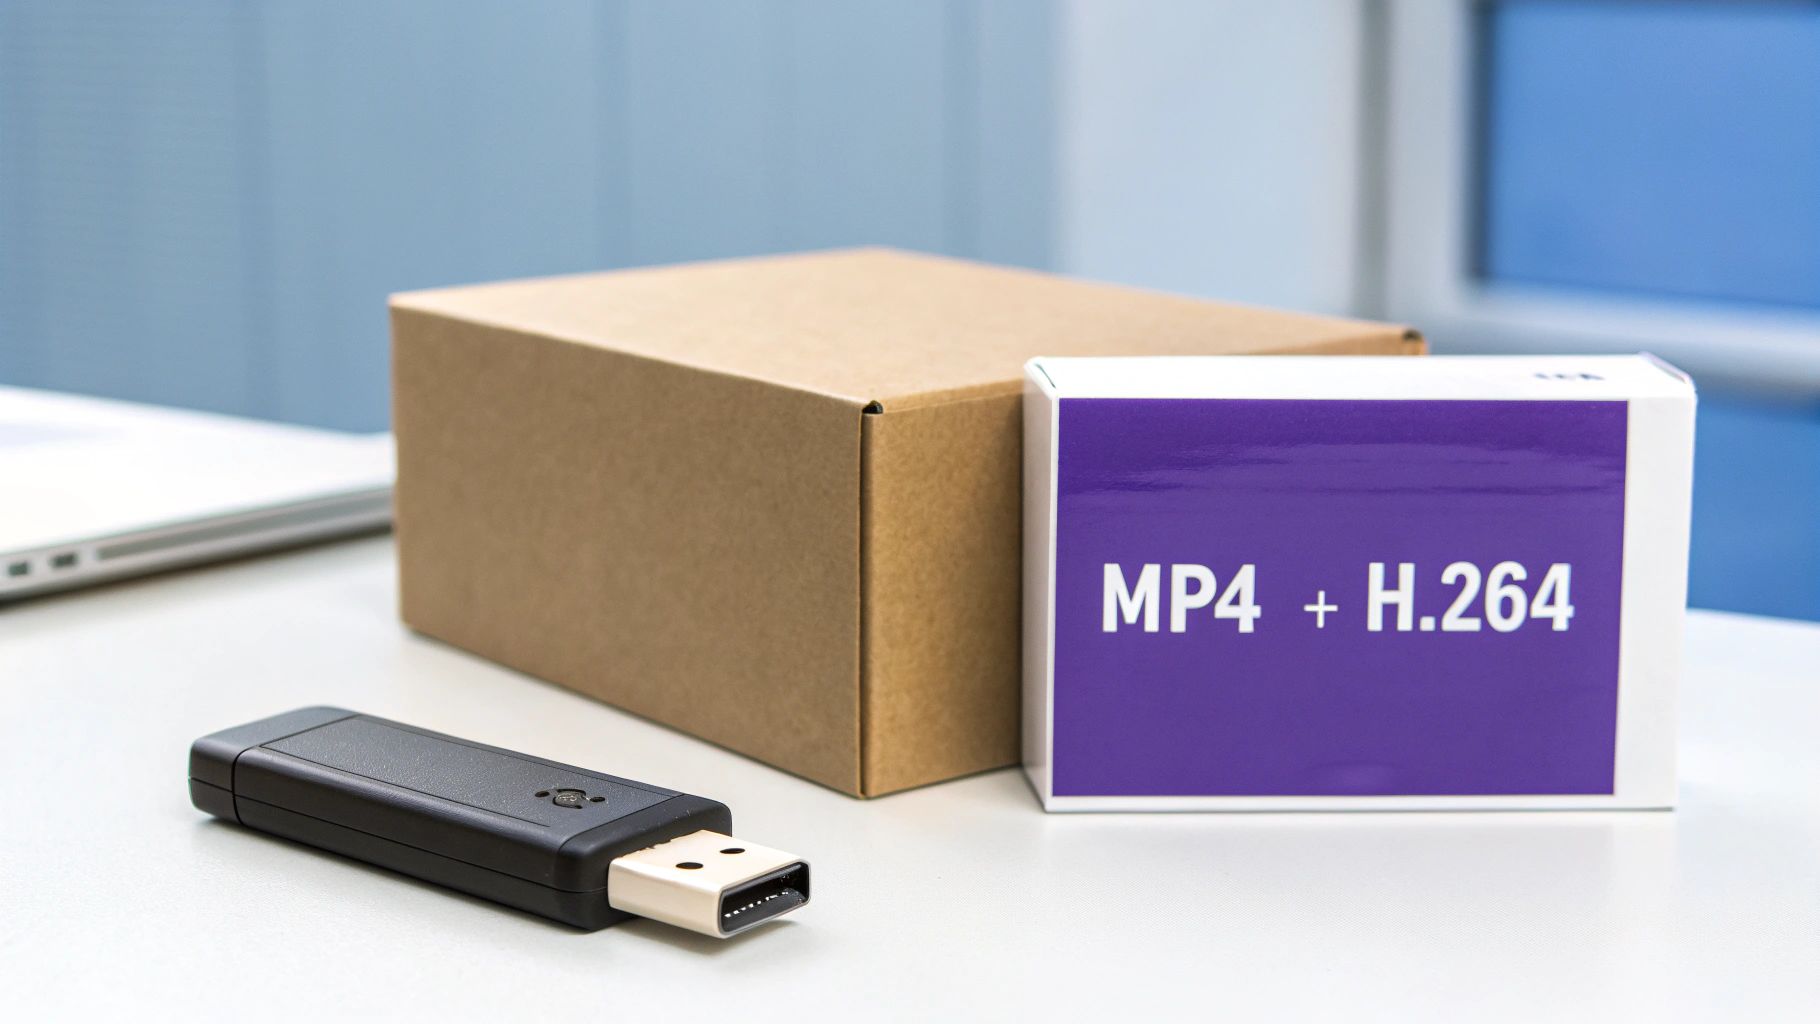
Let's cut right to the chase. In a world with dozens of video formats, the combination of an MP4 container and an H.264 (also known as AVC) codec is the reigning champion for almost everyone. It hits the sweet spot between three crucial things: universal compatibility, great quality, and small file sizes.
This dynamic duo is why your video plays just as well on a phone as it does on a desktop or smart TV. It’s the default for most editing software and the go-to format for giants like YouTube and Vimeo because, well, it just works.
Why This Combo Is King
I like to think of a video file as a delivery package. The MP4 container is the box itself—a standardized, universally recognized box that holds everything together. The H.264 codec is the genius packing technique used to shrink the contents (your video and audio) down so they fit inside without getting damaged.
This shrinking process is called compression, and it's what makes a file small enough to stream smoothly over the internet. The real magic of H.264 is how it pulls this off while keeping the video looking crisp and clear. Your audience gets a fantastic viewing experience without staring at a buffering wheel. It’s the perfect compromise for most creators.
For the vast majority of online video—from marketing ads to internal training guides—MP4 with H.264 delivers the perfect blend of performance and accessibility. It takes the technical headache out of the equation so you can focus on making great content.
When to Look Beyond the Basics
Of course, "best" isn't a one-size-fits-all term. While MP4/H.264 is your workhorse, certain projects call for different tools. A professional filmmaker might need a format that keeps more raw image data for color grading. A web developer might opt for a newer codec to get the absolute fastest load times on a website. It all comes down to your specific goal.
And as you dig into these options, don't forget that the technical specs are only half the battle. The visual presentation—your style—is what really hooks viewers. Creating a consistent look across all your videos is key. You can dive deeper into developing a great video style in our other guide.
This guide will break down the most important formats, walking you through the core concepts so you can go from confused to confident. You’ll understand why MP4/H.264 is so dominant and learn how to pick the right format when your needs get more specific, ensuring your videos always look their best.
Understanding Video Containers and Codecs
If you've ever felt overwhelmed by video formats, you're not alone. The secret to getting it right is understanding what’s happening "under the hood" of a video file. Every single video file is built from two core parts that work together: a container and a codec.
Once you get the hang of how these two interact, you'll be able to make smart, confident choices every time you export.
The Container Is Just the Wrapper
Think of a container like a shipping box. The box itself isn't the content; it’s just the vessel that holds everything together in one tidy package. For a video file, that means bundling the video stream, audio tracks, subtitles, and even metadata like the title or a thumbnail image.
You’ve definitely seen these container formats before. They're the file extensions you recognize: MP4, MOV, WebM, and AVI. Each type of "box" has its own set of rules about what it can hold and how it organizes everything. This is precisely why some formats play nicely everywhere, while others are a bit more picky.
MP4, for example, is the undisputed king of compatibility. It works on virtually every browser, operating system, and device out there, mostly because it pairs so well with the world's most common codec, H.264. That’s why it’s the go-to for almost everything online.
But remember, the container is only half the story.
The Codec Does the Heavy Lifting
If the container is the box, the codec is the ingenious packing method used to shrink everything down. The word itself is a mashup of "coder-decoder," and its job is to compress your massive video and audio data into a manageable size for storage or streaming. Without it, a short HD video clip would easily eat up hundreds of gigabytes.
Here's a simple analogy: imagine a codec is a vacuum sealer for your clothes before a trip. It sucks out all the unnecessary air (redundant data) to make the package much, much smaller. When you're ready to watch the video, the "decoder" part of the codec unpacks everything back to its original state so you can see it clearly.
Key Takeaway: A container holds the data, while a codec compresses and decompresses it. You need both to have a playable video file. The combination you choose—like an MP4 container with an H.264 codec—determines the file's final size, quality, and compatibility.
How this compression works is where the magic really happens. Most video codecs, including H.264, use what's called "lossy" compression. It’s a clever process that throws away tiny bits of visual information that the human eye isn't likely to notice anyway. To really dig into this, you should understand the fundamental difference between lossy and lossless compression.
Why the Combination Matters
Here’s where it can get a little tricky: the relationship between containers and codecs is flexible. A single container format, like MP4, can actually hold video that's been compressed with several different codecs.
For instance, you could have an MP4 file that contains:
- H.264 (AVC): The old reliable. It’s the industry standard for a reason, offering a fantastic balance of quality, file size, and universal playback support.
- H.265 (HEVC): The next-generation successor. It delivers roughly the same quality as H.264 but at a much smaller file size, making it perfect for 4K streaming.
- AV1: A modern, open-source codec pushed by tech giants like Google and Netflix. It’s designed for top-tier compression efficiency on the web, though it’s still gaining widespread support.
This is why you can have two MP4 files, and one plays everywhere while the other doesn't work on an older device. The container is the same, but the codec inside is different. Choosing the best video format isn't about picking just one thing; it's about selecting the right container and codec pair for where your video will be seen.
A Practical Guide to Common Video Formats
Trying to pick the right video format can feel like you're staring at a bowl of alphabet soup. MP4, MOV, HEVC, AV1… what does it all mean? Let's cut through the noise and look at the formats you'll actually use in the real world. Each one is just a combination of a container and a codec, mixed and matched for different purposes—from getting your video seen by everyone to delivering stunning 4K quality.
This simple diagram breaks down how a video file is built, with the container acting as a box that holds the compressed video (the codec) inside.
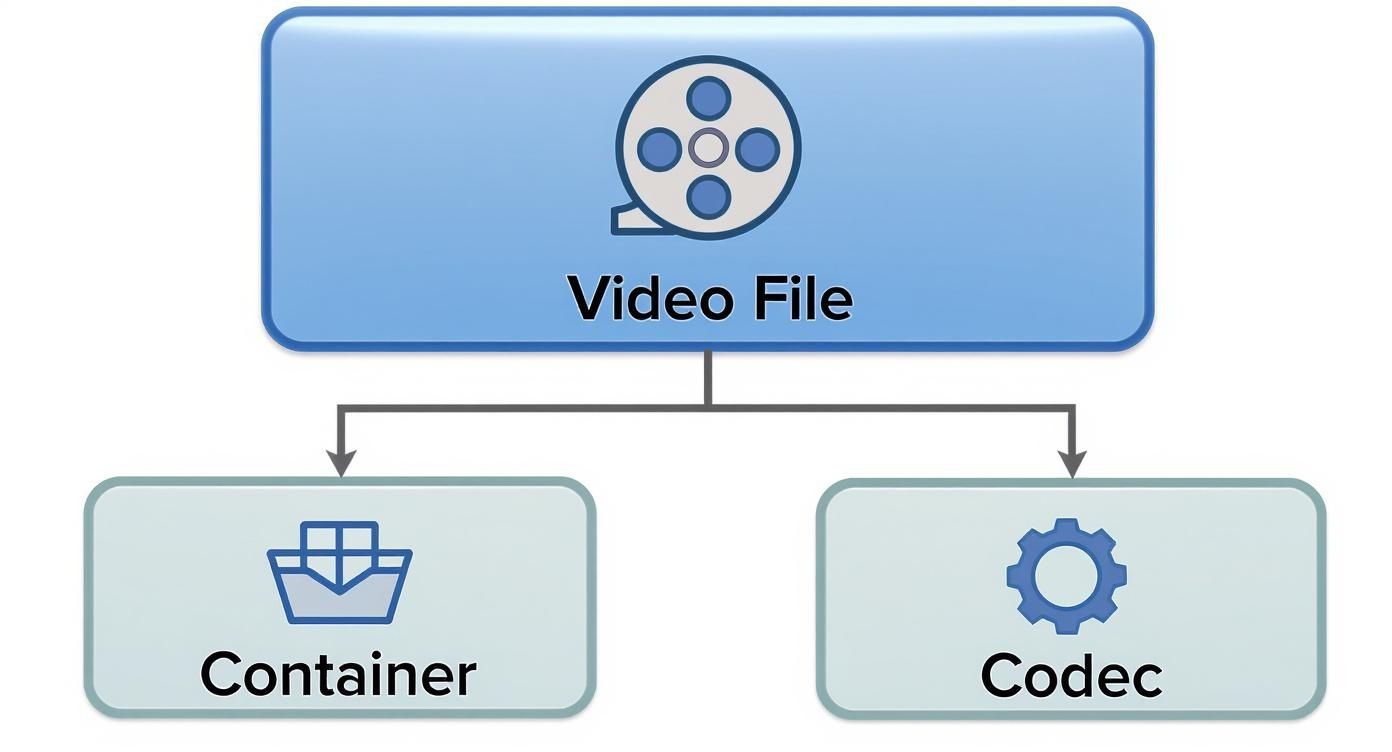
It’s a helpful reminder that a video file isn't a single thing. It’s a package, and knowing what's inside helps you make the right choices.
MP4 with H.264: The Universal Standard
If you only learn one format, make it this one. MP4 with H.264 (AVC) is the undisputed champion of compatibility. It’s the default choice for social media, websites, and pretty much any phone or computer you can think of.
Why is it so popular? It hits the sweet spot between great video quality and a reasonably small file size. For creators using a tool like Tutorial AI, exporting to MP4 with H.264 is the safest bet to ensure your video plays perfectly for everyone, everywhere.
H.265: The High-Efficiency Successor
Meet the follow-up to H.264: H.265, also known as High-Efficiency Video Coding (HEVC). Its superpower is incredible efficiency. It can deliver the same visual quality as H.264 but at roughly half the file size.
This makes H.265 the go-to codec for streaming 4K and 8K video, where file sizes can balloon out of control. The trade-off? It takes more processing power to work its magic, and some older devices and web browsers can't handle it yet.
H.264 is today's safe bet for maximum reach, while H.265 is the future, especially for high-resolution video. Choose H.265 when you need to squeeze ultra-high quality into a smaller package and you're confident your audience has modern devices.
The absolute explosion in online video is exactly why these efficient codecs are so critical. With the global video streaming market continuing to grow, formats that can deliver quality without hogging bandwidth are essential. You can find more details on the rise of video streaming from Evoca.tv, a trend that makes codecs like H.265 more important every day.
WebM: The Open-Source Powerhouse
Developed by Google, WebM is an open-source container format built from the ground up for the web. It usually contains either the VP9 codec or its even newer cousin, AV1. Both offer compression that rivals or even beats H.265, making them phenomenal for web performance.
You’ll see WebM all over Google's ecosystem, especially on YouTube. Since it's royalty-free, web developers love it for optimizing page load times without worrying about licensing fees. It’s not quite as universal as MP4, but it’s a first-class citizen in any modern web browser.
MOV: The Professional's Choice
The MOV container, originally from Apple, has been a workhorse in professional video editing for years, particularly on Macs. It’s often paired with powerful codecs like ProRes, which are designed to preserve as much image data as possible. This makes it perfect for heavy-duty tasks like color grading and visual effects.
MOV files are fantastic for the creative process, but they aren't meant for final delivery online because of their huge file sizes. The typical pro workflow is to edit with a high-quality MOV file, then export a compressed MP4/H.264 file to share with the world.
To make things even clearer, here's a quick reference guide to help you choose the right format for the job.
Comparing Popular Video Format Use Cases
This table breaks down the best applications for each format, so you can quickly decide what you need.
At the end of the day, matching the format to your goal is what matters most. For reaching the biggest audience, stick with the reliability of MP4/H.264. When you need pristine 4K streaming, H.265 is your best friend. And for the editing suite, MOV remains a trusted partner.
How to Optimize Your Video Export Settings
If choosing a container and codec is like picking the right shipping box, then your export settings are the art of packing it perfectly. This is where you get hands-on, making the critical trade-offs between stunning video quality, manageable file size, and smooth playback.
Get these settings right, and your video looks crisp and professional. Get them wrong, and you're left with a pixelated, stuttering mess. Let's break down the three pillars you'll tweak every single time you export: resolution, frame rate, and bitrate.
Choosing the Right Resolution
Resolution is all about clarity. It's simply the number of pixels that make up your video's image, and more pixels mean a sharper picture. For years, 1080p (1920x1080 pixels) has been the undisputed king of web video, and for good reason. It looks great on everything from laptops to smartphones without creating monstrously large files.
So, when would you pick something else?
- 4K (3840x2160 pixels): With four times the pixel count of 1080p, 4K delivers incredible detail. It's a fantastic choice for "future-proofing" your work. It's also a smart move for platforms like YouTube, which heavily re-compress everything. Uploading a 4K file often gives you a much cleaner-looking 1080p version after their algorithms are done with it.
- 720p (1280x720 pixels): While it’s less common these days, 720p still has its place. It's a solid option when the absolute smallest file size is your main goal, like for videos in an internal knowledge base or LMS where loading speed trumps pixel-perfect quality.
For most of what you'll create—especially for the web and social media—sticking with 1080p is the sweet spot.
Setting the Ideal Frame Rate
Frame rate determines the smoothness of motion in your video. Measured in frames per second (fps), it’s basically the number of still pictures flashed on the screen every second. The right choice can completely change the vibe of your content.
Here’s how to think about the most common options:
- 24fps: This is the cinematic standard. It gives video that classic, film-like feel with a touch of motion blur. It’s perfect for storytelling but can look a little choppy if you have a lot of fast action.
- 30fps: The long-time standard for TV, 30fps delivers a clean, smooth look that's become the default for most online content. It’s ideal for tutorials, vlogs, and marketing videos.
- 60fps: This high frame rate makes motion look incredibly fluid. It’s the go-to for recording video games, fast-paced sports, or for creating silky-smooth slow-motion shots.
For the kind of educational and marketing tutorials you'd make with a tool like Tutorial AI, 30fps hits the mark perfectly. It just looks professional and clear.
Mastering Bitrate for Quality and File Size
Of all the settings, bitrate is probably the most important and the most misunderstood. Think of it as the data budget for each second of your video. A higher bitrate means more data is used every second, which translates to higher quality and a bigger file. A lower bitrate uses less data, giving you a smaller file but potentially sacrificing quality.
Bitrate isn’t about how many pixels your video has (that's resolution); it’s about how much detail gets packed into each of those pixels. A 1080p video with a high bitrate can easily look better than a 4K video with a starved, low bitrate.
Getting this right is more critical than ever. Video content is projected to account for a staggering 82% of all consumer internet traffic by 2025. And with over 75% of video views now happening on mobile devices, delivering quality efficiently over cellular networks is key. This is exactly why a good handle on bitrate is non-negotiable for creating videos that work for modern audiences. You can discover more insights about video marketing trends on Insivia.com.
Instead of locking in one bitrate for the whole video (Constant Bitrate, or CBR), most modern tools use a Variable Bitrate (VBR). VBR is a smarter approach that allocates more data to complex, action-packed scenes and less to simple, static shots. This gives you the best of both worlds: optimized quality where it counts, while keeping the overall file size down. It's a huge advantage for creating content that’s easy to share. If you work with multiple design tools, it's also useful to know how to change download formats in Canva to keep all your assets optimized.
Choosing the Right Settings for Each Platform
Exporting a video isn't just the last step; it's a critical decision that determines how your audience will see your work. A one-size-fits-all approach just doesn't cut it. The settings that make a video shine on YouTube could make it a slow, buffering mess on your company’s training portal.
To make your content look professional everywhere, you need to think about its final destination before you hit that "Export" button. Each platform—from a social media feed to an internal Learning Management System (LMS)—handles video differently. Let's break down how to get it right every time.
Optimizing Exports for YouTube
It’s easy to get lost trying to match YouTube's exact compression specs. Don't. It's a game you can't win because they're always tweaking their algorithms. Instead, your job is to give them the best possible source file to work with.
Think of it like handing a professional chef the highest-quality ingredients. The final dish is always going to taste better.
- Container/Codec: An MP4 file with the H.264 codec is still the undisputed champion for compatibility. If you're working with 4K or higher resolutions, and your editing software can handle it, stepping up to H.265 (HEVC) is a smart move for preserving extra detail.
- Resolution: Always upload at your source resolution. If you shot it in 4K, export and upload it in 4K. This gives YouTube's servers more data to work with, which results in a noticeably cleaner 1080p version for most viewers.
- Bitrate: This is not the place to be stingy. A higher bitrate packs more visual information into the file. For a standard 1080p video at 30fps, aim for a bitrate of 10-15 Mbps. For 4K, you'll want to push that up to 35-45 Mbps or even higher.
By giving YouTube a pristine master file, you're not just ensuring your video looks great today—you're future-proofing it against their inevitable re-compression and algorithm changes down the line.
Best Settings for Websites and LMS Platforms
When you're embedding a video on a website or uploading it to an LMS, the game changes. Here, the biggest priority is finding the sweet spot between visual quality and fast load times. You want a file that plays instantly without demanding too much from your viewer's connection.
Your best bet is a well-balanced MP4 with an H.264 codec. This combo is the universal translator of the video world; it plays on virtually any browser or device without a fuss. For a standard 1080p video, a bitrate between 5-8 Mbps is usually perfect. It keeps the image sharp without creating a massive file that will have your audience staring at a loading icon.
Mobile-First Social Media Platforms
Platforms like Instagram and TikTok are designed for phones, and that means one thing: vertical video reigns supreme. Here, aspect ratio and file size are your two biggest concerns. Getting the specifics right for each platform can be tricky, but this comprehensive guide to social media video sizes and dimensions is a fantastic resource for nailing the details.
For these apps, you should always export in a vertical aspect ratio like 9:16 to fill the screen and grab attention. Stick with the reliable MP4/H.264 format, but be mindful of file size. Viewers are often on mobile data, so a bitrate of 4-6 Mbps for a 1080x1920 video is plenty to keep things looking crisp without eating up their data plan.
Recommended Export Settings For Major Platforms
Navigating these numbers can be a lot to remember, so here’s a quick-reference table to give you a solid starting point for your next export.
These are tried-and-true settings that balance quality and performance, but don't be afraid to run a few tests to see what works best for your specific content.
Advanced Needs: Transparency and Motion Graphics
What if you need to export a video with a transparent background? This is essential for things like animated logos, lower-thirds, or motion graphics that you plan to overlay onto other footage. This transparent layer is called an alpha channel, and standard formats like MP4/H.264 can't handle it.
When you need that transparency, you have to turn to more specialized codecs:
- ProRes 4444: This is a heavyweight professional codec, usually found inside a .MOV container. It’s the industry workhorse for a reason—it preserves perfect transparency and is built for editing workflows.
- WebM with VP9: A fantastic, modern option if your animation is destined for the web. It supports transparency while keeping file sizes much smaller than ProRes, which is a huge win for web performance.
Choosing the right format for the job ensures all your hard work pays off with a flawless final product, no matter where it's viewed.
Making Your Videos Accessible with Captions

Nailing the right video format is a huge win, but your work isn't done yet. To create truly great content, you have to make sure everyone can actually experience it. So many videos are watched with the sound off these days, which means captions have gone from a "nice-to-have" feature to an absolute must for keeping your audience engaged.
This is where it pays to know the difference between open and closed captions.
Open captions are literally "burned" right into your video frames. They're part of the picture, so they're always on and can't be turned off. While that guarantees they'll be seen, it can also get in the way of the visuals.
Closed captions, however, are a much smarter way to go. They exist as a separate, simple text file—usually a .SRT (SubRip Subtitle) file. This gives viewers total control, letting them toggle captions on or off whenever they want. If you provide multiple .SRT files, they can even switch between different languages.
Why Closed Captions Win
The flexibility for the viewer is a huge plus, but the real game-changer is how closed captions help people find your content. When you upload that .SRT file to a platform like YouTube, its search algorithms can read every single word. Suddenly, your video is searchable based on what you said, not just the keywords you crammed into your title.
Closed captions are a secret SEO weapon. They turn all your spoken dialogue into indexable text, helping you rank for more search terms and pulling in a much wider audience.
Getting your hands on an .SRT file is incredibly simple. Modern video editors, including Tutorial AI, can generate them for you almost instantly. You can get the full rundown on getting clean, accurate results in our guide to AI transcription.
The process is a breeze:
- Generate a Transcript: Create a text file from your video's audio track.
- Export as .SRT: Save that transcript as an .SRT file, which packages the text with all the necessary timestamps.
- Upload the File: When you upload your video, just attach the .SRT file alongside it.
Taking this one extra step makes your message crystal clear, even in a noisy coffee shop or a quiet library. More importantly, it ensures your content is fully accessible to people who are deaf or hard of hearing, letting your video make the biggest impact possible.
A Few Lingering Questions About Video Formats
Even after you get the hang of the basics, a few specific questions always seem to bubble up. Let's tackle some of the most common ones I hear, so you can feel totally confident the next time you hit that export button.
What Format Should I Use for Maximum Quality?
When you absolutely cannot compromise on quality—especially for serious editing, color grading, or archival purposes—you need to look beyond the typical delivery formats. This is where intermediate codecs like Apple ProRes or Avid DNxHD shine, almost always inside a .MOV container.
Think of these as the "raw" files of the video world. They use very light compression, which means the files are massive, but they give you all the visual information you need for heavy visual effects or precise color adjustments. The typical pro workflow looks like this: you edit with a high-quality ProRes master file, and only then do you export a much smaller, compressed MP4/H.264 file for the final delivery.
Should I Start Using H.265 Instead of H.264?
This is a great question. On paper, H.265 (HEVC) is the clear winner over H.264, delivering roughly the same visual quality at about half the file size. But in the real world, it's not quite ready to take over completely.
The main roadblock is compatibility. A surprising number of older devices and even some current web browsers still struggle to play H.265 video smoothly, if at all.
For now, it's best to think of H.264 as your universal language—the one format that works virtually everywhere. H.265 is more of a specialist tool. Use it for things like 4K and 8K streaming where every bit counts, but stick with the tried-and-true H.264 for general web use to make sure everyone can actually watch your video.
How Can I Make My Video File Smaller?
Shrinking a video file without turning it into a pixelated mess all comes down to one key setting: the bitrate. The bitrate determines how much data is packed into each second of your video, so lowering it is the fastest way to reduce file size.
But you have to be smart about it. Here’s how I approach it:
- Always use Variable Bitrate (VBR): This is a lifesaver. It intelligently gives more data to complex, fast-moving scenes and less to simple, static ones. You get a much better-looking video for the same file size compared to a constant bitrate.
- Lower the Target Bitrate slowly: Don't just slash the number in half. Nudge the bitrate down a bit, export a short test clip, and watch it. If it still looks good, nudge it down a little more. You're looking for that perfect balance point where the file is small but the quality is still crisp.
- Drop the resolution if you must: If you've lowered the bitrate as far as you can and the file is still a monster, your next best move is to reduce the resolution. Going from 4K to 1080p, or from 1080p to 720p, will make a massive difference in file size.
Ready to stop wrestling with complicated settings and create stunning tutorials effortlessly? Tutorial AI handles all the technical details for you. Our platform automatically optimizes your videos for clarity and performance, so you can focus on creating great content. From screen recording to AI-powered editing and voiceovers, we've built the fastest way to make professional-quality demos.
Start creating your first tutorial for free at Tutorial.ai
Article created using Outrank