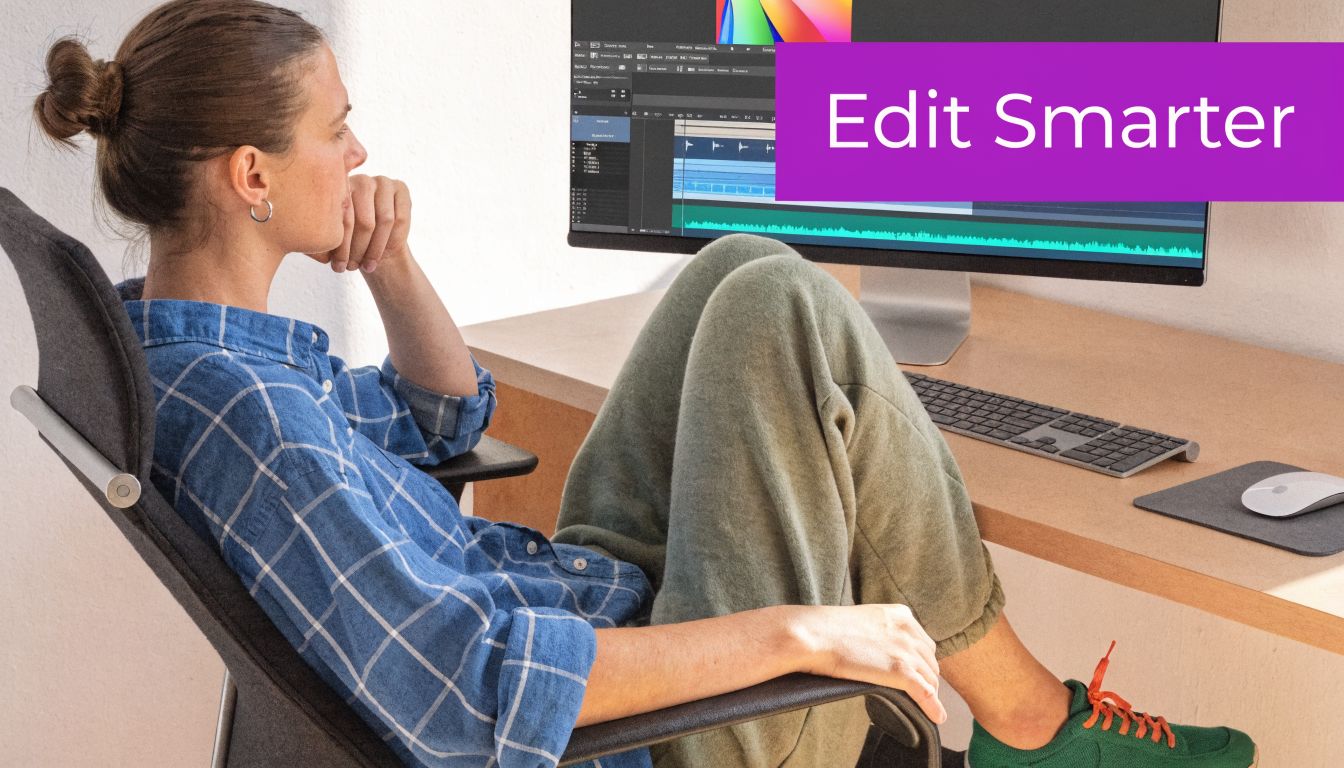
Most advice on how to do a video is pointed at the wrong job. It teaches camera angles, lighting setups, lens choices, and cinematic movement. That matters for brand films and talking-head content. It doesn't solve the main problem most product marketers, support teams, trainers, and subject matter experts have: turning a rough screen recording into a clean software tutorial people can easily follow.
That gap is easy to see. Existing "how to do a video" content overwhelmingly focuses on creative camera angles and narrative shooting, while neglecting screen capture workflows, cursor guidance, and software tutorial production, as reflected in this YouTube example about camera angles. If your job is making onboarding videos, feature announcements, support article videos, demos, or internal training, generic filmmaking advice leaves you with a workflow problem, not a creative breakthrough.
Beyond the Editor's Dilemma
The problem with tutorial video production is not recording. It's editing.
Subject matter experts can explain a workflow, diagnose a bug, or walk through a feature in real time. Traditional video software then turns that clear expertise into a production task. Once the screen capture is done, someone has to cut mistakes, tighten pacing, clean audio, add callouts, update visuals, and export the final file correctly. That is where good tutorials slow down.
On one end, teams rely on quick screen recorders and publish the one-take. It feels efficient for about ten minutes. Then the problems show up. The presenter searches for the right menu, restarts a sentence, fills space while clicking around, and leaves behind a video that asks the viewer to watch the work instead of learn the task.
On the other end, teams move the recording into Camtasia, Adobe Premiere Pro, or Final Cut Pro. Those tools can produce polished results. They also assume the person finishing the video can edit on a timeline, manage layers, trim precisely, clean up audio, and rebuild sections every time the product changes. For software tutorials, that is often the wrong handoff.
Why quick recordings disappoint
A rough screen capture usually fails in predictable ways.
- The viewer follows your clicks, not your teaching. Menu hunting, backtracking, and verbal placeholders stay in the final cut.
- Your expertise sounds less sharp than it is. Pauses, retries, and self-corrections make a strong explanation feel uncertain.
- The video becomes hard to maintain. Messy one-takes are harder to reuse in a help center, harder to localize, and harder to revise after a UI update.
I have seen this pattern over and over with product marketers, support leads, and solution engineers. They know exactly what the customer needs to do. Their first recording still comes out long, uneven, and harder to trust than the live explanation that produced it.
Why pro editing creates a bottleneck
Timeline editors are built for people who edit for a living. Software tutorial teams usually need something else. They need a workflow that lets the product expert stay focused on explanation while the system handles cleanup, structure, and visual polish.
Practical rule: If the only person who can update a product video is the video editor, the workflow is broken.
That matters even more for software education because the asset rarely stays finished for long. Interfaces change. Buttons move. Language gets refined. Support priorities shift. A tutorial that takes hours to edit becomes expensive to keep accurate.
The better model is script-based editing powered by AI. Record the walkthrough, turn the spoken track into editable text, cut the weak lines by editing the transcript, and let the platform handle timing, captions, voice cleanup, and visual alignment. That is the shift old workflows miss. It removes the need to wrestle with a complex timeline just to publish a clean tutorial.
For expert-led software videos, the goal is not cinematic editing skill. The goal is fast production, easy updates, and a finished result that sounds sharp, looks polished, and stays teachable.
Planning Your Video for Clarity Not Perfection
A strong tutorial starts before you record, but not with a rigid script.
The mistake is trying to sound flawless on the first take. That usually makes people stiff. They read instead of teach. The result is accurate, but flat.
For software tutorials, planning works better when it's shaped around clarity, sequence, and audience intent. You need to know where the viewer starts, what you need them to do by the end, and which screen moments matter.
Start with the job the video must do
Different tutorial types need different planning pressure.
| Video type | What the viewer needs | What to plan first |
|---|---|---|
| Demo video | Why the feature matters | Core use case and visible outcome |
| Onboarding video | How to get started | Exact setup sequence |
| Support article video | Fast resolution | Shortest path to the fix |
| Feature release video | What's new and what's changed | Before-and-after framing |
| Internal training video | Repeatable process | Decision points and compliance notes |
If you're making a support video, don't open with company context. If you're making a feature release video, don't bury the new capability halfway through. Match the structure to the viewer's urgency.
Build a speaking outline, not a script
A practical outline is enough for most expert-led videos. Keep it to a short list of beats you can glance at while recording.
Use this shape:
Opening outcome
State what the viewer will be able to do.Context
Give only the background needed to understand the task.Action sequence
Move through the product in the exact order the viewer should follow.Confirmation
Show the success state or expected result.Close
Point to the next action, related workflow, or common mistake to avoid.
That outline keeps your explanation natural. You can speak like a person who knows the product, not like someone reading legal copy.
Decide what belongs on screen
A good tutorial is selective. Not every click deserves airtime.
Before recording, mark three kinds of moments:
- Critical screens where the user could get lost
- Sensitive areas that may need blurring later
- Visual proof points such as settings, results, or status changes
If a step doesn't change the viewer's understanding or their ability to complete the task, it probably doesn't need to stay in the final cut.
Planning this way also reduces a common problem in software videos: over-explaining simple actions while rushing the moments that confuse users.
Keep the source material update-friendly
Product interfaces change. Menus move. Labels get renamed. If you structure the video around one clear workflow instead of a wandering tour, the asset is easier to update later.
That means:
- Use specific examples, but don't tie every sentence to a temporary screen state.
- Avoid long intros that will feel stale after a release.
- Separate must-know steps from optional tips.
The best planning habit is modest. Know your path. Know your audience. Know the one thing the video must accomplish. Then record with enough structure to stay clear, not so much structure that you sound trapped by the page.
Recording Your Screen and Voice Without Fear
Recording is not the hard part. Trying to sound perfect while driving the product is the hard part.
That distinction matters for software tutorials. Subject matter experts often assume they need presenter skills and editor skills before they can make a useful video. They do not. They need a clean capture of the workflow, clear narration, and a recording method that matches how they think.
The old approach pushed people toward one-take demos. You clicked, talked, corrected yourself, lost your place, then started over because the timeline edit later felt expensive. A script-based workflow changes the pressure. The recording only needs to be good enough to shape into a clear lesson.
Choose a recording method that reduces cognitive load
Two recording modes work well for software tutorials.
Live narration while you demo
Use this when you already explain the workflow naturally in real time and the sequence is second nature.
It fits well when:
- the path through the product is familiar
- cursor movement and spoken explanation need to stay tightly aligned
- the walkthrough benefits from natural momentum
Silent screen capture with voiceover later
Use this when accuracy matters more than live energy, or when talking and clicking at the same time slows you down.
It fits well when:
- the workflow includes exact fields, settings, or configuration steps
- you want a cleaner visual pass before you script the explanation
- you tend to lose phrasing while searching for the next click
If there is any doubt, start with silent capture. It is usually the faster choice for experts who know the product well but do not record often. The screen capture becomes the source of truth. The narration can catch up afterward.
For teams setting up the basics, this guide on how to screen record with sound covers the practical setup.
Record for editability
A usable tutorial recording is controlled, not theatrical.
Keep the desktop clean. Close unrelated tabs, notifications, and chat windows. If the interface is dense, increase zoom before you start instead of hoping viewers will squint through it later.
Cursor movement matters more than many teams realize. Slow down enough that each action reads clearly. After an important click, leave the result on screen for a moment. That short pause gives you cleaner cut points and gives the viewer time to register what changed.
Speak with intention too. Name buttons, fields, and settings the way they appear in the product. If you miss a line, repeat the sentence or redo the step and continue. Stopping after every slip creates worse recordings, not better ones.
Record a workable pass, not a heroic pass.
Use a colleague voice, not a presenter voice
The right tone for a software tutorial is closer to internal enablement than polished promotion.
Speak as if you are showing one capable coworker how to complete a task that matters. That keeps the pacing practical. It also prevents a common failure mode in expert-led videos: over-explaining obvious actions while rushing the one screen where the viewer can get lost.
A simple test helps. If a sentence would sound natural in a product handoff, customer call, or team training, keep it. If it sounds like stage copy, cut it.
Avoid the recording habits that create cleanup work
The fastest AI editing workflow still benefits from disciplined source material. Bad recording habits do not disappear. They show up later as confusing transcript edits, awkward visual jumps, or missing proof points.
| Recording habit | What it causes later | Better move |
|---|---|---|
| Talking while hunting for the right menu | Rambling narration and messy cuts | Find the path first, then explain it |
| Reading every label on screen | Slow pacing and repetitive audio | Name only what the viewer needs for the next action |
| Clicking through the result too fast | The payoff is easy to miss | Hold on the changed state for a beat |
| Restarting from the beginning after a small mistake | Wasted time and lower energy | Redo the line or step, then keep going |
One more practical habit helps a lot. Record in chunks.
Capture the core workflow first. Then pick up a cleaner intro, a short closing, and any edge-case screens you may want later. That gives you more options without dragging you back into old-school timeline thinking, where one messy take has to carry the whole video.
The Magic of AI-Powered Script-Driven Editing
Here is the part that changes the job.
Old editing workflows force a software expert to act like a video editor. Script-driven editing keeps the work in the medium the expert already uses well: words. You clean up the explanation in the transcript, and the video updates with it. That is a very different workflow from dragging clips across a timeline, trimming pauses by hand, and checking every cut for visual damage.
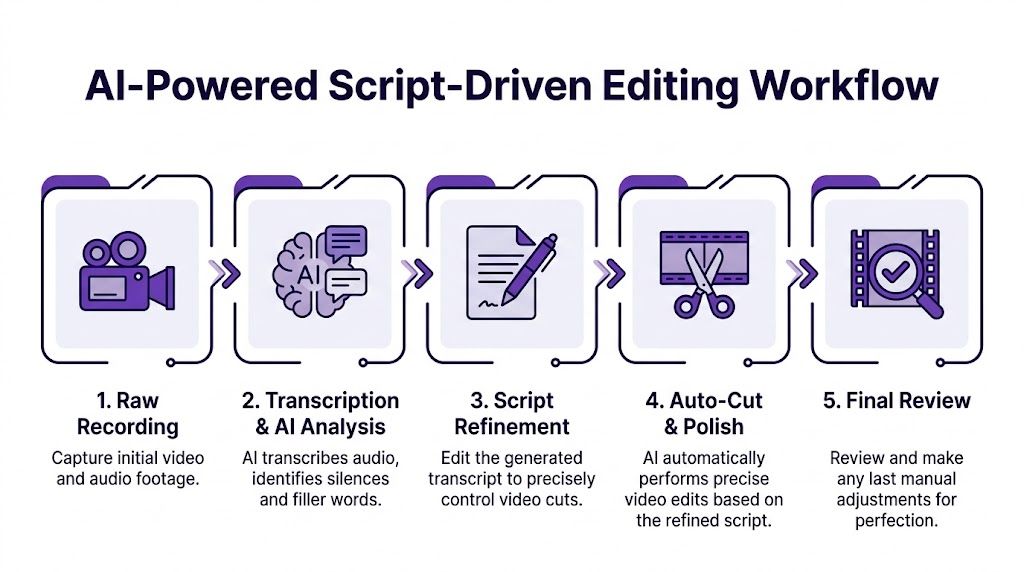
Edit the explanation before you edit the footage
For software tutorials, the first draft usually fails in predictable places. The expert opens the wrong panel, restarts a sentence, adds commentary that made sense while recording, then explains one click three different ways.
A timeline editor can fix that, but it does it slowly. Every cleanup decision becomes a hunt through audio, screen movement, cursor position, and timing. In a script-based system, you remove the line from the transcript and move on.
That sounds minor until you do it ten times in one video.
A practical pass often looks like this:
- Cut the throat-clearing intro so the tutorial starts on the first useful action
- Remove the section where the wrong menu opened
- Tighten a wandering explanation into one clear sentence
- Replace outdated wording without recording the whole segment again
That is why this workflow fits subject matter experts so well. The edit surface looks like documentation, not post-production software.
A useful companion for this style of workflow is an AI video script generator, especially when you want to tighten phrasing before regenerating narration.
What changes in practice
The gain is not just speed. It is control.
In the old model, one weak sentence can trigger extra recording, patchwork cuts, and visual cleanup. In a script-driven workflow, that same problem is usually a text edit. The expert keeps refining the lesson instead of wrestling with production mechanics.
That difference matters more in tutorial content than in brand video. Software education changes constantly. Feature names shift. Settings move. A step that was accurate last month can be wrong after the next release. If updates require timeline surgery, teams delay them. If updates work like revising a script, the tutorial stays current.
Here is a practical walkthrough of that style in action:
Why experts get better results with script-based tools
Traditional editors are powerful, but they ask for skills that many product marketers, trainers, founders, and support leads do not have time to build. They need to teach clearly. They do not need to become part-time motion editors.
This workflow reduces the gap:
| Editing need | Traditional workflow | Script-driven workflow |
|---|---|---|
| Cut filler words | Trim audio and inspect the cut | Delete words from transcript |
| Fix one sentence | Re-record or patch the voiceover | Rewrite text and regenerate narration |
| Shorten a section | Ripple clips and rebalance timing | Remove the paragraph |
| Update a feature name | Patch timing across audio and visuals | Change the text and reflow the scene |
That is the shift I care about most. Experts can produce clean, current software tutorials without getting trapped in complex timelines.
Add polish where it improves comprehension
Script-driven editing handles the message. Good tutorial production still needs visual guidance.
For software videos, the highest-value upgrades are usually simple:
Smart zooms
Use zooms to isolate the exact area that matters in a dense interface. If every movement zooms, the video feels jumpy. If key moments zoom, the viewer stays oriented.
Cursor emphasis
Cursor smoothing, highlighting, and size adjustments make actions easier to track. This is one of the fastest ways to reduce viewer confusion in click-heavy walkthroughs.
Blur and concealment
Account details, internal IDs, and customer information show up often in real product recordings. Blur them after capture so the tutorial stays usable without becoming a compliance risk.
Framing and presenter assets
If the tutorial includes a presenter intro or profile card, keep it consistent with the rest of your training library. Teams often pair product walkthroughs with a simple presenter image created through an AI headshot generator so new videos match existing education assets without scheduling another shoot.
The most significant breakthrough is ownership
The biggest win is that the expert can stay close to the final output.
Under the old model, the expert recorded and hoped an editor preserved the intent. Under a script-based workflow, the expert can shape the explanation, revise the wording, fix mistakes, and update the lesson after product changes. That is a better operating model for onboarding, customer education, internal training, and product marketing.
It also makes multilingual production easier to manage. When narration, captions, and scene timing stay tied to a script, updates are easier to carry across versions. The workflow starts to look less like film editing and more like maintaining a living knowledge asset.
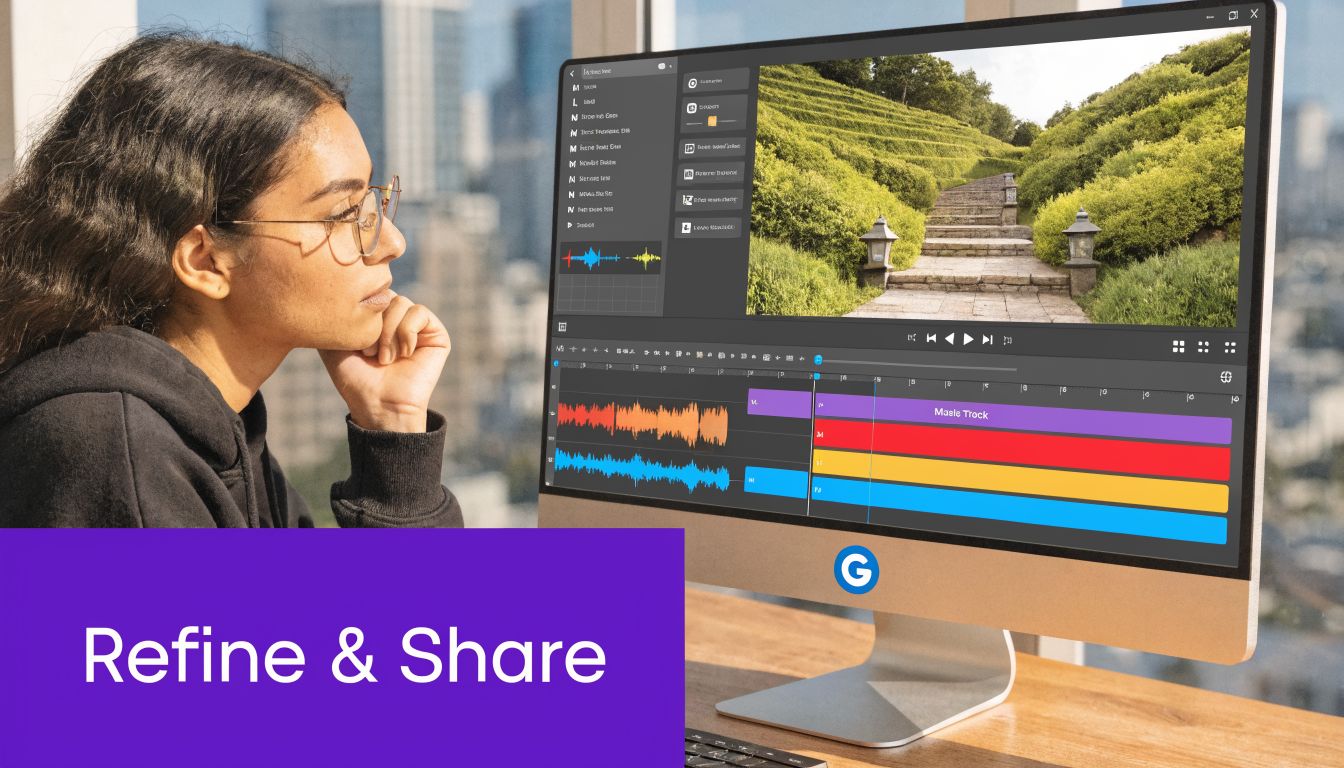
Adding Brand Polish and Global Reach
Polish does not come from a complicated timeline. It comes from standards.
That matters for software tutorials because viewers are not judging your motion design reel. They are deciding whether this lesson feels trustworthy, current, and easy to follow. In a script-based workflow, brand polish stops being a late editing task and becomes part of the publishing system. The expert records once, the team applies the same presentation rules every time, and the library stays consistent without handing the whole project to an editor.
Build a repeatable visual identity
For tutorial teams, consistency beats flair.
Use the same intro treatment, title card structure, caption style, and on-screen callout rules across every video. Keep logo use restrained. Keep fonts readable. Use brand colors to support orientation, not to decorate every frame. The product interface should remain the focal point.
Teams often overproduce this stage, especially if they are used to agency-style video work. That approach slows down tutorial production and adds visual noise. A customer education video needs a clean frame, clear labels, and stable formatting. It does not need trailer-style motion graphics layered over every click.
A practical standard looks like this:
| Layer | Good use | Bad use |
|---|---|---|
| Logo | Small presence in the intro or corner frame | Large watermark covering the interface |
| Colors | Used in titles, highlights, and section labels | Bright blocks competing with product UI |
| Typography | One readable font system | Mixed fonts and decorative display text |
| Animation | Brief transitions and clear emphasis | Constant movement that pulls attention from the lesson |
Use captions as part of the product experience
Captions affect usability.
In software tutorials, they help viewers catch feature names, menu labels, and workflow terms that are easy to miss on first watch. They also support accessibility and make videos usable in offices, shared spaces, and support environments where audio is off.
Clean them up before publishing. Break long lines. Correct product names. Remove transcription errors that change meaning. Keep captions out of the way of buttons, menus, and modal windows. Good captions do more than mirror the narration. They reinforce the language users will see inside the product.
Set up localization before the library grows
Localization becomes expensive when each language version is treated like a separate edit.
That is the old timeline problem in another form. One English recording turns into five duplicated projects, each with its own pacing fixes, retimed captions, and manually adjusted callouts. Script-based production avoids that mess because narration, scenes, and captions stay tied to source text. If your process supports video translation services, updating a multilingual tutorial library becomes far more manageable than rebuilding every version by hand.
This matters most for product teams, customer education leads, and support orgs with frequent UI changes. Labels expand across languages. Sentence length shifts. Timing needs to adapt without breaking the lesson. A script-first system handles those revisions with far less rework.
Give presenters a consistent face when needed
Presenter visuals only help when they support trust and continuity.
For onboarding academies, certification tracks, or expert-led help centers, a consistent presenter image can make the library feel organized even when multiple internal specialists contribute lessons. If you need profile photos for intros, author cards, or supporting course pages, an AI headshot generator can create a more uniform presenter presence without scheduling a new shoot for every subject matter expert.
The finish should stay simple. Clear brand rules, readable captions, and translation-ready structure do more for tutorial quality than flashy editing ever did. That is the shift. Experts can now produce company-ready training without becoming video editors.
Publishing and Measuring Your Video's Impact
Publishing is part of the workflow, not an afterthought.
Teams that adopt script-based production often fix the hardest part first: creating a clear tutorial without wrestling a timeline. Then they lose the gain by dumping the finished video on a generic channel and hoping viewers find it. For software tutorials, placement decides whether the video reduces friction or becomes another forgotten asset.
Publish where the viewer already works
A product tutorial should live next to the task it explains.
Use a simple rule. Put the video in the system, page, or workflow where the question shows up in the first place. That keeps the tutorial useful in the moment it matters, which is the whole advantage of expert-led instructional content.
- Knowledge base video goes inside the article that answers the question.
- Onboarding clip belongs in the LMS, help center, or in-product walkthrough.
- Sales demo segment should be easy to send in follow-up emails or add to CRM sequences.
- Feature release video fits product update pages, launch emails, and customer announcements.
- Internal training should sit with the process documentation the team already uses.
Old video workflows made every update expensive, so teams treated publishing like archiving. The newer script-first approach changes that. A tutorial can be revised quickly, republished fast, and kept close to the documentation it supports.
Export and title with purpose
For software education content, clarity wins.
Use export settings that match the destination, then title the asset around the job the viewer is trying to complete. This is one of the easiest places to improve performance without touching the recording.
A weak title says: "Platform Walkthrough April Update"
A strong title says: "How to assign user permissions in [product name]"
The second title matches search behavior, support handoffs, and internal sharing. Apply the same standard to descriptions, chapter labels, and surrounding copy. State the task, the outcome, and any setup the viewer needs before they start.
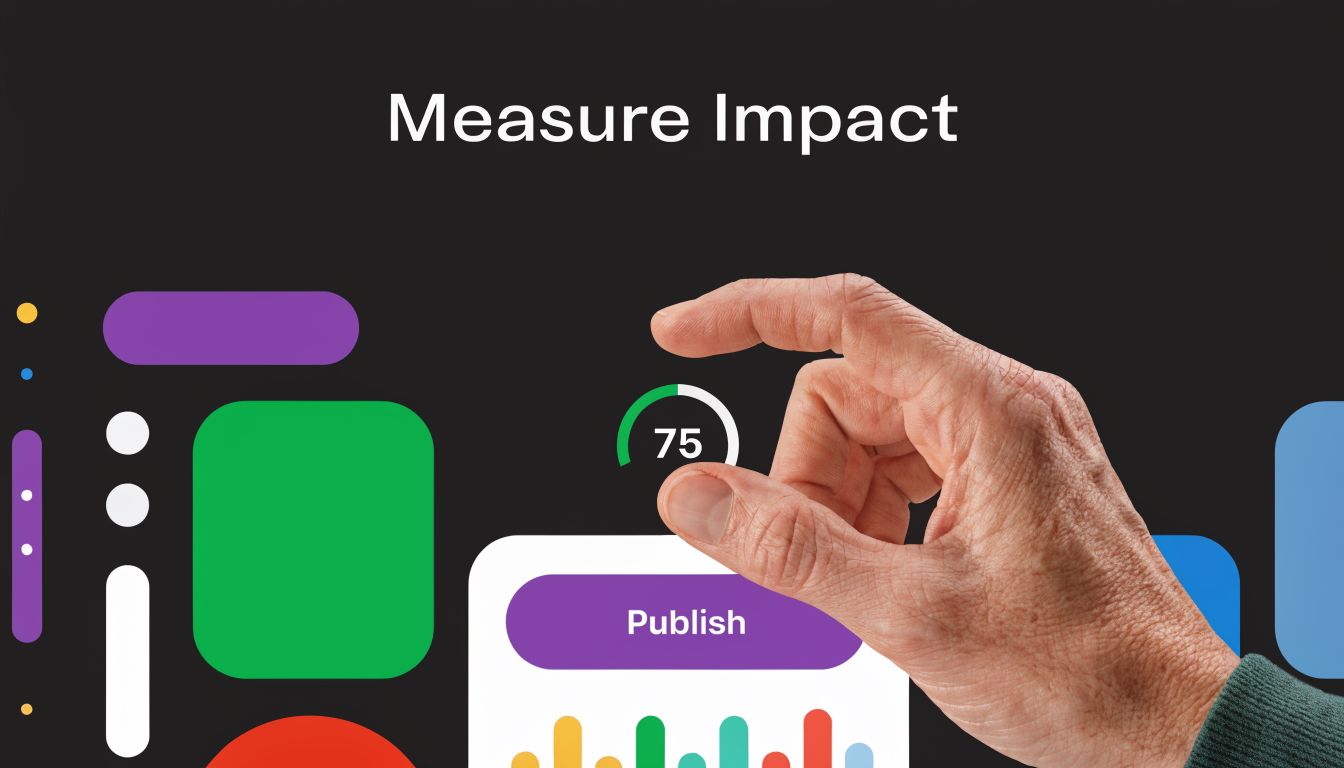
Measure the result, not just the view
Views are easy to report and easy to misread.
A tutorial is doing its job when it helps someone finish a task faster, submit fewer support tickets, or move through onboarding with less confusion. For teams making software tutorials, those signals matter more than broad awareness metrics.
Review performance from a workflow angle:
Engagement
Are viewers reaching the moment where the key action is shown?Drop-off points
Do exits cluster before the solution appears, which usually means the intro is too slow or the setup is unclear?Support impact
Are support agents sending the video, and does the related question decline afterward?Enablement reuse
Are onboarding, sales, or customer success teams using the asset because it explains the workflow better than static docs or slide decks?
A tutorial has done its job when it removes friction for the viewer and repeat work for the team.
That standard is more useful than vanity metrics because it ties publishing back to operations. If a video can be updated from the script, placed where users already work, and judged by whether it reduces confusion, subject matter experts can own more of the process without waiting on a traditional edit cycle.
Embrace the New Standard for Expert-Led Video
The old workflow asked subject matter experts to choose between speed and polish. That's why so many software tutorials either looked rushed or took too long to ship.
A better standard has emerged. Record the expertise quickly. Clean it up through the script. Add visual guidance that helps the viewer focus. Apply branding consistently. Localize without rebuilding the project from the ground up. Publish where the video can do its job.
That approach fits the reality of modern teams. Product marketers need feature release videos they can update. Support teams need article videos that solve issues clearly. Trainers need repeatable onboarding content. Sales teams need demos that sound sharp without requiring an editor for every revision.
The key shift is operational. Expert-led video no longer has to depend on messy one-takes or complex timelines. The most effective workflow now treats video more like living documentation: editable, reusable, easy to refine, and close to the people who know the product best.
If you're still thinking about how to do a video as either "just record it" or "hand it to editing," you're working from an outdated model. The smarter approach is faster, cleaner, and easier to scale.
If you want to create studio-quality tutorials, demos, onboarding videos, and support videos without wrestling with traditional editing software, try Tutorial AI. It gives subject matter experts a practical way to turn raw screen recordings into polished, on-brand video content fast.