If you want to create truly effective how-to videos, the old ways just don't cut it anymore. A modern approach combines clear scripting, clean screen recording, and an AI-powered editor to handle the grunt work. This new playbook is all about letting you produce polished, professional videos that solve real problems for your audience, without needing a film degree to do it.
The New Playbook for Creating How-To Videos
Not long ago, making a high-quality "how-to" video felt like a major project. You were usually stuck with two less-than-ideal options.
The first was to use a quick-and-dirty screen recorder. These tools are fine for a fast capture, but you'd often end up with raw footage that’s 50-100% longer than it needs to be, packed with ums, ahs, mistakes, and dead air. The final video felt rough and often wasted the viewer's time.
The second route was diving into professional software like Adobe Premiere Pro or Camtasia. These are incredibly powerful, but they come with a steep learning curve. You’d need to be a video editing expert and spend hours trimming clips, tweaking audio, and adding effects. This meant the actual subject matter expert—the person who knows the process inside and out—could rarely create the video themselves.
This is where AI-driven tools are completely changing the game, bridging the gap between simplicity and a high-end result.
The Modern, AI-Driven Workflow
Today's workflow lets the expert do what they do best: share their knowledge. You can just hit record and talk through your process naturally, without memorizing a script or stressing over every little mistake. The AI takes over from there, automatically turning your raw recording into a polished tutorial that looks like it was edited by a pro.
This approach is incredibly efficient and perfect for producing all kinds of instructional content:
- Sharp, clear product demos and explainer videos
- Employee and customer onboarding guides
- Quick-turnaround feature release announcements
- Detailed videos for your knowledge base or support articles
This isn't just a niche trend; the video marketing world is embracing this AI-first model. In fact, 63% of video marketers now incorporate AI into their creation process. Even more telling, 41% of all businesses use AI to make videos—that’s a 128% jump from just last year.
The whole process boils down to three simple stages.
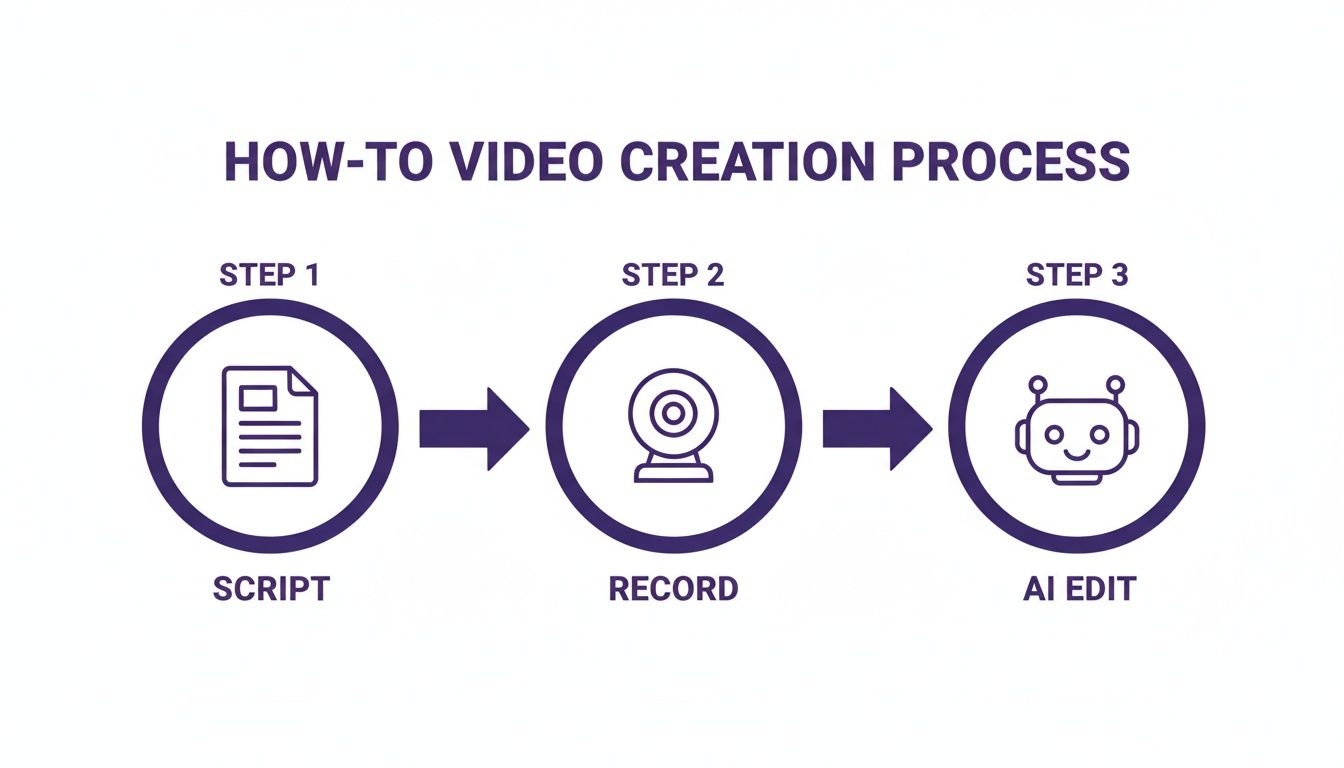
The graphic above really gets to the heart of it: you focus on the what (the script) and the how (the recording), and let intelligent tools handle the time-consuming editing. Building on this foundation with some core video production best practices can help you nail the recording phase right from the start.
Traditional vs AI-Powered Video Workflow Comparison
To see just how different this new approach is, let's compare the old way of doing things with the new AI-powered workflow. The table below breaks down the key differences in time, cost, and the skills needed for each.
Ultimately, the contrast is stark. The traditional path is resource-intensive and slow, while the AI-powered model is built for speed, efficiency, and empowering the experts who actually hold the knowledge.
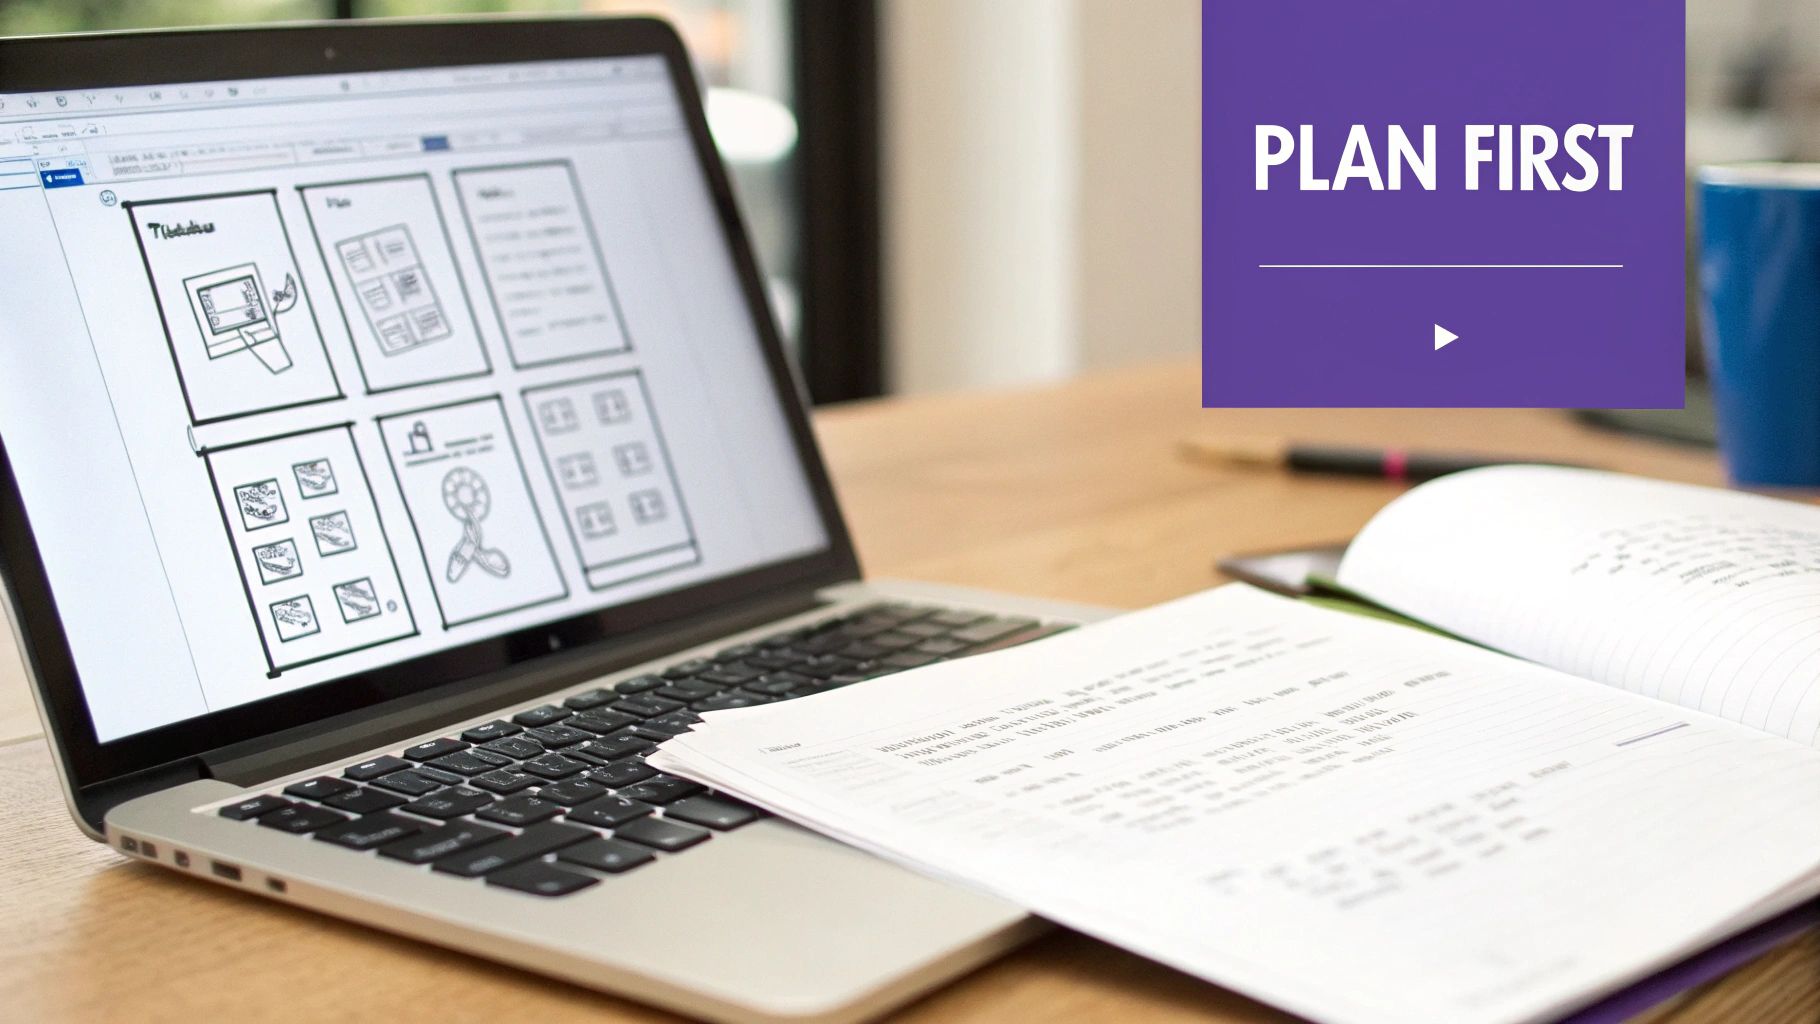
Blueprint Your Video for Maximum Clarity
Every great how-to video starts long before you hit the record button. Seriously. This pre-production phase is where you build the foundation for a clear, concise, and effective tutorial, saving yourself a world of pain during editing. A bit of planning upfront is the single best way to ensure your final video is focused and actually helps your audience.
I've seen it happen a thousand times: someone skips this part and ends up with a rambling recording, confusing instructions, and a video that just doesn't solve the viewer's problem. Don't be that person.
Define Your Audience and Their Problem
Before you write a single word, you have to know exactly who you're talking to. Are they a brand-new user who needs their hand held, or a power user hunting for a specific shortcut? Getting clear on their expertise level changes everything—the language you use, the pace you set, and how much context you need to give.
Once you’ve got your "who," you need to nail down their "why." What specific problem are they trying to solve right now? A truly useful how-to video doesn't just list features; it solves a real pain point.
The most effective instructional videos feel like a direct answer to a question the viewer just asked. Your goal is to anticipate that question and deliver the solution with absolute clarity.
For instance, instead of a generic "How to Use Our Dashboard" video, try something targeted like, "How to Create Your First Sales Report in Under 3 Minutes." This problem-first approach immediately tells viewers if the video is for them and promises a quick, valuable win.
Structure Your Video Logically
Okay, you know your audience and their problem. Now you need to outline the solution. A logical structure is what keeps people watching and prevents them from getting lost. I always think of my videos as having three simple parts.
- The Hook: Jump right in. State the problem you're about to solve and reassure them they're in the right place. Briefly mention the awesome outcome they can expect.
- The Steps: This is the heart of your video. Break the process down into the smallest, most logical chunks you can. Numbering them in your outline is a great way to guarantee a clean, linear flow.
- The Wrap-Up: Quickly summarize what they just accomplished. Then, give them a clear next step, whether that's exploring another feature, reading a related article, or reaching out for more help.
This simple framework is a reliable starting point for any tutorial and makes your instructions a breeze to follow.
Write a Conversational Script
Scripting isn't about writing a formal essay—it's about creating a natural, conversational guide. Your goal is to sound like you're sitting next to a colleague, walking them through something. Use simple words, short sentences, and a friendly, encouraging tone.
A great way to get started is to just bullet-point the key actions for each step from your outline. From there, you can flesh out those points with more natural language.
My go-to trick? Read your script out loud. It's the fastest way to catch clunky phrases or robotic sentences. If it feels weird to say, rewrite it until it flows. If you need a good starting point, this sample script outline is a great resource for structuring your ideas.
Remember, you don't need a perfectly polished, word-for-word manuscript. The point is to have a clear guide that keeps you on track during recording. This little roadmap will stop you from rambling and make sure you hit every critical point, which is the secret to creating how-to videos that are both informative and refreshingly concise.
Capture Professional Screen and Audio Recordings
Think of your raw footage as the foundation of your entire tutorial. If you start with clean, crisp recordings, the rest of the process becomes exponentially easier. It's tempting to rush this part, but a little prep work here will pay off big time, giving you a perfect canvas to work with in the editing stage.
Getting a Flawless Screen Capture
Your screen recording is the main event, so it needs to be perfect. Before you even dream of hitting that record button, spend a few minutes tidying up your digital workspace. Hide all those random desktop files and icons—your viewers don't need to see them. More importantly, close out any apps you aren't using and, for the love of all that is good, turn off your notifications. A stray email or Slack pop-up can completely derail an otherwise perfect take.
Next up, screen resolution. You'll want to set your display to a standard 16:9 aspect ratio, like 1920x1080. This is the sweet spot that ensures your video looks sharp and fits perfectly on everything from a giant monitor to a smartphone. If you're looking for a good tool to get started, there are plenty of great options out there. You can explore some of the best free screen capture software to find one that fits your workflow.
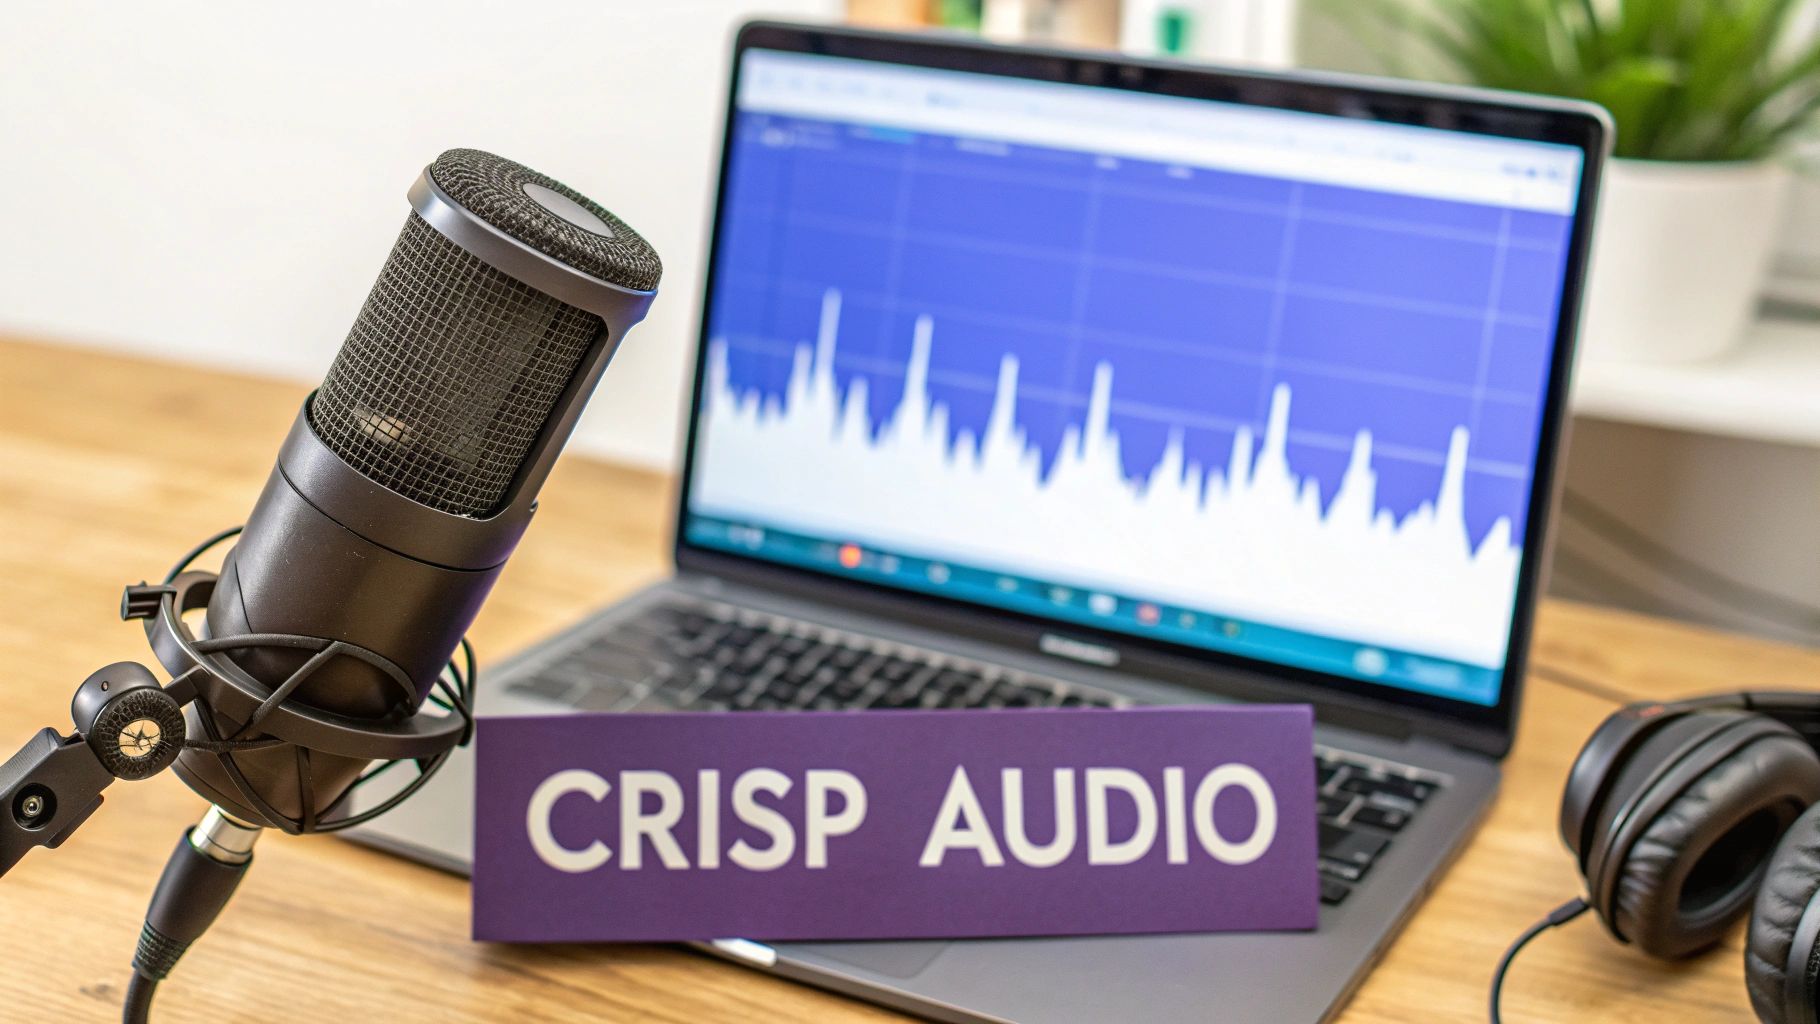
Nail Your Audio Recording
Let's be blunt: if your audio is bad, people will leave. It doesn't matter how amazing your visuals are; if viewers can't understand you, they're gone. The good news is that you don't need a soundproof studio to get great audio.
The single best investment you can make is a decent external USB microphone. Even an affordable one will sound worlds better than the tinny mic built into your laptop.
Just as important is your recording environment. Find a quiet room, preferably one with soft surfaces like carpets, curtains, or even a couch to soak up any echo. Stay away from humming refrigerators, open windows, or chatty colleagues.
A quick sanity check I always do: record yourself talking for just 30 seconds and listen back with headphones. This simple test helps you catch any weird background noise or volume issues before you’ve wasted time recording the whole thing.
A Smarter Way to Record Demos
The old way of recording tutorials was a real headache. Easy-to-use recording tools like Loom are great for quick captures, but the final footage is often 50-100% longer than necessary. On the other hand, professional video editing software like Camtasia or Adobe Premiere Pro requires expert video editing knowledge, creating a huge bottleneck.
This is where a tool like Tutorial AI completely changes the game. It generates polished video tutorials directly from screen recordings, making it perfect for creating demos, onboarding videos, explainer videos, feature release videos, knowledge base videos, and support article videos. Tutorial AI's tools let you speak freely without any practice, and your video will still look professional, as if it was edited in Adobe Premiere Pro. It allows the subject matter expert to create on-brand videos extremely efficiently.
Add a Human Touch with Your Webcam
Including a small picture-in-picture video of yourself isn't always a must, but it's a fantastic way to build a real connection with your audience. Seeing a friendly face makes the whole experience feel more personal and engaging.
If you go this route, lighting is your best friend. Try to face a window for soft, natural light, or grab a simple ring light to illuminate your face evenly. This gets rid of any harsh shadows.
One last tip: position your webcam at eye level. It’s a small tweak, but it creates a much more direct and natural conversation with your viewer, as if you’re talking right to them.
Turn Raw Footage into a Polished Tutorial with AI Editing
Okay, you've got your raw screen and audio recordings. Now for the magic. This is where modern editing tools take what you've captured and turn it into something genuinely professional. For a lot of people, editing is the most dreaded part of making a how-to video—it’s always been seen as tedious and painfully slow. But that’s changing, and fast.
The old way forced a frustrating choice. You could use a simple screen recorder like Loom, which is great for quick, off-the-cuff captures. The problem? The raw footage is often 50-100% longer than it needs to be, full of "ums," long pauses, and restarts. You end up with a video that feels rambling and doesn't respect the viewer's time.
On the flip side, you had heavyweight professional software like Camtasia or Adobe Premiere Pro. These are incredibly powerful, giving you control over every single frame. But they demand serious video editing skills and hours upon hours of manual work trimming clips, fixing mistakes, and adding effects. This complexity usually means the subject matter expert—the person who should be making the video—gets sidelined.
Bridging the Gap with AI
This is exactly where AI-powered platforms like Tutorial AI come in. They’re designed to fill that gap, generating a professional tutorial straight from your screen recording.
It’s a perfect fit for creating things like:
- Engaging product demos
- Clear customer onboarding flows
- Concise explainer videos
- Quick feature release updates
- Helpful knowledge base articles
- Detailed support videos
The whole idea is to let the person with the knowledge create the video, without needing a completely separate skillset. You can just talk and record your screen naturally, without obsessing over perfection. The AI does the heavy lifting afterward, turning your conversational recording into a tight, professional video that looks like it came out of a pro editing suite.
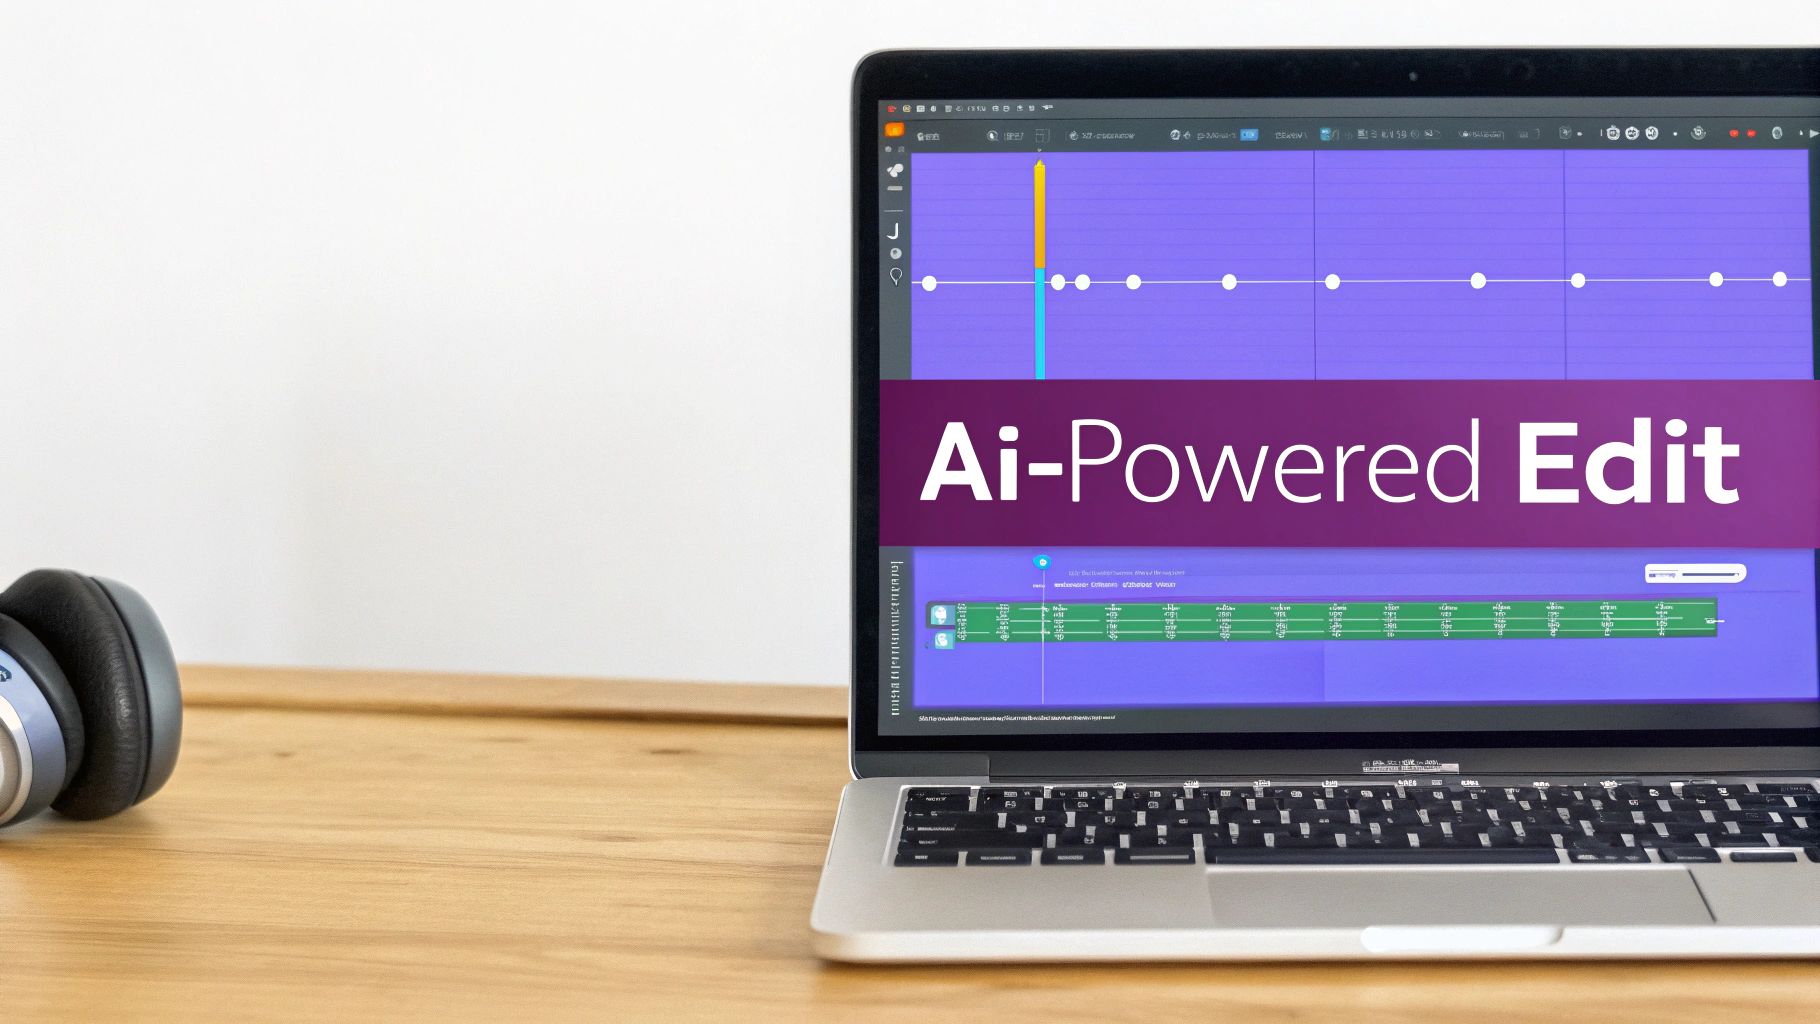
The real game-changer with AI editing is that it understands context. It's not just making random cuts. It intelligently snips out the fluff, tightens up the pacing, and zooms in on what’s important, creating a seamless experience for the viewer.
From Messy Recording to Polished Tutorial
So what does this actually look like? Instead of dragging a playhead across a complicated timeline, AI editing usually starts with a transcript of your audio. This text-based approach is incredibly intuitive. To get rid of a stumble or a long pause, you just delete the words in the transcript, and the video edits itself. It’s that simple.
This completely changes the game for creating how-to videos. It makes the complex process of video editing feel as easy as editing a Word doc. All of a sudden, anyone who can write an email has the power to edit a high-quality video.
This workflow is also a lifesaver for keeping content current. When a UI gets an update, you don’t have to re-record the entire video from scratch. You can just record the new part, pop it into your project, and let the AI weave it in seamlessly, even generating a new, matching voiceover.
Dynamic Effects that Actually Help the Viewer
Beyond just cleaning up mistakes, AI tools are brilliant at adding dynamic effects that make your tutorials more engaging and easier to follow. These aren't just for show; they’re smart enhancements that direct your viewer’s attention exactly where it needs to be.
Here are a few features that make a massive difference:
- Smart Zooms: The AI analyzes your screen activity and automatically adds smooth pans and zooms that follow your cursor or focus on the part of the screen you're talking about. It feels like a professional camera operator is guiding the shot, keeping the viewer locked in without you having to manually set a single keyframe.
- AI-Generated Voiceovers: Don’t feel like narrating live? You can just paste in your script, and the AI will generate a clean, natural-sounding voiceover. This is huge for creating versions in different languages or for anyone who just isn't comfortable using their own voice.
- Automated Captions: Good captions are non-negotiable for accessibility. AI can instantly generate and sync accurate captions for your video, making sure your content is clear to everyone, even with the sound off.
- Cursor Effects: You can add highlights, click animations, and smoothing to your cursor after you’ve finished recording. This makes it crystal clear where the viewer should be looking and what actions you’re taking.
By automating these crucial but time-consuming tasks, these new AI tools let you focus on what you do best: teaching. The end result is a polished, effective, and on-brand video, created in a fraction of the time by the person who knows the material inside and out.
Get Your Video Seen: Publishing and Promotion
You’ve created a fantastic how-to video. That’s a huge win, but it's only half the job. A brilliant tutorial sitting unwatched on a server doesn't help anyone. Now it's time to think like a strategist and get your video in front of the people who need it most.
This final phase is all about smart distribution—choosing the right platforms and promoting your work to make sure it gets seen.
Choose the Right Home for Your Video
Where you publish your video has a massive impact on who sees it and how they engage with it. There’s no single “best” platform; the right choice is all about your specific goals and, most importantly, your audience.
- Public Platforms (YouTube, Vimeo): If you're trying to build brand awareness or attract new users, these are your go-to spots. Think of YouTube as the world's second-largest search engine. It’s perfect for discovery.
- Your Knowledge Base or Support Center: For detailed tutorials designed to solve customer problems, this is the ideal home. Embedding videos directly into your support docs delivers immediate, in-context help right where your users are looking for it.
- An Internal LMS or Wiki: Got a video for employee training or internal processes? Hosting it on a Learning Management System (LMS) or a private wiki like Confluence keeps it secure and accessible only to your team.
The trick is to put your video directly in the path of your viewer. Don’t make them hunt for it.
Optimize Your Video so People Can Find It
Video SEO is your best friend, especially on search-heavy platforms like YouTube and Google. It all starts with a title that’s both compelling and packed with the keywords your audience is actually typing into the search bar.
Get inside your viewer’s head. A generic title like "Dashboard Features" is forgettable. Instead, try something specific and problem-focused, like "How to Create a Custom Sales Report in 5 Minutes." It promises a quick, clear solution and perfectly matches what someone would search for.
Your video description is prime real estate, so don't waste it. Use that space to add more context, drop in relevant links, and create timestamps or chapters so viewers can skip right to the part they need. This doesn’t just make for a better user experience; it gives search engines more information to index. And of course, don’t forget accessibility—accurate captions are a must. For a deep dive, our guide on how to add captions to videos has you covered.
Embed Videos for a Richer Experience
One of the most effective ways to leverage your tutorials is by embedding them directly where they’re needed most—in blog posts, on landing pages, and within your support articles. This turns a static page into a dynamic, multimedia experience that keeps people on your site longer.
A well-placed video tutorial can transform a good blog post into an indispensable resource. You’re no longer just telling people what to do; you’re showing them, catering to everyone who would rather watch than read.
Just make sure the video feels like it belongs. If you have a paragraph explaining a particularly tricky step in a process, embedding a short clip demonstrating that exact step right below it is incredibly powerful. It’s this kind of in-context help that makes your content truly valuable.
Slice and Dice Your Content for Social Media
Let’s be honest: not everyone has the patience for a full five-minute tutorial, especially when they're scrolling through social media. This is where repurposing your content becomes a game-changer.
The data backs this up. An impressive 71% of marketers have found that videos between 30 seconds and 2 minutes deliver the best results. What’s more, 63% of consumers say they prefer short-form videos when learning about a new product.
You can easily create YouTube Shorts from your existing how-to videos by pulling out the juiciest tips or biggest "aha" moments. These bite-sized clips are perfect for TikTok, Instagram Reels, and YouTube Shorts. They act as powerful little teasers that drive curious viewers back to your full-length content, massively expanding your video's reach.
Common Questions on Creating How To Videos
Even with the best-laid plans, a few questions always pop up when you start making how-to videos. Getting these details right can be the difference between a video that truly helps your audience and one that just adds to the noise. Let's tackle some of the most common questions I get asked.
What's the Ideal Length for a How-To Video?
The answer is almost always "shorter than you think." For a video explaining a single, focused task, the sweet spot is between 2 and 5 minutes. Anything longer and you'll see a sharp drop-off in viewer attention. Don't just take my word for it—71% of marketers have found that videos under two minutes perform best.
If you have a complex topic, your first instinct might be to make a long, comprehensive video. Fight that urge. A much better approach is to break it down into a series of shorter, bite-sized videos. This respects your viewer’s time and makes the information much easier to absorb and remember. Always be asking yourself, "Can I make this shorter?" and then edit without mercy.
What's the Single Most Important Element?
This one is easy: crystal-clear audio. It's non-negotiable.
Think about it—people will put up with a slightly grainy camera or a less-than-perfect background. But if they can't understand what you're saying because of background noise, muffled speech, or a bad connection, they are gone. A simple external USB microphone is one of the best and most affordable investments you can make to instantly level up your videos.
Once you’ve got your sound sorted, instructional clarity is the next priority. Your steps have to be logical, simple, and get the viewer straight to their solution. A video that’s easy to follow will always beat one with fancy graphics but a confusing message.
How Can I Make My Screen Recordings More Engaging?
Staring at a static screen is a recipe for boredom. To keep your viewers tuned in, you need to add a bit of life to your recordings and guide their eyes.
Here are a few tricks I use all the time:
- Smart Zooms: Modern editing tools can automatically pan and zoom to follow your cursor, which feels much more natural and keeps the focus where it needs to be.
- Cursor Effects: A simple highlight or click animation on your cursor makes a world of difference. It’s a small visual cue that says, "Hey, look here!"
- Annotations and Cards: Don't be afraid to break up the recording. Pop in a simple text overlay to add context, use a title card to introduce a new section, or even add a quick picture-in-picture of yourself to explain a key point.
- Energetic Narration: Your voice sets the tone. A friendly, conversational voiceover is infinitely more engaging than a flat, robotic delivery.
These small touches are what separate a professional-feeling video from an amateur one.
Do I Really Need Expensive Software?
Not anymore. While heavy-hitters like Adobe Premiere Pro are incredibly powerful, they also have a massive learning curve and are often way more than you need for a simple tutorial.
A quick screen recording with a tool like Loom is easy, but the raw footage is often 50-100% longer than it needs to be, full of "ums," pauses, and mistakes. On the other end, fixing those issues in professional software like Camtasia or Premiere Pro turns the subject matter expert into a frustrated video editor. That’s a huge bottleneck.
This is exactly where tools like Tutorial AI are changing the game. They're built specifically to turn messy screen recordings into polished, professional tutorials. Think demos, onboarding flows, feature updates, or videos for your knowledge base.
You can just record your screen and talk through the process naturally, without a script. Afterwards, the AI cleans it all up, making it look like it was professionally edited. This puts the power back in the hands of the person who knows the material best—the subject matter expert—letting them create high-quality, on-brand videos without having to become a pro editor.
Ready to stop wrestling with complicated editing software and start creating polished tutorials in minutes? With Tutorial AI, you can turn your raw screen recordings into studio-quality videos effortlessly. Try Tutorial AI for free and see how simple it can be.