Let’s be honest, those static slide decks we all rely on are starting to lose their punch. To really grab an audience and make your message stick, you need something more dynamic. The good news is you can turn a PowerPoint into a video right from the app itself, using built-in tools like ‘Export to Video’ for a quick, no-fuss conversion, or ‘Record Slide Show’ to add your own voice and precise timings.
This guide will walk you through exactly how to use those features. But we won’t stop there. I’ll also show you how to take that basic recording and polish it into a professional-quality video that actually gets results.
Why Bother Turning Slides into Video?
In a world overflowing with content, a standard slide deck just doesn’t cut through the noise anymore. When you convert that same presentation into a video, you transform a passive click-through into a genuinely engaging experience. It’s not about flashy effects; it’s about making your core message more memorable and a whole lot more effective.
For SaaS companies, this is a game-changer. Videos are incredibly flexible and can be used across the business to hit specific goals.
Just think about the possibilities:
- Sales Enablement: Instead of sending a prospect a dense 20-slide deck they’ll probably skim, imagine sending a crisp, two-minute video that nails your key value props. It’s far more likely to get watched—and shared with other decision-makers.
- Customer Training: You can onboard new users with a library of short, clear video tutorials. This drastically cuts down on support tickets and helps customers get value from your product faster.
- Knowledge Base & Support: A quick video can explain how to solve a complex problem much better than a long article with a dozen screenshots. The result? Happier customers.
To see the difference in impact, just look at how these two formats stack up.
Impact of PowerPoint Slides vs. Video Content
| Attribute | Static PowerPoint Slides | Dynamic Video Content |
|---|---|---|
| Engagement | Passive; relies on user to click through. | Active; guides the viewer through a narrative. |
| Retention | Lower recall of information. | Higher recall due to audio and visual cues. |
| Accessibility | Limited to those who can read the content. | More accessible with audio, captions, and translations. |
| Sharing | Often shared as bulky files via email. | Easily shareable via links on any platform. |
| Consistency | The message can be misinterpreted. | Delivers a consistent, perfectly timed message every time. |
Ultimately, video allows you to control the narrative and deliver a polished, consistent message whether you’re reaching one person or one thousand.
The Growing Demand for Video
This shift isn’t just a fleeting trend; it’s a fundamental change in how people prefer to consume information. The numbers back this up. The global video presentation software market is expected to jump from USD 884 million in 2025 to USD 1,298 million by 2034. That kind of growth tells you this is becoming a standard business practice, not a niche tactic.
We’re seeing this across the board. The success of strategies that turn blog post into video proves how powerful it is to repurpose static content into a more engaging format. Your existing presentations are a goldmine of content just waiting to be brought to life.
By converting your slide decks, you deliver a consistent, powerful message at scale. Every viewer gets the same perfectly pitched explanation, ensuring clarity and brand alignment, whether it’s for one person or one thousand. First, we’ll dive into mastering the tools you already have inside PowerPoint. Then, I’ll show you how to take that raw export and refine it with advanced AI—letting you skip the steep learning curve of traditional video editing software and get straight to a polished, professional result.
Using PowerPoint’s Built-In Video Tools
Believe it or not, PowerPoint is more than just a slide-making machine. It has some surprisingly powerful, built-in features that let you turn a PowerPoint into a video without ever leaving the app. Getting these foundational steps right is the secret to producing a polished video, whether you use the raw export or decide to enhance it later.
You’ve really got two main paths to choose from: the simple ‘Export to Video’ or the more involved ‘Record Slide Show.’ Knowing which one to pick for the job at hand is the key to working smarter, not harder.
The Quick Export Method
Got a presentation that’s all visuals and no talk? The ‘Export to Video’ function is your best friend. This is the fast lane for turning your slides into a video file.
Think of it as a direct conversion. It takes all your slides, animations, and transitions and neatly packages them into a standard video. This is perfect for silent, self-playing loops you might run on a screen at a trade show or as a simple background visual for a webinar waiting room.
Here’s how you pull it off:
- Nail Down Your Timings: Before you even think about exporting, you have to tell PowerPoint how long each slide should stay on screen. Head over to the ‘Transitions’ tab and look for the “Advance Slide” > “After” setting. Punch in the duration for each slide. If you skip this, PowerPoint just uses a default time, and trust me, it’s never what you actually want.
- Pick Your Quality: Go to
File > Export > Create a Video. This is where you’ll choose the resolution. For most things you’ll post online, Full HD (1080p) is the sweet spot—it gives you great clarity without a massive file size. If your slides are packed with super-detailed charts or you know it’ll be shown on a huge screen, go for 4K, but just be ready for a much beefier file. - Export and Be Patient: Once you click “Create Video,” it’s time to let it cook. The time it takes will vary depending on how complex your presentation is and the quality you chose.
This method is super straightforward, but it offers zero control over the narrative flow. For anything that needs that human touch, you’ll need to step up to the recording feature.
Adding a Human Element with Record Slide Show
This is where the magic happens. The ‘Record Slide Show’ feature lets you transform a static deck into an actual, engaging presentation. It doesn’t just capture your slide timings; it records your voice, any on-screen drawings you make, and even your webcam feed if you want to show your face. It’s the absolute best way to create a solid first draft of a training module or a product demo right inside PowerPoint.
This is the final export screen you’ll see after you’ve done all your recording and setup.
As you can tell, the options are simple and direct. You pick your video quality and make sure it’s set to use your recorded timings and narrations. Clicking that “Create Video” button brings all your hard work together into one file.
The recording process itself is really intuitive. Once you enter the recording mode, you get a special view that shows your current slide, your speaker notes right in front of you, and a little preview of what’s coming next. This setup is a lifesaver for delivering a smooth, confident narration without fumbling.
Pro Tip: Whatever you do, don’t just read your slides out loud. That’s a classic mistake. Use your speaker notes as a guide for your talking points. Your voiceover should add context and stories that aren’t on the screen. That’s what makes a video truly valuable. While you’re recording, you also have a few digital tools at your disposal that can really help your audience follow along.
- Laser Pointer: This lets you direct your viewers’ eyes to a specific part of the slide without making a permanent mark. It’s perfect for pointing out a key number in a chart.
- Pen and Highlighter: You can actually draw or highlight right on the slide to emphasize a data point or circle an important image. These annotations get saved with the recording and become part of your final video.
Best Practices for a Clean Recording
Getting a high-quality video out of PowerPoint isn’t just about hitting the record button. The small details you manage before you record will make a huge difference in the end. Think of it like setting a stage—good prep is everything.
First up, your audio quality is non-negotiable. Please, don’t use your laptop’s built-in mic. It will pick up every keyboard tap, room echo, and background hum. A decent external USB microphone is a small investment that makes you sound infinitely more professional.
Next, control your recording space. Find a quiet room, preferably one with soft surfaces like a rug or curtains to absorb sound. Shut the door, silence your phone, and close any apps that might pop up with notifications. A single “ping” can completely ruin an otherwise perfect take.
Finally, practice your delivery. Even though you can re-record narration for individual slides, it’s much better to have a natural, consistent flow from beginning to end. Run through your script a couple of times. Get comfortable with the pacing so your slide clicks feel natural, not rushed. Your audience can instantly tell when you’re hesitant or sound like you’re reading, and it pulls them right out of the experience.
Nailing these fundamentals ensures you create the best possible source material to turn your PowerPoint into a video that looks and sounds like a pro made it.
Nailing Your Narration and Pacing
Once you’ve got the technical side of recording in PowerPoint down, it’s time to focus on what separates a basic screen recording from a truly polished video: your voice and the rhythm of your presentation.
Let’s be honest, even the most beautifully designed slides will fall flat if the audio is poor or the timing is off. A clear voice and deliberate pacing are what will keep your audience hooked.
The secret to great narration? A script. It’s so tempting to just hit record and “wing it,” but writing for the spoken word is a totally different ballgame than writing an email or a document. You need to sound conversational, direct, and break down complex ideas into short, easy-to-follow thoughts.
Before you even think about recording, jot down your key talking points for each slide. Then, and this is the important part, read them out loud. Does it sound like you? Is the language clear? This one simple step will save you from all those awkward “ums,” “ahs,” and long pauses that can make a video feel amateurish.
Recording Crystal-Clear Audio
Your voice is doing the heavy lifting here, so the quality of your audio is completely non-negotiable. Nothing makes people click away faster than distracting background noise or a muffled, distant voice. The good news is you don’t need a high-end studio to get great results.
Your microphone is the place to start. Investing in an external USB microphone will give you a massive leap in quality over your laptop’s built-in mic. It’s a game-changer. Here’s a pro tip: when you record, don’t put the mic directly in front of your mouth. Position it just off to the side. This simple move prevents plosives—those harsh popping sounds from “p” and “b” words.
Your recording space matters, too.
- Find a quiet spot. Get away from the hum of the fridge, the air conditioner, or traffic noise outside.
- Soften the room. Hard surfaces create echo. Recording in a room with carpets, curtains, or even throwing a blanket over your desk can absorb that echo and make your voice sound much cleaner.
- Slow down. Speak just a little slower than you would in a normal conversation. This gives your audience a moment to absorb what’s on the slide while they listen to you.
The goal is always clarity. A steady, well-paced narration sounds confident and makes your content so much easier to understand. If you’re looking for absolute perfection and consistency, exploring an AI voice generator for videos can be a fantastic way to produce studio-quality voiceovers every time.
Mastering the Flow of Your Presentation
Okay, your narration is recorded. Now you have to sync it perfectly with your visuals. Pacing isn’t just about how fast you talk; it’s the dance between your voice and your slides. This is where you move from just recording to actually editing for impact.
PowerPoint’s “Record Slide Show” feature gives you full control. As you speak, it records when you advance each slide, locking in that timing. Did a slide go by too quickly? Or did it linger too long? No problem. You can just re-record the timing for that single slide without having to start over from scratch.
Fine-tuning your slide timings to sync perfectly with your voiceover is what creates a seamless, engaging rhythm. It’s the subtle difference between a passive slideshow and a dynamic, guided experience for the viewer.
Using Transitions That Enhance, Not Distract
Transitions are the little visual bridges that connect your slides, but they have a big impact on the overall professional feel of your video. The golden rule is to keep it simple. The best transitions are the ones you barely notice; they just guide the eye smoothly from one point to the next.
For a clean, modern look that keeps the focus on your content, stick with these:
- Fade: A gentle fade is elegant and professional. It’s my go-to and works for just about anything.
- Push: This one makes it look like the new slide is pushing the old one out of the way. It’s great for showing a step-by-step process.
- Wipe: A simple wipe from left-to-right is another clean, no-fuss option.
On the flip side, some of PowerPoint’s flashier transitions can instantly make your video look dated. I’d strongly recommend avoiding these:
- Checkerboard or Blinds: These are just jarring and pull attention away from your message.
- Origami or Airplane: Fun, maybe, but they’re distracting and can feel unprofessional.
- Vortex or Glitter: These are way too over-the-top for a professional video and can seriously undermine your credibility.
By scripting your narration, capturing clean audio, and carefully managing your timing and transitions, you can turn your PowerPoint into a video that looks and sounds incredibly professional and, most importantly, keeps your audience engaged.
Elevating Your Video With AI Editing
You’ve exported a video from your PowerPoint presentation, complete with narration and basic timings. That’s a fantastic start, but let’s be honest—it’s often just the raw material. The distance between a basic screen recording and a genuinely professional video can feel like a chasm, one that used to require complex software and years of experience to cross.
This is where AI editing tools completely change the game. Instead of you having to wrestle with confusing timelines and keyframes, these platforms offer a much smarter and more intuitive way to turn a PowerPoint into a video. They finally bridge the gap between simple recording tools and high-end editing suites, making it possible for anyone to create polished, on-brand content.
From Raw Recording To Polished Tutorial
Tutorial AI specializes in generating video tutorials based on screen recordings, making it perfect for creating demos, onboarding videos, explainer videos, feature release videos, knowledge base videos, and support article videos.
One of the biggest problems with unscripted recordings, often made with easy-to-use tools like Loom, is that they are frequently 50-100% longer than necessary. On the other hand, professional video editing software like Adobe Premiere Pro or Camtasia requires expert video editing knowledge and a significant time investment.
Tutorial AI’s tools solve this dilemma. They let you speak freely without any practice, and your final video will still look professional, as if it was edited in Adobe Premiere Pro. This empowers the subject matter expert to create on-brand videos with extreme efficiency.
The whole idea is to let experts be experts. The technology should take their raw knowledge and shape it into a professional video, making the expert the hero—not the video editor. This approach isn’t just a niche trend; it’s rapidly becoming the new standard. As of 2025, a stunning 41% of businesses are using AI to create videos. That’s a massive 128% jump from just 18% in 2023. On top of that, 51% of video marketers now actively use AI tools for creation and editing, with 58% of marketing videos featuring AI-generated voiceovers that are almost indistinguishable from human narration.
Video Editing Workflow Comparison
The difference in workflow is night and day. Here’s a quick comparison of the old way versus the new AI-powered approach:
| Feature | Traditional Editing (Premiere Pro/Camtasia) | AI-Powered Editing (Tutorial AI) |
|---|---|---|
| Core Workflow | Manual timeline-based editing. Requires slicing, trimming, and aligning clips. | Text-based editing. Edit the video by editing the transcript. |
| Learning Curve | High. Requires significant training and practice to become proficient. | Low. Intuitive and easy to learn, often in minutes. |
| Mistake Correction | Requires re-recording sections or complex audio/video patching. | Type to correct the transcript; AI regenerates the voiceover seamlessly. |
| Pacing & Timing | Manually cutting and adjusting clips to get the rhythm right. | Edit pauses and silence directly in the transcript. |
| Visual Polish | Manual keyframing for zooms, cursor effects, and animations. | Automated smart zooms, cursor effects, and branding applied by AI. |
This table really highlights how AI removes the technical hurdles, allowing you to focus purely on the quality and clarity of your content.
Editing Your Video Like A Document
The biggest mental shift AI introduces is the ability to edit your video by simply editing a text transcript. When you upload your recording to a platform like Tutorial AI, it immediately transcribes your audio.
From that point on, your entire workflow changes.
- Delete a word or sentence in the transcript, and the corresponding video and audio are instantly cut. No more hunting for the exact frame on a timeline.
- Fix a mistake or rephrase something by just typing the new text. The platform can then regenerate that bit of the voiceover with a lifelike AI voice, patching it perfectly into your video.
- Add pauses or tweak the pacing by making small edits to the text, which gives your narration a much more natural, conversational feel.
This “edit like a doc” approach isn’t just simpler—it’s incredibly fast and precise. It completely removes the technical barrier to entry.
This new workflow breaks the old, rigid cycle of scripting, recording, and editing, turning it into a much more fluid process where you can refine your video continuously.
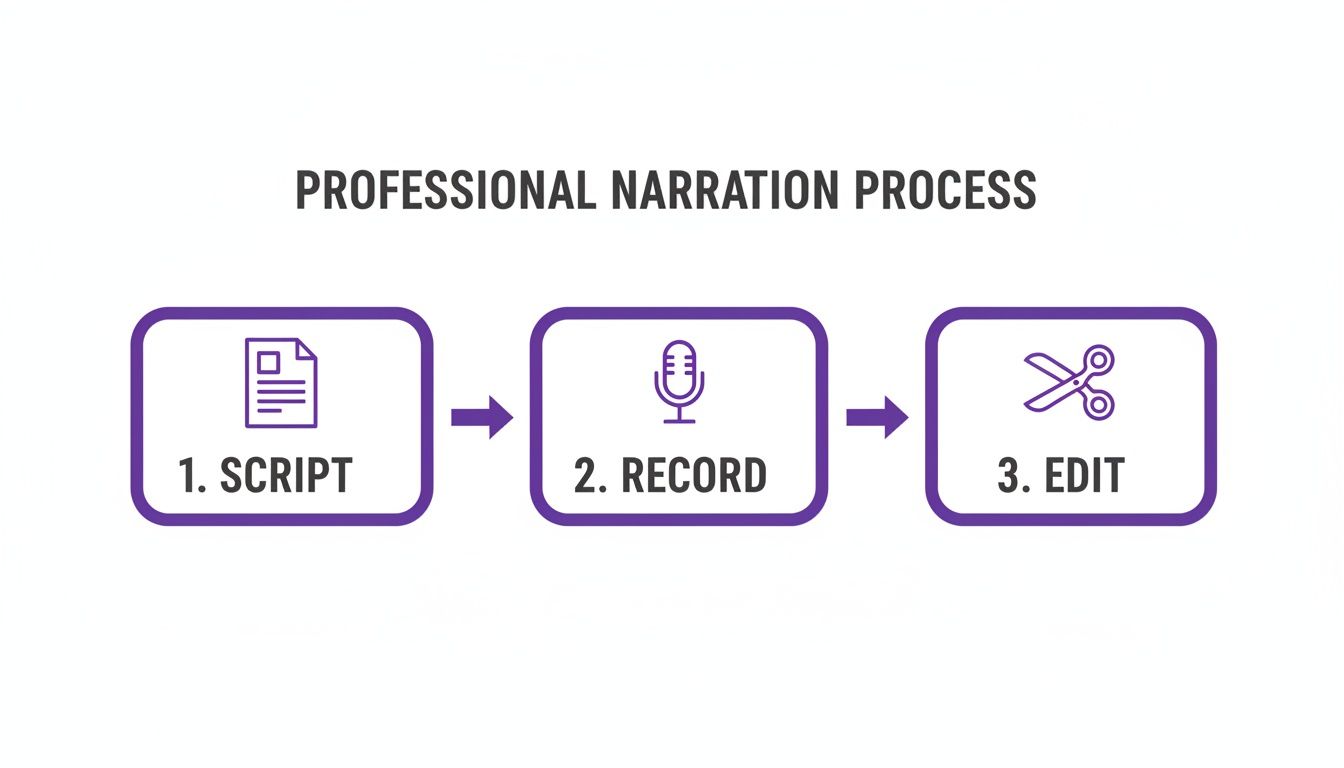
While this graphic shows a linear path, AI blends these steps, letting you jump back and forth to make improvements without ever having to start over.
Adding Professional Polish Automatically
Beyond text-based editing, AI tools are brilliant at adding the dynamic visual touches that make a video engaging. These are the kinds of effects that used to require a skilled video editor to add one by one.
Here are a few key enhancements that happen almost automatically:
- Smart Zooming: The AI analyzes your narration and automatically zooms in on key areas of the screen you’re talking about, guiding the viewer’s eye for you.
- Cursor Effects: Instead of a jerky, distracting mouse pointer, you can add smooth cursor movements, highlights, or clicks after the fact to create a clean, intentional walkthrough.
- Automated Branding: Just upload your brand assets once—your logo, colors, and fonts—and the platform can automatically add branded intros, outros, and lower thirds to every video, ensuring a consistent look.
This automation is a lifesaver for creating demos, onboarding videos, and knowledge base articles. If you want to explore the wider world of these tools, you can learn more about different types of AI video editing software and what they can do.
By combining the solid foundation of your PowerPoint with the intelligence of an AI editor, you can produce high-quality, on-brand videos in a fraction of the time and cost it used to take.
You’ve done the hard work—your video is polished and ready to go. But a fantastic video that no one sees isn’t much use, is it? The final step is getting it in front of the right eyeballs, and that’s all about smart publishing and distribution.
This is where your strategy becomes just as important as the creation process itself. You need to meet your audience where they already are, whether that’s a public platform like YouTube or an internal company wiki.
Before you upload anything, you have to export it from your editing tool. The goal here is a simple one: find the sweet spot between crisp visual quality and a file size that won’t take forever to upload.
For pretty much any use case you can think of, an MP4 file is the gold standard. It’s universally compatible and works everywhere.
When it comes to resolution, you’ve got a couple of solid choices:
- 1080p (Full HD): This is the go-to for most business and training videos. It keeps on-screen text and graphics looking sharp without creating a monster file that’s a pain to upload or stream.
- 4K (Ultra HD): If your video is packed with fine details or you know it’ll be shown on large screens, 4K is a great option. Just be warned—the file sizes are significantly larger, and your export times will be much longer.
Getting Your Video in the Right Place
Where you publish your video should be a direct reflection of what you’re trying to accomplish. A scattergun approach rarely works. Instead, match the distribution channel to the video’s purpose and your audience’s workflow.
For instance, if you’re creating a tutorial to cut down on customer support questions, don’t just throw it on YouTube and hope for the best. A much smarter move is to embed it directly into a Zendesk or Confluence knowledge base article. That way, the solution is right there when the customer needs it most.
The same logic applies to sales. If you’ve made a great product demo, get it into a platform like Salesforce where your sales team can easily grab it and send it to prospects. It helps them deliver a consistent message and gives potential customers something they can easily review and share with their own teams.
Reaching a Wider Audience on Public Platforms
When your goal is broader marketing or education, platforms like YouTube and Vimeo are your best friends. They have massive built-in audiences and powerful tools to help people discover your content.
To make the most of them, you need to nail the small details that drive visibility. Write a compelling title and a description loaded with relevant keywords. Create a custom thumbnail that’s both professional and eye-catching. You’d also be surprised how much timing matters; knowing the best time to upload YouTube videos can give your content a serious initial boost.
The key is to be strategic. Don’t just upload your video everywhere. Place it where it will solve a specific problem for a specific audience to ensure your content delivers a measurable return on your effort. There’s a reason so many businesses are all-in on video. In 2025, an incredible 94% of businesses said video marketing gave them a good ROI, and 87% credited it with a direct increase in sales. And audiences are asking for it—84% of consumers want to see more videos from brands, with presentation-style content being a top request for 48% of them. You can check out more of these video marketing statistics on Wix.com.
Finally, don’t overlook accessibility. Adding accurate captions or subtitles is non-negotiable today. It’s essential for viewers with hearing impairments and for the huge number of people who watch videos with the sound off. You can learn more about this in our guide on how to add captions to videos.
By being thoughtful about your export settings, strategic with your placement, and careful with your optimization, you can make sure all the hard work you put into creating your video truly pays off.
Got Questions About Turning Your PowerPoint into a Video?
It’s one thing to create a slide deck, but turning it into a polished video is a whole different ballgame. It’s totally normal to have a few questions before you dive in. Getting the right answers upfront can save you a ton of headaches down the road.
Let’s tackle some of the most common questions we see.
What’s the Best Resolution for My Exported Video?
For almost everything you’ll do online—whether it’s for YouTube, a company training portal, or a social media post—1080p (Full HD) is your best bet. It’s the sweet spot between crisp, clear quality and a file size that won’t take forever to upload or buffer.
Now, if you’re creating something that’ll be projected on a massive screen or a presentation packed with incredibly fine details, stepping up to 4K might be worth it. Just be ready for much, much larger files and longer waits while it exports. Think about where your audience is actually going to watch this before you decide.
Can I Edit the Video After It’s Exported from PowerPoint?
Technically, yes, but it’s a real pain. Once you export from PowerPoint, your presentation is baked into a single video file. All those individual text boxes, images, and animations are flattened. You can’t just go back and fix a typo on a slide. You’d have to bring that video file into a traditional video editor to chop it up or overlay new graphics.
This is exactly why AI-powered tools are changing the game. When you bring your recording into a platform like Tutorial AI, you can edit the video by simply editing the text transcript. Need to cut a sentence? Just delete the words. It’s a “edit like a doc” workflow that makes tweaking your video infinitely easier.
You don’t have to be stuck with a rigid, one-and-done video export anymore. The real magic happens when you can refine your message by editing text, letting you fix mistakes without ever having to hit “re-record” or fuss with a complicated timeline.
How Do I Make My Video More Engaging?
Engagement isn’t just about flashy graphics; it’s about holding your viewer’s attention with a clear, compelling story.
First things first: audio. Nothing makes people click away faster than crackly, muffled sound. A clean recording is non-negotiable. Beyond that, use animations and slide transitions with purpose—they should guide the eye, not just add clutter.
But to really level up, you’ll want to add professional touches that PowerPoint just can’t do on its own.
- Use smart zooms that automatically pan and focus on key details right as you mention them.
- Add custom cursor effects to make your on-screen movements clear and intentional.
- Apply branded intros, outros, and overlays to give your video a polished, consistent feel.
These are the kinds of details that turn a simple screen recording into a professional-grade tutorial that people actually want to watch.
Ready to turn your screen recordings into polished, on-brand tutorials in a fraction of the time? Discover how Tutorial AI can help you create professional demos, training content, and knowledge base videos with an intuitive, text-based editor. Learn more about how Tutorial AI works.