Great voice overs don’t just happen by accident. They’re the result of careful planning, a solid recording process, and meticulous editing that perfectly marries the audio to your visuals. It all starts with a clear plan and a well-written script, culminating in a polished, professional sound that truly connects with your audience.
Crafting Your Voice Over Blueprint
Before you even think about hitting that record button, you need a plan. Seriously. This pre-production work is what separates a frustrating, amateur-sounding narration from a smooth, professional final product. Getting this foundation right will save you a world of headaches and re-records later on.
This is the stage where you stop just thinking about the words and start thinking about the performance. You’re making deliberate choices here that will ultimately decide whether your message lands, whether you’re building a product demo, an explainer video, or a training module.
Define Your Audience and Tone
First things first: who are you actually talking to? The way you’d speak in a voice over for a kid’s educational cartoon is worlds away from the tone you’d use for a corporate training video for executives.
Knowing your audience inside and out shapes everything—the words you choose, the speed of your delivery, and the overall emotional vibe. Do you need to be authoritative and direct? Or would a friendly, conversational approach work better? Nail this down from the start to ensure your voice builds trust and connects with your listeners. The industry is moving in this direction, too; a recent report found that 52% of companies plan to use voice-over artists for their branding, and they overwhelmingly prefer natural, human tones over the classic, booming “announcer” voice. You can dig deeper into voice over industry trends and insights to see where the market is headed.
Script for the Spoken Word
Here’s a pro tip: writing for the ear is completely different than writing for the eye. A script that’s meant to be read aloud needs to sound natural and flow smoothly, not like you’re rigidly reading off a teleprompter.
A few practical pointers for scripting:
- Use contractions. Nobody says “it is” in a normal conversation. Write “it’s,” “don’t,” and “you’re” to sound instantly more human.
- Read every line out loud. As you write, say the words. If you trip over a sentence or it just sounds awkward, rewrite it until it flows off the tongue.
- Short sentences are your friend. Long, winding sentences are tough for a listener to process. Break down complex ideas into shorter, punchier thoughts.
A great voice over script doesn’t just inform; it guides the listener’s attention and emotion. Think of your script as the musical score for your voice—every word, pause, and inflection has a purpose. To keep your planning on track, this simple checklist can be a lifesaver. It forces you to think through the critical steps before you get caught up in the tech.
Voice Over Planning Checklist
| Phase | Key Action | Why It Matters |
|---|---|---|
| Strategy | Define the audience and project goals. | Dictates the entire tone, style, and language of your narration. |
| Scripting | Write the script and read it aloud for flow. | Ensures the language sounds natural and conversational, not robotic. |
| Review | Get feedback on the script from a colleague. | A fresh pair of ears can catch awkward phrasing you missed. |
| Timing | Rehearse the script against the video visuals. | Guarantees your narration syncs with on-screen actions, saving editing time. |
By checking these boxes, you’re setting yourself up for a much smoother recording and editing process.
Timing and Rehearsal
With your script ready, the next step is to time it against your visuals. If your voice over is for a screen recording or an animation, the narration has to hit its cues perfectly. There’s nothing worse than talking about a feature that isn’t on the screen yet.
Do a full read-through of your script while watching the video. I can’t stress this enough—this rehearsal is non-negotiable. It’s your chance to find clunky phrases, catch last-minute typos, and adjust your pacing so your words land exactly where they need to. This one step can save you from the agony of trying to stretch or shrink audio clips in post-production just to make them fit.
Building Your Home Recording Space

Okay, your script is polished and ready to go. Now, where are you going to record it? The good news is you don’t need a soundproofed, professional studio that costs a fortune to get clean, crisp audio. You can pull this off right from home with a few smart moves.
The real goal here isn’t soundproofing—blocking out every single noise from the outside world. That’s a massive and expensive undertaking. Instead, we’re going to focus on sound treatment, which is all about controlling the sound inside your room. This is how you kill the echo and reverb that scream “amateur recording.”
Selecting the Right Microphone
Your microphone is the single most important piece of gear in this whole setup. It’s the heart of your sound. For voiceover work, the choice usually boils down to two main types: condenser or dynamic.
Condenser microphones are pretty much the studio standard. They’re incredibly sensitive and capture all the rich detail and nuance in your voice, making you sound present and professional. They’re perfect for a quiet, controlled space.
Dynamic microphones, on the other hand, are a bit more rugged and less sensitive. Their superpower is rejecting background noise, which makes them a fantastic option if your recording space isn’t perfectly silent.
| Microphone Type | Best For | Key Characteristic |
|---|---|---|
| Condenser | Quiet, treated spaces | Captures rich vocal detail and nuance. |
| Dynamic | Noisier, untreated rooms | Excellent at rejecting background noise. |
If you’re just starting out, a quality USB condenser mic like a Blue Yeti or a Rode NT-USB is a great middle-ground, offering fantastic quality without a complicated setup.
DIY Sound Treatment for a Clean Sound
Hard, flat surfaces are the enemy of good audio. Sound waves love to bounce off walls, desks, and wood floors, creating that hollow, echoey reverb you want to avoid. The fix? Surround yourself with soft, absorbent things.
And you don’t need to buy expensive acoustic panels to do it.
- Raid your closet. Seriously. A walk-in closet filled with clothes is a natural sound booth. All that fabric soaks up sound waves, giving you a wonderfully “dead” space that’s perfect for recording.
- Build a pillow fort. It might feel a little silly, but draping heavy blankets or comforters over a couple of chairs or a mic stand creates a makeshift vocal booth that works wonders.
- Use what you have. Even just stacking some thick pillows or couch cushions on your desk around the microphone can make a noticeable difference by reducing reflections.
The core idea behind sound treatment is absorption. You want your voice to go from your mouth directly into the microphone—and nowhere else. Stop those sound waves from bouncing around, and you’ll get a clean, direct signal that’s a dream to edit later.
Essential Accessories for Quality Audio
A couple of other small, inexpensive items can make a huge impact on your sound quality.
First up is a pop filter. This is the mesh screen that sits in front of the mic. It’s essential for softening the harsh burst of air that comes from “p” and “b” sounds (known as “plosives”), which can cause a distorted popping noise in your recording.
A shock mount is also a great investment. It’s a cradle that suspends the microphone, isolating it from any vibrations coming up through the mic stand or your desk. This little gadget prevents any accidental bumps or rumbles from ruining a perfect take.
Choosing Your Recording Software
Finally, you need some software—often called a Digital Audio Workstation (DAW)—to actually record your voice. You don’t have to spend any money here. Free tools like Audacity or Apple’s GarageBand are more than powerful enough for recording and editing professional-sounding voiceovers.
Once you have it installed, just make sure you select your USB microphone as the input device. Do a few test recordings to check your levels. You’re looking for a strong, clear signal that doesn’t “clip” (which is when the audio is too loud and distorts).
If your project involves recording your screen, the next step is to master how to screen record with sound to ensure both your voice and the on-screen action are captured perfectly together.
Mastering Your Vocal Delivery
Once your script is locked in and your recording space is prepped, it’s time to step up to the mic. This is the moment you transform those words on the page into something that actually connects with your audience. Your delivery is what separates a voiceover that people listen to from one that’s just background noise.
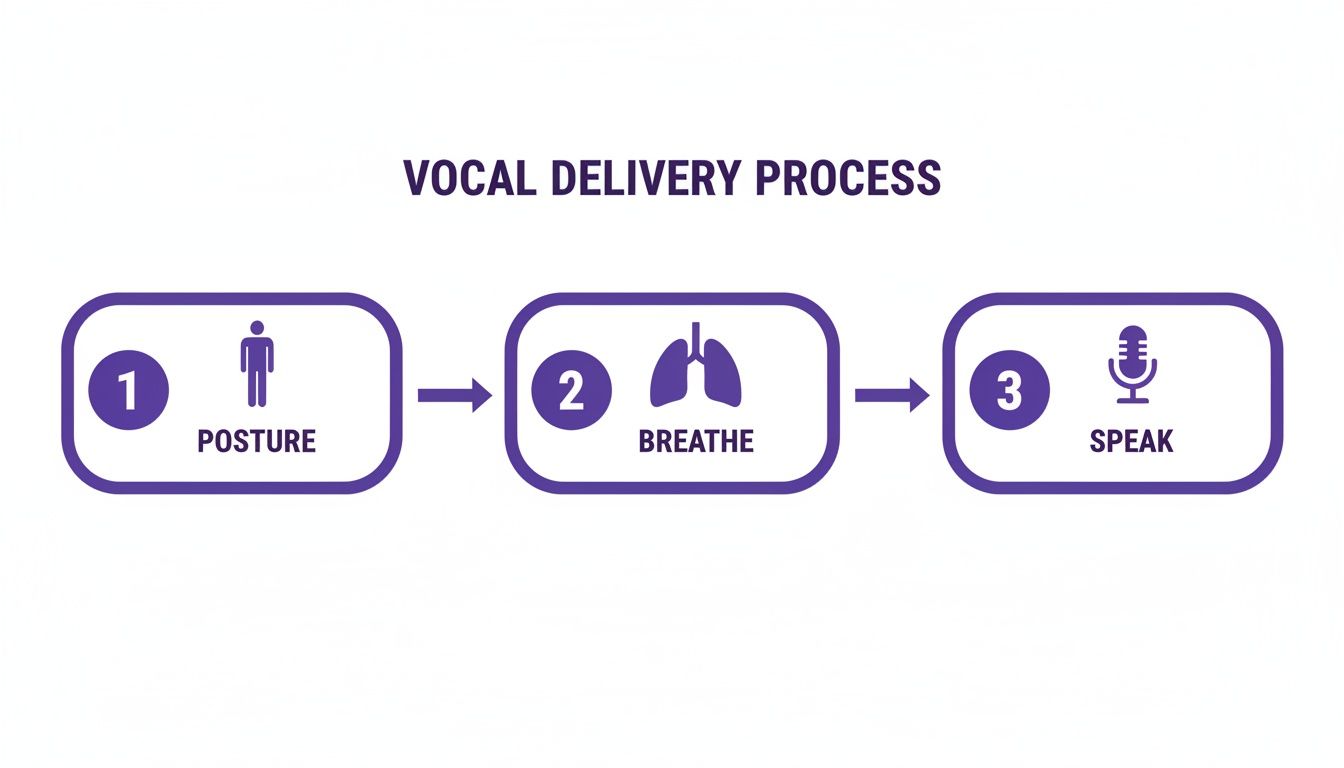
And let’s be clear: great delivery isn’t about having a booming “radio voice.” It’s about being clear, authentic, and engaging. Even small physical tweaks can make a massive difference. For starters, check your posture. Sitting or standing up straight opens up your diaphragm, giving you much better breath control and a richer, more resonant tone. It’s a simple fix that keeps you from sounding muffled or tired.
Preparing Your Voice for Performance
You wouldn’t run a marathon without stretching, right? The same principle applies here. Warming up your voice before you hit record is a non-negotiable step for preventing strain and ensuring you sound your best right from the first take.
A few quick exercises will do the trick:
- Lip Trills: You might feel a little silly, but blowing air through relaxed, closed lips (think “motorboat” sound) is fantastic for gently warming up your vocal cords and getting your breath support in check.
- Tongue Twisters: Fire off a few rounds of “red leather, yellow leather” or “she sells seashells by the seashore.” This is a classic for a reason—it gets your tongue, jaw, and lips loosened up for crisp, clear articulation.
- Humming: Start with a gentle hum and slide your voice up and down your natural range. It’s a low-stress way to find your ideal pitch and get a feel for your vocal resonance before you start speaking.
These warm-ups take just a few minutes, but they pay off in a big way, keeping your voice flexible and consistent throughout the entire recording session.
The Art of Pacing and Inflection
Now for the performance itself. The real magic happens in your pacing (how fast or slow you speak) and inflection (the rise and fall of your pitch). A flat, monotonous delivery is the fastest way to lose your audience’s attention.
Imagine your script is a story with its own rhythm. Your voice is the instrument that brings that rhythm to life. You can speed up a bit when you’re talking about something exciting, then slow right down to let a really important point sink in. Let your pitch rise naturally when asking a question and fall when you’re closing out a thought. This variety is what makes you sound like a real person having a conversation, not a robot reading a script.
The best voiceovers don’t feel like a performance at all; they feel like a genuine conversation. Your goal is to inject emotion and meaning into the words, making your listener feel like you’re talking directly to them.
Choosing Your Recording Workflow
When it comes to actually capturing your audio and video, you’ve got two main paths you can take. You can either record everything at once or tackle the audio and video separately. Each method has its own pros and cons, and the right choice really depends on your project.
- Live Narration: This is the “one and done” approach where you record your screen and your voiceover simultaneously. It’s a huge time-saver for quick, informal videos where a few small flubs aren’t the end of the world. The downside? It’s tough to nail a perfect take when you’re juggling on-screen actions and speaking at the same time.
- Silent Screen Capture and Separate Voiceover: Here, you record all your visuals first, then go back and record the narration as a separate audio file. It definitely takes more time, but it gives you total control. You can focus 100% on your vocal performance without distraction. For polished, professional-grade tutorials, this is the way to go.
A Smarter Workflow with AI Tools
The traditional trade-off has always been between speed and quality. An easy-to-use recording via a tool like Loom is often 50-100% longer than necessary, full of “ums,” pauses, and restarts. On the other hand, professional video editing software such as Camtasia or Adobe Premiere Pro gives you immaculate control but requires expert video editing knowledge to get a clean result.
This is where a new breed of tools like Tutorial AI is really shaking things up. Tutorial AI generates video tutorials based on screen recordings for things like demos, onboarding videos, explainer videos, feature release videos, knowledge base videos, and support article videos. Its tools let you speak freely without any practice, and still, your video will look professional as if it was edited in Adobe Premiere Pro. This allows the subject matter expert to create on-brand videos extremely efficiently, bridging the gap between a raw recording and a studio-quality final product.
Polishing Your Audio in Post-Production
Getting your voice recorded is really just the starting line. The magic that takes a good recording and makes it a great voice-over happens in post-production. This is your chance to clean up the raw audio, balance the sound, and sync it perfectly with your video, creating a seamless and professional experience for your audience.
The goal isn’t to make your voice sound fake or over-produced. Instead, you’re just enhancing its best qualities. You’ll be snipping out distracting background noises, making sure the volume is steady and easy to listen to, and even using silence to add emphasis. Think of it like tidying up a room—all the good stuff is already there, you’re just making it shine.
Cleaning Up Your Raw Audio
Your first job in the editing software is a simple cleanup pass. No matter how quiet your room is, your mic will inevitably pick up small, unwanted sounds that can pull your listener out of the moment. It’s time to put on your detective hat.
Listen closely for these common culprits:
- Mouth Clicks and Pops: These tiny noises are surprisingly distracting. You can usually spot them in your audio waveform as little sharp spikes—just zoom in and snip them out.
- Loud Breaths: A normal breath is fine, but a huge gasp for air between sentences can be jarring. Instead of deleting the breath entirely (which sounds unnatural), just lower its volume. A reduction of -10 to -15 dB usually does the trick.
- Background Noise: Did the fridge hum for a second? Did your chair squeak? Find those sounds and get them out of there. Most editing software comes with a noise reduction tool that can learn the sound of your room’s ambient tone and remove it from the whole track.
This is why your recording technique matters so much. A clean recording from the start makes this whole process ten times easier.
As you can see, getting the physical side of recording right from the beginning saves you a ton of headaches in the editing bay.
Using EQ and Compression for a Professional Sound
Once your audio track is clean, you can add that professional broadcast-quality richness and presence. This is where two key tools come into play: Equalization (EQ) and Compression.
EQ is all about adjusting the tonal balance of your voice. For most people, a slight boost in the lower frequencies (around 100-250 Hz) adds warmth, while a little lift in the higher frequencies (around 2-5 kHz) adds clarity and presence. I almost always use a “low-cut” or “high-pass” filter to get rid of any inaudible, muddy rumble below 80 Hz.
Compression is the secret sauce for consistent volume. It automatically reduces the loudest parts of your speech and boosts the quietest parts. This creates a much smoother, more balanced sound so your listener isn’t constantly reaching for their volume knob. For a deeper look at the tools involved, check out our guide on the best video editing software for beginners.
EQ is like sculpting the tone of your voice. Compression is about controlling its dynamics. Using them together is what makes a voice-over sound powerful and easy to listen to.
Syncing Your Voice-Over to Video
Alright, it’s time to bring it all together and marry your polished audio to your video. Precision is everything here. Your narration has to line up perfectly with what’s happening on screen. If you say, “now click the save button,” your cursor better be doing exactly that at that exact moment.
Here’s a pro tip: before you even start dropping in your audio clips, go through your video timeline and place markers at key visual moments. This gives you clear targets to aim for when you’re laying down the narration.
Don’t be afraid to tweak the timing of your video clips, either. Sometimes slowing down or speeding up a screen recording just a fraction is all it takes to lock it in perfectly with your voice. And remember, silence is a powerful tool. A deliberate one- or two-second pause after you make a key point gives the viewer a moment to digest it. If you just rush from one sentence to the next, you’ll overwhelm your audience and your message will get lost.
Using AI to Create Effortless Video Tutorials
If you’ve ever tried to create a video tutorial, you know the struggle. You’re usually stuck between two imperfect options: quick-and-dirty screen recorders or heavyweight, complex video editing suites. For experts who just want to share what they know, that gap can feel like a canyon.
This is a pain point I see all the time with teams trying to create demos, onboarding flows, or knowledge base videos. The raw recording from a simple tool is rarely ready for an audience. It’s often littered with “ums,” awkward pauses, and those moments where you lose your train of thought—all the stuff you need to clean up.
The Problem with the Old Way
Think about the typical workflow. An expert fires up a tool like Loom, hits record, and just starts talking through a process. It’s fast, sure, but the final video is often 50-100% longer than it needs to be. Every hesitation and verbal stumble is captured in real-time.
To make it presentable, someone has to dive into a professional tool like Camtasia or Adobe Premiere Pro. These programs are incredibly powerful, letting you snip out every little mistake with surgical precision. The downside? They come with a monster learning curve. This creates a classic bottleneck: the person with the knowledge isn’t a video editor, and the video editor doesn’t have the subject matter expertise.
You’re left with a tough choice. Either publish a long, rambling video that viewers will struggle to get through, or pour a ton of time and money into professional editing. Neither is a great option.
A Smarter Path to Polished Videos
Thankfully, a new wave of AI-powered tools is completely changing the game. Platforms like Tutorial AI are built to close that gap between simple recording and professional polish, giving you a workflow that’s both fast and high-quality. The central idea is brilliant: let the expert focus on explaining the topic, and let AI handle the tedious work of cleaning it up.
This approach completely flips the script. You no longer need a perfect, one-take performance or deep editing skills. Just record your screen and talk through it naturally. The AI analyzes the recording and automatically edits it into a tight, professional video that looks like it was cut by an expert.
The real magic here is the efficiency. It turns your subject matter experts into prolific creators, allowing them to produce a ton of on-brand video content without ever touching a complex editing timeline. This is a fantastic way to scale the creation of all sorts of crucial videos:
- Product Demos: Show off new features without the fluff.
- Onboarding and Training Videos: Help new users and teammates get up to speed faster.
- Explainer Videos: Make complex ideas simple and easy to follow.
- Feature Release Updates: Announce what’s new with a sharp, clear walkthrough.
- Knowledge Base and Support Articles: Give visual answers to common customer questions.
How Tutorial AI Transforms the Process
With a tool like Tutorial AI, the whole process becomes dead simple. Your expert records their screen and voice, speaking freely. The AI then takes over, automatically snipping out the dead air, mistakes, and filler words like “uh” and “um.” It intelligently tightens the pacing, making the final cut much more engaging.
This saves an unbelievable amount of time in post-production and also removes the pressure to perform perfectly on camera. It gets even better when you realize an AI voice generator for videos can refine the audio even further, letting you edit the voice-over simply by editing a text transcript. The final video has all the expert’s authentic knowledge, just delivered in a much cleaner, more professional package. It’s a truly efficient way to handle the entire how to do voice over process for your tutorials.
Common Questions About Doing Voice Overs
Jumping into voice overs for the first time? You’ve probably got questions. Lots of them. That’s completely normal. From what microphone to buy to how to sound less like a robot, getting good answers early on can save you a ton of headaches.
Let’s walk through some of the most common questions I hear and get you some straight, practical answers. Getting these basics down will give you a solid foundation and the confidence to hit record.
What Is The Best Microphone For A Beginner?
If you’re just starting out, my advice is always the same: get a good USB condenser microphone. You can’t go wrong with models like the Blue Yeti, Audio-Technica AT2020+, or Rode NT-USB. They deliver fantastic clarity and detail without forcing you to buy and learn a separate, complicated audio interface.
These mics are basically plug-and-play, which makes setup a breeze. The one non-negotiable feature to look for is a cardioid pickup pattern. This is a lifesaver because it’s designed to capture sound from directly in front of it while ignoring most of the noise from the sides and back. For anyone recording in a less-than-perfect room, this is your best friend for isolating your voice.
How Can I Avoid Sounding Robotic When Reading A Script?
The secret to a natural delivery starts long before you press record—it starts with the script itself. Write like you talk. Use contractions (“it’s,” “you’re”) and keep your language simple. Read your script out loud a few times and if any phrase feels unnatural or clunky to say, rewrite it.
When you’re ready to record, try standing up. It opens up your diaphragm for better breath support and injects a little extra energy into your voice. And don’t be afraid to use hand gestures as if you were having a real conversation. My best tip? Smile when you talk. Seriously. It adds a warmth and friendliness to your tone that listeners can actually hear.
Should I Record My Voice Live Or Separately?
Recording your voice while you capture your screen—live narration—might seem faster, but it’s a bit of a tightrope walk. One little mistake and you have to start the whole thing over. For a much cleaner, more professional final product, the better way is to capture your screen first, then record your voice over separately.
This two-step approach gives you complete control. You can nail the script without fumbling with your on-screen actions, then focus entirely on your vocal performance. During the editing process, it’s so much easier to sync your perfected narration to the visuals. For any project where quality really matters, recording separately is the only way to go.
Do I Need To Soundproof My Room?
Nope, you don’t need a professional, soundproof studio. What you really need is “sound treatment,” which is just about managing the echo and reverb inside your recording space. And you can get great results with some simple DIY tricks.
A classic move is to build a makeshift vocal booth by hanging heavy blankets or duvets around your desk. Even better, a walk-in closet full of clothes is an acoustic goldmine.
Soft, uneven surfaces like clothes and blankets are fantastic at absorbing sound waves. They stop that echo that instantly makes audio sound cheap and amateurish. This one trick, paired with a good cardioid mic, can get you professional-sounding audio in just about any home.
Are you ready to create professional-quality tutorials and demos without the steep learning curve of traditional video editors? Tutorial AI uses artificial intelligence to automatically transform your raw screen recordings into polished, on-brand videos in minutes. Just speak freely, and let our AI handle the rest. Discover how Tutorial AI can streamline your video creation process today.