If you're looking for the quickest way to shrink a MOV file, grab a dedicated tool like HandBrake. Just load your video, pick the ‘Fast 1080p30’ preset, and tweak the Constant Quality slider to somewhere between 20-23. This is my go-to method for getting a great balance between a smaller file and sharp, clear video.
Why and When to Compress MOV Files
Before we jump into the different tools, let's talk about why you'd even need to compress a MOV file. Developed by Apple, the MOV format is fantastic for capturing high-quality video, which is why it’s the default for iPhones and a favorite in professional editing suites. The catch? That quality comes with a seriously hefty file size.
That beautiful screen recording of a software demo looks crisp, but its size can cause a lot of friction. You try to email it to a client and hit the attachment limit. Uploading it to your team's knowledge base feels like it takes an eternity. Before you know it, a few dozen of these videos have gobbled up your hard drive space. Compression is the answer to these all-too-common problems.
Striking the Right Balance
At its heart, compression is about making a file smaller by cleverly removing data that the human eye won't miss. The real goal is to find that perfect sweet spot: the file is small and easy to manage, but the video quality still looks fantastic. This is where codecs come into play. A codec (short for coder-decoder) is the engine that does the heavy lifting of compressing and decompressing your video.
Modern codecs are incredibly good at this. For example, you can often shrink a MOV file by 60-70% using a codec like H.265 (HEVC) without a noticeable drop in clarity. A one-minute 1080p MOV file, which might start at a whopping 1.5 GB, could easily be slimmed down to 450-600 MB. That’s a game-changer for sharing online.
This simple decision tree breaks down the logic perfectly.
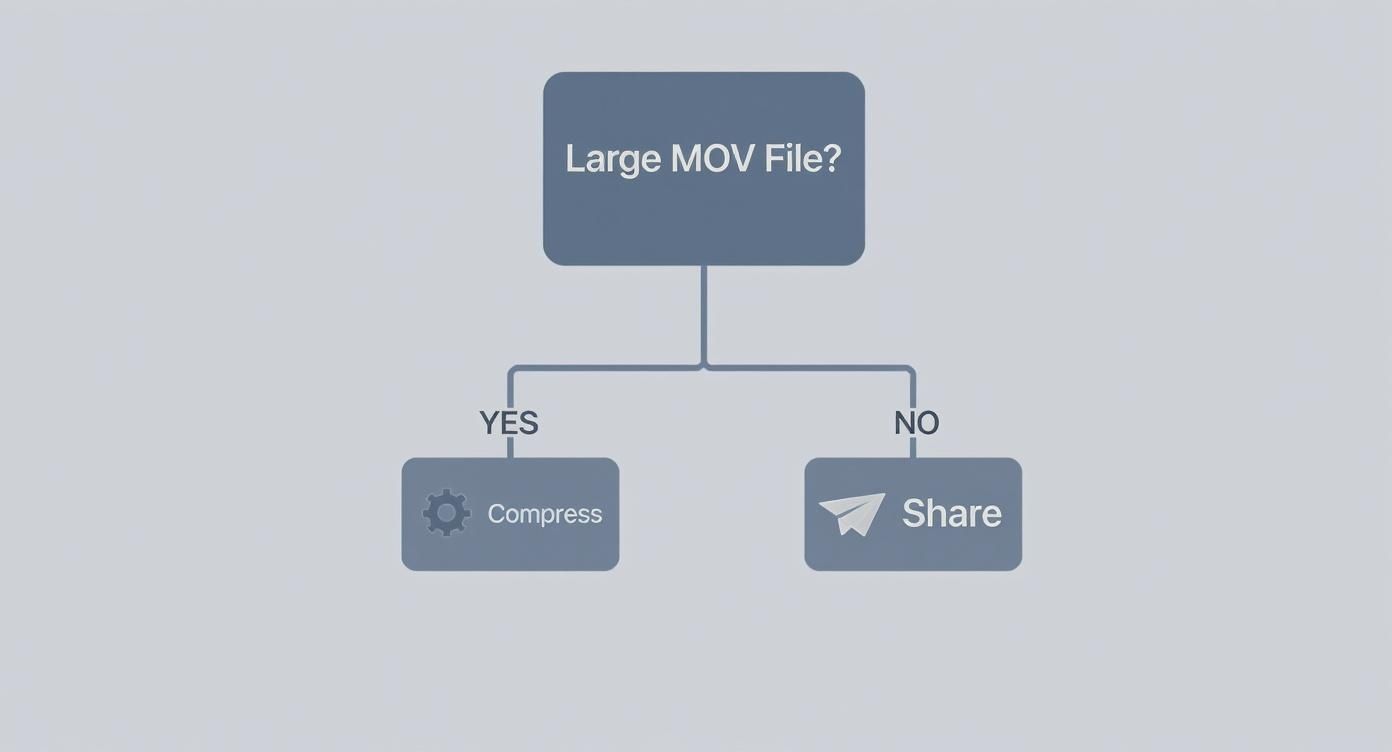
As the flowchart shows, it really comes down to the file's size and what you plan to do with it.
The real art of compression isn't just making files smaller; it's making them smaller without anyone noticing. For most web and tutorial content, a well-compressed MP4 is indistinguishable from the original MOV to the average viewer.
Ultimately, knowing when to compress is all about your end goal. If you're weighing your options, our guide on the best video format can help you choose wisely. For more practical tips on distribution, check out these efficient ways to share large video files.
Comparing MOV Compression Tools
To give you a quick overview, here's a look at the tools we'll be covering. Each has its own strengths, depending on what you need.
Whether you need a quick fix or a powerful, automated workflow, there's a tool here that will get the job done right.
Quick Compression Using QuickTime Player
If you're on a Mac, you already have one of the simplest tools for compressing a MOV file hiding in plain sight. QuickTime Player, the default video app on macOS, does more than just play videos—it has a surprisingly effective export feature that’s perfect for quick-and-dirty compression. I always recommend this method when you just need a smaller file right now and don't want to mess with downloading new software.
Think of it as the ideal solution for making a hefty screen recording small enough to drop into Slack for a colleague, or for trimming down a personal video before emailing it to family. It's a no-fuss process built for speed, not for granular control.

Using The Export As Function
First, just open your MOV file in QuickTime Player. Once it's playing, head up to the menu bar at the top of your screen and navigate to File > Export As. This is where the magic happens. A small menu will pop up with a few resolution options.
This menu is intentionally simple. QuickTime gives you presets that take care of all the complicated settings behind the scenes. Here’s a quick rundown of what to expect:
- 1080p: This is a great middle ground. It significantly cuts down the file size but keeps the video in high definition, making it perfect for most modern screens.
- 720p: Go with this option for a much smaller file. The video will still look sharp on phones and tablets, and the size will be far more manageable for uploading or sending.
- 480p: This is your go-to for maximum compression, especially if you need to squeeze a video into an email attachment. The quality is noticeably lower, but it’s often good enough for a quick look.
Just pick a resolution, tell QuickTime where to save the new file, and let it work. It will create a new, compressed video without touching your original high-quality MOV.
Pro Tip: You might see a choice between "Greater Compatibility (H.264)" and "Higher Efficiency (HEVC/H.265)." I almost always stick with H.264. It’s the universal standard and guarantees your video will play on just about any device out there.
Knowing QuickTime's Limitations
While QuickTime is fantastic for simple jobs, it's important to know what it can't do. You have zero control over fine-tuning settings like video bitrate, audio quality, or hitting a specific file size target. What you see in the presets menu is what you get.
This is why, for more professional work like creating polished tutorials, relying on the best tools for screen recording with their advanced export settings is a much better strategy in the long run.
Still, for everyday sharing, QuickTime Player is a fast, accessible way to compress a MOV file. When you just need to get a file sent and don't need pixel-perfect quality, it's an unbeatable first choice that’s already on your Mac.
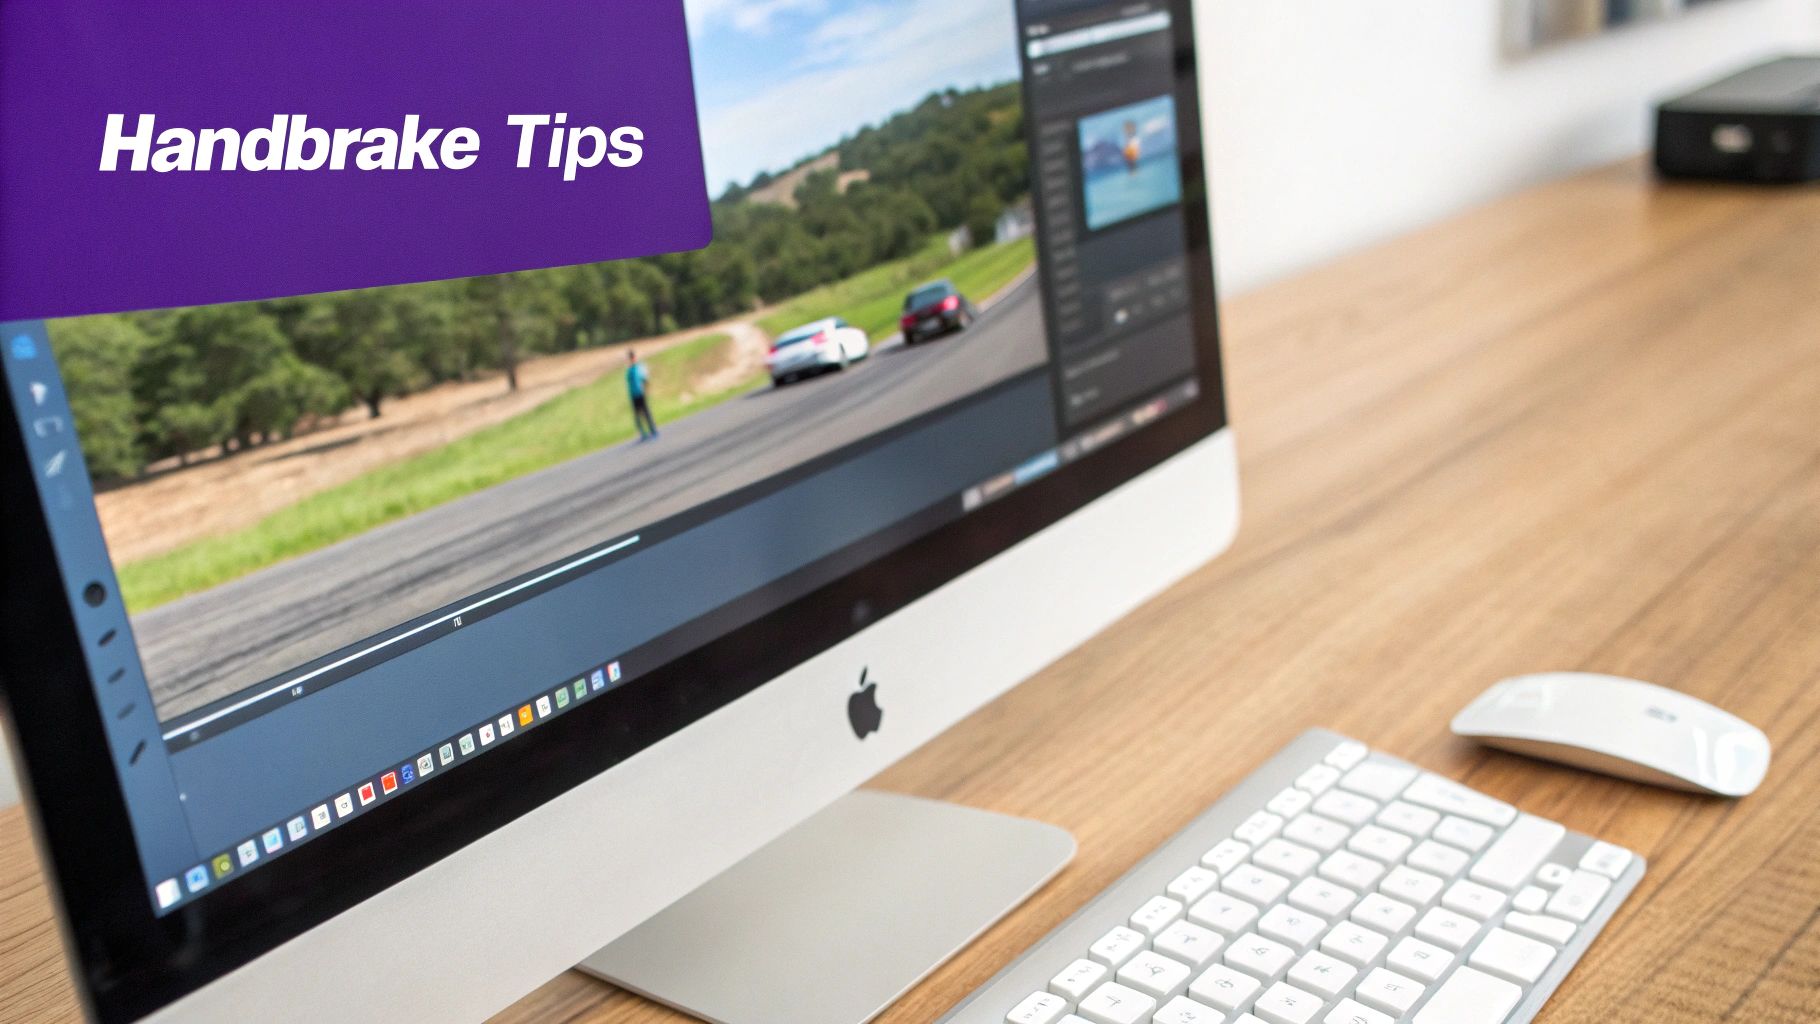
Advanced MOV Compression with HandBrake
When QuickTime’s simple “Export As” option just doesn’t cut it, you need to bring in a specialist. For that, I always turn to HandBrake. It's the undisputed champion of free video transcoding, giving you granular control over every single aspect of the compression process.
I’ll be honest, the interface can look a bit intimidating at first glance. But once you know where to look, it’s actually incredibly logical. I personally use HandBrake for almost all of my own tutorial videos because it lets me create custom presets. This means every video I produce has consistent quality and file size, which is a lifesaver for managing a professional knowledge base.
This is how you compress an MOV file like a pro.
After you load a video, this dashboard is your command center. Everything important is right there: presets, a summary of your settings, and tabs for fine-tuning the video, audio, and dimensions.
Choosing Your Starting Point
The best way to get started with HandBrake is to not start from scratch. Why reinvent the wheel? The built-in presets are excellent and provide a fantastic foundation.
For most of what I do—and for most web content in general, especially screen recordings—the Fast 1080p30 preset is the perfect jumping-off point.
Just select it from the Preset dropdown menu. That one click instantly configures dozens of settings for a high-quality 1080p video at 30 frames per second, neatly packaged in a universally-compatible MP4 file. Seriously, this gets you 90% of the way there.
Mastering the Video Tab
Now for the fun part, where we can really make a difference. Head over to the Video tab. This is where you’ll have the most significant impact on your final file size and quality.
There are really only two key settings you need to understand here:
- Video Encoder: This is the engine that does the compressing. Your main choices are H.264 (x264) and H.265 (x265). Think of H.264 as the reliable standard—it works everywhere. H.265 is the newer, more efficient model that gets you smaller files for the same quality.
- Constant Quality: This is HandBrake’s secret sauce. Instead of guessing at a bitrate, you just tell HandBrake how good you want the video to look. It’s controlled by the RF (Rate Factor) slider, and it’s a bit counter-intuitive: lower numbers mean higher quality (and bigger files).
The evolution of codecs like H.265 (also known as HEVC) has been a game-changer. It can often compress a video to about half the size of H.264 while looking just as good. For example, a massive 10 GB 4K MOV file can shrink to around 3-4 GB with H.265, saving a ton of storage space and upload time. If you're curious about the industry-wide impact, the latest industry analysis on media processing solutions has some fascinating data.
My go-to setting? For most of my screen recordings, an RF value between 20-23 using the H.264 encoder hits the sweet spot. The final file is small enough for quick uploads, but the quality is so crisp you'd be hard-pressed to spot any difference from the original MOV.
Fine-Tuning and Finishing Up
Once you have your preset selected and your quality dialed in, you’re pretty much done.
All that's left is to tell HandBrake where to save the new file at the bottom of the window, then click the big green Start Encode button. HandBrake will take it from there.
By starting with a solid preset and just making a few intentional tweaks in the Video tab, you can confidently compress any MOV file for any purpose. This approach takes a powerful tool and makes it simple, giving you repeatable, high-quality results every single time.
Compressing with VLC and FFmpeg
Sometimes the best tools are the ones you already have. Beyond dedicated compression apps, two incredibly powerful and flexible options for shrinking MOV files are likely sitting on your computer right now: VLC Media Player and FFmpeg.
VLC is famous for playing literally any video file you throw at it, but it also has a surprisingly capable conversion tool tucked away. Then there's FFmpeg—the command-line powerhouse for anyone who wants ultimate control and automation. If you're trying to avoid installing yet another single-purpose app, these two are your best friends.
Using VLC Media Player's Conversion Feature
Most people don't realize that VLC is more than just a media player. It has a hidden 'Convert / Stream' function that’s perfect for quick-and-dirty compression jobs. It’s a fantastic way to shrink a MOV file without having to leave an application you already know and trust.
Getting started is simple. Just open VLC and head to File > Convert / Stream. A new window will pop up where you can drag and drop your MOV file.
From there, you just need to choose a profile. A great, safe bet for almost any situation is Video - H.264 + MP3 (MP4). This profile makes sure your final video is in the universally compatible MP4 format, which will play nicely just about anywhere.
If you want a little more control, click the Customize button. This opens up the Video Codec tab, where you can tweak things like the resolution or bitrate to further dial in the final file size. It's a straightforward but effective method for on-the-fly compression.
Harnessing the Power of FFmpeg
For those who crave ultimate control and the ability to automate compression, nothing beats FFmpeg. This is a command-line tool, so there's no fancy interface—you'll be typing commands into your Mac's Terminal or Windows' Command Prompt. While that might sound intimidating, its precision is absolutely unmatched.
At its most basic, you can convert and compress a MOV file with just one line of code. The real magic happens when you understand what each piece of that command does, because it opens up a world of customization.
Here’s my go-to command for turning a MOV file into a high-quality, web-ready MP4:
ffmpeg -i input.mov -c:v libx264 -crf 23 -c:a aac -b:a 128k output.mp4
Let's quickly break down what this command is actually doing so you can tweak it for your own needs.
- -i input.mov: This just tells FFmpeg what your source file is.
- -c:v libx264: This sets the video codec to H.264, the gold standard for web video.
- -crf 23: This is the Constant Rate Factor, and it's your main quality control knob. A value of 23 is an excellent starting point, striking a great balance between quality and file size. Lower numbers mean higher quality (and bigger files), while higher numbers do the opposite.
- -c:a aac -b:a 128k: These commands set the audio codec to AAC and the audio bitrate to 128kbps—perfect for clear sound that doesn't bloat the file.
- output.mp4: Finally, this is just the name of your new, compressed file.
What's cool is that FFmpeg is the engine running behind the scenes of countless video apps you already use. Learning its basics means you’re picking up the fundamental language of video processing, a skill that's useful across tons of different tools.
Mastering FFmpeg and other advanced techniques can teach you a lot, like how to convert video to H.264 for the best possible balance of size and quality. With just a few simple commands, you can build an incredibly efficient workflow to compress any MOV file for any purpose.
Using Online Tools and Video Editors
Sometimes, you just need a quick fix and don't want to install new software. In those cases, a couple of great options are right at your fingertips: online compression tools and the video editor you're already using.
Online tools are fantastic for a one-off job. You have a MOV file, it's too big, and you just need to shrink it down fast. Simple as that.
But, a word of caution is in order here. When you use a free online service, you're uploading your video to someone else's server. Before you do, think about what's in that video and take a quick look at the tool's privacy policy.
As a rule of thumb, I never upload confidential or proprietary video content to a free online compressor. It’s best to stick to non-sensitive files to keep your data safe.
If you decide to go this route, look for a tool with a clear privacy policy, reasonable file size limits for free users, and at least some control over the output format and quality. The good ones will give you basic controls so you don't end up with a pixelated mess.
Compressing Directly in Your Video Editor
For a much more professional and secure approach, just handle the compression right inside your video editing software. Honestly, this is the method I use most often because it slots perfectly into the final step of my workflow, saving time and giving me total control over the outcome.
Powerhouse editors like Adobe Premiere Pro, DaVinci Resolve, and Final Cut Pro all have incredibly robust encoders built right in.
When your project is polished and ready to go, you can easily shrink the final MOV file by tweaking a few key settings in the export window.
- Choose the Right Format: First, select H.264 as your video format. This usually wraps your video in an MP4 container, which is the gold standard for compatibility across the web and social media.
- Adjust the Bitrate: This is your main lever for controlling file size. A lower bitrate means a smaller file, but it can also impact quality. For a crisp 1080p video intended for the web, I find a target bitrate between 8-12 Mbps is a great starting point.
This approach isn't just efficient; it’s also a more sustainable practice. Trimming down video file sizes makes a real difference. A seemingly small 10% reduction in size can add up to billions of kilowatt-hours saved annually on a global scale.
By exporting directly from your editor, you eliminate the extra step of processing your video through another tool. You can even create and save your own export presets, ensuring every video you create is perfectly optimized from the get-go. And to make your final video even better, take a look at our guide on how to add captions to videos to boost accessibility and keep your audience engaged.
Common Questions About Compressing MOV Files
When you start digging into how to compress a MOV file, the same questions pop up time and time again. I've heard them all, and getting the right answers can save you a ton of frustration and help you get better results, faster.
Let's cut right to the chase and tackle the big ones.
Will Compressing an MOV File Ruin the Quality?
The short answer is yes, but it’s not that simple. All compression is technically "lossy," which just means it sheds some data to get smaller. The magic is in what data gets tossed. Modern codecs are incredibly sophisticated, designed to remove information the human eye won't even miss.
You're in the driver's seat here. If you're using a tool like HandBrake, for example, you have fine-grained control. My go-to setting for a great balance is a Constant Quality (RF) value between 20 and 23. This can slash a file's size in half (or more) while keeping it looking virtually identical to the original on most screens.
The goal isn't zero quality loss; it's imperceptible quality loss.
What’s the Best Format to Compress a MOV File Into?
For just about anything you'll do online—sharing, uploading, streaming—MP4 is the undisputed king. There’s really no contest.
When you convert your MOV to an MP4 using a standard video codec like H.264 or the newer H.265, you hit the perfect trifecta: amazing quality, tiny file size, and universal compatibility. An MP4 will just work, no matter the device, browser, or platform.
Think of it like this: MOV is your high-resolution master tape, perfect for the editing suite. MP4 is the final product, ready for everyone to watch.
Unless you have a very specific technical reason not to, converting from MOV to MP4 for final delivery is almost always the right move.
How Do I Make a Huge MOV File Small Enough for Email?
This is a classic problem. Most email clients have a pretty strict attachment limit, usually around 20-25 MB. Getting a high-quality MOV file under that wire means you have to get aggressive.
Here’s the game plan I follow using a tool like HandBrake or a video editor:
- Slash the Resolution: This is your biggest lever. Dropping from 1080p to 720p, or even 480p for a quick preview, will make a massive difference.
- Crank Up the Compression: In HandBrake, this means sliding the RF value higher, into the 24-28 range. You're telling the software to prioritize file size over perfect clarity.
- Lower the Audio Bitrate: Audio takes up space, too. Dropping the bitrate to 96kbps (or even 64kbps if it's just speech) can save you a few extra megabytes.
But what if it's still too big? Don't force it. At that point, it’s time to stop fighting the attachment limit. The best solution is to upload the video to a service like Google Drive or Dropbox and just email the share link. It’s a cleaner experience for everyone involved.
Ready to create stunning tutorials without wrestling with complex compression settings? Tutorial AI is an AI-powered screen recorder that automatically optimizes your videos for clarity and size. It handles the technical details, so you can focus on creating great content. Start creating for free at Tutorial AI.